How to Program HobbyWing Fusion RTR ESC?

How to Program HobbyWing Fusion RTR ESC?

April 2024 – various video comments

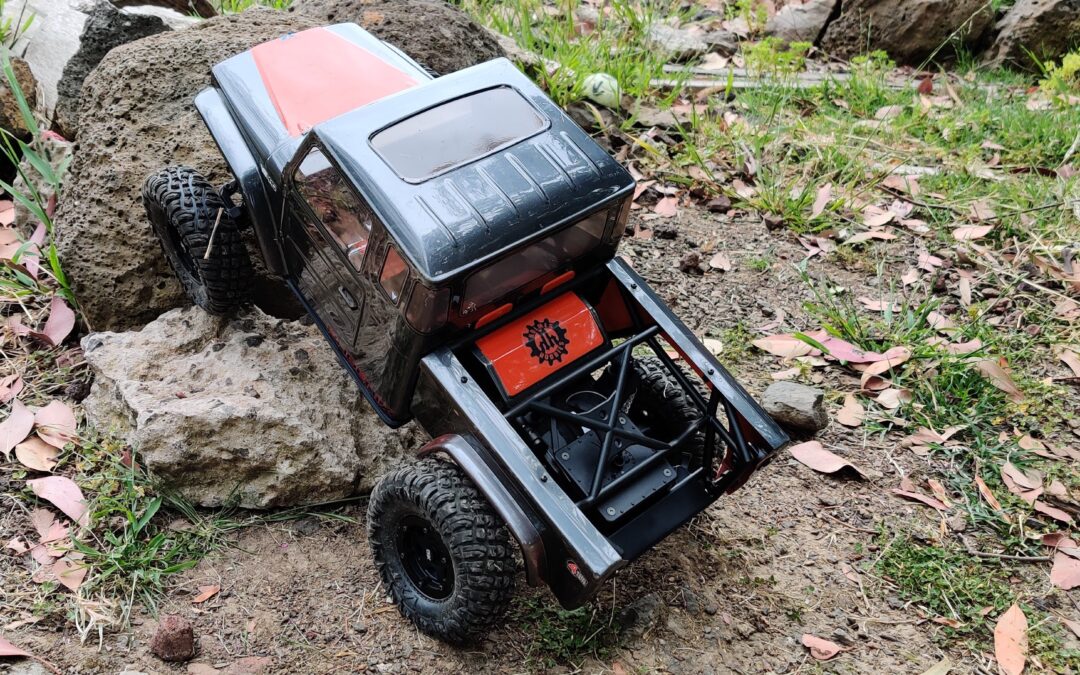
Redcat Ascent Fusion: How do you program the HobbyWing Fusion RTR ESC? (or, how to program the HobbyWing Fusion Crawler ESC).

HobbyWing Fusion RTR ESC Programming

A. There are three variants of the HobbyWing Fusion now: the Fusion Pro 2300kv, the Fusion SE 1800kv and 1200kv, and the Fusion RTR (aka. Fusion Crawler) 1800kv. It’s the Fusion RTR that ships with the Redcat Ascent Fusion, and we’ll probably see this OEM-supplied unit in other RTR models in future, too.

You can use any of the programming cards from the HobbyWing WP-1080 ESC (and we have a programming guide for all crawlers for the WP-1080 here), the HobbyWing Fusion Pro, or the HobbyWing Fusion SE. It’s the ESC itself that dictates what each menu does, regardless of the sticker on your programming card.

HobbyWing Fusion RTR ESC Programming Menu

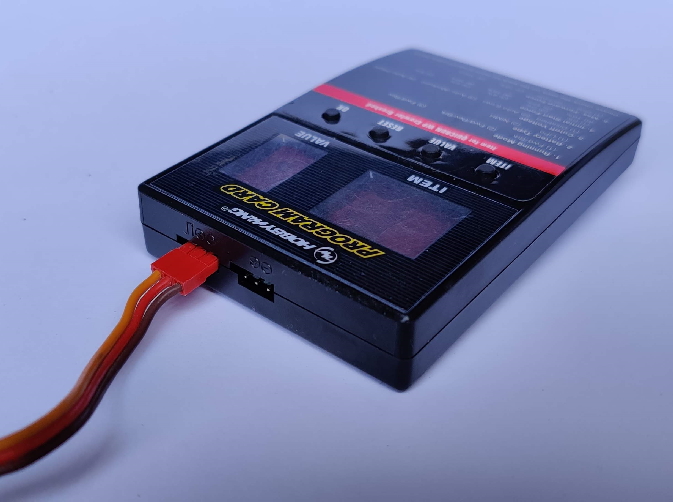
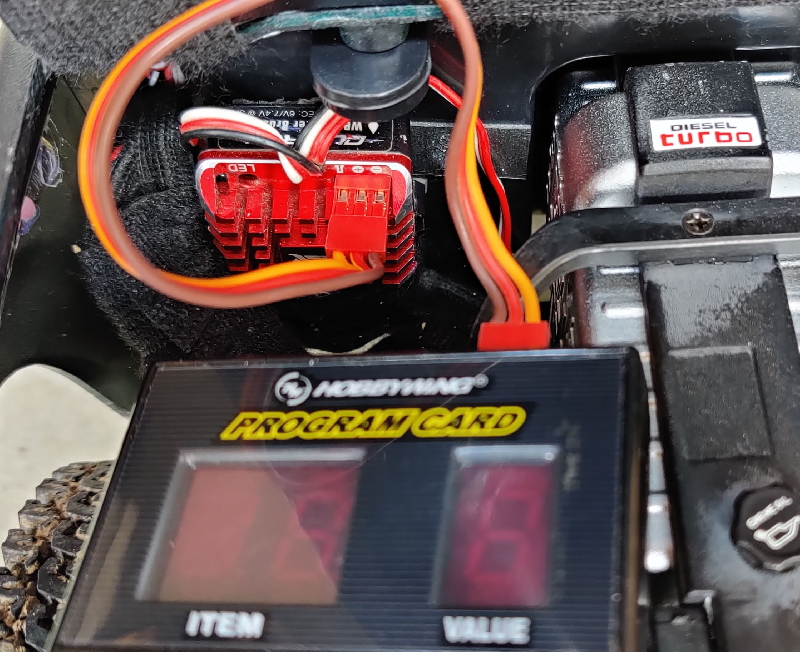
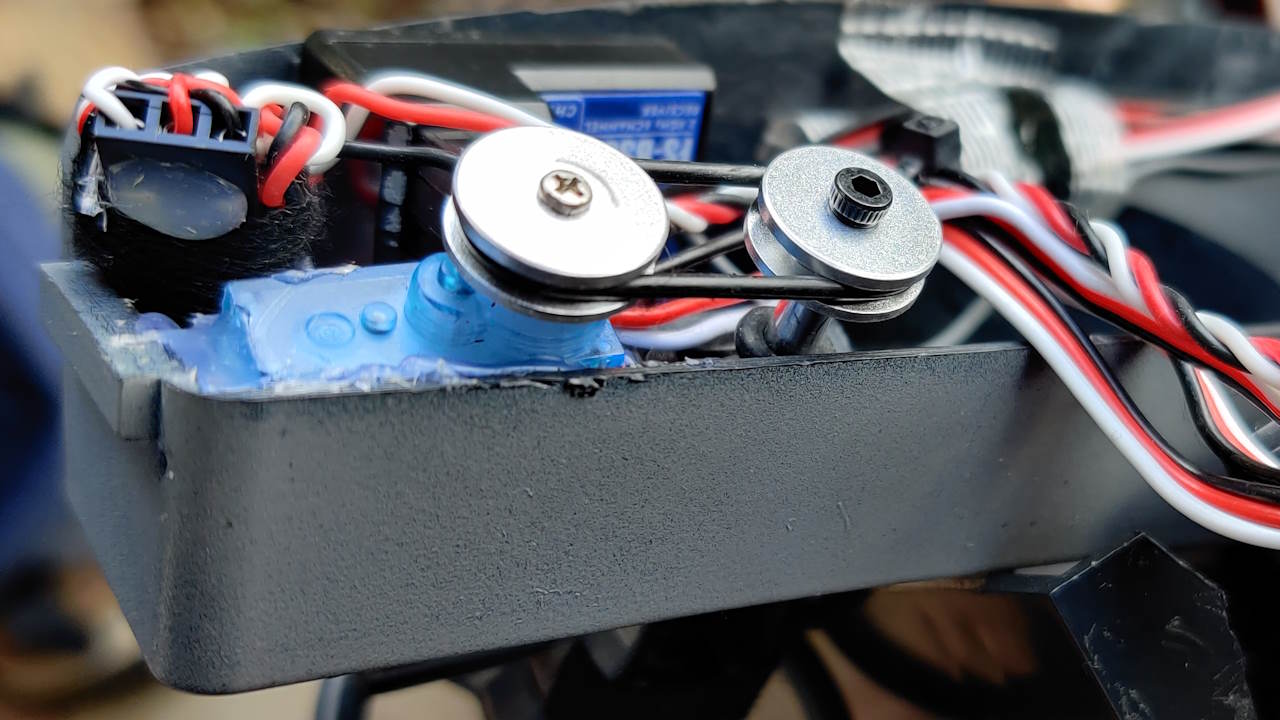
First, remove the rubber water shield on the power button module and plug in your HobbyWing programming card. There’s an illustration to show signal, +ve and -ve (white, red and black, in that order).

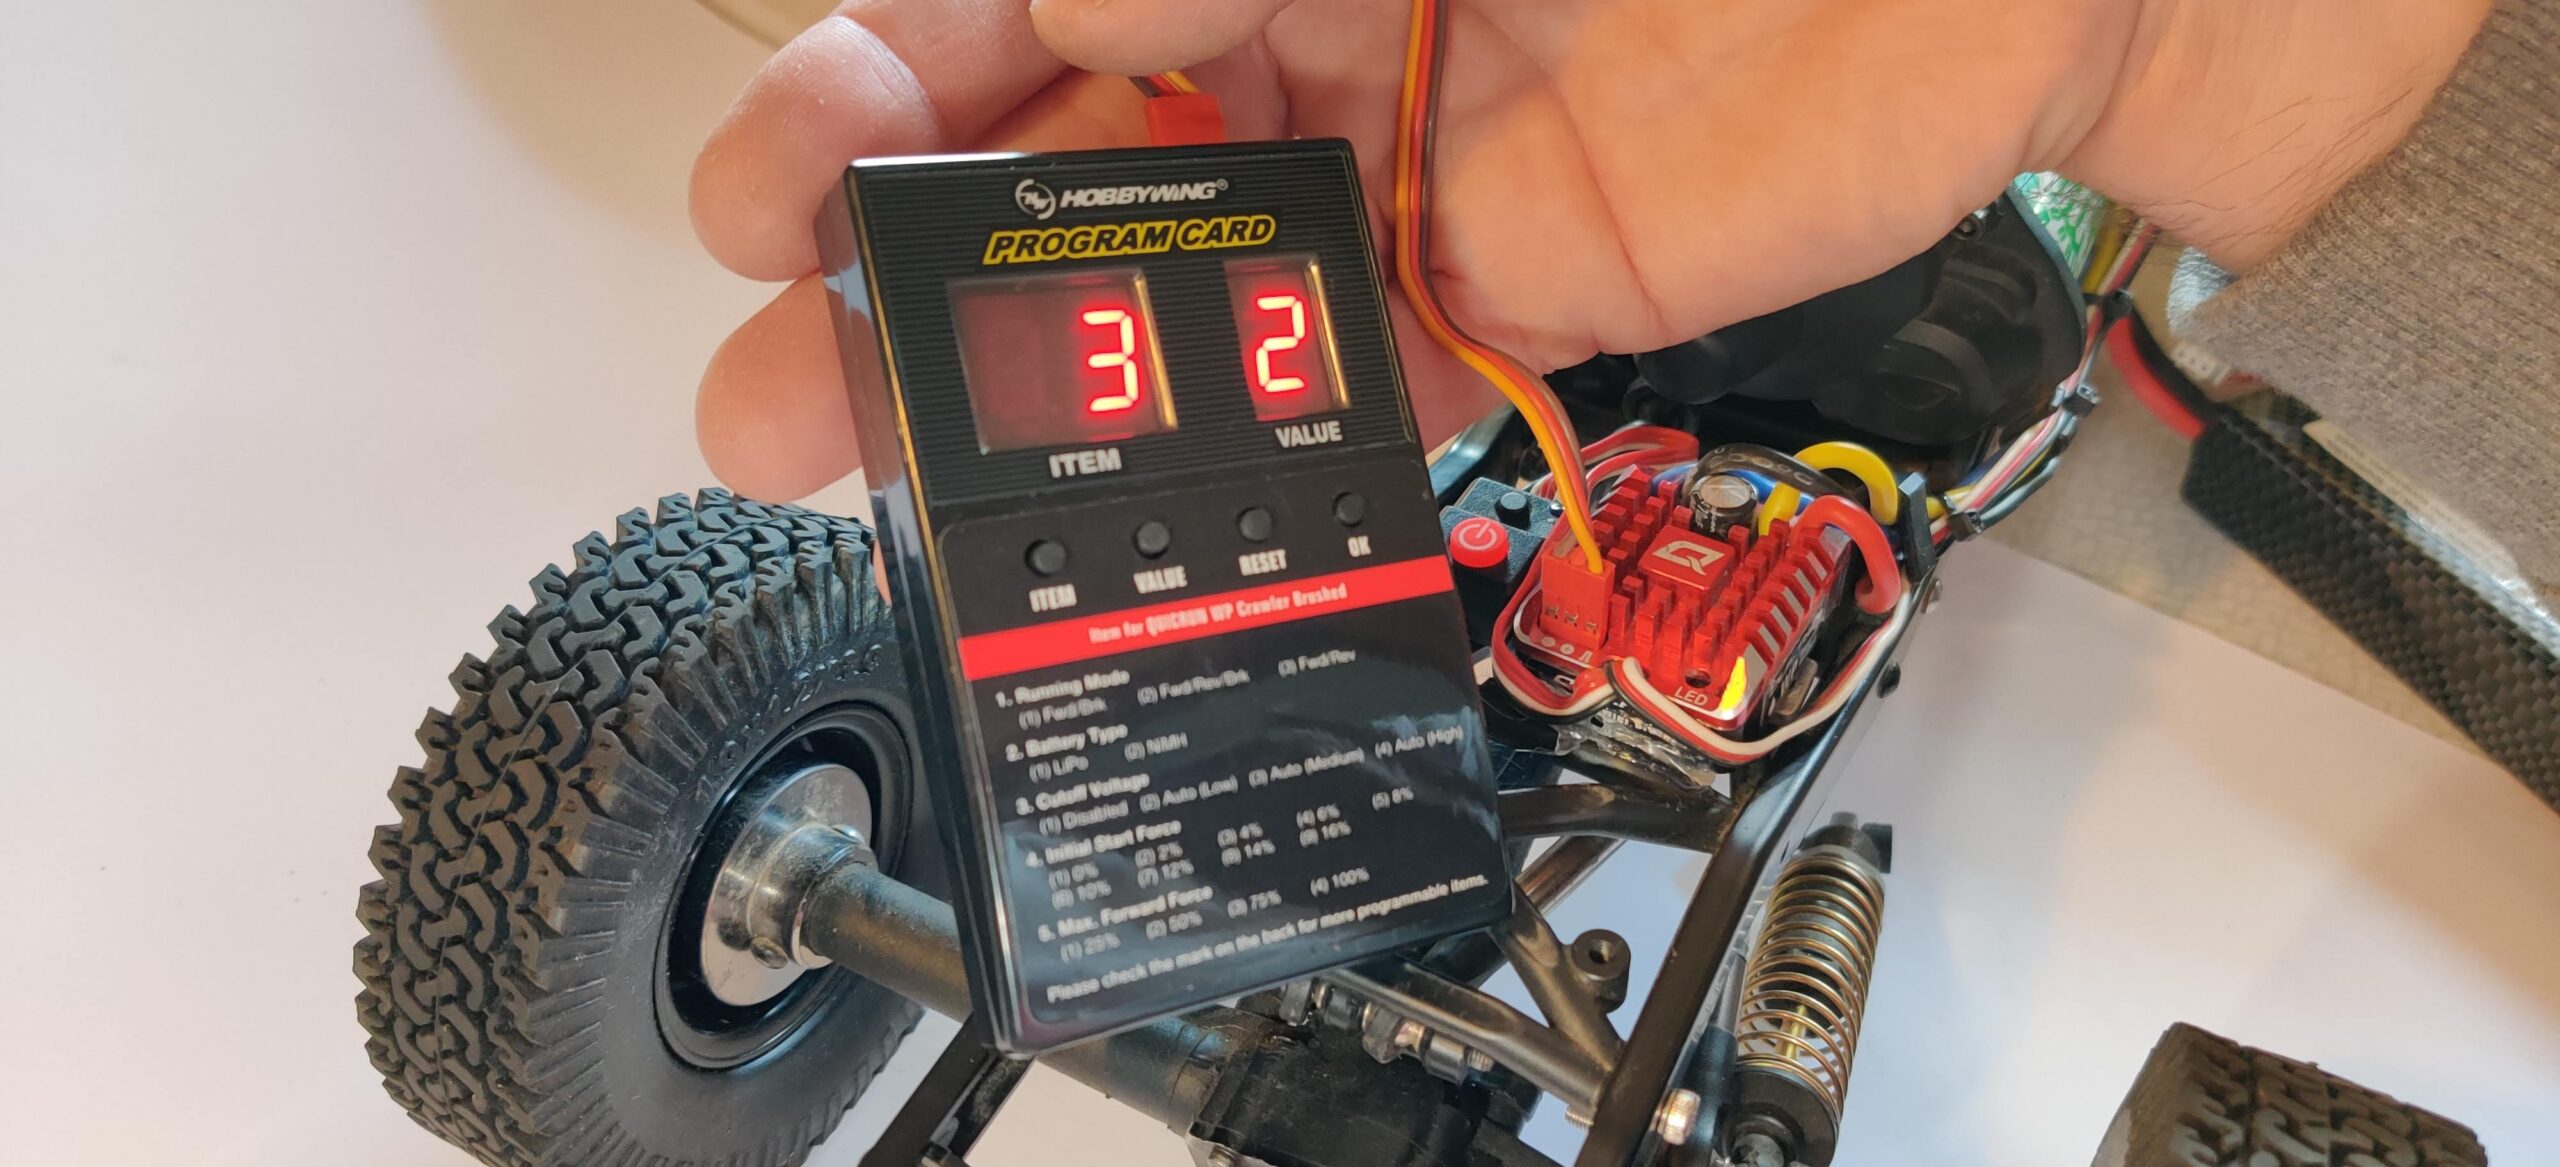
Press Power to turn the ESC on. The card’s red digits should illuminate. Here’s what each menu item is:

  1. Low-Voltage Cutoff (LVC) for LiPO batteries (1-4; 1 is Disabled (for NiMH batteries), 2-4 is low-high, maybe 2.7v, 3v and 3.3v at a guess);
  2. Motor Rotation (1 CW, 2 CCW);
  3. Drag Brake Force (1-5; 1 is off; 2-5 weak-strong drag brake);
  4. Drag Brake Rate (1-6; slow-fast application of drag brake).

Press Item to cycle through 1 to 4, Value to cycle through the item options, then when you’re done with all of them, press OK to save.

Press the power button to turn off the system.

Unplug the programming card, replace the rubber water sheild, and power up – you’re ready to test!

Craig Veness

Craig Veness

RC-TNT

Craig has been into radio control since the 90s and into RC crawling since about 2010, when a Losi MRC started the obsession! Now it's all rocks this and crawl that and upgrade all the things! ...You know how it is, right? Welcome home 🙂

How to Install RCRun RUN80 Steering Wheel

How to Install RCRun RUN80 Steering Wheel

May 31, 2023 – video comment from Oliver Walther

Could you give some information how to install the RCRun RUN80 steering wheel servo? I’ve got my kit and for the steering module there are only two alloy pullies and the micro servo. No frame for the servo or other stuff. I hope you could help. Ty from the other end of the rc world (germany) 😉


A. The RCRUN Run80 Landcruiser 80-Series body interior (available here) includes a steering assembly that steers with the steering servo input. (You can see a gif of this below). There’s a micro servo that is used to achieve this and it operates via a 1:1 pulley system inside the dash. The micro servo sits inside the plastic mold shape, but there’s no obvious retention mechanism for it.

You need to affix the servo to the bottom corner of the dash mold, and then align the two pulley wheels so the servo can turn the steering column. The whole mechanism is kinda weak and there is slop in the system, but it does work. It doesn’t have to work very hard, thankfully. (And if I was going through all this again, I probably would not worry about having the moving steering wheel – it just adds complexity and noise and you can barely see it when the car is driving – though it is definitely cool, which I totally do get).

Anyway, see below for a couple of photos I took of mine. I secured the servo with a bit of hot glue but you could use double-sided tape or some other glue and it should be fine. Hope that helps make it a bit clearer! We’ve got more general info about this amazing vehicle on our write-up, right here on the site.

-Craig

Steering Wheel Servo
RCRun RUN80 Steering

TRX4 Shocks on Vanquish Phoenix Portal VS4-10?

TRX4 Shocks on Vanquish Phoenix Portal VS4-10?

Oct 3, 2022 – video comment from John Barnicoat

I tried the TRX-4 shock substitution but found the adjustable shock/spring collar interferes with the Phoenix Portal’s shock mount area at the top. The collar is bigger in diameter than the stock shock, so it doesn’t fit all the way into the recess under the mount. How did you get these to fit?

A. Mine didn’t fit either. I had to dial the pre-load down a little so they’d fit. I wanted some pre-load anyway, so it wasn’t a problem. Some shock designs let you run without the collar at all, but these shocks don’t allow that. The difference between some and no pre-load is minimal at the front, but the rear is not quite the case.


I suppose you could cut away some of the shock mount around where the collar needs to go, but that wouldn’t be ideal for strength. You could put a softer spring in, or you could try a different shock of the same length. I don’t have a perfect answer in this case because we’re fitting two parts together that aren’t designed for that – but my testing on my rocks at least has shown this to be a good change. Tinker, test, then tinker some more – that’s all I can really suggest for this one! Hopefully you find a setting you like.

-Craig

Vanquish Phoenix Portal
Phoenix Portal Front-Left
Rear-Right Shock
Rear-Left Shock
Front-Right Shock

Smaller Tires on EX86110?

August 17, 2022 – video comment from Guly 15

RGT Pioneer EX86190: Is it possible to mount smaller rims and tires on the Pioneer? I’m thinking of maybe a similar dimension to the ones on the BRX01.

RGT Pioneer & Smaller Tires

A. The EX86110 can fit smaller tires – it’s a fairly standard hex and 5mm axle arrangement, typical of most 1/10 RC crawlers.

Be aware that not all wheels fit all trucks. Some have larger offsets that need wider axles, for example. Other wheels have thicker rims that can rub on steering knuckles or portal outer covers and/or weights.

For the EX86110 and smaller tires, your main concern will be rim thickness, as those axles are not particularly long. For the Team Raffee Steelie Beadlocks we photographed here for you, the wheel nut was only just able to bite onto the axle over the wheels, so thread lock would be advisable for these!

The first photo compares the smaller tires to the OEM EX86110 set. The second photo is them next to our red BRX01. The last two are with them mounted. Here’s what the wheels and tires are, and where to get them:

  • Team Raffee Co. 1.9 Steelie Beadlock Wheels (AsiaTees)
  • Team Raffee Co. 1.9 Crawler Tire 1.2″ Type B (AsiaTees)
Craig Veness

Craig Veness

RC-TNT

Craig has been into radio control since the 90s and into RC crawling since about 2010, when a Losi MRC started the obsession! Now it's all rocks this and crawl that and upgrade all the things! ...You know how it is, right? Welcome home 🙂

I Was Wrong! (Sorry, RGT!)

I Was Wrong! (Sorry, RGT!)

June 18, 2022 – video comment from El Duderino Lebowski

RGT Rescuer EX86190: I tried to find anywhere that described exactly which type of powder metal process was used to make the gears in this drivetrain, and I just couldn’t find anything. Is that because it’s proprietary industrial secrets for how good they are, or because they don’t want us to know how cheaply made they are? Lots of questions, no answers.

It would be interesting to find out more about these gears and how they were made. The way it’s worded does make it sound like a positive feature, which implies they’re made with one of the better methods, but at this price point, we can’t just accept that assumption.

There are a number of modern powdered metal processes that are actually superior to other forms of manufacturing and are preferred in high-stress high-performance and/or mission critical applications (HIP comes to mind here), so without knowing which method was used, it’s hard to gauge whether or not these are any good.

If these gears are [made well], no problem. …If these are just a cheap cast powder process (I really hope that’s not the case!), then yeah, your observations are spot on, and possibly somewhat optimistic, about their durability.

RGT Rescuer EX86190 Gears

A. Thanks for bringing this up, I should have done this in my review. Sorry I missed it!

I’ve taken the truck apart to see what we’re dealing with here. I found the transmission, diff and portal gears all have the same appearance. They’re smooth, not rough like the powder-coated cast gears I’ve seen from other manufacturers (eg. the BOM TC). They looked pretty good.

They were not magnetic, for whatever that’s worth. I’m not familiar with latest manufacturing methods but given the smooth surfaces even on the gear teeth, I’m inclined to think this process must be alright. Certainly, the gears have stood up to considerable use already in my unit. I’ve used it in all weather, including under water and in mud, with no maintenance until today. 

Service Time!

I dried everything out, applied a fresh glob of moly grease to everything, and bolted it all back together. If anything changes on this front, I’ll update this post and let you all know in a Community post. So far, so good! -Craig

Craig Veness

Craig Veness

RC-TNT

Craig has been into radio control since the 90s and into RC crawling since about 2010, when a Losi MRC started the obsession! Now it's all rocks this and crawl that and upgrade all the things! ...You know how it is, right? Welcome home 🙂

Does the TRX4 Sport Fit the DC1 Body?

Does the TRX4 Sport Fit the DC1 Body?

June 4, 2022 – video comment from Dayle Guy

Do you think the DC1 Disco body will fit on the TRX4 Sport?

A. The wheelbase is an exact match. The DC1 body is slightly more narrow than the TRX4, so some consideration will be needed for the sliders and wheel dish depth. You’ll also want to change or at least bring in the bumpers, as they’re too long for the DC1 body in stock positions.

Here, we put the DC1 body on the TRX4 Sport. Body holes are in different locations, but with the DC1 body, you cut your own, so no problems there. It shouldn’t be too difficult to get this one to fit.

Happy modding! -Craig.

Which Should I Buy – SCX10 II or III?

Which Should I Buy – SCX10 II or III?

June 6, 2022 – video comment from Ivo Anjos

I would like to see the SCX10 III Base Camp compared to a stock or mostly stock SCX10 II. There are some really good deals on SCX10 II and I would like to know if it is still a good budget option and how it compares with these more recent rigs.

A. I think you’ll find the SCX10 II will compare closely in performance to the Axial Base Camp. They’re similar enough in geometry and layout that there won’t be a lot in it.

You really could buy on price and get a similar experience – but there are a few things to keep in mind: over the 10.2, the Base Camp gives you adjustable chassis length and portal axles and, I think, better tires and definitely better shocks.

Equipment quality is generally equal to or better in the SCX10 III Base Camp, then. But if you can get the 10.2 for, say, 60-70% of the 10.3 it may well be worthwhile for you.

-Craig

Base Camp Descending Rock LHS
How to Set Steering End-Points?

How to Set Steering End-Points?

June 11, 2022 – video comment from GabrielDuchi

How do I program the steering limits with the RTR (Ready To Run) radio transmitter that comes with the RGT Rescuer EX86190?

A. What you’re after is the Steering EPA (End Point Adjustment). That’s the limiter that prevents the servo from trying to steer the wheels past their physical limits.

On the top of the radio there’s a lid. Under the lid are three sets of controls:

  1. the top switches are for channel reversing – you can ignore these unless you are making changes to the servo, motor or ESC at some later time.
  2. the top dials are for setting Trim (point of center).
  3. the bottom dials are for setting EPA (End Point Adjustment).

It’s the bottom dials we’re interested in. Steering is on the left and Throttle is on the right. Here’s how to adjust end point for your steering:

  1. Turn the radio and the car on.
  2. Dial the Steering EPA dial (the bottom-left one) back to zero.
  3. Turn the wheels to their maximum limit to the left.
  4. Increase the steering EPA dial (the bottom-left one) upward until the wheels reach their physical limit. Back it off just a shade.
  5. Turn the wheels all the way to the right. Observe closely to see if the servo is straining or if there’s more reach available by dialing the steering EPA dial back and forth a little.

One of Left or Right will be more limited than the other. Your aim is to find the furthest the servo can move the wheels without straining. Check you’re happy that the servo isn’t straining beyond its limit either way by turning that steering EPA dial back a shade if it’s needed. Then you’re all set!

I found this a little difficult to explain but in practice it is a fairly intuitive process once you know which dial to adjust.

Happy driving!

-Craig

EX86190 Radio Steering EPA
Why Overdrive the Front?

Why Overdrive the Front?

June 13, 2022 – video comment from EP RC

Why does front axle overdrive work better than [just driving faster]? That must work better, as with overdrive on an axle you are constantly losing traction somewhere just to make any progress.

A. Overdrive (commonly referred to as ‘o/d’) is a rock crawling thing. Overdriving the front axle makes the front wheels turn faster than the rear wheels, typically by 5% to 15%, but there are implementations out there of up to 33%!

Overdrive can be achieved by driving the front axle faster or the rear axle slower. Ring and pinion gear ratios can be changed so the difference happens on the axle at each or either end. Alternatively some transfer cases have a provision to drive the front faster than the rear, such as the StealthX transmission from Element RC’s Enduro line.

Overdriving the front helps the vehicle maintain direction on difficult climbs where traction is low. It does this in two ways:

  • It lets the front pull the rear onto and through problems.
  • It also maintains a low loading effect on the suspension by way of that front/rear wheel speed difference. This is thought to aid traction on rock problems, though it would be undesirable on flat, high traction surfaces.

On steep ascents without overdrive, the rear has more of the vehicle’s weight on it and so often has more traction available than the front axles. With that extra traction, the rear will work to push the vehicle forward. This hinders it from turning in whatever direction you’re steering. It’s like a slow-motion, understeer effect that is undesirable on rock problems.

There are a few ways to address this understeer effect:

  • DIG (DIsengageable Gear) locks the rear drive, such as in the VS4-10 Phoenix and SCX10 III. You can then drag the nose of the rig around with the front while the rear stays in place. (You can also use DIG to ‘DIG up’ by loading the suspension and drive line before popping the rear drive back on, but that’s for another discussion!)
  • Remote locking and unlocking rear diffs (such as on the TRX4) also can help bring the vehicle’s nose to the direction you want by lowering the drive (or authority) over the vehicle’s direction from the rear.

Both of these options mean the front wheels do more of the work, pulling the vehicle round to whatever direction you want to face. Unlocking the rear diff isn’t as effective as DIG, but both have their place in crawling.

Overdrive is another way to address the understeer issue. By keeping the suspension slightly loaded and keeping more of the traction authority up-front with that higher wheel speed, your crawler will more consistently and reliably reach the line you’re trying to drive.