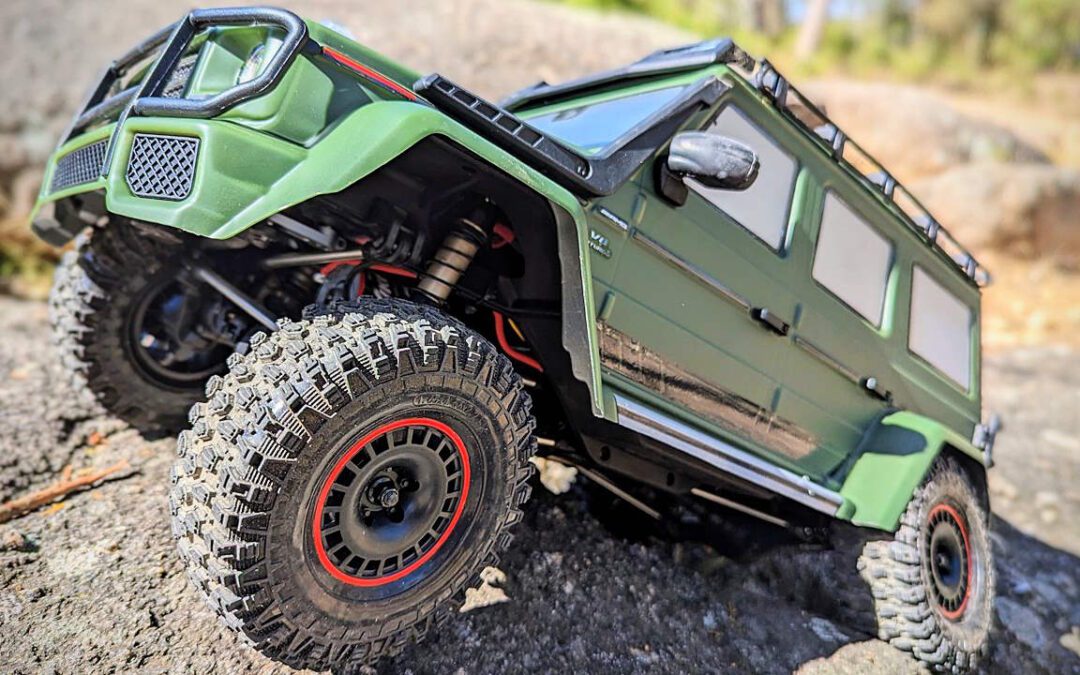
Rlaarlo TK07 Pro: Ready, Set, Scale!

Rlaarlo TK07 Pro: Ready, Set, Scale!

Scale Adventure, Refined

Everyone, meet the new Rlaarlo TK07 Pro. It’s a 1/7 scale crawler with bells and whistles as good as any you’ll find today, in any size. I’ve been fortunate to drive some impressive RC crawlers over the years, and the recent Rlaarlo JK07 Pro became an instant favourite. Its size and capability make for a sublime trail rig that looks the part and turns heads – I love this thing.

So when Rlaarlo followed this with their announcement of the TK07 Pro, a slightly shorter wheelbase tribute to the iconic 1987 Nissan Patrol, I was intrigued. Could they capture the magic of the JK07, but in a slightly smaller, perhaps more trail-friendly package? Spoiler alert: Yes, they absolutely did!

Rlaarlo TK07 Box

A Shorter, Sweeter Ride

While the JK07 set the benchmark for larger-scale realism and intricate detail, its long wheelbase sometimes made tight crawling challenging. Enter the TK07 Pro: sporting a shorter wheelbase, a lighter build, and a zippy 2600KV motor (compared to the JK07’s 2200KV), this model immediately felt more torquey. Where the JK07 excels as an impressive, feature-packed flagship, the TK07 shines brightly as an accessible, rugged adventurer, wiht a few less frills but still retaining the best bits.

Built Tough, Thoughtfully Designed

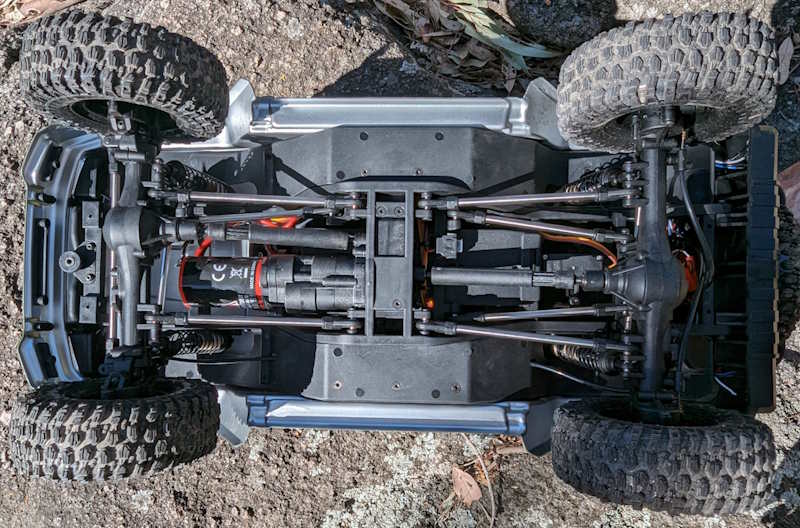
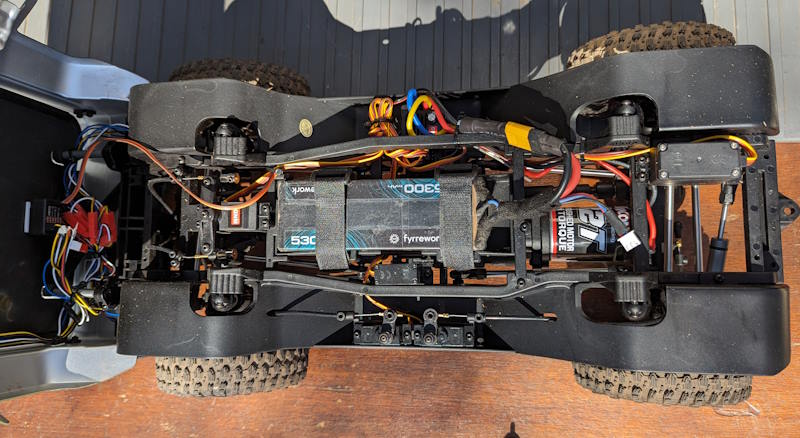
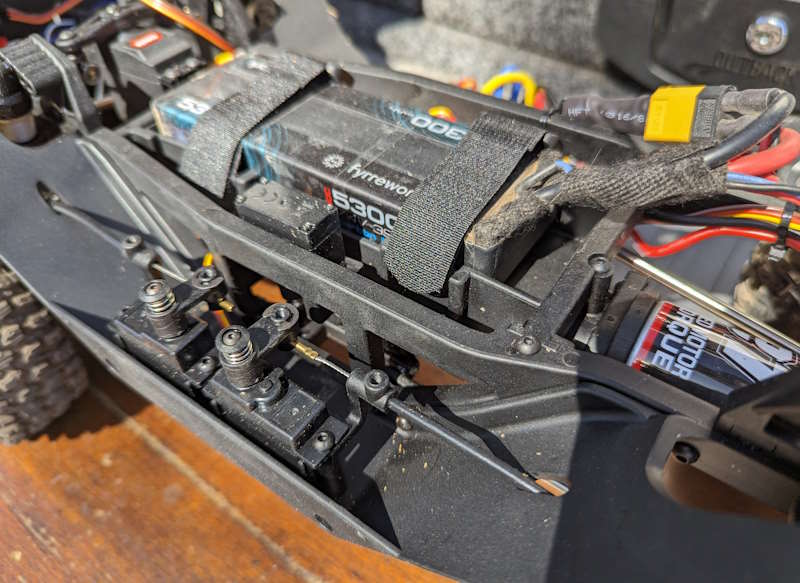
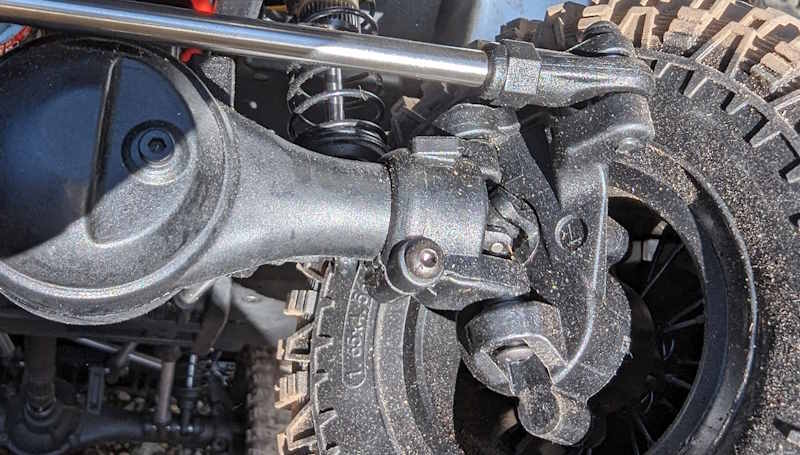
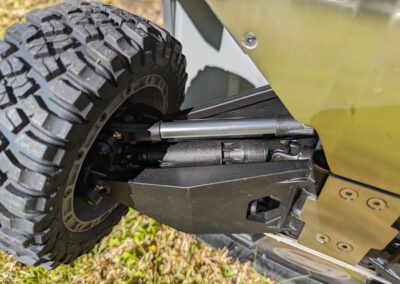
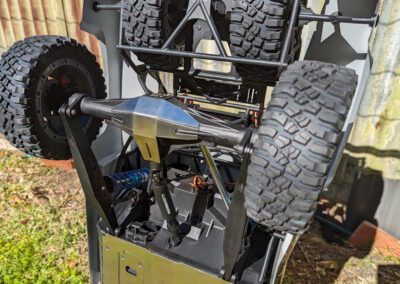
Rlaarlo continues their winning formula here. The robust CNC-cut chassis and impressive running gear remain largely unchanged from the JK07, which is fantastic news. I like its sturdy telescoping driveshafts, metal axles, and universal joints all return, giving a reassuring sense of durability.

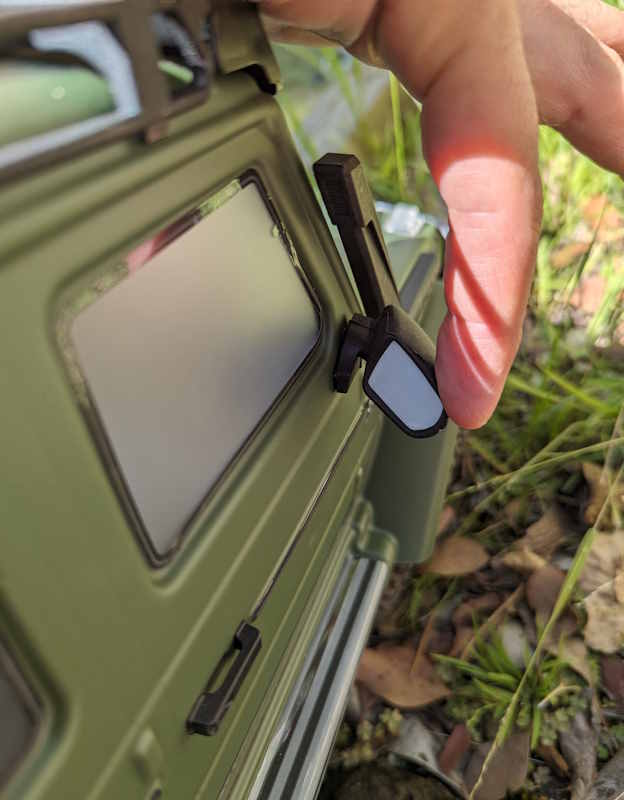
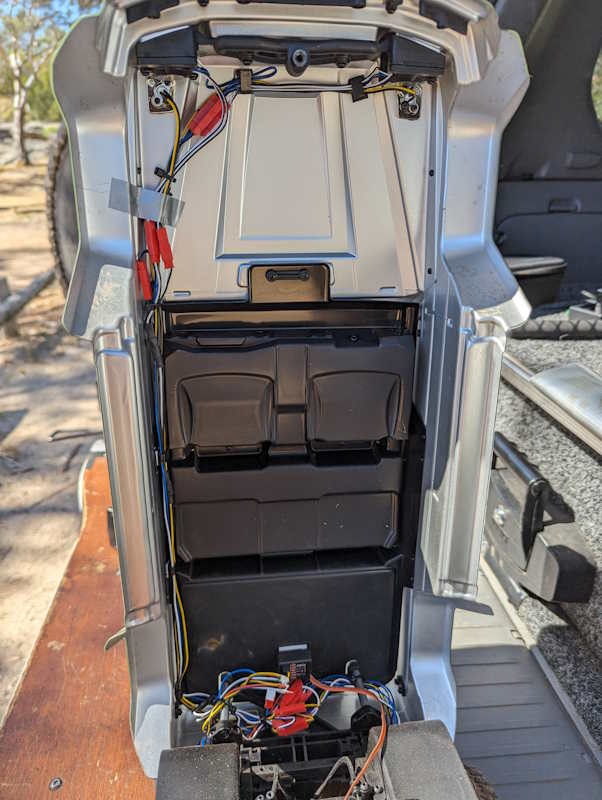
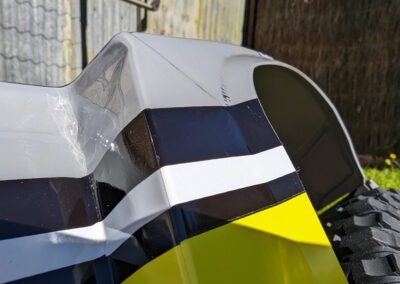
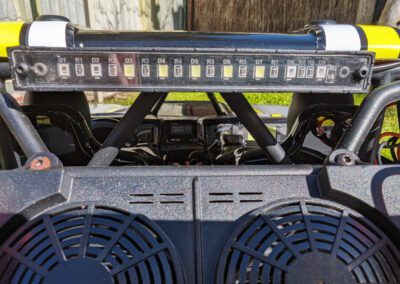
The differences here are subtle, yet significant: the TK07 trades the fancy interior features, like functional windscreen wipers and a moving steering wheel, for a simpler, cleaner interior. Honestly, I appreciate this change; fewer bells and whistles mean fewer things to go wrong, leaving you free to focus on the trails. There are less lights on the body, but there’s a healthy aftermarket out there and a simple light bar will scare away the night, if you’re so inclined.

Smarter Steering, Sensible Suspension

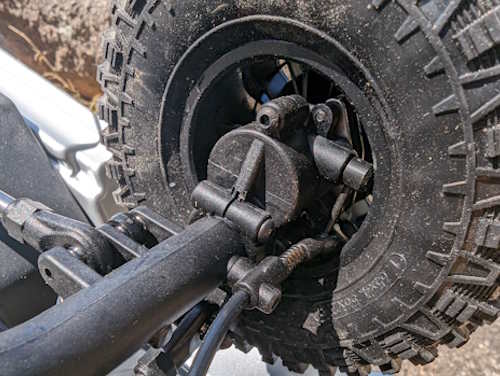
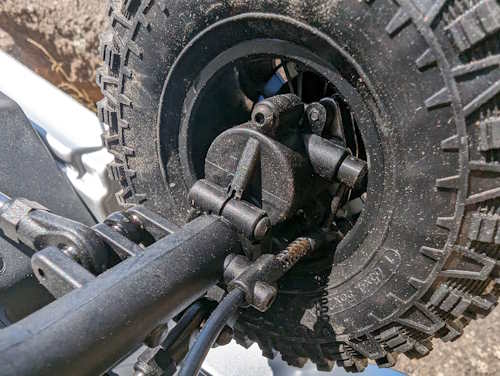
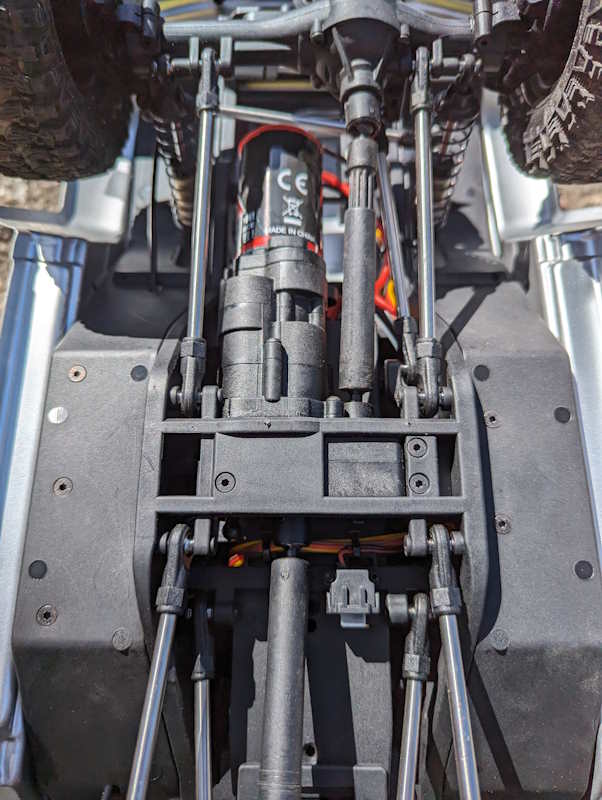
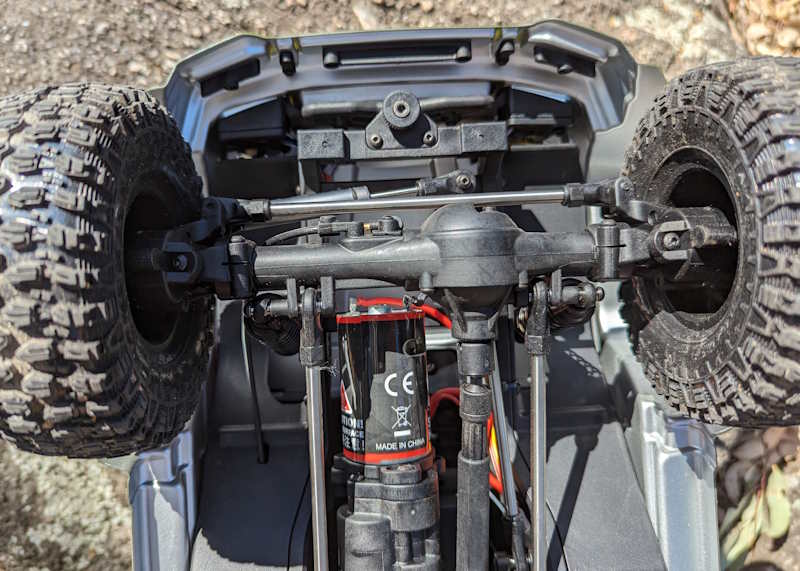
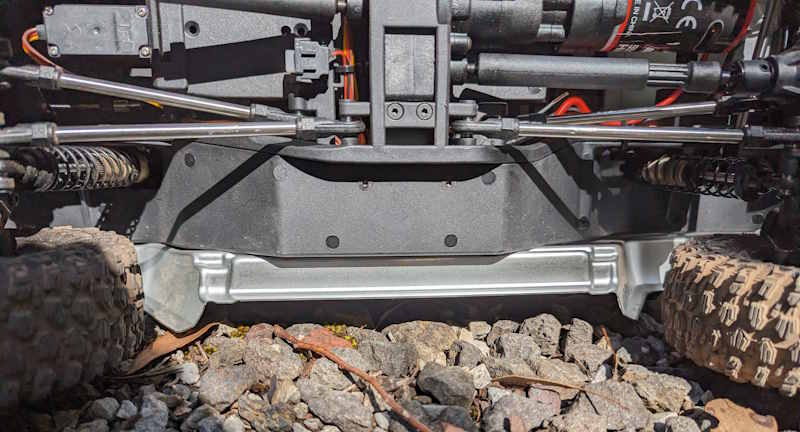
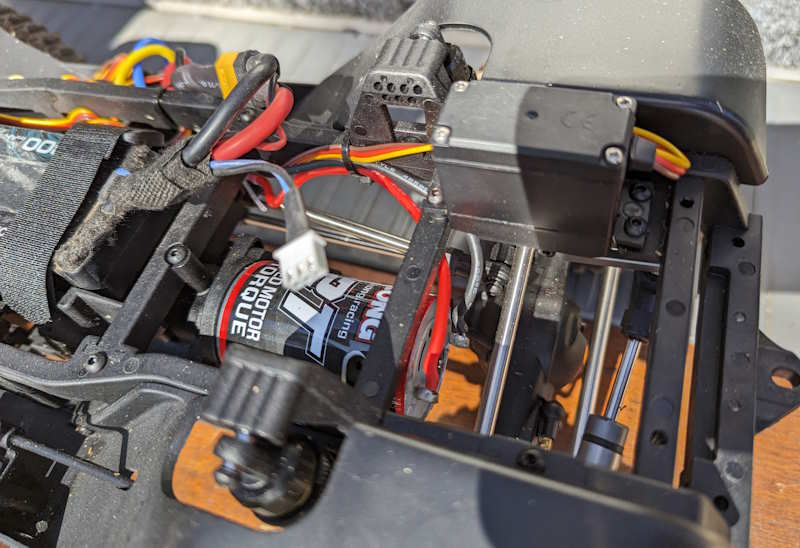
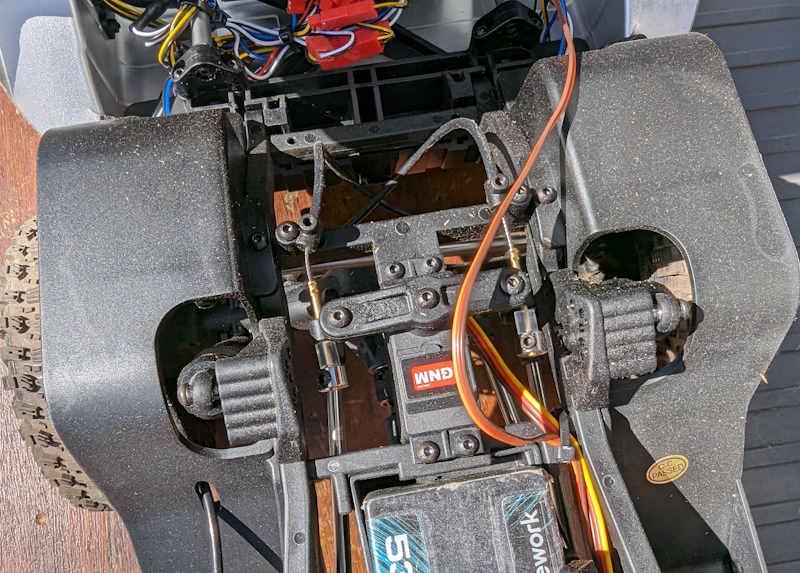
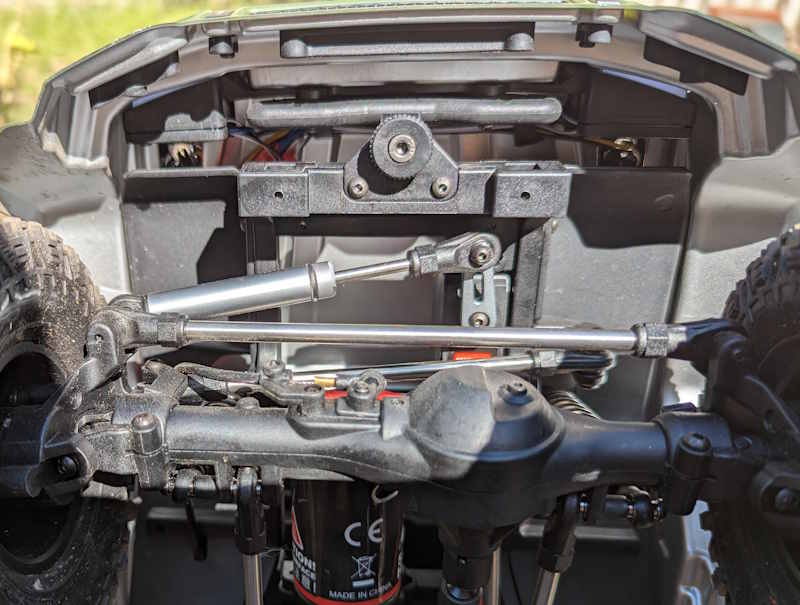
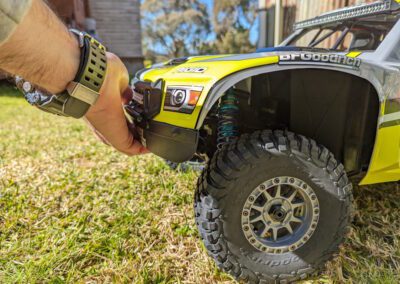
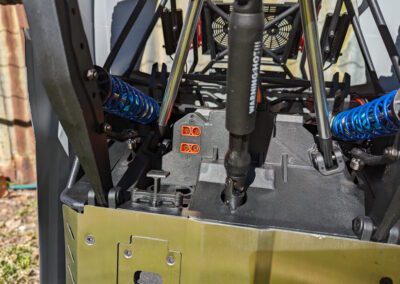
One notable update is the steering damper, essentially a servo-saver intended to protect the servo. While it softens steering precision slightly, most hobbyists, myself included, might prefer swapping it out for a solid link for more direct control. One of my youtube channel members suggested instead hydro-locking the damper instead of repalcing it (ie. over-fill it so it’s completely firm). Not a bad idea! The servo itself is a capable 45kg unit, robust enough for general trailing, although serious rock crawling enthusiasts may opt for something stronger.

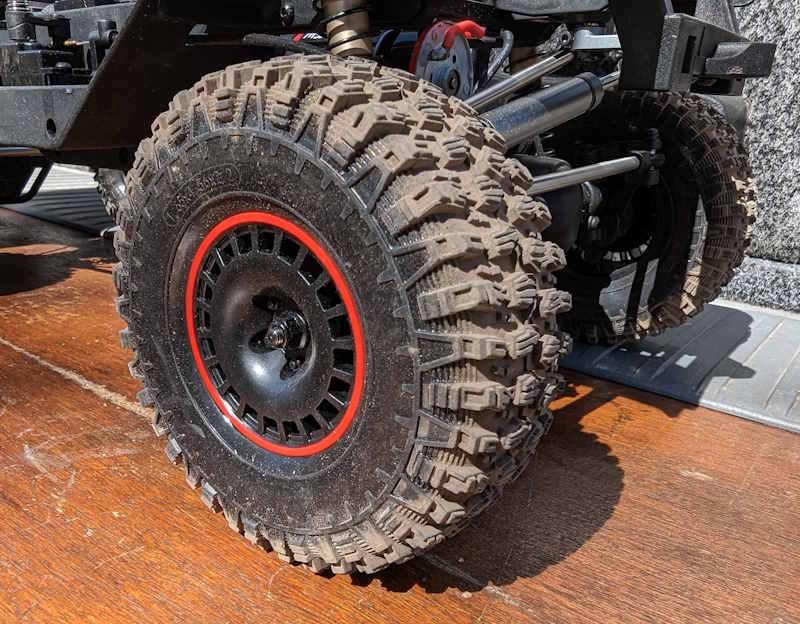
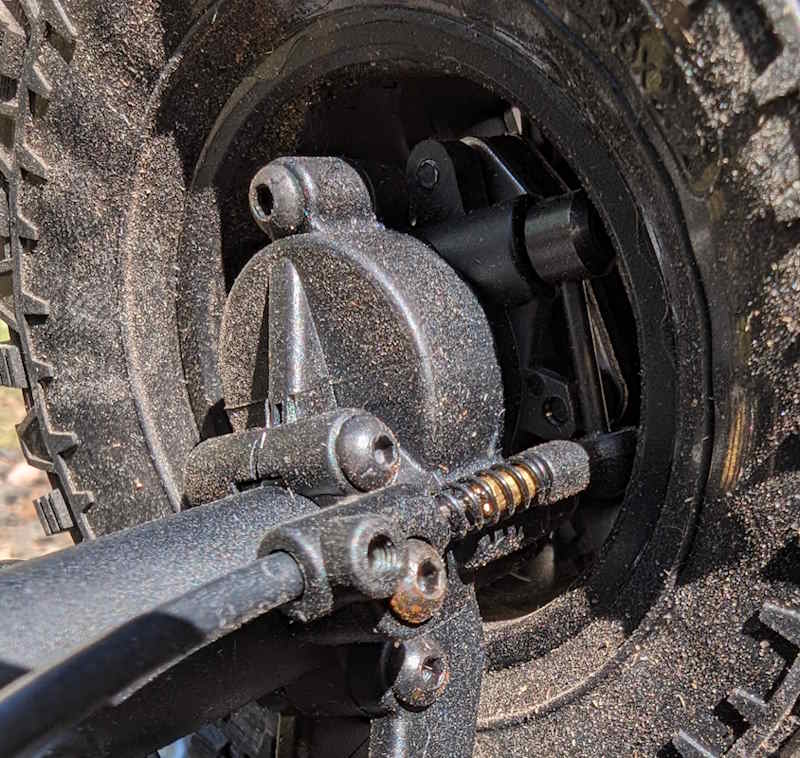
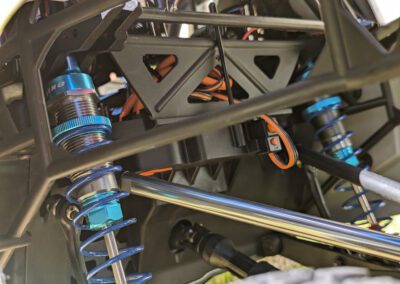
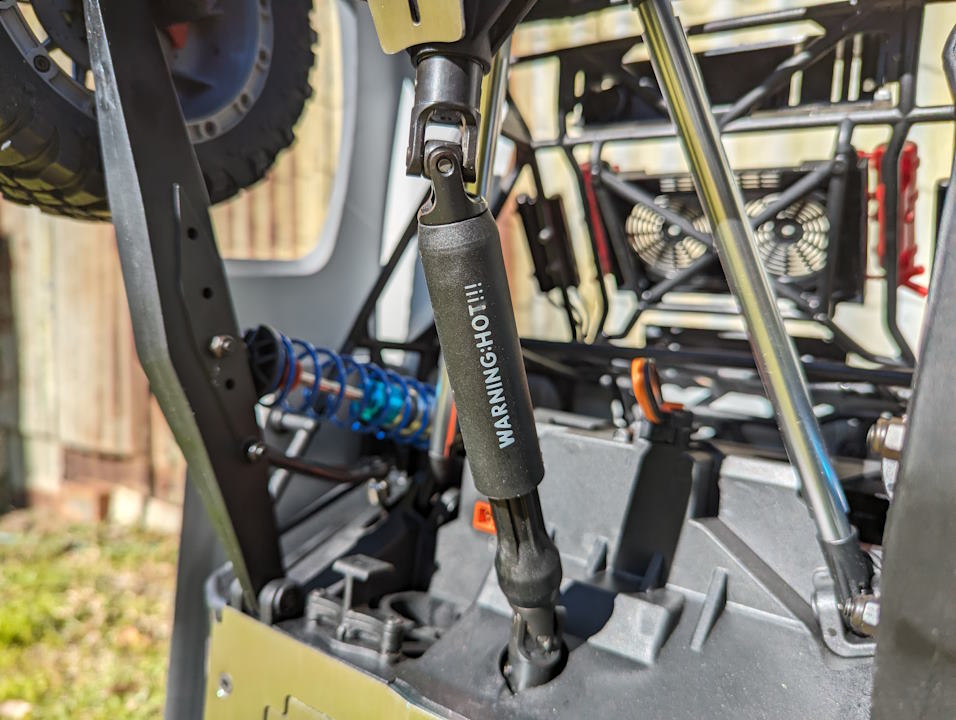
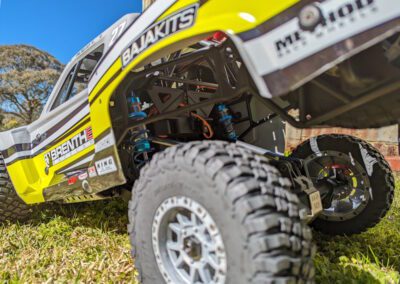
TK07’s suspension setup is spot-on, offering excellent damping without leaks, thanks to thoughtful details like protective boots over the shock shafts, a small yet appreciated touch.

TK07 Steering Damper

Feature-Packed Without Overkill

Just like the JK07, the TK07 sports a capable two-speed transmission, selectable front-wheel, rear-wheel, or all-wheel drive, and remotely lockable differentials. These features significantly elevate your crawling experience, allowing you to gradually ramp up capability as trails get tougher. Even in water and mud, these engage and shift without complaint and have no external bits to get damaged, unlike those of some manufacturers’ implementations.

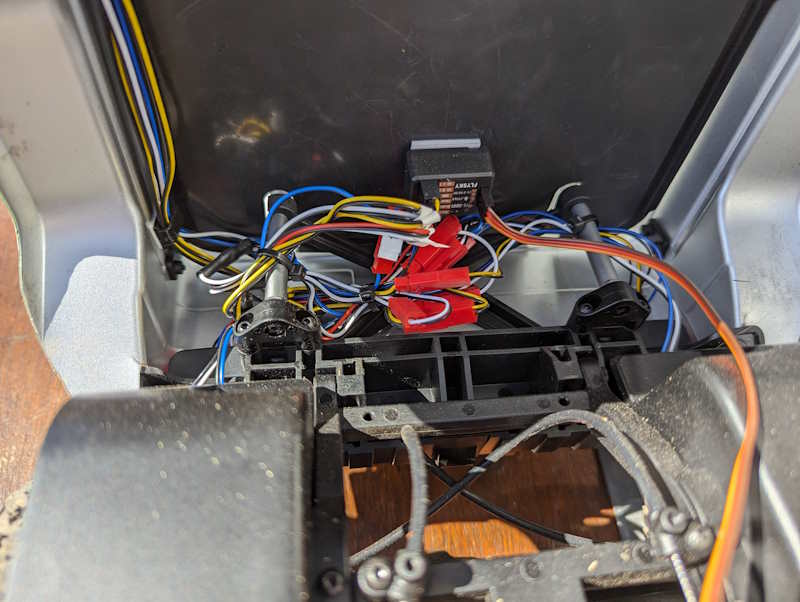
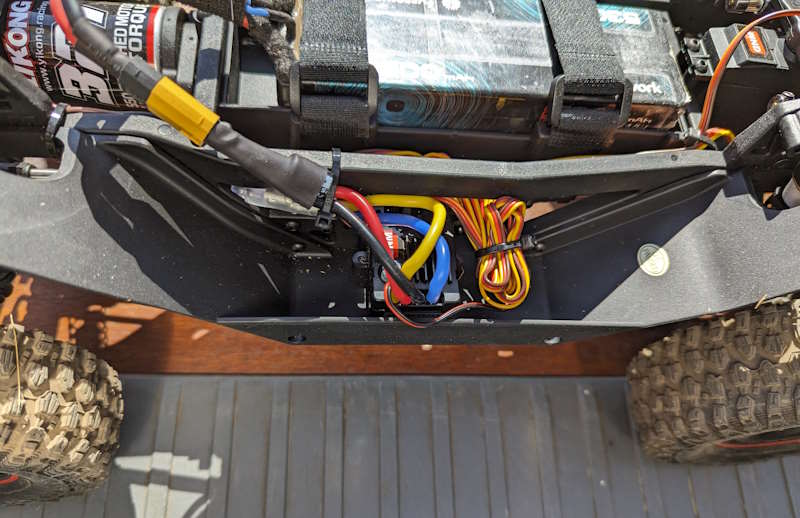
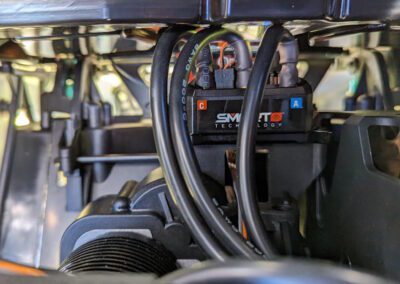
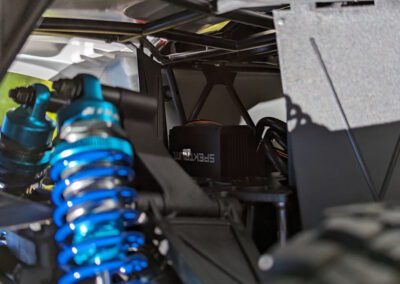
The electronics are top-tier, with a 140A ESC managing both 3S and 4S LiPo packs smoothly, complemented by a sensored motor and Field Oriented Control (FOC) system, providing buttery-smooth low-speed modulation.

Rlaarlo TK07 Brushless or Brushed?

Rlaarlo offers two versions of the TK07:

  • Brushless (TK07 Pro): More powerful, efficient, and offers better low-speed control with punchier acceleration. Supports 3S and 4S LiPo batteries. A great choice if you demand maximum performance.
  • Brushed (TK07): Less expensive but still highly capable. Supports 2S and 3S LiPo batteries. Ideal if you prefer a balanced, all-round scale trail experience without breaking the bank. Upgradable if desired later on.
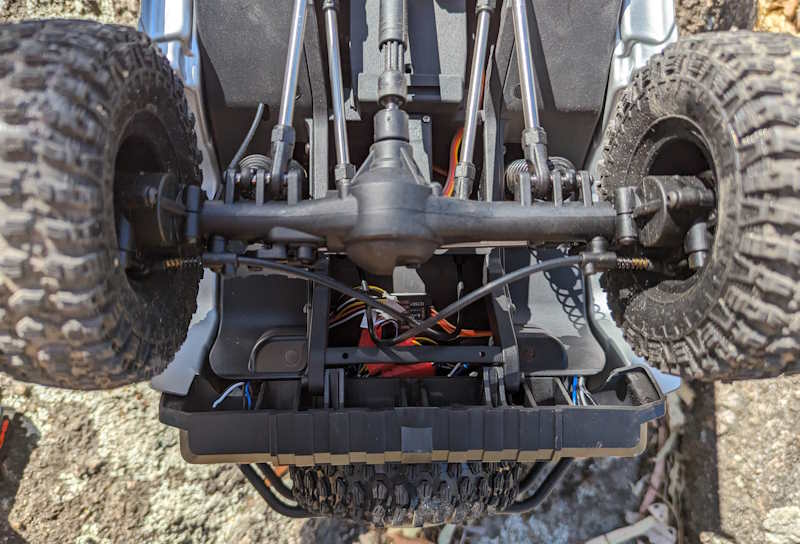
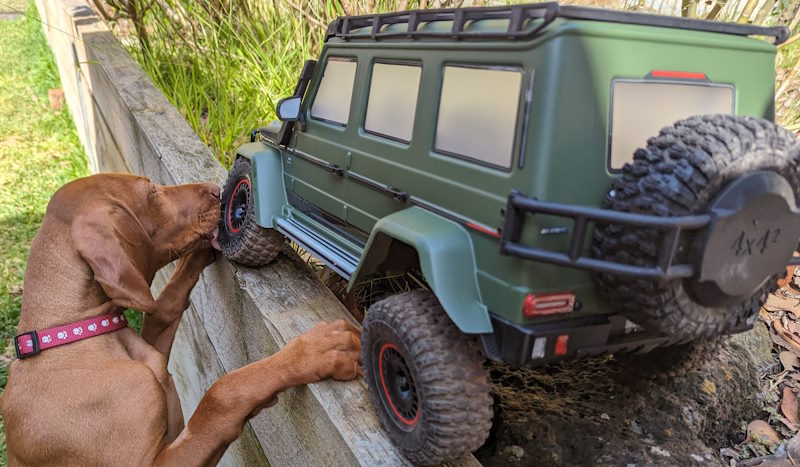
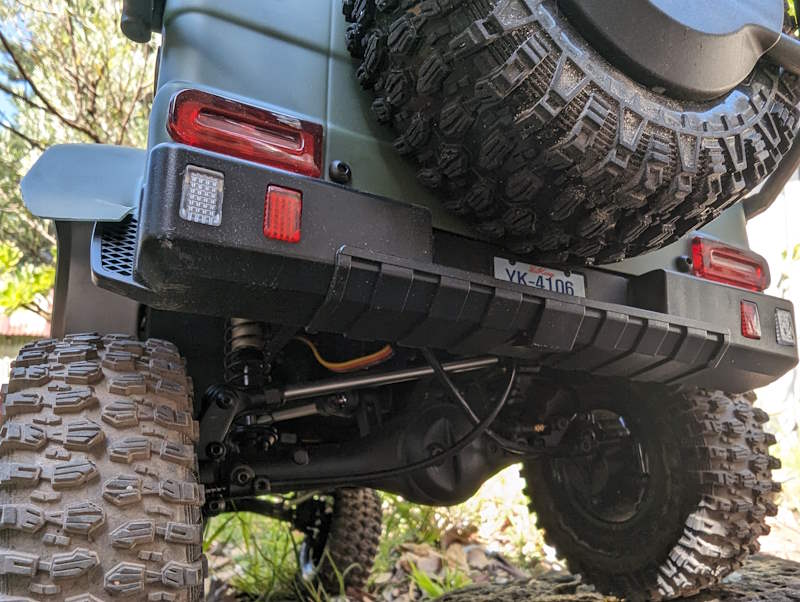
Rlaarlo TK07 Rear-Left

Room for Customisation

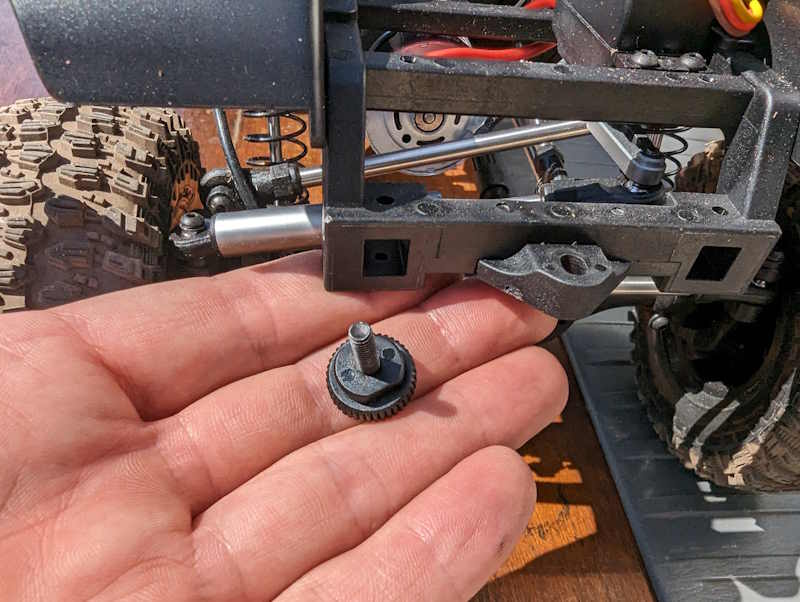
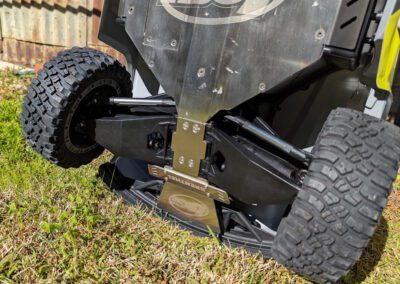
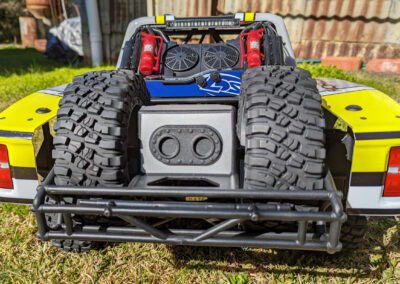
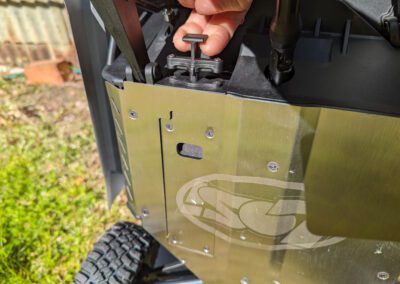
It’s great that the TK07 comes ready-to-run and impressively well-equipped, but there’s always room to mod a rig to your liking. I noted the spare wheel lacks an included mounting screw, easy enough to fix, but worth mentioning (now included, Rlaarlo tells me – they’ve shipped an allen key and bolt to do the job; it’ll be included with yours). Although the tow hitch is functional, its rectangular shape puzzled me; you might consider modifying or swapping it out for a more versatile option.

(On that note, my tow hitch design for the MK07 and JK07 models is available now here for free download and printing).

Rlaarlo TK07 On the Trail

Driving the TK07 Pro is simply a joy. Its shorter wheelbase and lighter weight make it more nimble on trails and pleasingly capable over rocky terrain. The lower gearing, despite the higher KV motor, results in superb crawling control at low speeds, with a confident drag brake holding the truck firmly on descents. It still has plenty of punch, too. I think 2600kv was the right choice.

The Verdict

The Rlaarlo TK07 Pro hits a sweet spot that many crawlers aim for but few achieve: scale realism without sacrificing rugged trail capability. It’s a little simpler than its flagship sibling, but retains all the essential performance features that matter. If you admired the JK07 but hesitated due to its size or complexity, the TK07 Pro is likely your perfect match.

As always, my focus at RC-TNT remains honesty and detail. Rlaarlo sent me this vehicle with no strings attached, allowing me to remain completely unbiased. I genuinely like what Rlaarlo is doing here, and the TK07 Pro has quickly become a firm favourite in my stable. It’s easy to recommend for both new adventurers and seasoned crawlers.

Where to Get Yours

Rlaarlo sells direct, here.

Consider the longer JK07 Pro too, here.

See It in Action

Watch my full review and driving impressions below.

For more details and alternative crawler comparisons, check out my JK07 Pro article here.

Craig Veness

Craig Veness

RC-TNT

Craig has been into radio control since the 90s and into RC crawling since about 2010, when a Losi MRC started the obsession! Now it's all rocks this and crawl that and upgrade all the things! ...You know how it is, right? Welcome home 🙂

A note on affiliate links: I was provided with this car by the manufacturer for review purposes. The purchase links in the above article may be affiliate links, which means I may be paid a small commission if you choose to click on them to make a purchase. As always, I make effort to ensure that no review is impacted by this – I still report on bugs and issues encountered during product testing, and my fixes or solutions if found. Thank you for reading and happy RC-ing!

Rlaarlo JK07 Pro: the Search is Over!

Rlaarlo JK07 Pro: the Search is Over!

Dessert First: My Conclusion

A cheeky spoiler first: the new Rlaarlo JK07 Pro has quickly become one of my all-time favourite RC vehicles.

Now, I want you to appreciate what a momentous feat this is. I’ve been into RC since the 1980s and currently have a shipping container to hold my models. There’s a total of 7.5m (26ft.) of shelving, with 6 levels, to store my 1/10 and larger models, side-by-side. I have many, many RC cars as part of my RC-TNT ‘library’ of models for content creation.

Okay, so once more, the Rlaarlo JK07 Pro is one of my all-time favourite RC vehicles. Now you may see what a big deal this is!

Rlaarlo JK07Pro Studio

The Search for Scale

This is not a review of the Rlaarlo JK07 Pro. (I do have a video for that, if you’re interested – it’s at the end of this article). But no, today, I am inspired to tell you a bit of a story. It’s still ultimately about the new 1/7 scale beauty from the pointy green R, but it’s quite personal and very much a recalling of times past and dreams unfulfilled – until now. But I get ahead of myself.

I have Rlaarlo to thank for inspiring me to share this with you. I also must thank them for sending me one of their rare ‘Pro’ versions of their epic new trail truck. So, grab a coffee, find a comfy seat, and please enjoy my tale of…


The Search for True Scale!

Rlaarlo JK07Pro Front-Left

Four Decades Ago…

I had a blessed childhood. I’m well aware of that. My parents were soil scientists and throughout the 1980s and 90s, they travelled in their Toyota Landcruiser 60 series (and later, 80 series) crisscrossing the many trails of much of the NSW public forested land. They dug small holes, took soil samples, and assembled reports about the state of the land for the NSW Forestry Commission. Some of those reports are still in use and I heard recently they are still today considered the gold standard for this sort of work. Way to go, mum and dad!

I was the eldest of three kids. I’ve always been a tinkerer and have always, always loved things that go. My first word was ‘car’, followed by ‘mum’. That should tell you something! Well, we kids sometimes rode along with our folks on some of their shorter forestry trips. We stayed up the road with our grandparents for the other, longer ones – still had to go to school, after all! But those trips were pretty great.

Veness & Assoc PL

Grounded

My Dad had installed a small, 12V TV on the center console of the Landcruiser and a 12V VCR underneath it (it played analogue video tapes on the TV, for those of you born this century). We’d bring snacks and some toys and would play near the car, make things from sticks, and generally just be kids between the many stops mum and dad would make.

One thing I always took along with me was a small RC car. But it was a two-wheel drive thing that ran on 4x AA batteries and with the electronics of the late 80s, it wasn’t particularly capable nor efficient on power. But the batteries were rechargeable, and I had two sets, so I often was able to keep the thing running for about half the stops we made.

Taiyo Jet Hopper Grace Bros

The Dream

My little RC car had basic suspension, no diff (just an axle with a plastic gear on it, driven by the motor) and weak, 3-position steering. It could handle a little water – it was just a basic AM radio system and there wasn’t much to its electronics – but it was quite limited. Still, I had a blast with that thing. Many fond memories were made, driving up little gravel gullies, across obstacles, down sandy animal trails, and just generally around the place. I played in my own little imaginary world and it was great!

Back then, I didn’t know it, but what I longed for was a more scale experience. I had the imagination, but was limited by electronics of the day. Plastics manufacturing was still new-ish, basic radio technology was sketchy and there was a very small (but rapidly growing) toy and hobby market for RC cars.  Despite this, the scene was set.

Tandy 1980s

The Mid 90s

We moved to Coffs Harbour, NSW in December 1988. It was notable because it started raining in early December and didn’t stop raining until mid-late January 1989. Back then, Coffs had a population of around 55,000 people (the greater Coffs area is pushing 180k people now).

There was a Tandy Electronics in town, and I have a vivid memory of my first trip in there with my dad. He needed a new CB radio. I was distracted by their hobby and toys section – there were so many different cars there! And trucks! They stocked a lot of Tamiya and I had no idea about any of it – but I knew right then that I wanted IN!

Tamiya Bruiser

It Began With Tamiya

 It was 1993 and I bought my first hobby-grade car. I hadn’t realized that crawlers were even a thing – and much of the time, they weren’t anyway, as people were cutting and modifying various monster trucks and scale runners like the Clod Hopper and Bruiser, turning them into slow rock machines. So, I started my time in the hobby with a Tamiya Stadium Blitzer.

I had a great time with it, burned through many a NiCAD pack and sets of tires, both on- and off-road sets, until I sold that to my cousin later in the 90s. My brother had a monster truck with two speeds for a time, and that was cool. His first foray onto rocks ended up blowing its plastic transmission. (Oh, how times have changed!)

Tamiya Stadium Blitzer

My First Crawler

If you know me from RC-TNT on YouTube, you may be surprised to learn that it wasn’t until 2011 that I experienced my first real rock crawler. It was a Losi MRC (or Mini Rock Crawler) and I had SUCH a great time with that thing! When I retired it, the car had a 1/10 80 Series Landcrusier body on it with a home-made winch, metal sliders, 1.9” wheels and 4.3” tires. I drove the wheels off that thing – several times, in fact!

In the years following, I dipped into the 1/24 scene (starting with the Losi Trail Trekker in 2013) and into 1/10 and bigger (starting with an old, well-used SCX10 Deadbolt I picked up second hand). A new Vaterra Ascender soon followed, and that puts us in about 2015.

Getting Into Scale

By now, the rot had truly set in. There was no turning back. I was busily building scale obstacle courses at home and meeting people near and far to trail drive with during weekends and even after work, into the night. I could not get enough of RC scale driving and models!

Of course, the problem with meeting other people to drive with is that you see what they’re up to in the hobby. You start to get more and more ideas about what you want to do with your rig/s. And once your mind starts spinning away on these things, there’s only one cure…

Rlaarlo JK07Pro Scale Front
Rlaarlo JK07Pro Scale

More and Bigger Crawlers, Please!

You can no-doubt see where things are heading at this point. By 2017 I had probably 50 lipo batteries and several balance chargers, and various 1/24, 1/18, 1/10 and 1/8 scale machines, some of which I’d built myself and some that were kit builds, and others that were used RTR machines from local buy/sell groups in the hobby.

I have a photo of my Trail Trekker in LC80 guise using its winch up the side of a rock from around 2013. It’s my first photo of a scale crawler showing how I was really trying to capture that feel of a real car. The more realistic, the better. I thought that meant better bodies, better tires and more accessories. To some extent, that was correct. But I was missing something.

Trail Trekker Winching

Running Gear Matters

Sometime in 2017, Traxxas announced a bold new RC crawler with a previously unheard-of feature: remote locking differentials. In a 1/10 scale crawler. I came across a leaked photo of a shiny grey Defender on oversized tires and looking incredible. My jaw just about hit the floor, along with the rest of me, as I fell off my chair when I saw it! I think I called a couple of friends right then to tell them about it. Guys! Remote lockers! On a 1/10!?

When it was released, I bought one of the first Traxxas TRX4 models available in Australia. Man, I drove that thing for YEARS and its running gear was amazing. But over time, inevitably, I wanted more! More scale! More running gear! And more realism!

TRX4 Defender

Just Like My ‘Real’ Car

A few years later, Boom Racing released the BRX01 (article here) and along with it, a transfer case option that included selectable 4WD/RWD. The car had full-time locked axles, but with overdrive gears in the transfer case, that was a sublime option for an already brilliant scale rig. (You can read about that one here, it’s still one of my favourite trail rigs today).

My full-size 80 series Landcruiser was RWD most of the time, with an open diff. Lock the hubs and you’d have 4WD high and low range. And then, if you wanted, you could install lockers so you could lock the front or the rear diffs, too. But no RC model ever had that level of detail. For some years now, I’ve been patiently waiting for such a thing to become a reality. Here’s where it gets good. Better than good!

Rlaarlo JK07Pro On Rock
Rlaarlo JK07Pro Chassis

Rlaarlo To The Rescue!

This brings us to 2025 and Rlaarlo has, unexpectedly, incredibly, delightfully, come through for we scale afficionados. My dream of the ultimate scale, trail crawler may have actually, finally, been fulfilled! It’s time to talk about the new Rlaarlo JK07 Pro – I have one of just five in the world at time of writing – and I’m SO excited to tell you about it!

There’s a video review and drive demo I’ve made for this car that you can find at the end of the article. It’s very worth watching. But here, I’m going to take you over some of the scale detail and goodies that I couldn’t include in the video, else I’d still be filming it right now. It’s a bit of a list!

Rlaarlo JK07Pro Rear-Right

Rlaarlo JK07 Pro Features

Ok, ready for this?

  • 1/7 scale long wheelbase;
  • full working light kit (with working LEDs on the front fenders and bendy mirrors!!);
  • selectable RWD/4WD/FWD;
  • high and low speed;
  • selectable remote locking diffs;
  • working windscreen wipers (3 speed settings!);
  • huge brushless motor and servo;
  • a longer wheelbase AND body than the Axial SCX6 (yes, really!);
  • a GPS-measured top speed on 4S (yes, 4S!) of 29kph (or 18mph);
  • working side awning;
  • working rooftop camper with collapsible ladder;
  • sand ladders and scale shovel;
  • a full interior including a steering wheel that turns with the wheels; and,
  • everything’s waterproof!

The whole thing weighs around 8.4kg (or 18.5lb), it looks fabulous, and the body comes off and goes on without body clips or other tools. It’s hinged and has gorgeous cable routing, and the entire machine is controlled by a DumboRC (Rlaarlo-branded) 10-ch radio transmitter.

I honestly and truly think the Rlaarlo JK07 Pro might be the most complete package of ANY RTR I’ve ever had. Really. If you’ve seen my toy shop of a studio, you’ll know that means of most cars on the market today.

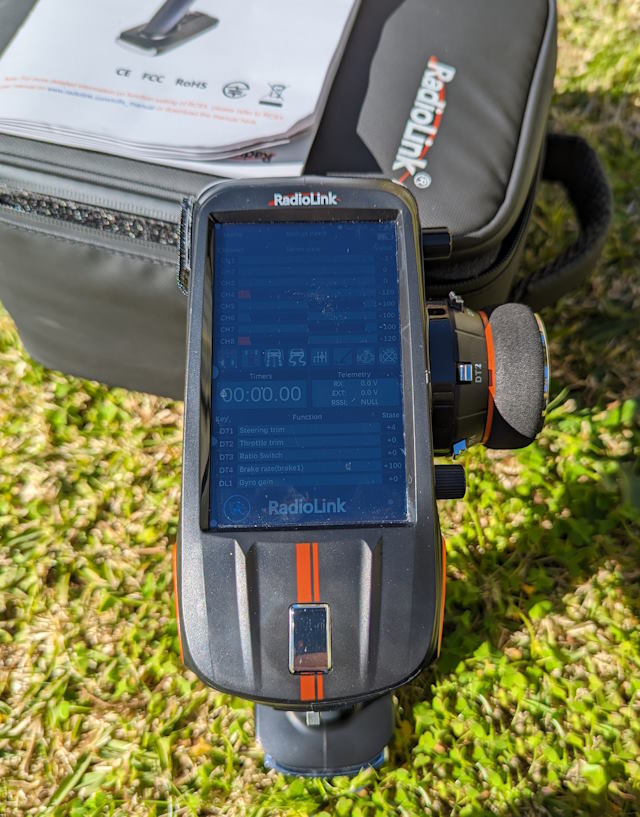
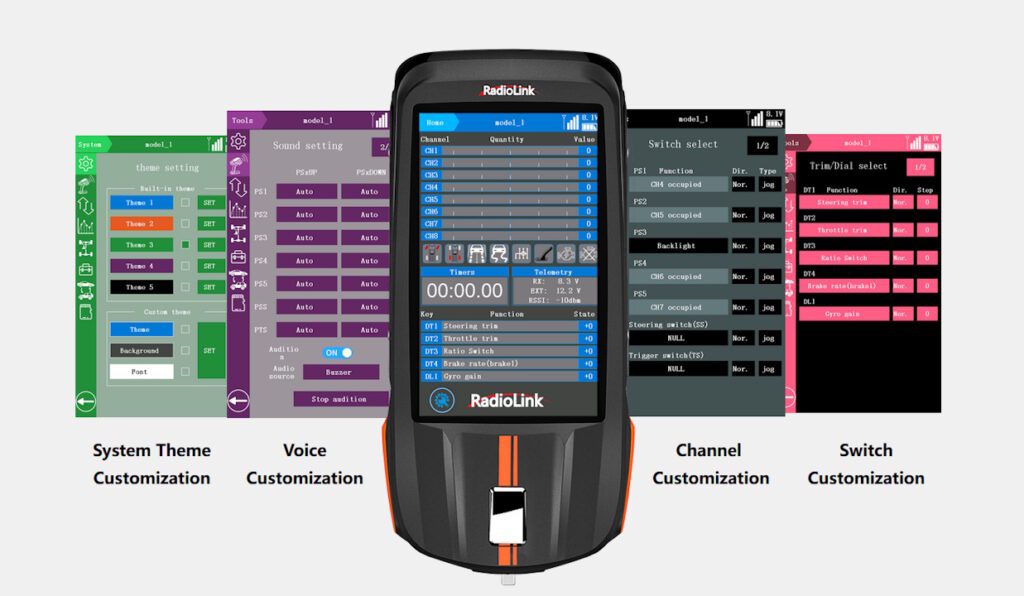
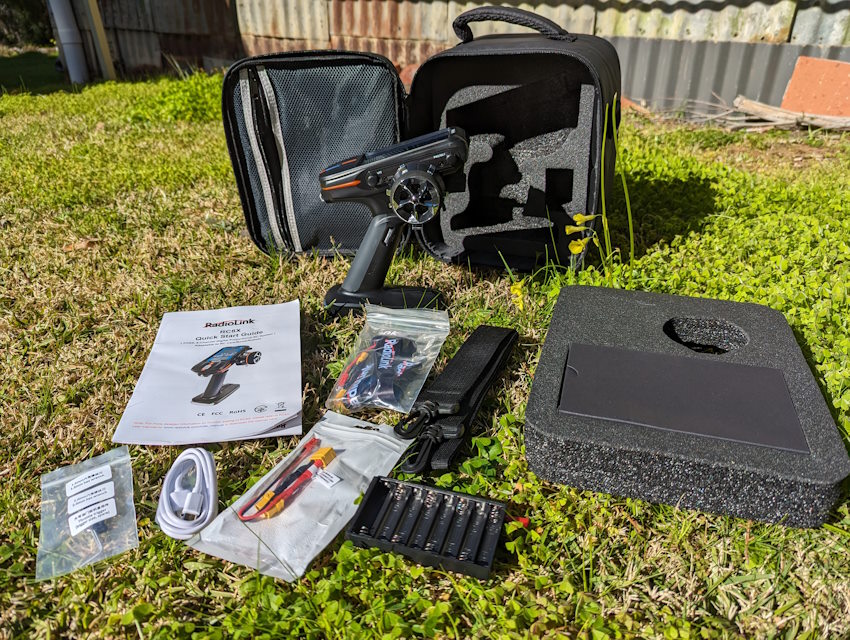
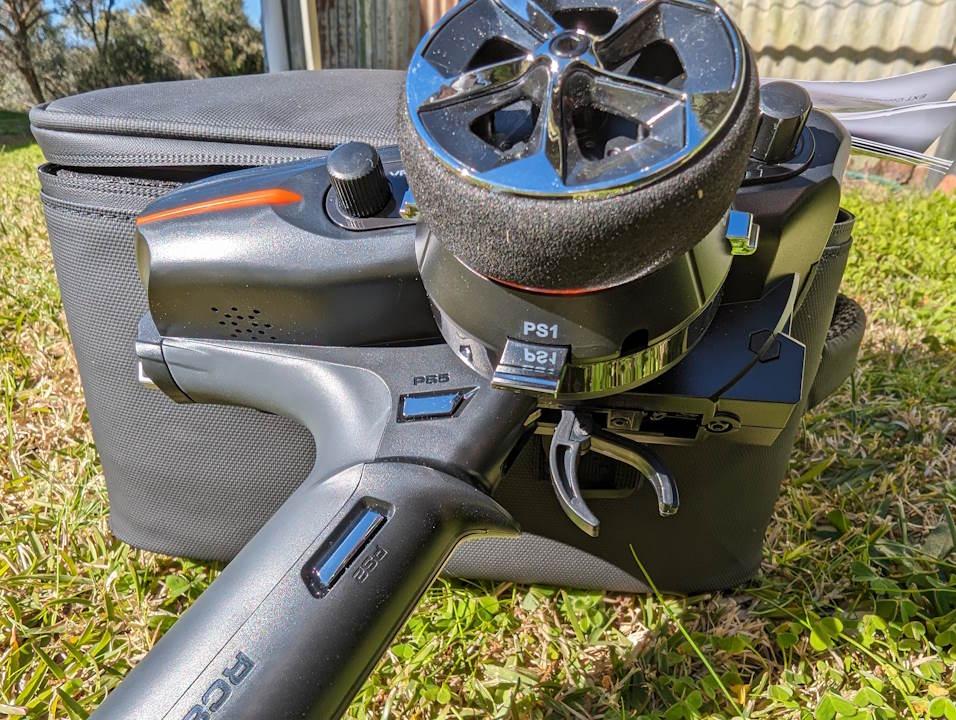
Rlaarlo JK07Pro Radio

What I Love

The previous section pretty much tells the story there. This is a durable car with very well conceived execution. All the plastics are nice and bendy for good durability. Components are thoughtfully placed. The car runs well and has a wonderfully scale body roll to it. Driving in just RWD and unlocked is a hoot! And I LOVE being able to slowly increase the car’s ability to match increasingly challenging terrain: RWD open diff, 4WD open diff, 4WD front/rear locked. So fun.

The battery tray is huge and fits a 7A 4S and a 10A 3S lipo – both are ideal for a car of this size. (Adapters here, if you buy either of these). Rlaarlo sells suitable batteries and many spare and upgrade parts for the JK07 as well.

The body is beautifully appointed and there’s a complete interior. There are many stickers included with the thing so you can customize it a bit, and the tires and foams are very good. I wouldn’t add more brass to it, I think the car is balanced just nicely out of the box. It’s quiet, power-efficient and just plan fun to drive.

Rlaarlo JK07Pro Campsite

Things Needing Improvement

There aren’t many things on this list, but a few items are in need of attention if you’re going to use this a lot. Firstly, the two rear tow hooks are plastic. They snap very easily if you tip the car on its bottom for cleaning or inspection. I wish these were either metal, hinged, or both. (My Rlaarlo contact has confirmed they’re looking to iterate on this in future). Also, the rear springs are too soft, even with full preload applied. I’d prefer slightly thicker diameter rear springs so the car can ride a bit more stably, especially on corners and steep ascents.

The steering wheel needs a bearing in the shaft so it doesn’t grind around when its servo tries to move it. And lastly, if you’re crawling with it beyond anything mild, the large wheels and mass of the vehicle overwhelm the 45kg brushless servo. I’m going to fit a 70kg brushless unit to mine. Lastly, the manual is a bit vague on features – more on that in a moment.

Rlaarlo JK07Pro Servo

Wipers & Steering Wheel

These seemingly unrelated things had one factor in common: neither worked properly for me, but for different reasons.

Steering Wheel: the steering wheel was installed too tightly, so instead of rotating with its micro servo, it kinda ground left and right. Loosening the retention screw behind it fixed this. Simply a factory installation issue, no biggie.

Wipers: The wipers have a button on the radio (CH10) but the manual isn’t clear on how this works. A single press makes them wipe once. Holding it down for a few seconds turns them on. Pressing CH10 3x rapidly adjusts the wiping speed. A single press will turn them off.

Rlaarlo JK07 Pro Wipers

My Overall Impression

This is not just Rlaarlo’s best car to date. The Rlaarlo JK07 Pro is one of the best RC trail rigs on the market, period. I’m completely serious. For me, at least, the complexity afforded by the various servos and design are such that I can have a true scale adventure with this thing. I can get stuck, get recovered, and even winch myself out if I wanted to install a winch on one of the two spare radio channels (both of which conveniently have a dial). It’s such a great car.

The Rlaarlo JK07 Pro won’t be for everyone. But for those among us who are still kids at heart, dreaming of scale adventure, this flagship model from Rlaarlo may be just the model you’ve been waiting for. I am so, so pleased with it. Oh yes.

Rlaarlo JK07Pro Descending

Where To Buy

Rlaarlo sells direct from their website.

Also consider the JK07’s predecessor, the shorter-wheelbase Rlaarlo MK07.

Rlaarlo JK07Pro Filming

See It in Action

I’ve got a detailed video of my experience with the Rlaarlo JK07 Pro below.

Also learn about other Rlaarlo vehicles I’ve examined here: https://rc-tnt.com/rlaarlo/

See my Rlaarlo videos here, on YouTube.

Craig Veness

Craig Veness

RC-TNT

Craig has been into radio control since the 90s and into RC crawling since about 2010, when a Losi MRC started the obsession! Now it's all rocks this and crawl that and upgrade all the things! ...You know how it is, right? Welcome home 🙂

A note on affiliate links: we were provided with this car by the manufacturer for review purposes. The Rlaarlo and other seller links in the above article are affiliate links, which means we may be paid a small commission if you choose to click on them to make a purchase. As always, we make effort to ensure that no review is impacted by this – we still report on bugs and issues encountered during product testing, and our fixes or solutions if found. Thank you for reading and happy RC-ing!

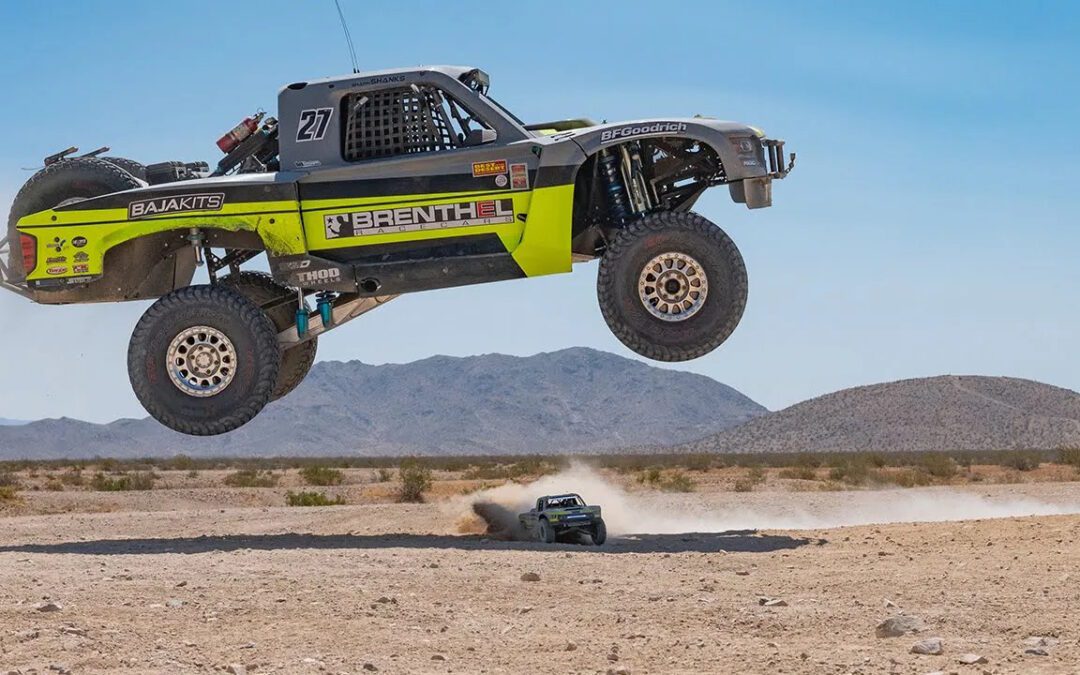
JK07 Pro Specs
FMS FCX18 Chevrolet K10 Blazer 2.0

FMS FCX18 Chevrolet K10 Blazer 2.0

The FMS FCX18 Chevrolet K10 Blazer is back, but with the same name as a few years ago. What’s going on? If you’d prefer to hear about it than read this interview, here is an AI-generated ‘deep dive’ podcast-style discussion between two AI hosts, courtesy of Google’s NotebookLM. It covers the below interview, which consists entirely of my own, very much NOT AI words and thoughts.

If you prefer to listen than read, it does justice to the interview below. Enjoy!

What’s New?

RC-TNT: Let’s talk about the new FMS FCX18 Chevrolet K10 Blazer. You’ve got the new version here to look at, sent from Banggood for review (buy here). How does that work?

Craig: That’s right, BG have sent the car to me for review purposes. I didn’t pay for it. But as always, my stipulations are simple but not-negotiable: I don’t accept payment for the review, I don’t provide my reviews to the manufacturer or retailer before releasing them to the public, and I show everything I find during my review, the good and the bad. Honesty first. If they’re not able to agree with my simple terms, I don’t accept the car for review. Pretty simple!

Okay, onto the cars. I bought the original with my own money and have received the newer version for review, that’s correct. This week, I’ve had both the old and the new models out at the same time and compared them closely. There are some differences between them that are worth talking about!

FMS FCX18 Chevrolet K10 Blazer Box Comparo

Body Changes

RC-TNT: Starting with the body, could you describe the visual differences between the previous version and the new truck?

Craig: The new version has undergone some noticeable updates. First, the tires (and the wheels) are now considerably larger, which not only changes the look but also improves performance significantly. The larger tires give it a more rugged, aggressive stance, and they help with ground clearance when crawling over obstacles.

The front wheel wells are gone now, which might seem like a small change, but it actually makes a big difference when the wheels articulate. You won’t have as much rubbing or interference, though the downside is the undercarriage is missing a little of the solid, scale feel the original version had. I don’t think it’s a huge loss though.

The metallic cherry red paint on this version is another standout—it has a sparkly, cherry-colored finish compared to the previous version, which was a bit more muted. Combined with the darker, more tinted windows, it really gives the model a more premium look. These changes to the body make the new version feel both more functional and visually appealing.

Mmm, Donuts

RC-TNT: That’s interesting! You’ve mentioned tires and wheel wells. So, let’s move on to the running gear. How do the changes in the wheel and tire size impact the new model’s performance compared to the previous version?

Craig: The larger tires are a game-changer for performance. They provide better grip on a variety of surfaces, from loose dirt to rocks. You’ll notice improved ground clearance, which allows the vehicle to handle bigger obstacles with ease. On the previous version, the smaller tires sometimes struggled with traction, especially on uneven and steep terrain or peaky obstacles, but the new ones make the vehicle much more capable.

The larger tires also contribute to better stability overall, because of the increased surface area making contact with the ground. It’s a small change that has a big impact on how the vehicle performs in real-world crawling scenarios. The bigger the tire, the smaller the relative size of the obstacles, basically.

FMS FCX18 Chevrolet K10 Blazer V1 & V2 Undersides

Gearing Up

RC-TNT: It sounds like those larger tires make a real difference! Speaking of gearing, could you elaborate on the new two-speed transmission in the updated model? How does it enhance the vehicle’s versatility compared to the previous version?

Craig: The two-speed transmission is one of my favorite upgrades in this model. It really enhances versatility. In low gear, you get that slow, controlled crawling performance with high torque, which is perfect for tackling technical trails or rocky climbs. High gear, on the other hand, allows for faster movement on flatter terrain, like when you’re driving between obstacles or on a trail run.

The ability to switch between these two modes on the fly is a massive improvement. It means you don’t have to compromise—you can have precision and torque when you need it and then switch to speed and battery efficiency when the terrain allows. The previous version’s single-speed setup just couldn’t offer that level of adaptability without a brushless upgrade, so this is a big step forward. The brushed system is now far more versatile.

FMS FCX18 Chevrolet K10 Blazer Radio Comparo

Steering Committee

RC-TNT: That sounds like a great upgrade for a better trail and crawling experience! Now, let’s talk about the steering. How does the shift from a chassis-mounted servo to an on-axle servo affect the steering performance of the new FMS FCX18 Chevrolet K10 Blazer?

Craig: Switching to an on-axle servo is a fantastic improvement for performance, though there are drawbacks. With a chassis-mounted servo (CMS), you often deal with linkage flex and a certain amount of slack in the steering. This can result in less precise handling, especially when the suspension is under load.

The servo-on-axle (SOA) setup eliminates most of these issues because it’s directly connected to the steering assembly. This means the steering response is more accurate to full throw in both directions. You’ll notice this especially when one side of the axle is much lower or higher than the other, when crawling. Steering remains consistent, whereas the old CMS system can vary. Despite the drawback of looking less scale, you’re getting consistent performance regardless of how much the vehicle is articulating. Overall, it makes the driving experience feel a lot more dialed-in.

Shocking Updates

RC-TNT: It’s fascinating how those changes impact performance! Tell us more about the suspension setup. How does the updated suspension on the new model differ from the previous version, and what benefits does it bring to the FMS FCX18 Chevrolet K10 Blazer?

Craig: The suspension on the new version is noticeably improved. First, the new shocks are oil-filled with aluminum bodies, including adjustable pre-load with thumb screw rings! The old ones were plastic and friction only, so this is already a big step up.

So yes, the shocks feel more refined, with better damping that allows for smoother articulation. This is crucial for crawling because it helps the vehicle maintain stability while navigating big changes to tire position on bigger obstacles.

The previous version was decent for what it was, but this one feels more balanced and capable. It’s also easier to tune the suspension to your liking, whether you want it softer for more articulation or firmer for better stability on inclines. This flexibility makes it more adaptable to different terrains and driving styles. Plus, the improved suspension works in harmony with the larger tires and the on-axle servo, creating a more cohesive and capable crawling platform.

Lying Down on the Job

RC-TNT: You mentioned there’s a new angle for the shocks earlier, and a change in the springs as well. What’s going on there?

Craig: That’s right, yes. On the first version of the model, the rear shocks were laid down at quite a significant angle, in order to fit them to the chassis rails, underneath the bed. The new model stands those shocks up some more, and so you see the top of the shock hoops in the bed. They’ve kind of got cutouts, which is not ideal aesthetically, but it greatly improves your options for suspension tuning.

The way that they pulled it off on the old one with the laid down shocks was that they just used really stiff springs, because the more you lay down the rear shocks, the less authority they’ll have over the suspension’s movement. So, they had to go with really quite thick diameter springs in the rear. It worked but it made the truck quite bouncy.

With the more stood up rears, the springs are nice and thin and the preload is adjustable. It’s tunable and it can articulate more easily and consistently throughout the entire range of motion. It’s really a delightful update, and I’m so happy they did that.

FMS FCX18 Chevrolet K10 Blazer V1 & V2 Beds

Escaping Short Circuits

(See what I did there? Har har.)

RC-TNT: That sounds like a significant improvement for both performance and tunability! Now, let’s talk about the electronics. How does the new waterproof control module in a plastic box compare to the previous model’s setup, and what benefits does it offer for the FMS FCX18 Chevrolet K10 Blazer?

Craig: Functionally, they’re the same, but aesthetically, when you lift the hood, it is actually a lot neater. The old model had the battery sitting back behind this board, so you just saw the naked electronic board, which is visually quite similar to a lot of the cheap cars that are out there.

It did still have conformal coating on the board, so it was water-resistant, like the new unit. However, being contained in a little plastic box with a separate little push-button switch, the new one looks much nicer, and your wires and components are prevented from accidental physical damage.

The other advantage of having the little plastic box, which is physically smaller than the old PCB, is that it’s backed further towards the firewall, towards the cab, that is. And now the battery tray is right up front, whereas the old one had the battery behind it. And that’s just as well, because the new battery is more than double the size of the old one. They’re both 2S batteries, that’s 7.4 volt LiPo batteries, but the old one was 380 milliamp-hour, the new one is 900 milliamp-hour. The charger is twice the output too, so you can now enjoy double the runtime, combined with your two-speed giving you so much more flexibility, while your charging time will be roughly the same as the old one.

It’s just an all-round better package from the electronics perspective. The other thing I’ll note on electronics is that the lighting is now a bit more modular. You’ve got plugs in the rear, as opposed to a hard-line wire that goes from the rear lights all the way to the front. Now they can be disconnected and split for upgrading, if you want to get a little bit more fancy with the lights. So overall, it’s a much more elegant solution with the lighting than it used to be on the old model.

FMS FCX18 Chevrolet K10 Blazer Eng Bay Comparo

Radio Star

RC-TNT: Those are some fantastic updates, making the new model both more efficient and user-friendly. Finally, let’s wrap up with the radio system. How does the upgraded radio with an extra channel enhance the driving experience of the new FMS FCX18 Chevrolet K10 Blazer?

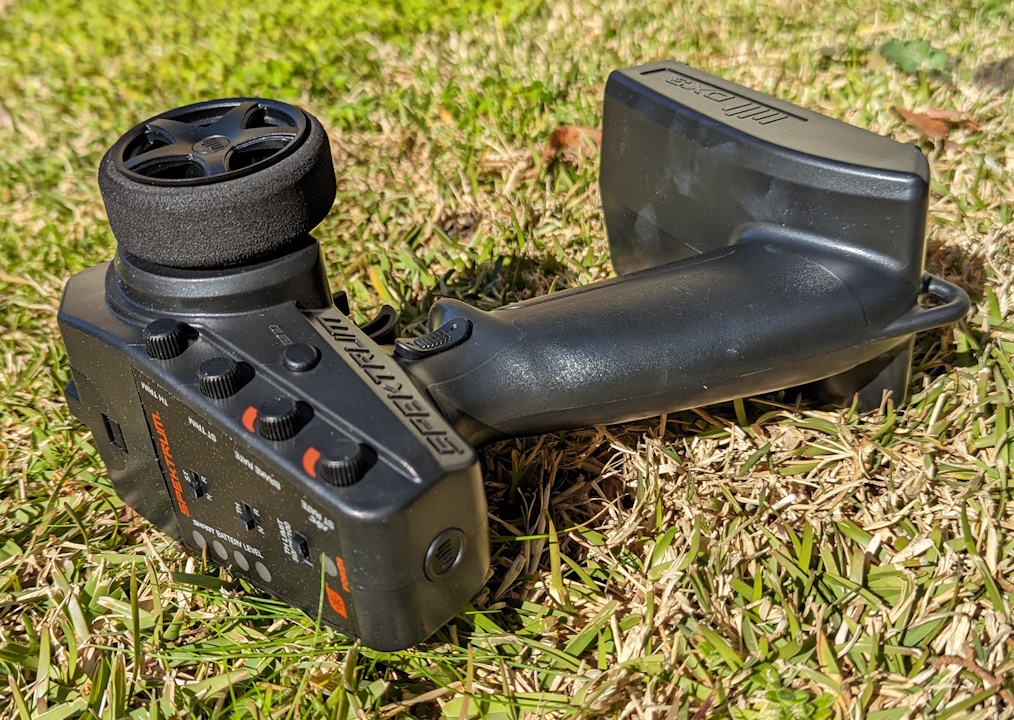
Craig: The very practical approach they’ve taken to having a more power-efficient radio, for a start, is very good. It only takes two AA batteries. The old one took three AAA batteries, which was an inconvenient number, as far as getting batteries, or charging them. Also, AAA batteries have less capacity than AA batteries, and the higher your voltage in the system (4.5v vs 3v), the faster that voltage is going to drop.

So, combined with having fewer and bigger batteries, your runtime in the newer remote is now vastly greater than in the old one. The radio is also physically smaller, but to my large adult hands, it’s more comfortable to use. The wheel feels nicer, the trigger feels nicer, the balance of the radio is nicer.

Regarding the extra controls, the thumb press for the gear change is very nice. The radio has all the normal accoutrements for throttle and steering tuning and adjustment. Overall, it’s a real improvement.

FMS FCX18 Chevrolet K10 Blazer Inclusions Comparo

FMS FCX18 Chevrolet K10 Blazer FTW

RC-TNT: It’s impressive how many thoughtful improvements they’ve made! From the larger tires to the upgraded radio, it sounds like the new FMS FCX18 Chevrolet K10 Blazer offers a much more refined and capable experience. Thanks for walking us through these differences, Craig! Is there anything else you’d like to add about this model?

Craig: Not much more, except to say that the overall package is very impressive. The combination of aesthetic upgrades, like the paint and tinted windows, and functional improvements, like the two-speed transmission and suspension, really sets this model apart from its predecessor. It’s clear that a lot of thought went into making it not just look better, but perform better too. I think anyone who picks this up will be thrilled with what it offers.

Thanks to Banggood for supplying this model for review. Help support RC-TNT by using this link to buy one for yourself, if you like the model! Thanks 🙂

RC-TNT: That’s true, added performance and functions in a pretty package makes for a compelling new model. Thanks for sharing your insights! We look forward to seeing the full review on the channel. Talk to you next time on RC-TNT!

Plates Comparo

A note on affiliate links: we were provided with this car by the manufacturer for review purposes. The Amazon and AsiaTees links in the above article are affiliate links, which means we may be paid a small commission if you choose to click on them to make a purchase. As always, we make effort to ensure that no review is impacted by this – we still report on bugs and issues encountered during product testing, and our fixes or solutions if found. Thank you for reading and happy RC-ing!
Craig Veness

Craig Veness

RC-TNT

Craig has been into radio control since the 90s and into RC crawling since about 2010, when a Losi MRC started the obsession! Now it's all rocks this and crawl that and upgrade all the things! ...You know how it is, right? Welcome home 🙂

Build a UTB18 for Competition

Build a UTB18 for Competition

Who This is For

I’m a big fan of the Axial Capra UTB18. It’s been seemingly built for durable fun in a small size, but did you know it also has all the right geometry and dimensions to perfectly fit with WRCCA Mini 1.9 class specs? This isn’t by accident!

If you’re someone wanting to run in WRCCA Mini 1.9 class and you’re looking for something a bit different and like the idea of using your Axial UTB18 as a base, you’ve come to the right page! Follow this outline and you’ll end up with a competition-proven Mini chassis capable of helping you win your event.

Affiliate Note

This article necessarily has links to all the products I’m using for my rig. I’ve used affiliate links wherever I can because it helps support my work without costing you anything more – that’s a no-brainer! These recommendations are nonetheless legit and they’re the gear I’m using. I want to help you build your rig, and we’re going to do it honestly and with transparency.

Also, I’ve worked with RCAWD to develop the portal gears for the UTB18. I’ve linked directly to their storefront for all the bits I’m running.

RC-TNT HT Feather V2.36 Rear-LHS

Background

After we got our first Bambu P1S printers, my friend Harry T. and I got to talking. We both had Axial UTB18 ‘Baby Capras’ and both participated in local RC crawling comps. We set ourselves a challenge to each design a chassis for the UTB18 to improve its high center of gravity and its overall crawling ability.

For my design, I also decided to make it something people could download and build themselves. So, one of the parameters I set myself was to retain the original suspension, links and drive shafts, in order to minimise the outlay and complexity of the build.

Testing

I printed several iterations over that day and sent them to Harry. He tested them and reported back with his opinions. I’d modify the design, then send it back to him for more testing. The next day, we had a good working prototype. To honour Harry’s help, I named my chassis after him: the HT Feather.

I’ve since shared the story of its build on my YouTube channel and then driven it to second place at the 2024 ECCF, which is something of a Nationals event for Australian rock crawling. The chassis moves well, is easy to build, quite durable (in PLA+) and works amazingly well. I watched it stably out-crawl far more expensive rigs during the event and it was very satisfying to drive.

Since then, folks have been messaging me with something like “How do I build one like yours? Give me all the details, not just the chassis!”. This article is an answer to them, and also to you, if you’re interested in building your own budget beastie. Let’s go!

HT Feather v7 Rear Left

UTB18 Videos

If you’d like more background on the development of this machine, check out my Mini class videos on RC-TNT:

  1. My original Mini 1.9 Comp Rig: https://youtu.be/NkMp5FG-LlQ
  2. UTB18 Review: https://youtu.be/EJZytzGkbBs
  3. Upgrading the motor & ESC: https://youtu.be/e-ILpmQpH7E
  4. Replacing my Mini 1.9 with UTB18: https://youtu.be/qTZ1Ie6_u7Q
  5. My bolt-on comp chassis, free to download! https://youtu.be/plJ2p2RE-F4
  6. Getting the tires right: https://youtu.be/OziL7NPY4SU
  7. RCAWD Wheels and final tweaks: https://youtu.be/tgjrdzU7ySQ
  8. National 2nd Place and exploring suspension: https://youtu.be/isiTjDfnzd4
UTB18 Top-Down

The Parts

MODEL & CHASSIS

First, you’ll need an Axial Capra UTB18, of course! https://amzn.to/3X5S0lg

CHASSIS: Also, you’ll want to get my HT Feather chassis downloaded and printed. Full instructions are contained in the file and also on the download page. https://rc-tnt.com/project/rc-tnt-ht-feather-chassis-for-utb18-v2-36/

HARDWARE: a pack like this is handy: https://amzn.to/45acRWv. Use the button head screws in the prescribed lengths (8x of each 8mm and 12mm, plus the extra 4x 12mm for the newer rear piece).

RC-TNT HT Feather V2.36 Sliced

ELECTRONICS

RADIO: This guide assumed you’ll use your own radio system of choice. I’m running a FlySky GT5 (http://asiate.es/aff?l=150074&i=76070) with a budget and light-weight FS-A3 receiver: https://amzn.to/3R9Lbeu

SERVO: I ran this servo for 3 comp seasons and it was perfect: jx Servo CLS5830HV V2: http://asiate.es/aff?l=165766&i=76070

I’ve recently upgraded to the jx BLS-HV7132MG brushless model for some more speed: http://asiate.es/aff?l=155209&i=76070

MOTOR: With motors, you have a few choices. I really like this cheap and cheerful Surpass Hobby 1300kv Outrunner: https://amzn.to/3V87in2

ESC: And I’ve found the perfect pairing for this motor and either of the above servos is the Rhino 80A Brushless AM32 ESC: https://amzn.to/4bBxsp8 (we’re picking the 80A instead of the $14 cheaper 40A because of the 10A vs 3A BEC they come with. The 80A version is the obvious choice).

The previous ESC I was running was the Castle Mamba Micro X ESC, which worked fine too, but it made the outrunner motor quite loud with its lower PWM rate: http://asiate.es/aff?l=208954&i=76070

UTB18 Servo

GEARING

There are between 3 and 5 sets of gears to upgrade, depending on what outcome you want. I’ll give you the list and put an * next to the ones I’m running in mine.

*Transmission – Steel Gears: https://rcawd.com/en-au/products/rcawd-axial-utb18-steel-48p-transmission-gear-set-upgrade-parts-for-1-18-capra-trail?ref=mcc

*Portal Gears – Front Overdrive (24/17 – 22.78% O/D): https://rcawd.com/en-au/products/rcawd-utb18-48p-portal-gear-set-24t-17t?ref=mcc&variant=43370775838911

*Portal Gears – Rear Underdrive (27/14 – 10% U/D): https://rcawd.com/en-au/products/rcawd-utb18-48p-portal-gear-set-24t-17t?ref=mcc&variant=43370775806143

Diff Gears – Front Overdrive (31/13 – 6.45% O/D): https://rcawd.com/en-au/products/rcawd-axial-18-1-utb18-upgrades-35t-13t-40crmo4-differential-gears-axi212000?variant=42306402582719

*Diff Gears – Rear Underdrive (35/13 – 5.81% U/D): https://rcawd.com/en-au/products/rcawd-axial-18-1-utb18-upgrades-35t-13t-40crmo4-differential-gears-axi212000?ref=mcc&variant=42306452029631

UTB18 Portal Gears

SHOCKS, LINKS & SHAFTS

SHOCKS: I’m running stock shocks for now, but very soon will swap over to a set from Pricey’s Custom Crawlers. Check out this video to learn more.

LINKS: I’m still running the stock links that come with the UTB18, though I’ve been considering experimenting with shorter front links and longer, bent rear links. I’d have to make these myself, as I’m not aware of any on the market (other than made-to-order by the likes of Pricey’s Custom Crawlers and similar): https://www.facebook.com/profile.php?id=100057753455776

STEERING: However, you will want better steering and drag links than the noodley stock ones: https://rcawd.com/en-au/products/rcawd-axial-utb18-capra-upgrades-aluminum-alloy-steering-link-set-linkage-tie-rod-axi214001?ref=mcc&variant=42175530074303

DRIVE SHAFTS: I also ran the plastic drive shafts for an entire competition season without a problem. I changed to steel unis before the ECCF though, just to be extra careful – breakages suck! https://amzn.to/4bEIqdH

SERVO MOUNT: Another issue I noticed was the servo was wiggling on its plastic mount a bit, so I’ve recently upgraded that to alu: https://rcawd.com/products/rcawd-axial-utb18-capra-upgrades-aluminum-front-servo-linkage-mount-plate-rear-linkage-mount-plate-axi212009?ref=mcc&variant=42175477711039

LINK RISER: Lastly, I am soon going to experiment with this rear link riser, FYI: https://amzn.to/4c0X4LV

UTB18 Stock Links
UTB18 Shafts

WHEELS & TIRES

TIRE OPTIONS: This is an interesting one. There are a few options for tires. I’ve been running RC4WD’s 1.9 4.19” comp pins and have been very happy with them, including with the stock foams.

RC4WD’s site: https://store.rc4wd.com/rc4wd-bully-competition-19-scale-tires.html

RC4WD pin tires: https://amzn.to/3LyvFpK

I haven’t yet tested the new INJORA 1.9 4.19” Comp Pins, though I have them here ready to test soon: https://s.click.aliexpress.com/e/_DdpuUHh

The other tire to mention that was popular at ECCF was the HPI Rover in 1.9”. They’re sub-4” tires, but you can’t argue with Jakey Scholefield’s first place result with them on his PBCCP Vibe chassis (nor Zac Davidson’s third place on the same gear): https://amzn.to/3yJ7dyA

WHEELS: the best wheels to use for this setup are an easy sell. See the video in the list above for how I set them up, and buy them here: https://rcawd.com/en-au/products/rcawd-cyberwheelz-adjustable-weight-1-9-beadlock-wheel-rims-for-1-10-rc-crawler?ref=mcc

RC4WD Pin Tires
RCAWD Cyberwheelz

EXTRA MASS

This element of setup is somewhat a personal thing. However, if you’re building the rig to be like mine, and critically, with the RC4WD pin tires, I’ve found this setup to work best:

AXLES: stock plastic units with stock shafts

PORTAL OUTERS: https://amzn.to/3R87GAG (both ends)

FRONT PORTAL HANGERS: https://amzn.to/3X00dYf

FRONT PORTAL INNERS (KNUCKLES): https://amzn.to/3X3pRLy

You do end up with a front-heavy rig here. But remember, with the stock geometry (tilted skid aside) that the HT Feather chassis lets you run, in my opinion, the rig does better like this. I found it very predictable and it ascended things well, even with that rear weight. Indeed, the rear weight really helped it on steep descents, allowing the rig to be predictable in all conditions.

UTB18 Front Weights

BATTERY

The stock UTB18 battery won’t fit in the HT Feather battery tray. But it’s too big anyway, IMO. I recommend these, one for each comp course run: https://amzn.to/4bGJ5em

If you buy something else, be aware that not all 450mah 3S batteries fit. I’ve used these ‘E-Flite Blade 180’ batteries for years and have a bunch of them. They’re quality cells, have a really high charge rate (I’ve done 5C in a pinch at comps, though usually charge them at 2C) and they’ll give you 7 to 11 minutes of hard crawling in a 1/10 rig. Even longer in a brushless HT Feather!

UTB18 Batteries

Finishing Up

Now you’ve got everything you need to build a budget champion! Of course, budget is relative and combined, this all adds up to quite a bit. So, if you’re wondering in which priority to do thee mods over time, I’d suggest starting with the (free) HT Feather, the wheels and tires, and maybe even just front portal overdrive gears to begin with. See what you think and go from there.

Happy tinkering and enjoy your time on the rocks with your epic new comp killer!

HT Feather on rock
Craig Veness

Craig Veness

RC-TNT

Craig has been into radio control since the 90s and into RC crawling since about 2010, when a Losi MRC started the obsession! Now it's all rocks this and crawl that and upgrade all the things! ...You know how it is, right? Welcome home 🙂

RGT Intruder: An Important Release!

RGT Intruder: An Important Release!

Heard of RGT?

Before we get to the RGT Intruder EX86020 (available here), I think some context would be helpful. Previously a lesser-known manufacturer, Chinese company RGT have been making quite a splash with their 1/10 trail rig releases over 2022 and 2023.

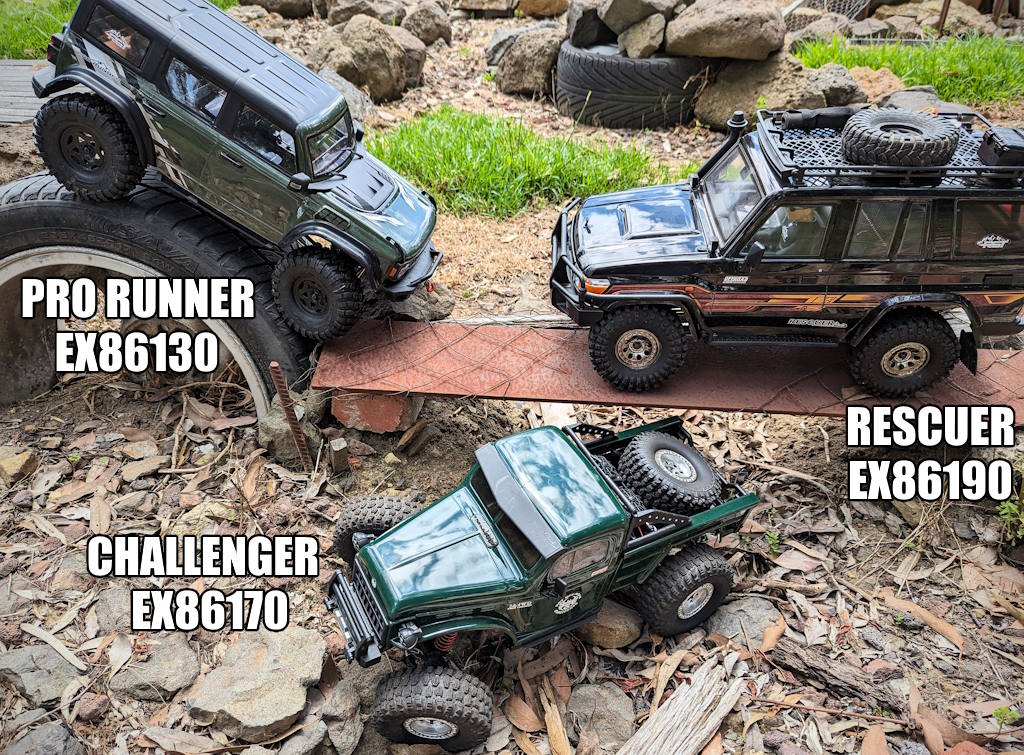
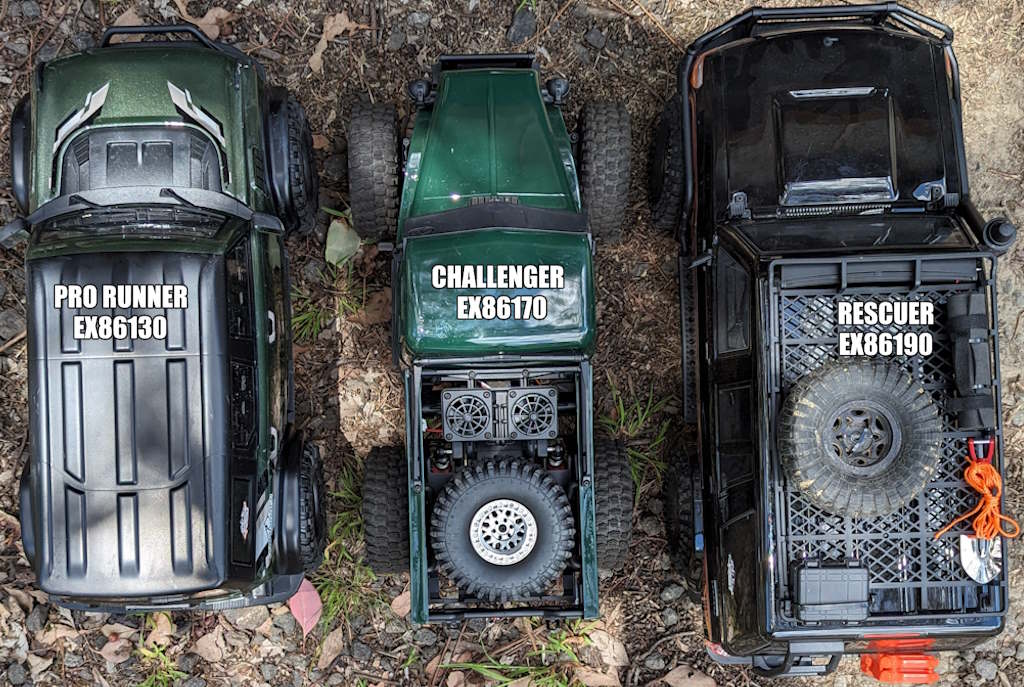
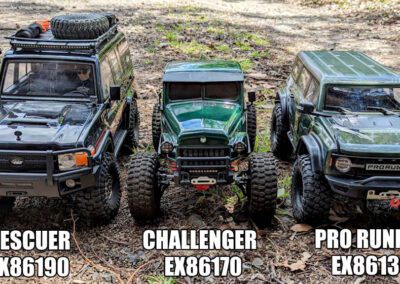
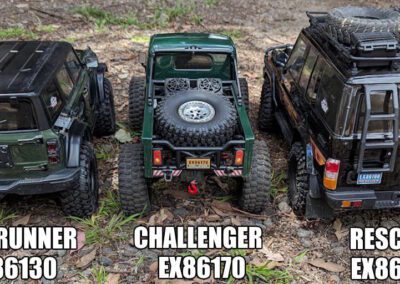
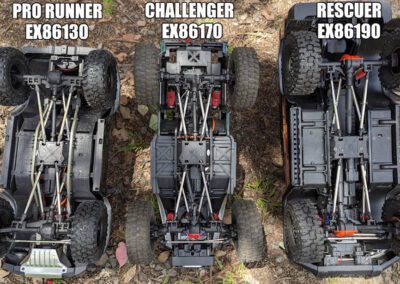
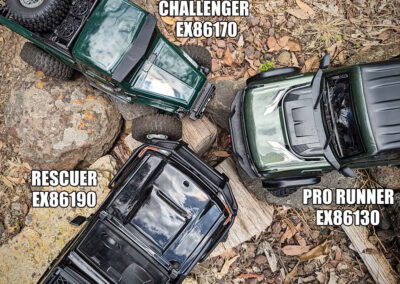
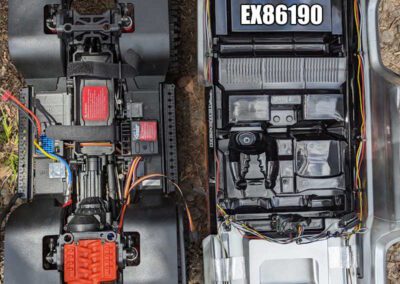
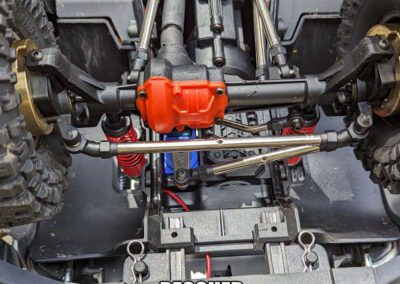
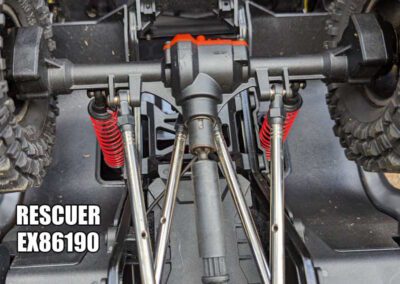
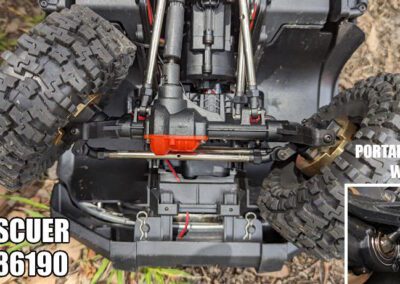
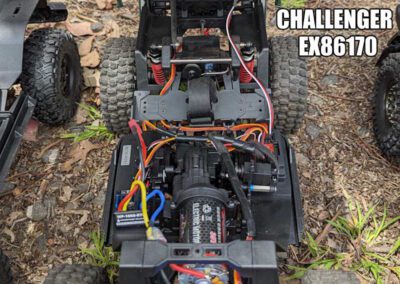
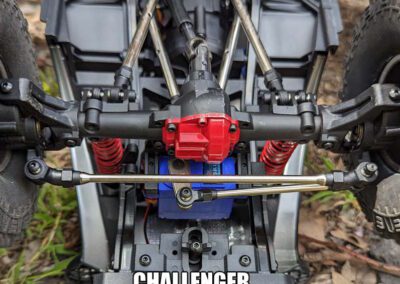
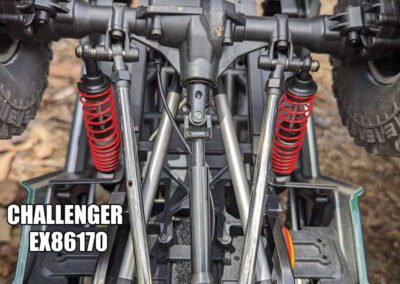
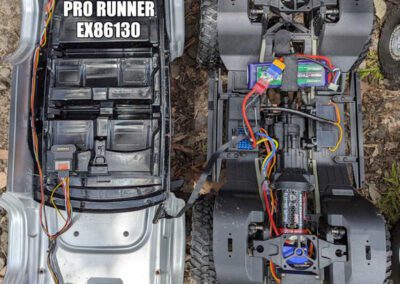
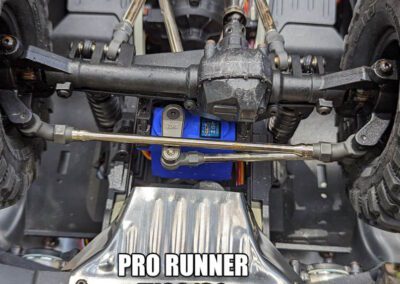
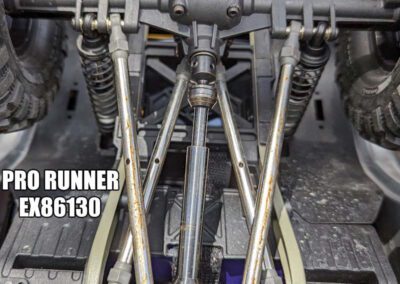
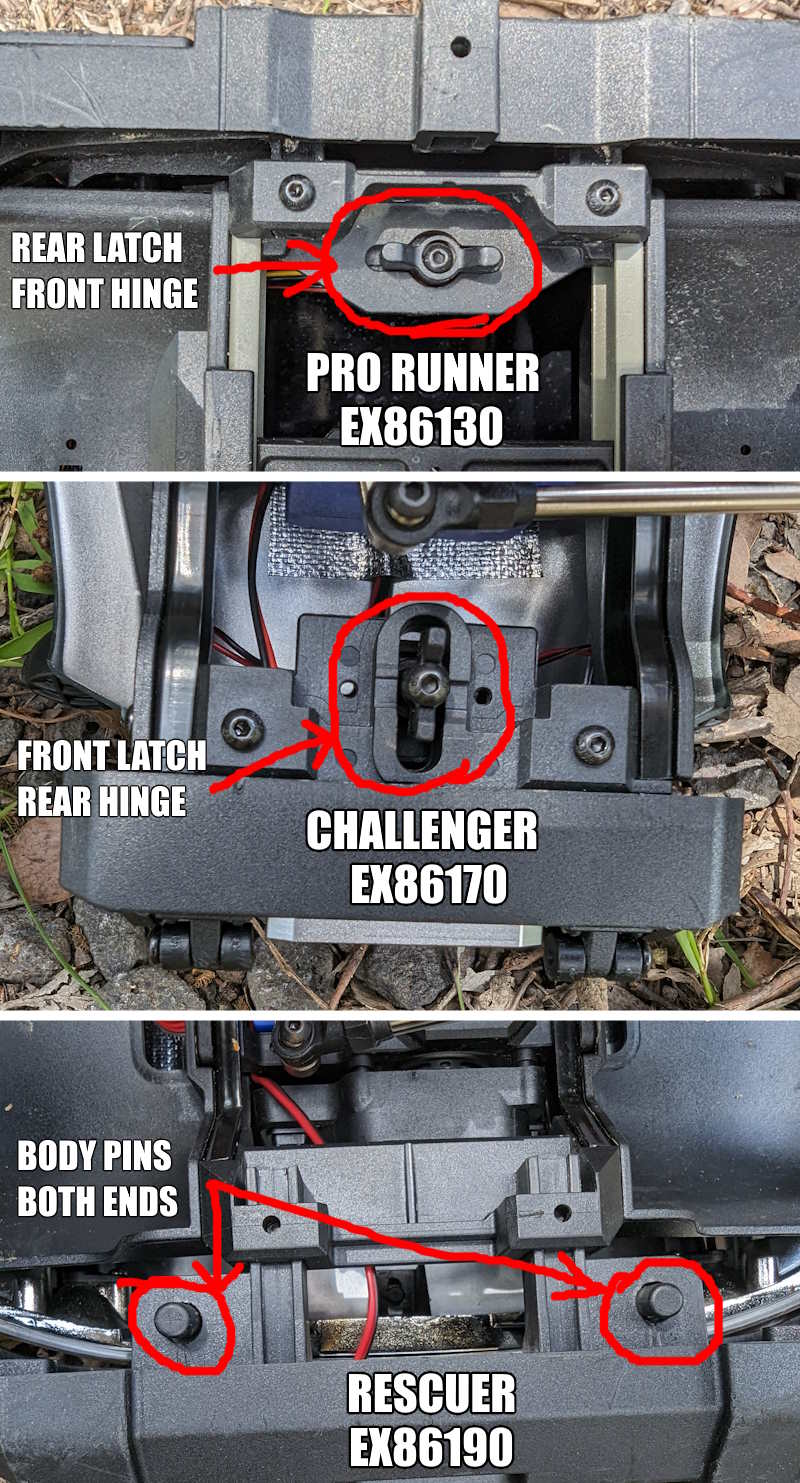
For instance, you may have already seen our recent comparison article, “Which RGT is best for you?”. In this one, I compared three of their best and biggest recent releases: Rescuer, Challenger and Pro Runner. I’ve also looked at the Tracer, Pioneer, and the 136100 range either here or on the channel – and all have their merits.

3 RGT Models - Rear

What’s the Big Deal?

So, what’s the fuss about the RGT Intruder? Isn’t it just another car? Well, no: for a start, it’s their first big release for 2024. Secondly, it looks the same as the RGT Rescuer EX86190, which will inevitably lead to comparisons with the older, larger model. We’ll see below that this apparent similarity is only cosmetic in nature – but more on that in a moment.

I see it as an important next step after their successful, more ‘standard’ models. Their previous SWB (Short Wheel Base) models have been underwhelming, or, if finished beautifully as with the 136100v3, weaker than it should have been. (Both my 136100v2 and v3 have a broken front axle and both were the CVD joints not standing up to crawling). But now, folks are starting to pay attention.

RGT Rescuer EX86190 on Grass

The Big Reason

RGT has proven they can make great vehicles. They’ve shown how their own designs are working – obvious IP infringement aside with the bodies and often the tire treads. And they’ve shown that they can make a decently durable model that performs well AND has parts and upgrade availability. That’s actually quite a big deal.

As these models draw new potential customers to consider the brand, their newest model releases matter all the more. From where I’m watching, the RGT Intruder EX86020 is possibly their most important release. This is their first high-level scale model RC crawler that doesn’t have the extra bells and whistles that many folks disparage. It has a gorgeous body. The price suggests quality. The running gear is solid (U-joints in those front axles, for example). And it’s all 1/10 scale kit.

In short, this model needs to be good. Better than good. Newcomers to RGT are watching this one!

RGT Intruder Chassis Top-Down

What’s It Like?

The first thing that jumped out to me was that gorgeous body. I made a post on my YT community page that said something like, “Gosh, this car just looks amazing from any angle” – and it really does!

There are a bunch of extras they throw in so you can add more lights, mount a larger battery tray, add some scale extras and have a play with suspension mount points and so on. There’s a lot of good here, though the main ‘feature’ of this model is its appearance. I mean, just look at it!

RGT Intruder External Sides
RGT Intruder Included Parts

Body Issues

There’s only one issue with the body: it is not licensed. This has been the case for all of their crawlers, to my knowledge. Toyota may not be pleased, and I don’t condone the practice. Unlicenced bodies are a problem for the hobby, as are cloned parts. I really need to do a blog post on just this topic, as there are a few things to unpack here. But the car is pretty and the colour choices are all quite good.

This model comes with some extra plastics for both the cabin and the exterior of the body, like a rear-view mirror, extra spotlight cases, wipers, and so on. You need to fit these yourself. The folding side-mirrors come installed though, as do the door handles and the rear pillar air vents. If you do nothing with the extras after you unbox it, the car is still very complete. I also appreciate the captured body pins – you won’t lose these during a battery change on the trail!

RGT Intruder Captured Body Clips

RGT Intruder Interior

Well, it has one. My original RGT Rescuer did not have one (see? Even I’m comparing this car to the Rescuer! It’s inevitable!), though now the EX86190 does ship with an interior. I bought mine separately. The interior in the Intruder here is the same as the one I bought. This is a good thing, as it helps keep RGT’s costs down. It’s attractive, functional, and being polycarbonate, about as light as it could be. Good!

There are no lights in the cabin, but there are lights on all corners, controlled by a central module that’s attached to the underside of the body’s mold piece. It connects to the LED port on the all-in-one Receiver/ESC/Light Controller on the chassis. I’ll get to that further down.

RGT Intruder Front View
RGT Intruder Body Underside

Wheels and Tires

There’s the promise of performance, with vented tires (including foams), and they’re about as large as could reasonably fit under this scale of body. They’d be 43” tires in real life – and on this kind of vehicle, even something like 35” tires are BIG. So, RGT have pushed the performance there as far as they dare. It’s a compromise, scale vs capability, and I think it was the right move to max the diameter out.

They’re glued 4.31″ tires on plastic 1.9″ wheels. However, I do think the tire carcass is too stiff for the weight of this car. The foams feel about right, but the rubber in the tires is either too thick or too rigid, and to my feel, they don’t bend enough around rocks. Traction is lost that the car really needs. We’ll get to this shortly.

RGT Intruder Wheels & Tires

Chassis and Links

This is a talking point: the rails are 3mm CNC-milled aluminum with a stunning finish. They are really pretty! And the chassis is very stiff, too, thanks to the generous plastic-fiber cross bracing from nose to tail. The shock hoops are part of the rails and even the panhard mount is finished in the same lovely material. Full marks for that.

Links and geometry are also well designed. There’s full movement for both axles, no binding, and plenty of room for everything to move as it needs to. And the car isn’t heavy. These are all great things, too. Honestly, we’re off to a very solid start at this point.

Oh, those links are 6mm stainless steel with stainless steel ball ends, too. It’s so premium. Not everyone will appreciate how nice this is, but as an RC guy with ALL the cars and a lot of experience at this point, I want to emphasize just how high the quality is on this vehicle. RGT have not cut corners on chassis and links.

RGT Intruder Shock Hoops
RGT Intruder Underside

Suspension

The coil-over shocks are also very nice. Aluminum body, thumb-screw adjustable pre-load, appropriately plush springs and intelligently mounted. I like these.

However, my unit arrived with empty shocks. Not everyone will notice this, and not everyone will care, but you want some oil in your shocks. It limits how bouncy they are, which limits how much the wheel reacts to changes in terrain at high or low speed. I’d recommend 30 wt. oil, give or take. Worth doing.

The shocks move well and the car is in good shape with this setup. Just don’t forget the oil like my car’s assembler did!

RGT Intruder Adjustable Alloy Shocks

Straight Axles

No portals here. But the best thing about these straight axles is how tough they are. I love seeing steel universal joints on front steering axles in a crawler. It’s really the only way to go for performance and strength. Yes, they’re not as smooth as CVDs and similar, but the extra steering angle the unis afford you make the trade-off well worth it.

The housings themselves aren’t particularly scale, but the size is small and they are attractive. It’s a high-pinion position like Axial’s AR45 axles and the gears are helical cut (or spiral? Can’t quite tell from the photos). Either way, they’ll be strong, and with the default tooth count of 30/8, overdriving/underdriving using the diff gears for better crawling and steering should be a straightforward undertaking. (I’m confident these will fit, though I haven’t tested them yet!)

RGT Intruder Rear Axle and Links
RGT Intruder Front Axle and Links

Radio & AIO Rx/ESC/Lights

After a couple of vehicles with the new FlySky MGXX-BS radio systems, this is my first one with the middle-spec option, the MG6-BS. It’s a 6-channel radio (4x AAs) and an AIO (All-In-One) receiver, 60A ESC and light controller with discrete light hub for body-mounting. The radio is comfortable in the hand, all plastic, and with two stand-out features/design elements:

  1. Channel 5 is a spring-loaded thumb dial that returns to center. What a perfect controller for a winch! (The chassis and bull-bar have a mount point and fairlead respectively for exactly that, too!); and,
  2. A set of DIP switches on the radio that give you control over drive mode (Fwd/Brk/Rev and Fwd/Rev); LiPO/NiMH; Drag Brake (0%, 25%, 50%, 100% – though it’s weak even at 100%); and all the channel reverse options.

It’s a good system. Be aware the light kit is a cut-down version that gives you headlights or no headlights, and indicators and reverse being always enabled based on steering and throttle inputs respectively.

The biggest drawback is that Reverse is WEAK. Slow and underpowered, it seems to have been a cost-saving choice, as you need less MOSFETs in the ESC for reverse for this outcome. Saved FlySky a buck or two, though you miss it on the trail. Apart from this one drawback, I like the whole system.

RGT Intruder MG6-BS Radio
RGT Intruder FlySky 2A-BS AIO
p

Our Test Course

If you’re not familiar with how we test RC rock crawlers, we have a course that challenges any 4x4 RC crawler in many ways:

  • Approach and departure angle: these  are challenged on Problems 2 and 3;
  • Side-hill ability: tested on Problems 1, 3 and 5;
  • Breakover (skid clearance): tested on Problems 4 and 6;
  •  Suspension articulation and centre of gravity: challenged on problems 2 and 5; and lastly,
  • A punishing ascent on problem 6 tests all of balance, break-over, articulation, tire traction and approach and departure angles.

Put together, we have a gnarly, challenging set of problems that challenge all crawlers. If a rig can conquer 3 or more of them, chances are you have a reasonably high-performance rock crawler. There are some machines that can claim all success on all six in stock form – but not many!

Driving Woes

I tested it on my 6-Problem course. Bad news first: that slow and underpowered reverse is a big enough drawback to be quite noticeable. I also found the steering servo to be slow and it faded under heavy crawling within a few minutes (though it didn’t fail outright).

The motor and gearing is too fast for crawling and too slow for trail driving. There’s no second speed here, so unlike the Rescuer (there’s that comparison again!!), you’re stuck with your gearing, battery and motor choice. This feels just like comparing the TRX4m to the FCX24 with its 2-speed, actually!

The tires are too stiff. The suspension moves like it should, though being filled with oil would have helped. The car is top-heavy and it tips over easily.

RGT Intruder 25kg MG Servo

Driving Wins

On the bright side, this car looks magnificent on the trail. It looks amazing on the rocks. It moves nicely, with plenty of scale body roll without being too much. It’s quiet, and very pleasant to watch it work over the ground.

Without upgrades, in stock form, this will be a frustrating car to drive if you’re going beyond basic obstacles. The waterproofing is a nice touch, as are the lights, but that capability limitation will make itself known regularly.

With upgrades, though? Yeah, I think this could easily become one of my favorite cars. I’ll get back to you on that, as I’m planning on doing all of the upgrades I list below. The car drives okay. Could be better. 4/10.

RGT Intruder Rear-Right

Value Proposition

So, did they pull it off? Is the car worth the asking price? For a bigger, established brand name, the price is good. Although, newer names have been creeping in with very durable and very capable options in recent times – just look at the Ecto if you’re not convinced (review here)!

I think this car represents real potential for the owner who loves the Landcruiser body and has plans to improve it. As a stand-alone crawler, it’s not as good as a similarly priced rig from Element, such as the Sendero HD. But as a scale crawler with potential to go ultra-scale at low speeds, it leaves the more expensive TRX4 and Axial CJ7 in its dust. But those crawlers will be better on the trail with their second speeds, and better on the rocks, with their better tires and overall performance. So, what to do here? Buy it if you love the body, but be prepared to upgrade as you’re able.

RGT Intruder Unclipped Brush Bars

Upgrades?

Open your wallet for this one. I try to be reserved in my upgrade recommendations usually, but this rig really wants a list of things. Ready?

Wheels & Tires

First, the tires need to go. They aren’t great. And since they’re glued, go with a weighted beadlock wheel too. I’m quite partial to the Boom Racing Hustlers – check them out (and I even found some period-correct steel ‘Sunraisia’ style beadlocks that go *perfectly* with this car)!

Also, you’ll want to install wheel wells (I’ll design some soon to download and print).

Electronics

The slow, weak servo needs replacing. Try my favorite budget crawler servo and you can even run it directly off the 2S battery (signal and ground wires to receiver, positive wire to battery connector, via a switch if you want). Or, my fave 7.4v brushless all-rounder is this guy.

While we’re on electronics, the AIO Rx/ESC and motor combo is sufficiently lacklustre that you’ll eventually throw your hands up and slap in a Fusion system instead.

You’ll want a radio system too, in that case – buy a receiver for any other radio you have, or consider the ever-reliable FlySky GT5.

Banggood sells really cheap 6-ch receivers so you can use this handset for up to 20 models, which is handy.

Lights & Accessories

Lastly, lights: use a Y-splitter for the light control module on the throttle channel and hope for the best (I will try to make an Arduino-based adapter for this to piggy-back off throttle and steering channels soon).

Down the track, you may consider a servo winch – the car is certainly ready for one! And perhaps also some scale accessories and you’ll be sorted!

RGT Intruder 35T 550 motor

Bottom Line

It’s a worthy body on a basic car. With upgrades, it’ll be a SWB beast! Without em, it’ll be a bit frustrating to drive. Pick obstacles appropriate to its capability and you’ll enjoy yourself. Just keep the limitations in mind if you’ve got your heart set on this gorgeous model.

My thanks to Banggood for providing RC-TNT with this model to review. I’d have purchased it myself if they hadn’t, because, just look at it! But they made the investment and have my thanks. Grab your own RGT Intruder EX86020 from Banggood here.

RGT Intruder Rear Left
Craig Veness

Craig Veness

RC-TNT

Craig has been into radio control since the 90s and into RC crawling since about 2010, when a Losi MRC started the obsession! Now it's all rocks this and crawl that and upgrade all the things! ...You know how it is, right? Welcome home 🙂

A note on affiliate links: we were provided with this car by the manufacturer for review purposes. The Amazon and AsiaTees links in the above article are affiliate links, which means we may be paid a small commission if you choose to click on them to make a purchase. As always, we make effort to ensure that no review is impacted by this – we still report on bugs and issues encountered during product testing, and our fixes or solutions if found. Thank you for reading and happy RC-ing!
More RGT Articles…