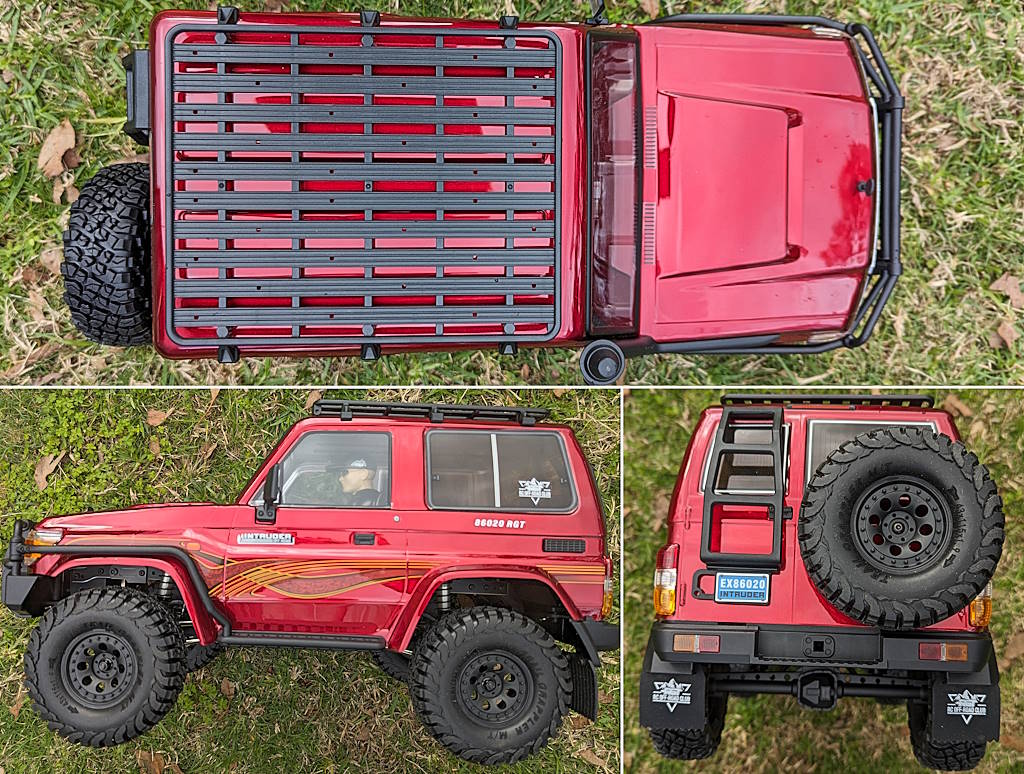
The RGT Intruder EX86020 may be RGT’s most important release this year. Is this something great under a pretty body or more of the same old?
RGT Intruder: An Important Release!
Heard of RGT?
Before we get to the RGT Intruder EX86020 (available here), I think some context would be helpful. Previously a lesser-known manufacturer, Chinese company RGT have been making quite a splash with their 1/10 trail rig releases over 2022 and 2023.
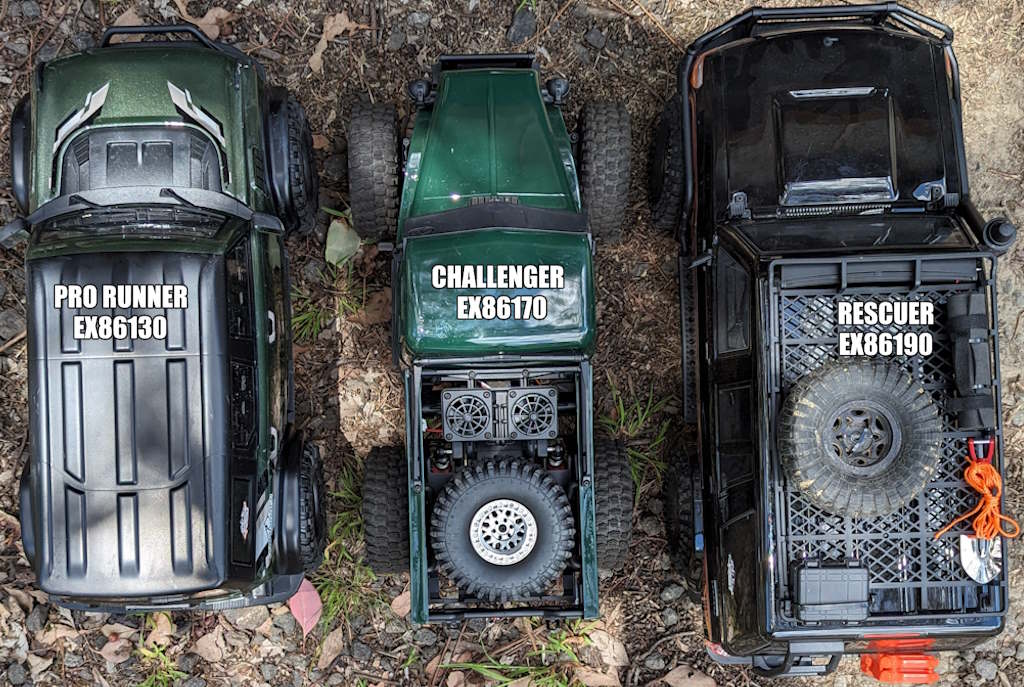
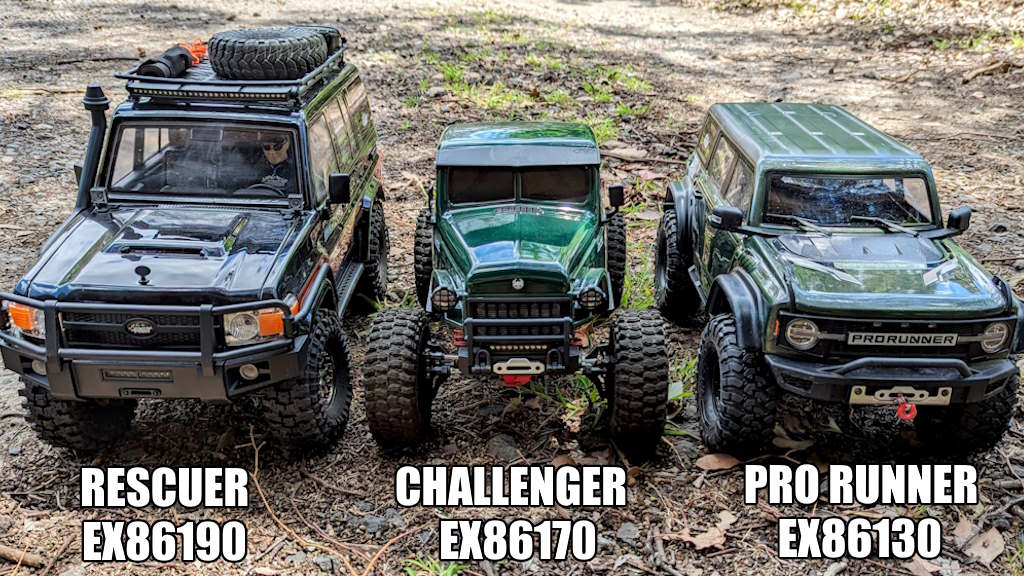
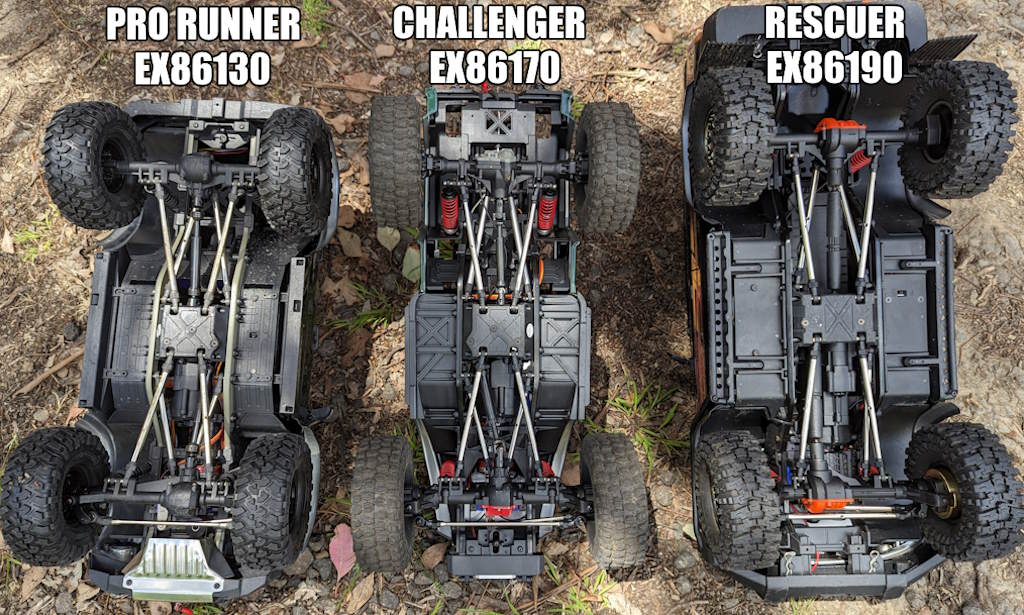
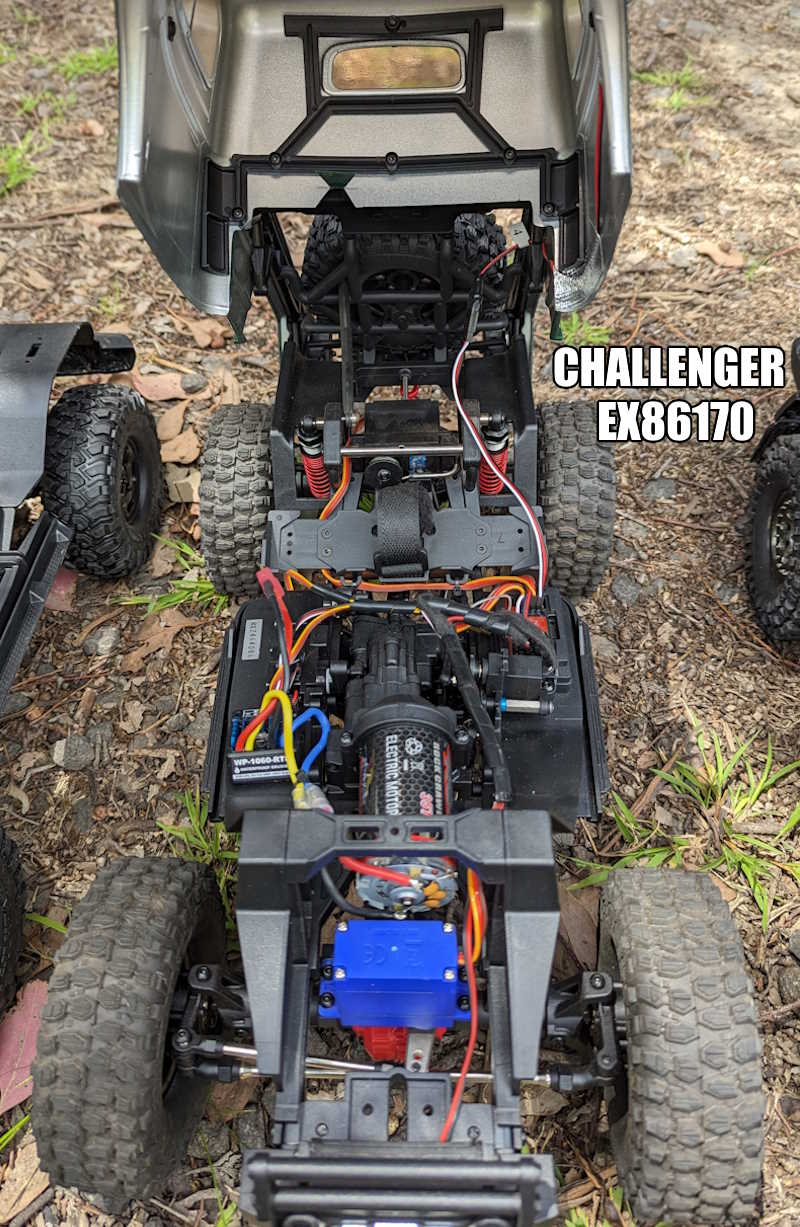
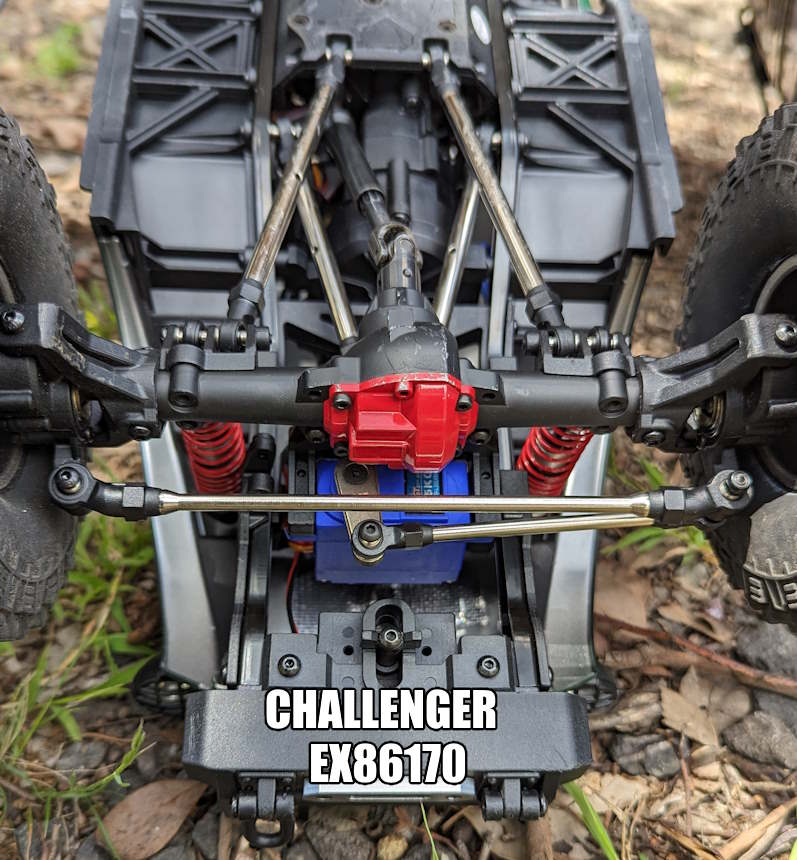
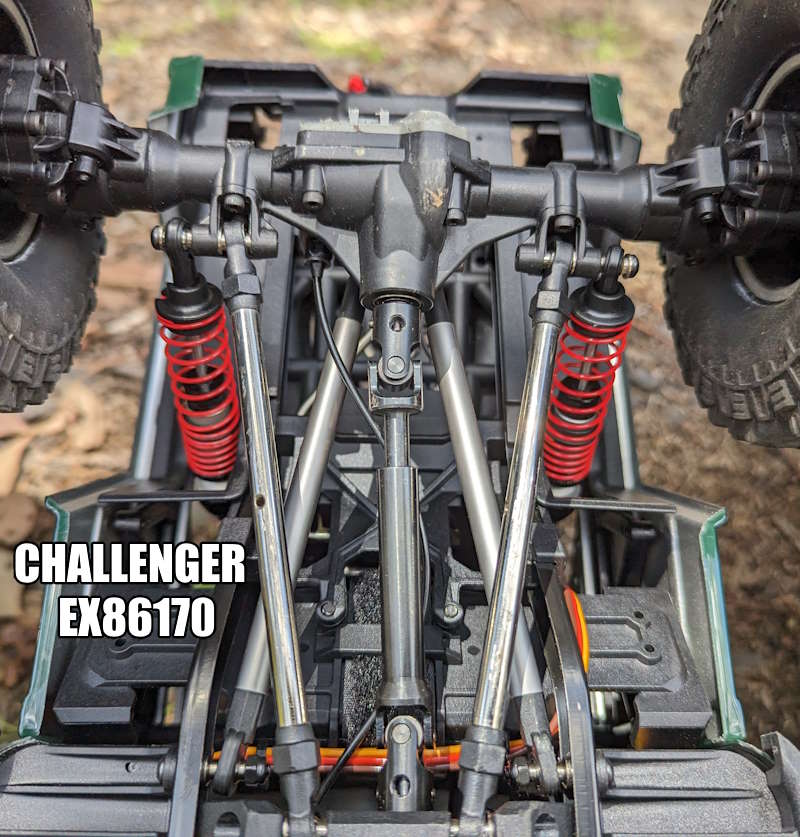
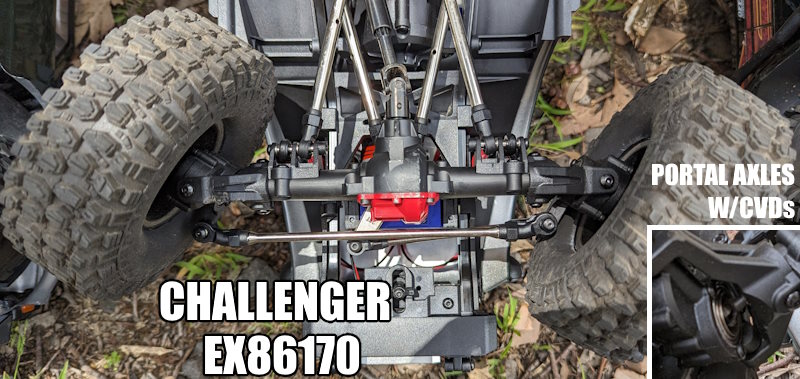
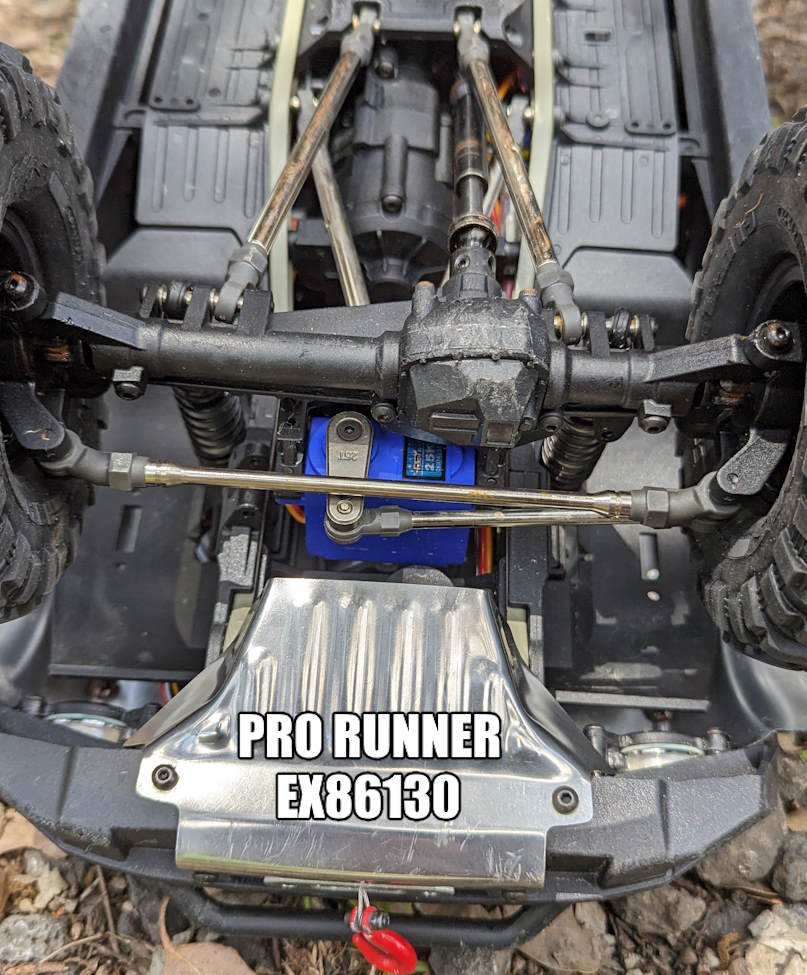
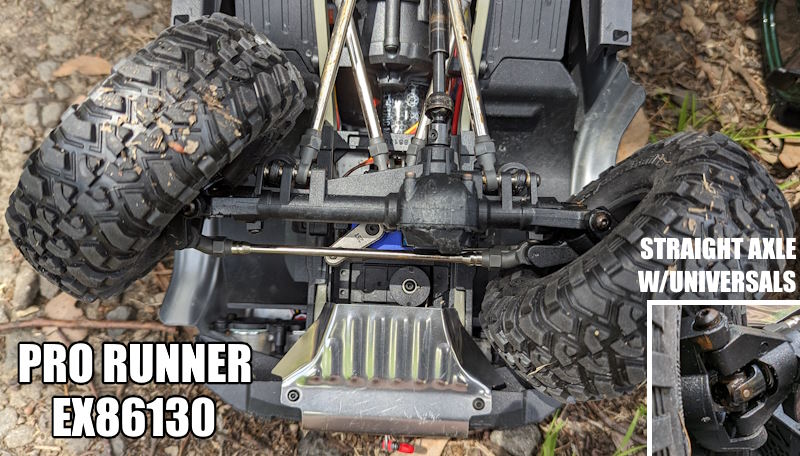
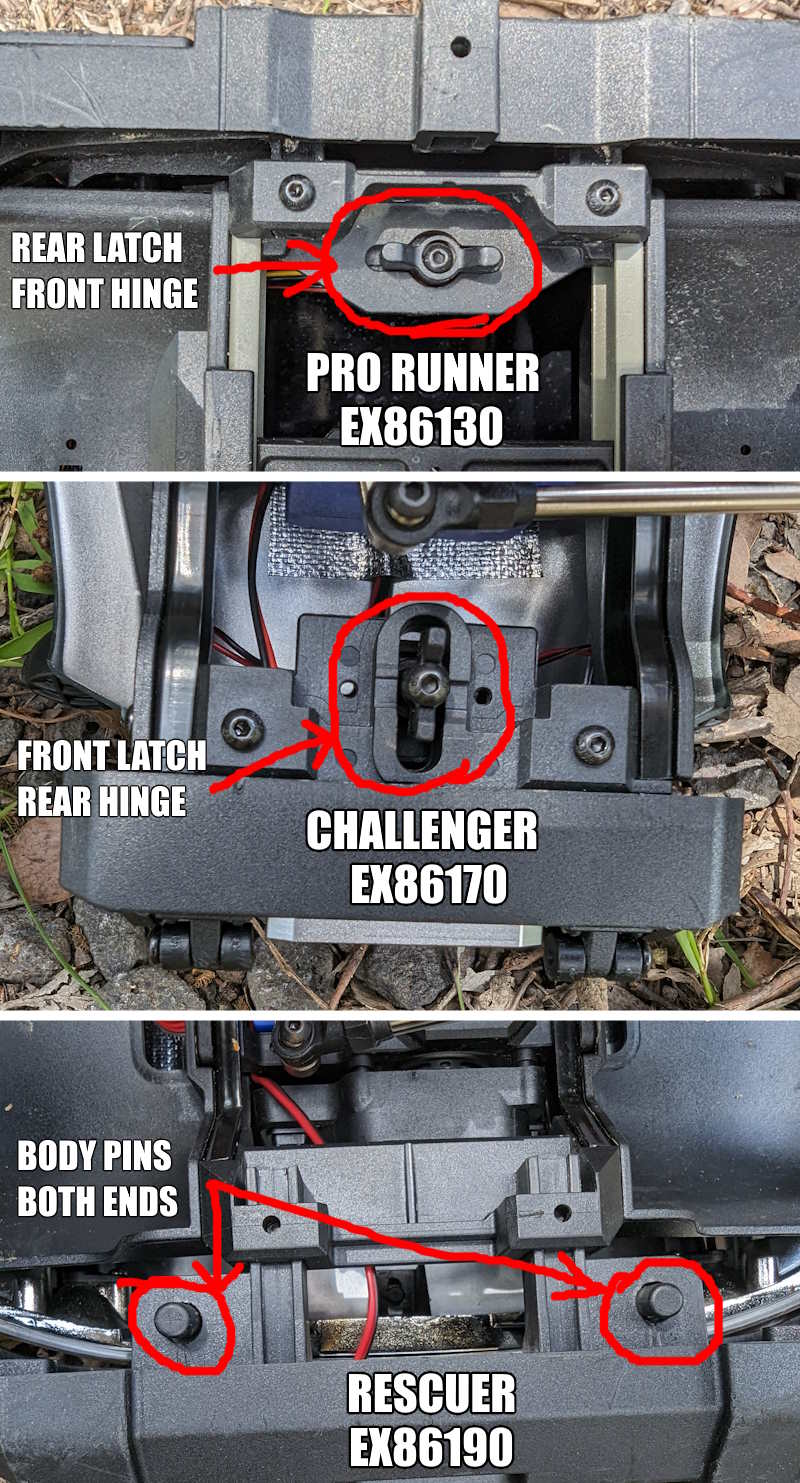
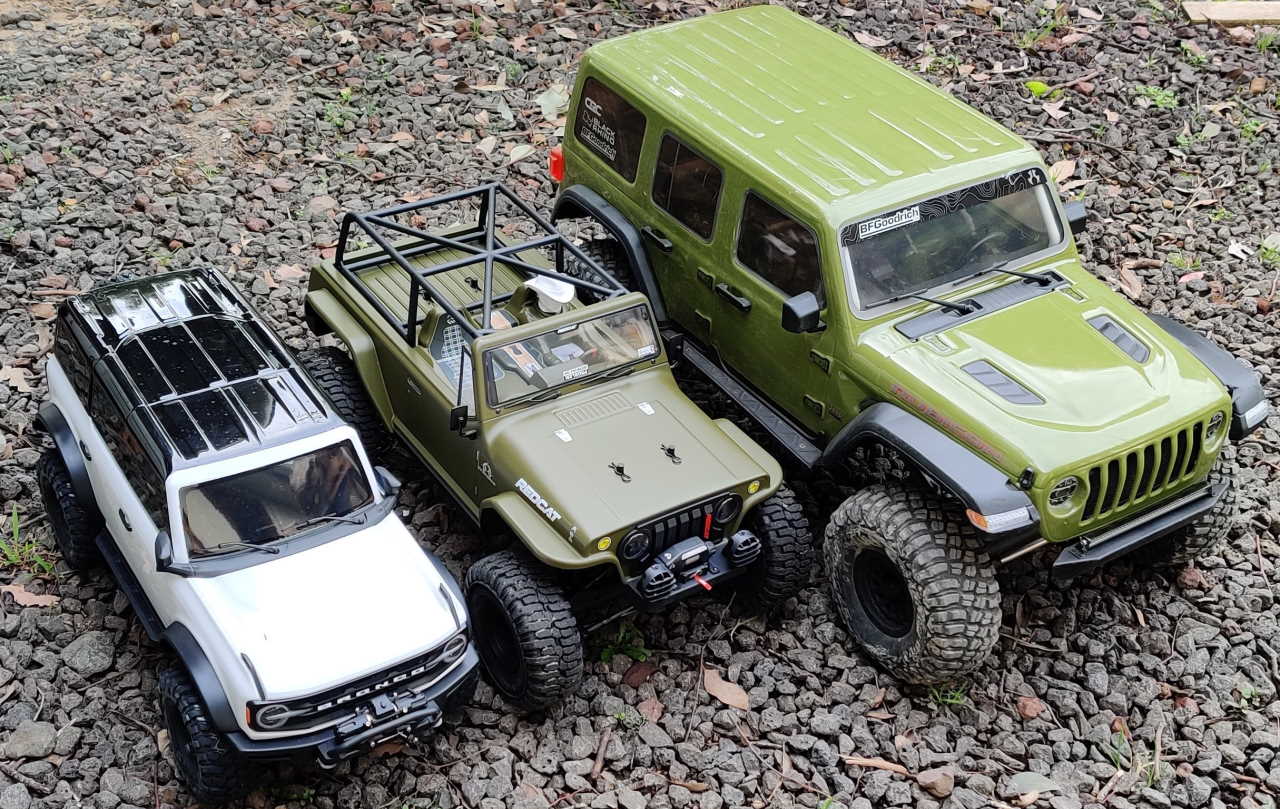
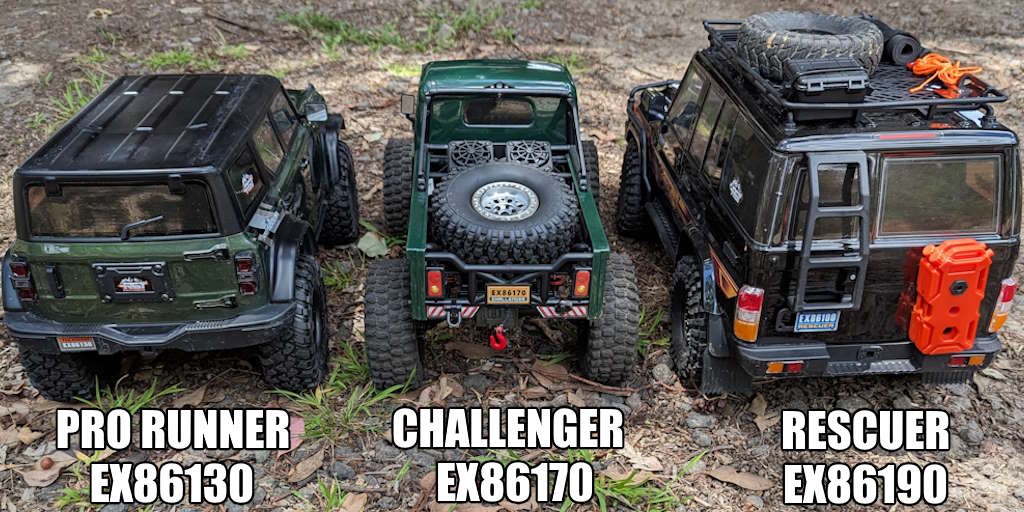
For instance, you may have already seen our recent comparison article, “Which RGT is best for you?”. In this one, I compared three of their best and biggest recent releases: Rescuer, Challenger and Pro Runner. I’ve also looked at the Tracer, Pioneer, and the 136100 range either here or on the channel – and all have their merits.
What’s the Big Deal?
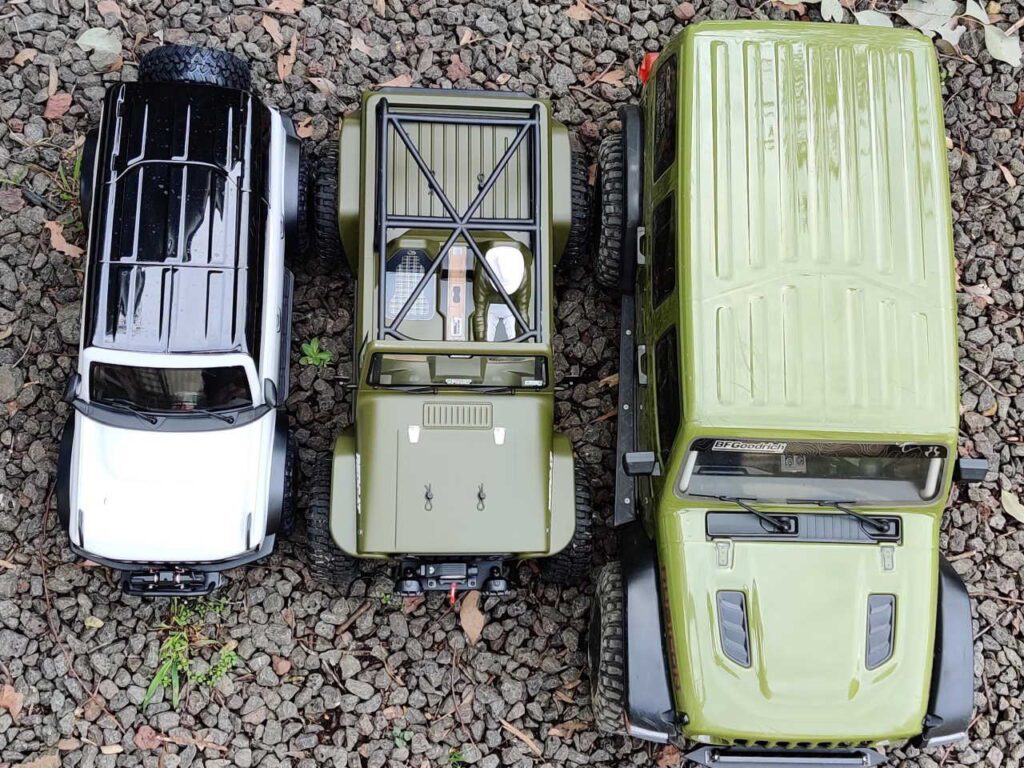
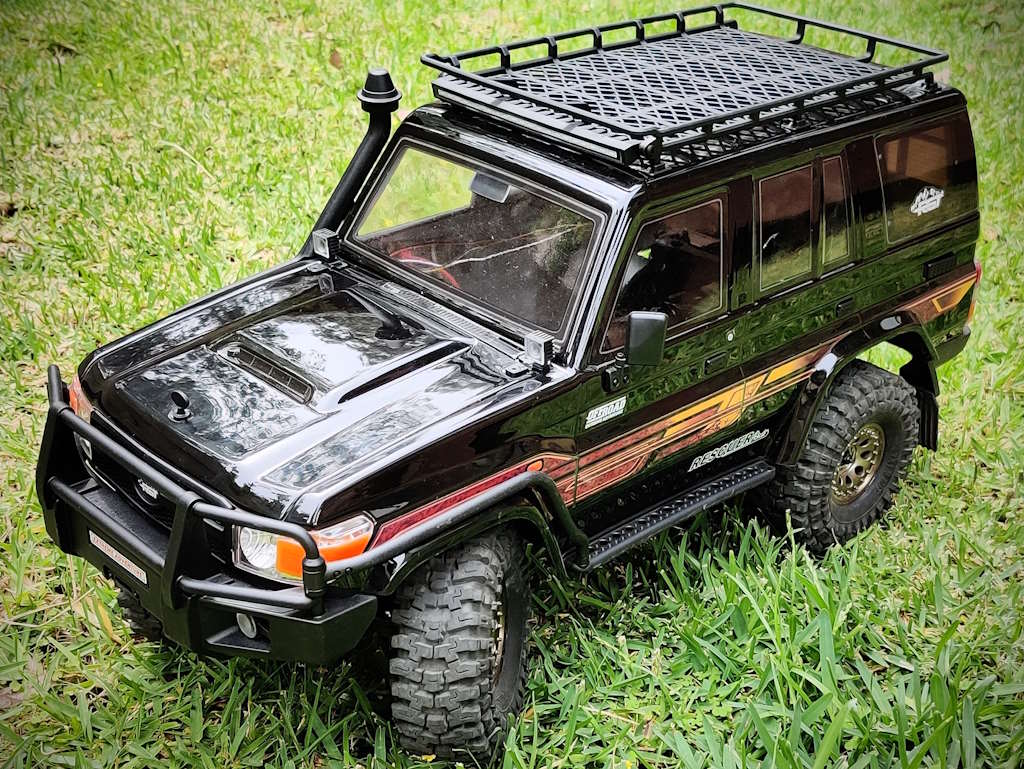
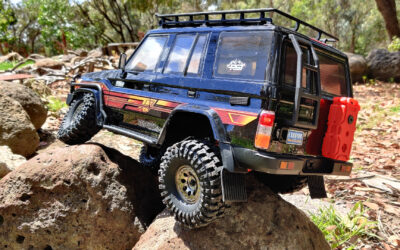
So, what’s the fuss about the RGT Intruder? Isn’t it just another car? Well, no: for a start, it’s their first big release for 2024. Secondly, it looks the same as the RGT Rescuer EX86190, which will inevitably lead to comparisons with the older, larger model. We’ll see below that this apparent similarity is only cosmetic in nature – but more on that in a moment.
I see it as an important next step after their successful, more ‘standard’ models. Their previous SWB (Short Wheel Base) models have been underwhelming, or, if finished beautifully as with the 136100v3, weaker than it should have been. (Both my 136100v2 and v3 have a broken front axle and both were the CVD joints not standing up to crawling). But now, folks are starting to pay attention.
The Big Reason
RGT has proven they can make great vehicles. They’ve shown how their own designs are working – obvious IP infringement aside with the bodies and often the tire treads. And they’ve shown that they can make a decently durable model that performs well AND has parts and upgrade availability. That’s actually quite a big deal.
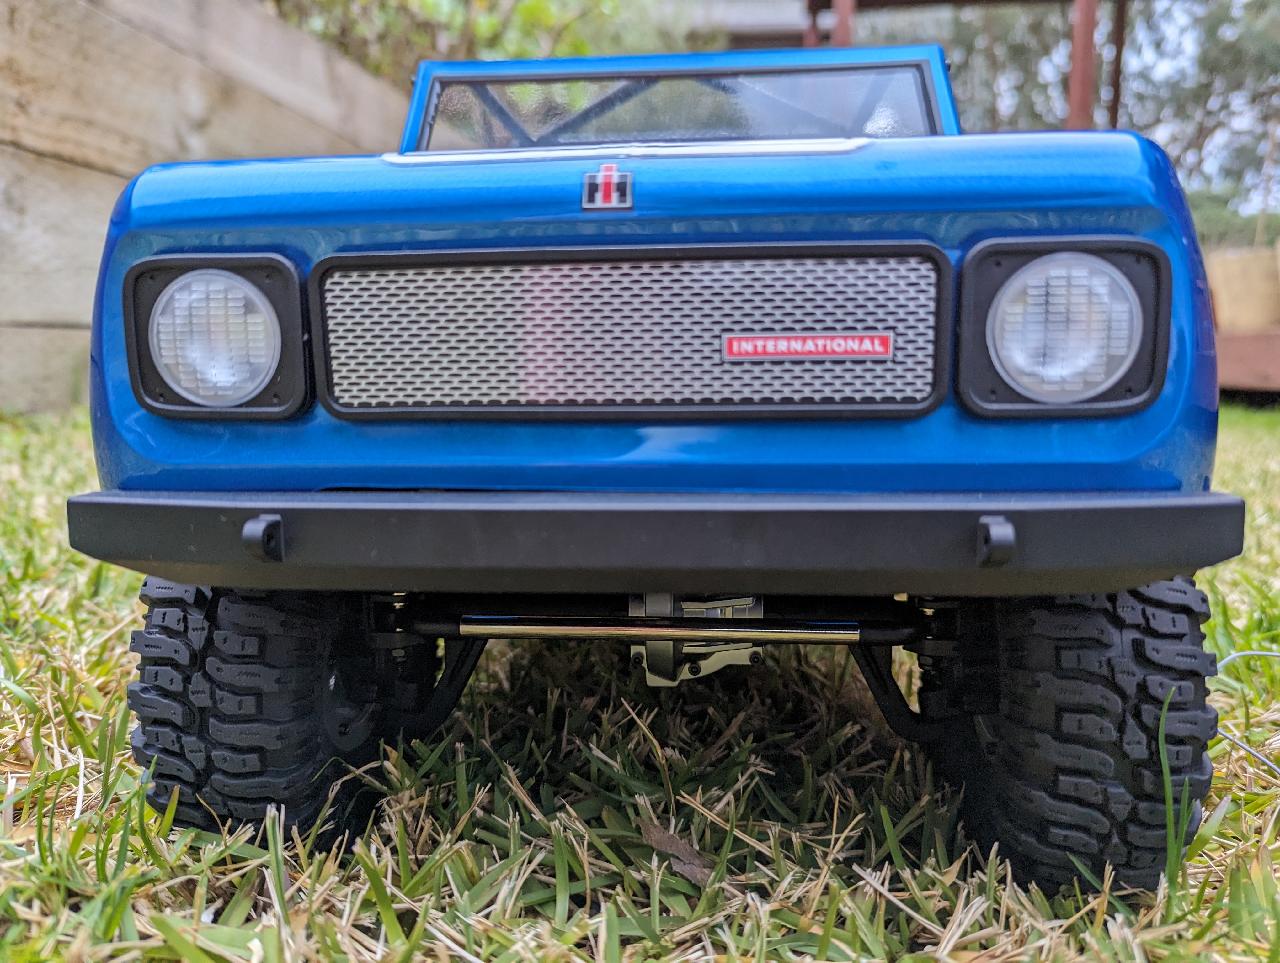
As these models draw new potential customers to consider the brand, their newest model releases matter all the more. From where I’m watching, the RGT Intruder EX86020 is possibly their most important release. This is their first high-level scale model RC crawler that doesn’t have the extra bells and whistles that many folks disparage. It has a gorgeous body. The price suggests quality. The running gear is solid (U-joints in those front axles, for example). And it’s all 1/10 scale kit.
In short, this model needs to be good. Better than good. Newcomers to RGT are watching this one!
What’s It Like?
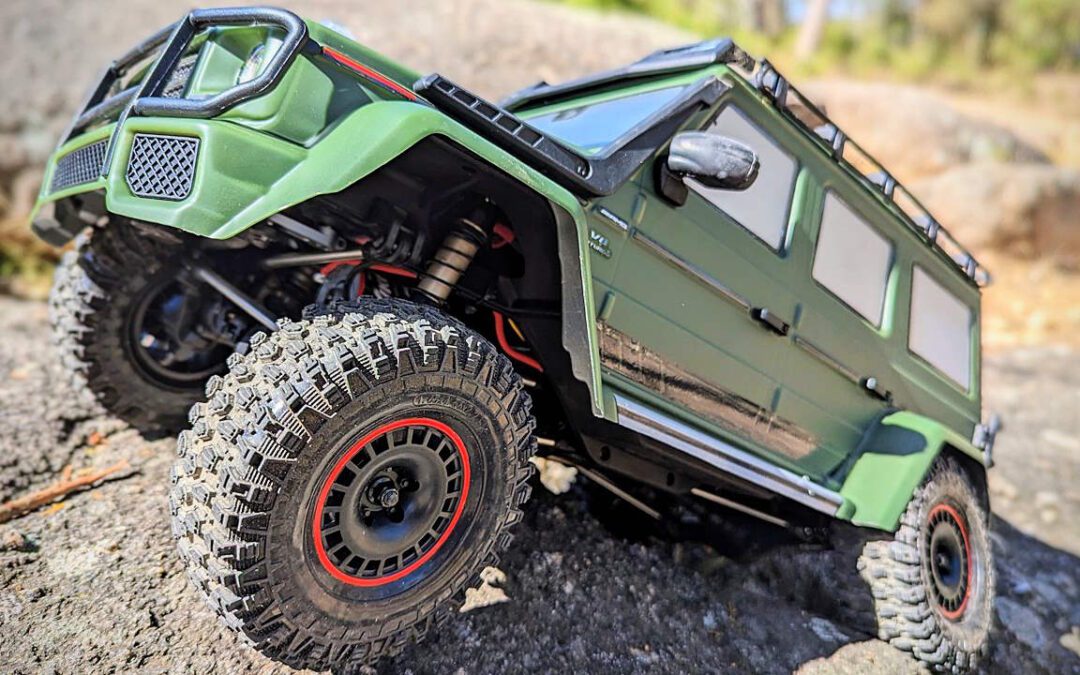
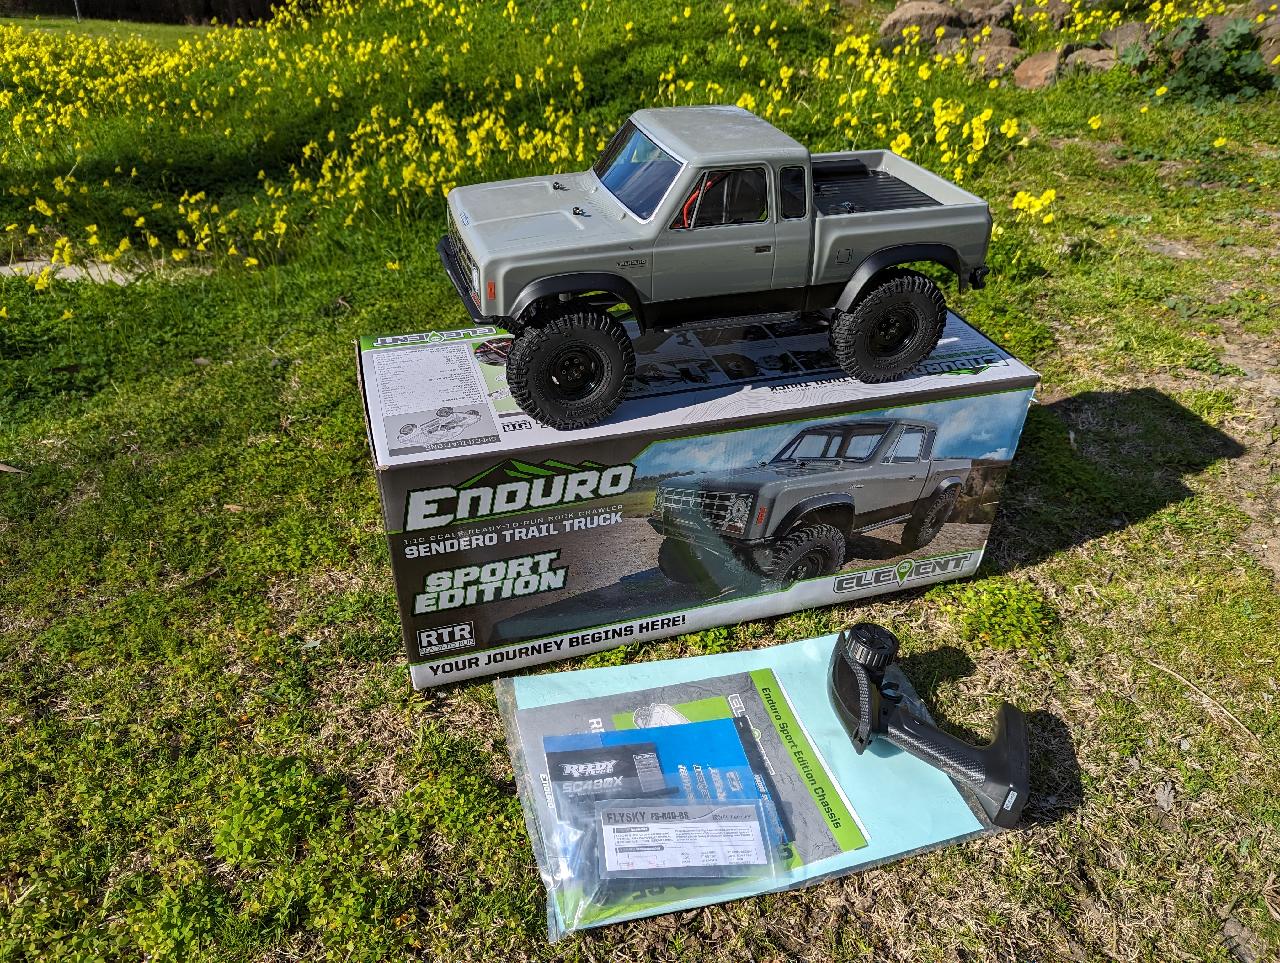
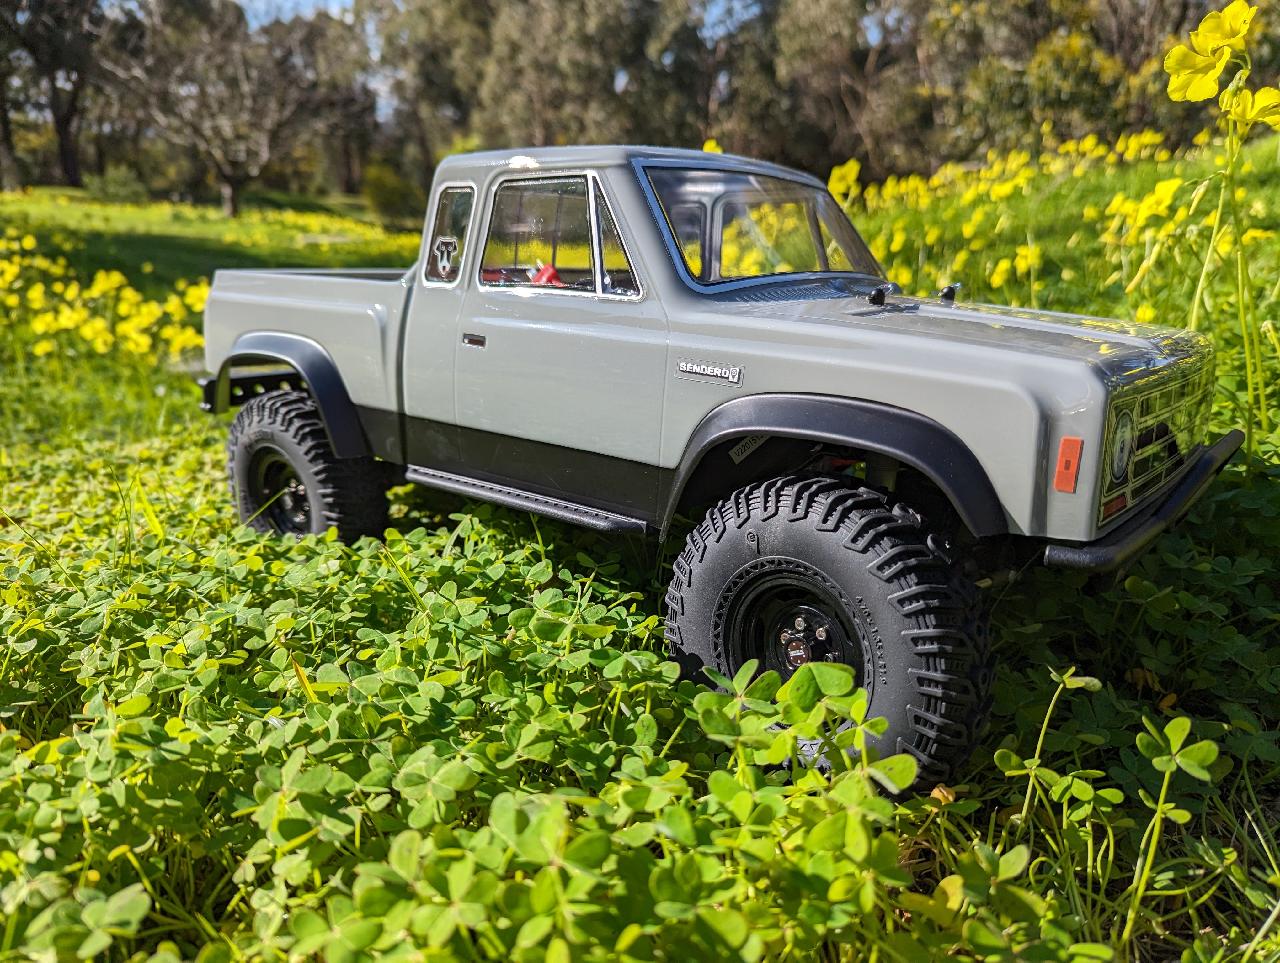
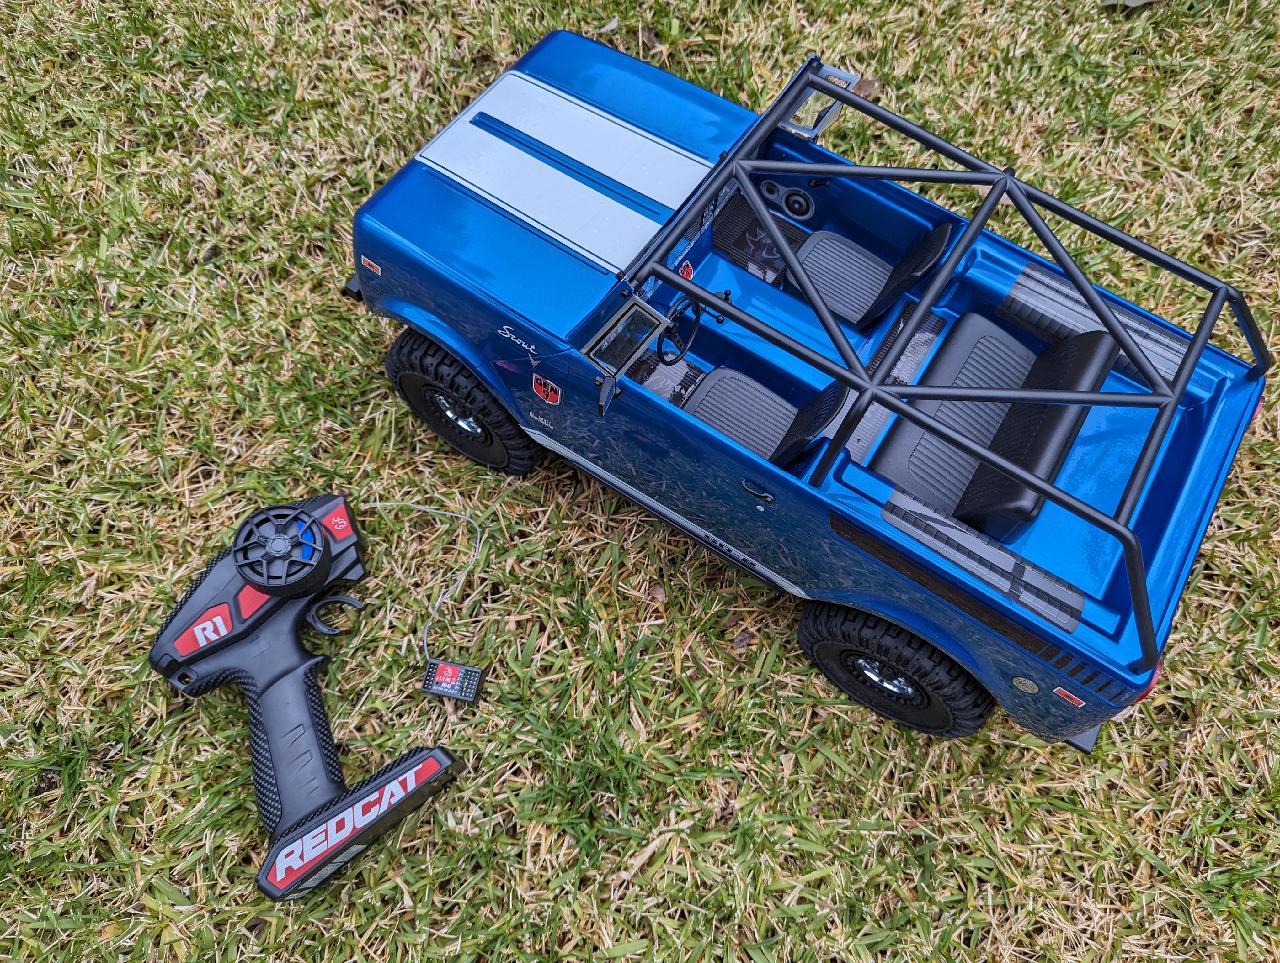
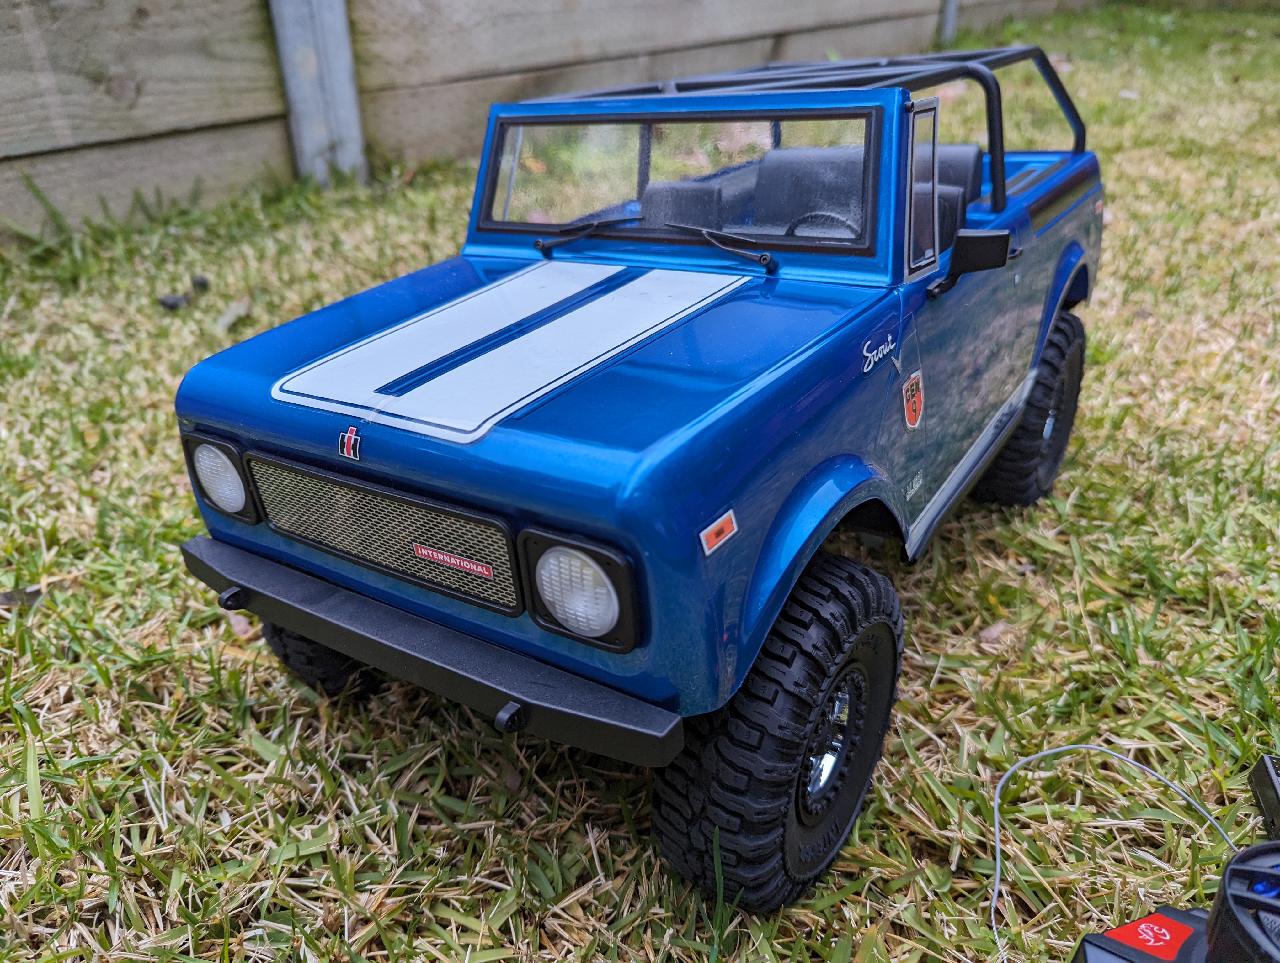
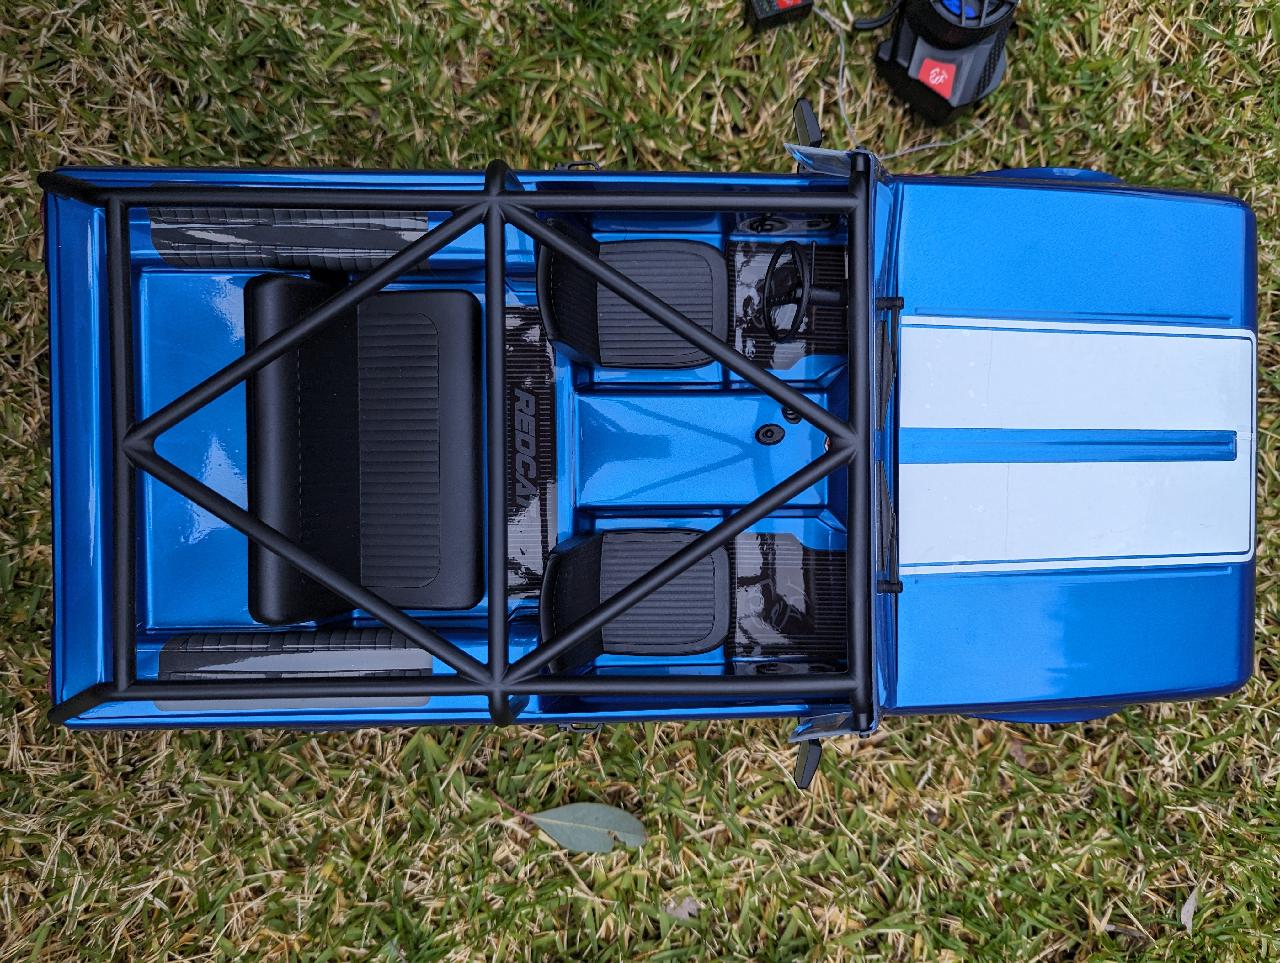
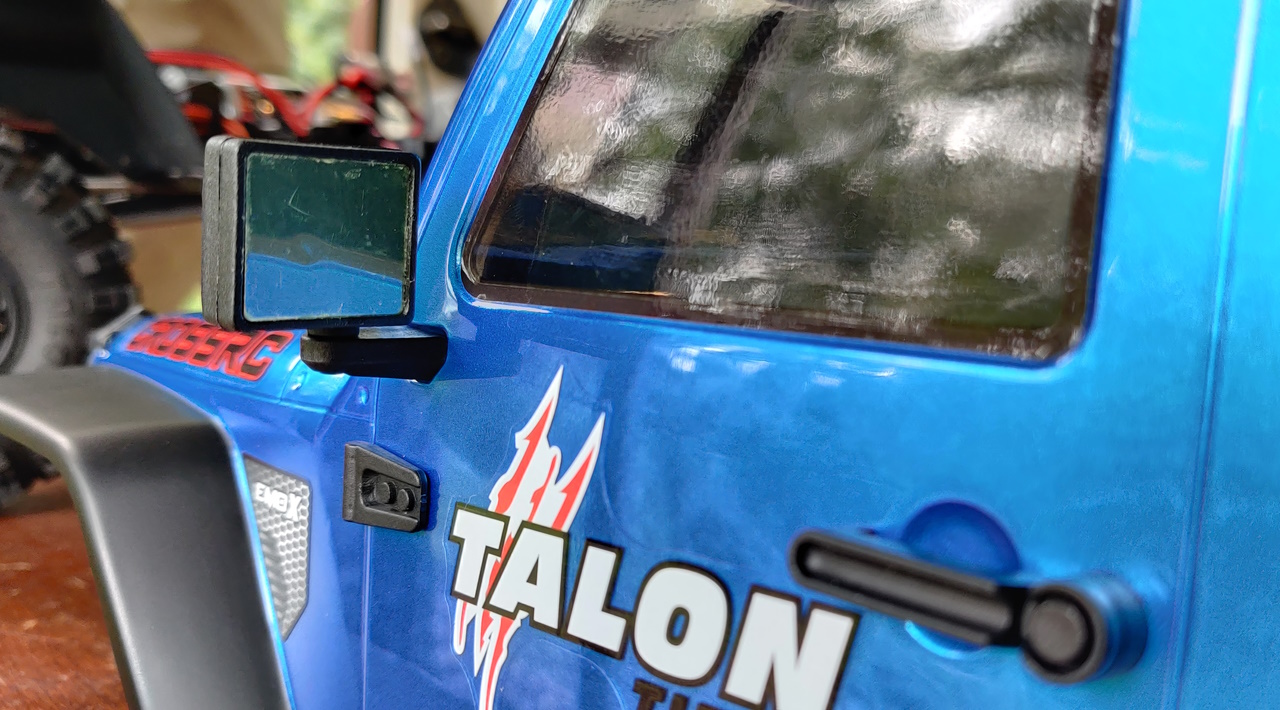
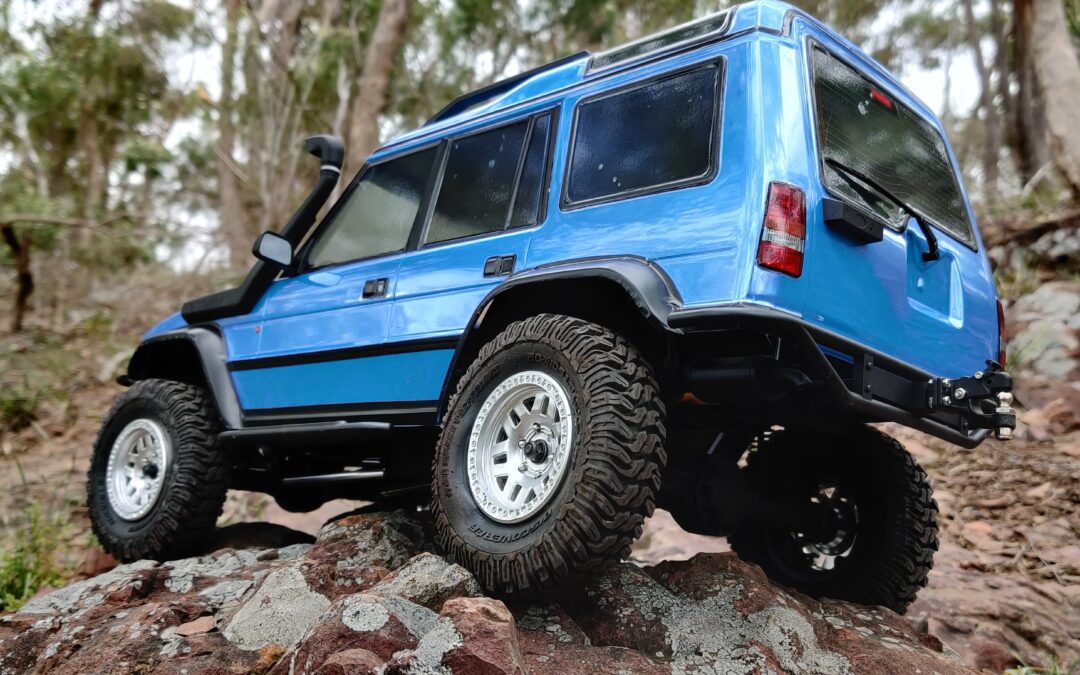
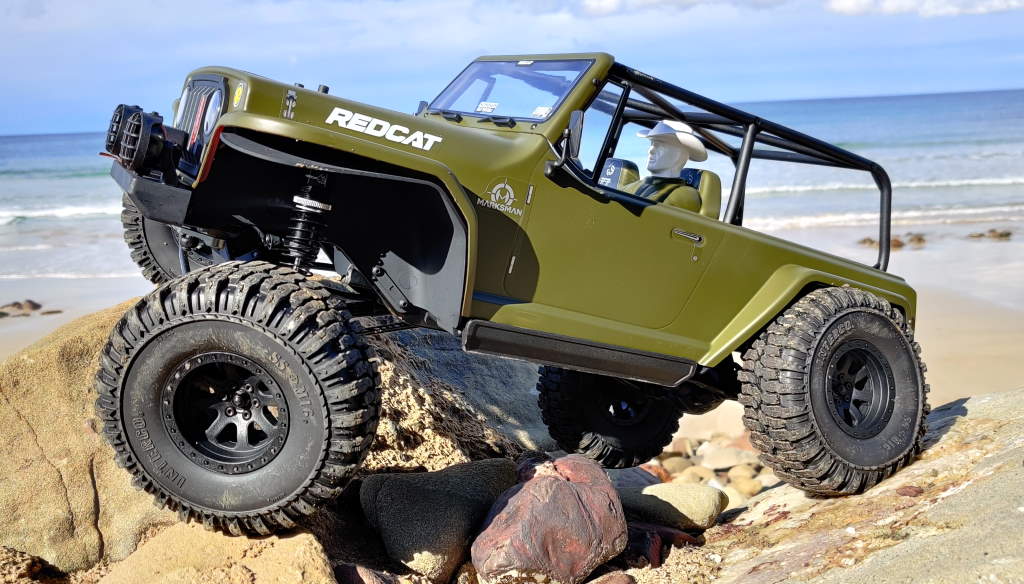
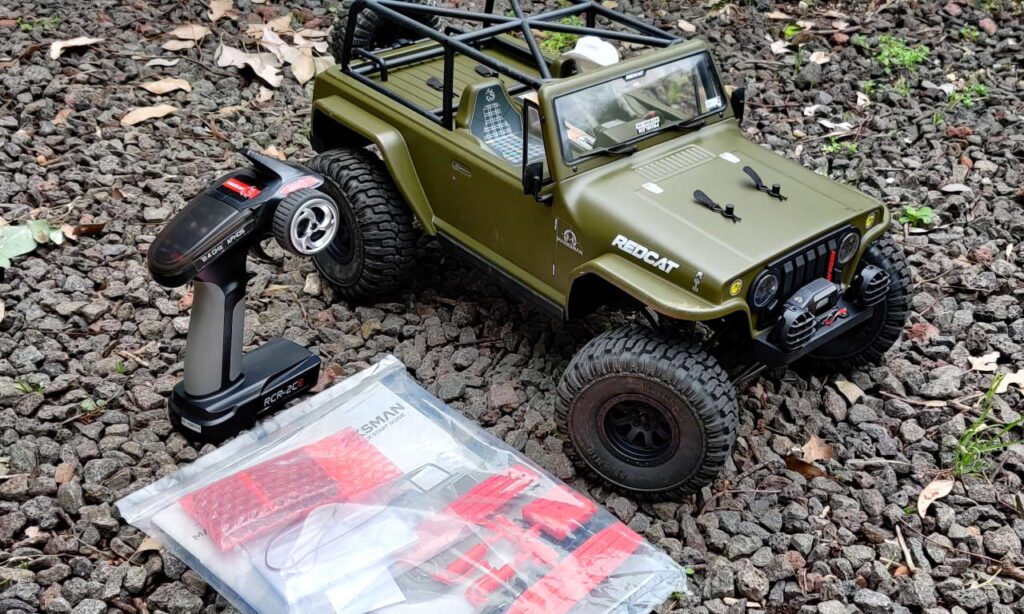
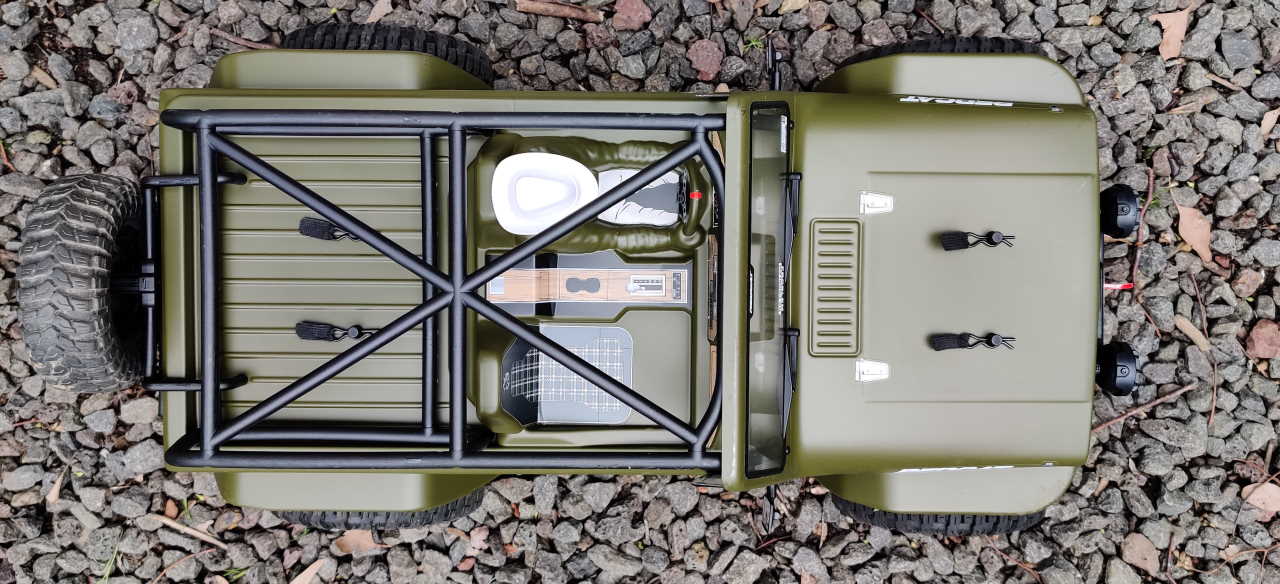
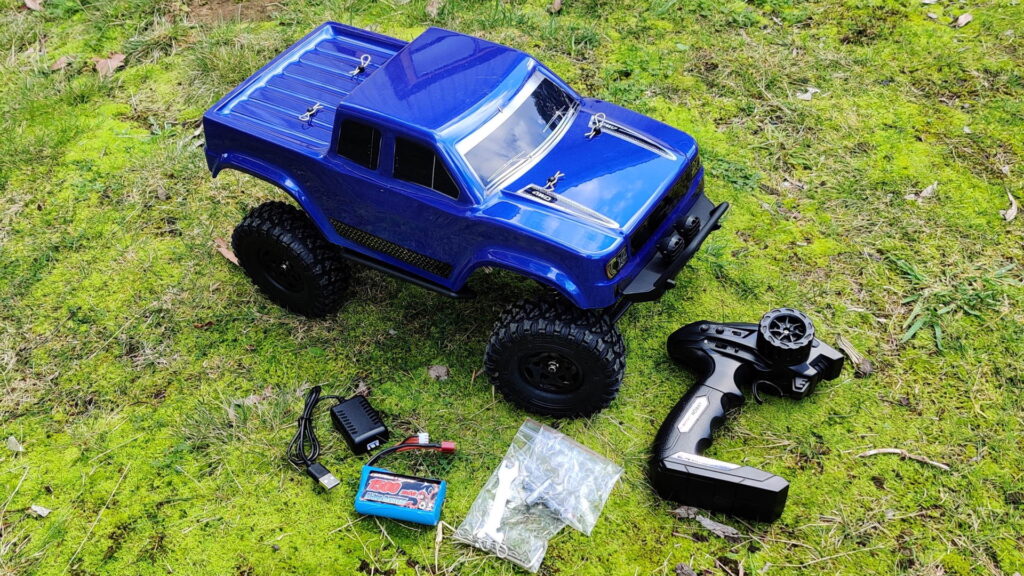
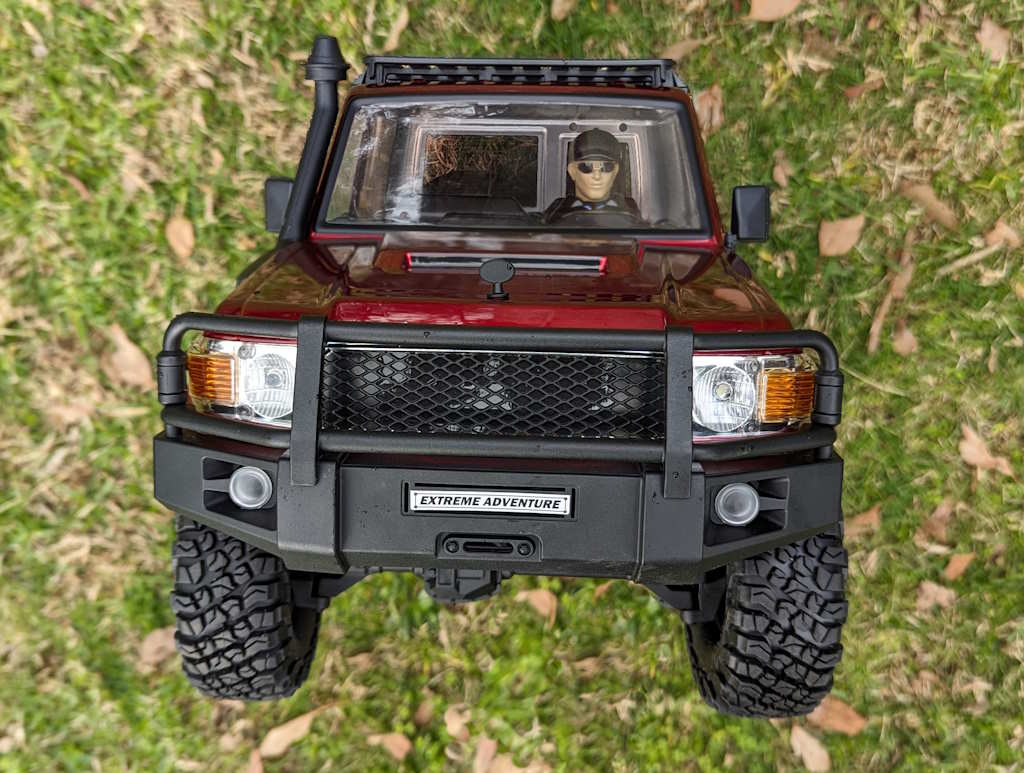
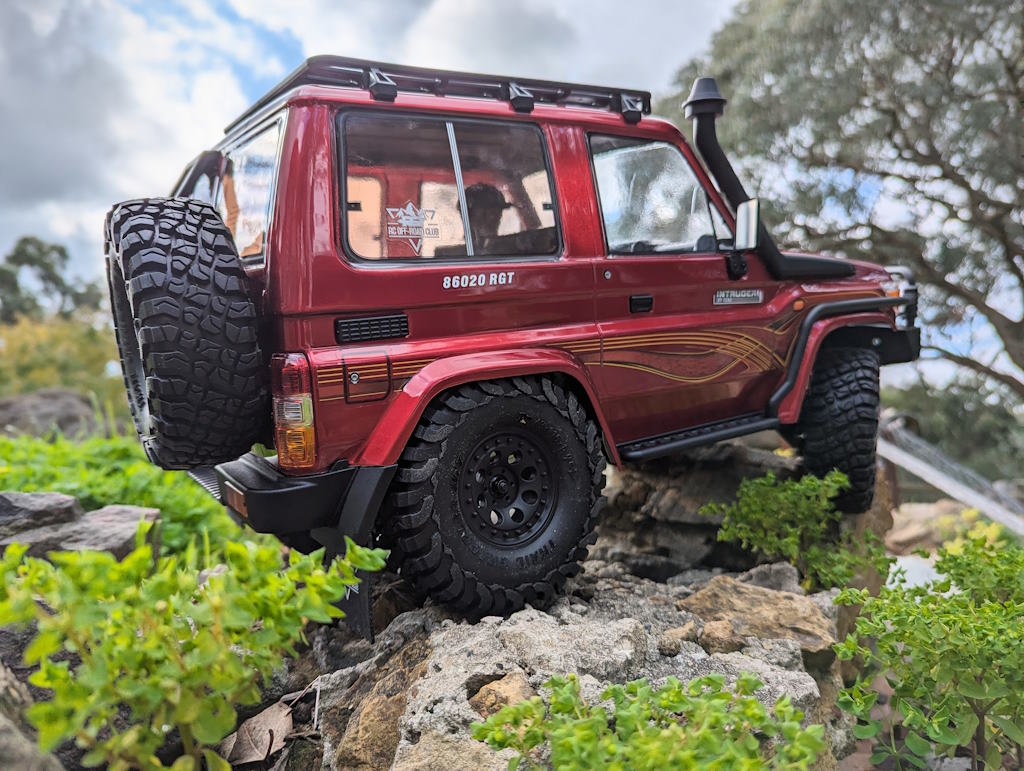
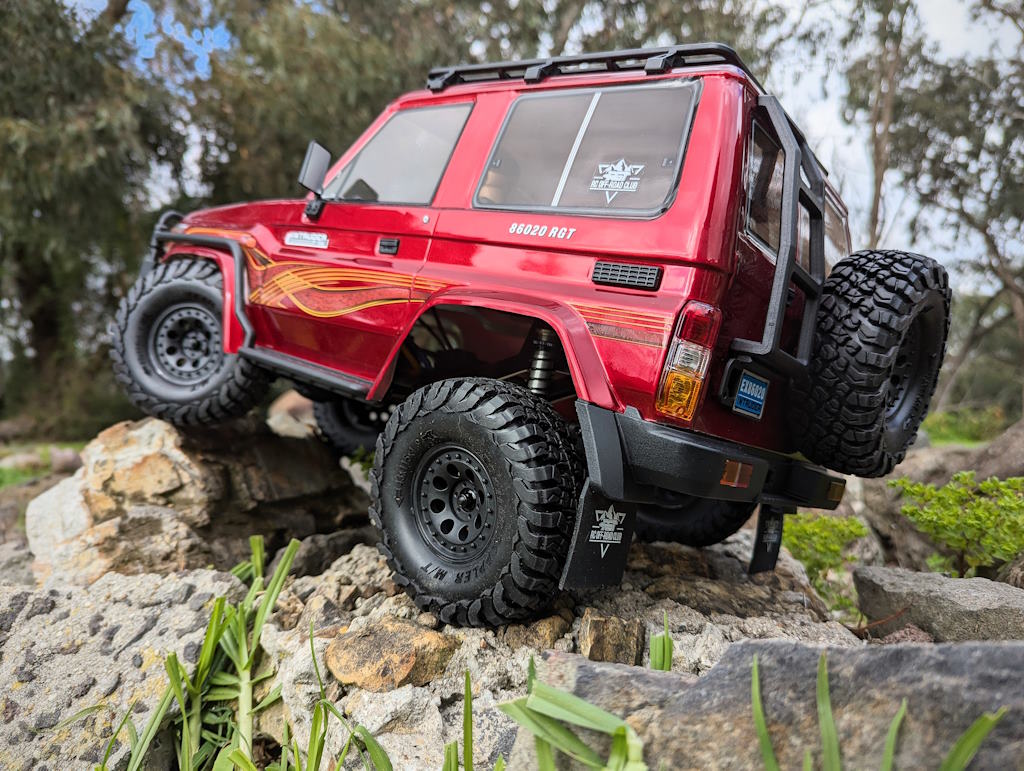
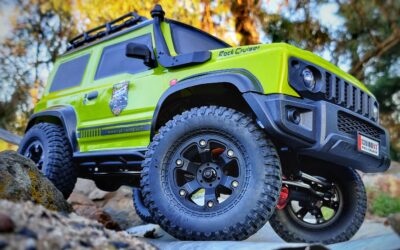
The first thing that jumped out to me was that gorgeous body. I made a post on my YT community page that said something like, “Gosh, this car just looks amazing from any angle” – and it really does!
There are a bunch of extras they throw in so you can add more lights, mount a larger battery tray, add some scale extras and have a play with suspension mount points and so on. There’s a lot of good here, though the main ‘feature’ of this model is its appearance. I mean, just look at it!
Body Issues
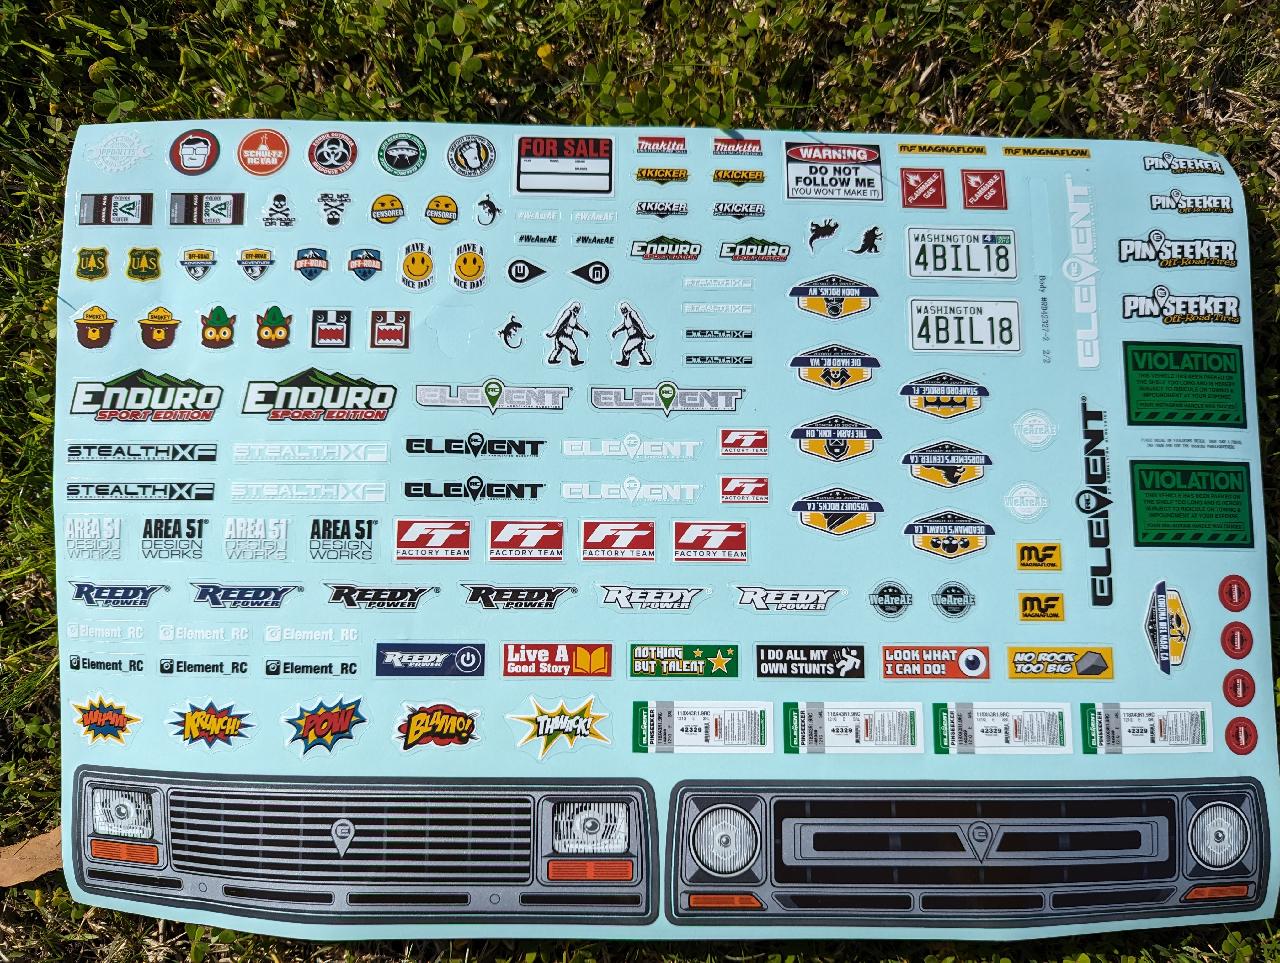
There’s only one issue with the body: it is not licensed. This has been the case for all of their crawlers, to my knowledge. Toyota may not be pleased, and I don’t condone the practice. Unlicenced bodies are a problem for the hobby, as are cloned parts. I really need to do a blog post on just this topic, as there are a few things to unpack here. But the car is pretty and the colour choices are all quite good.
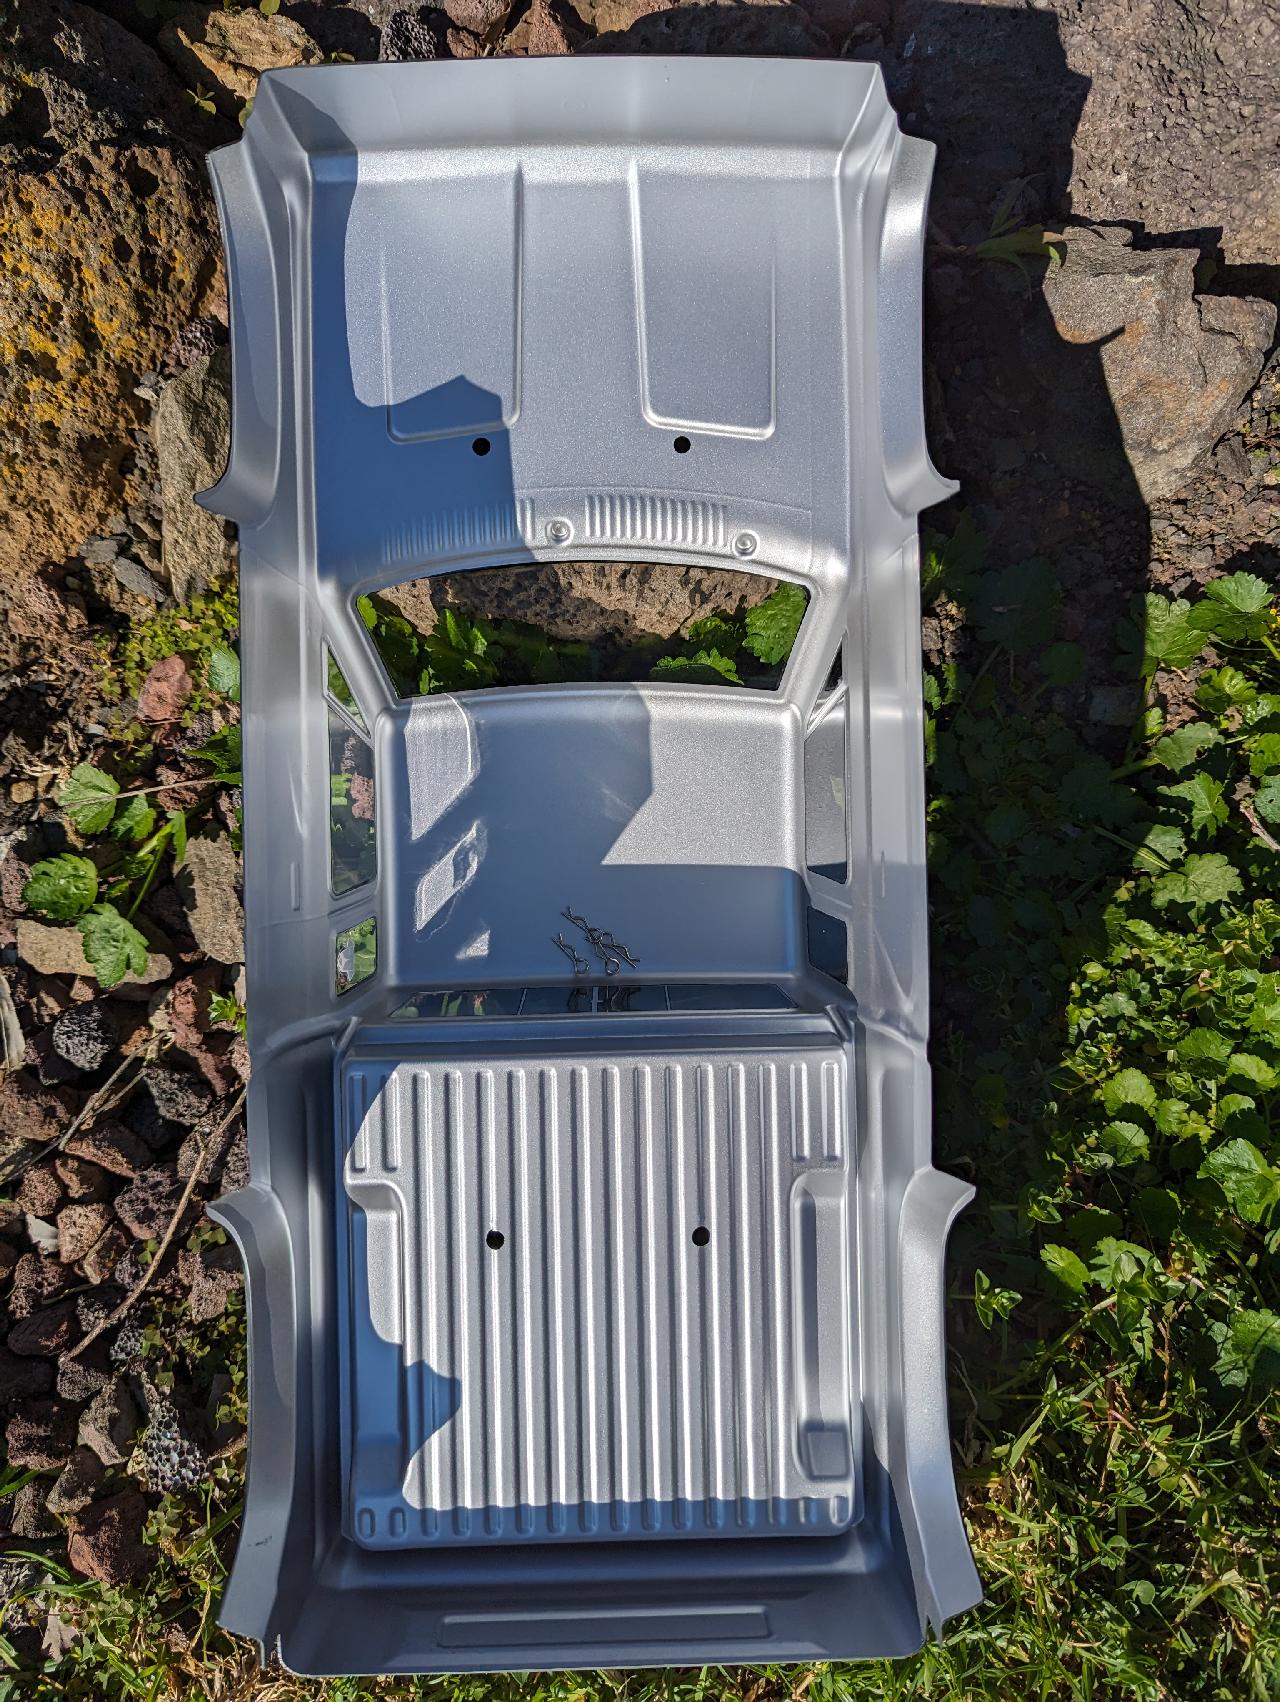
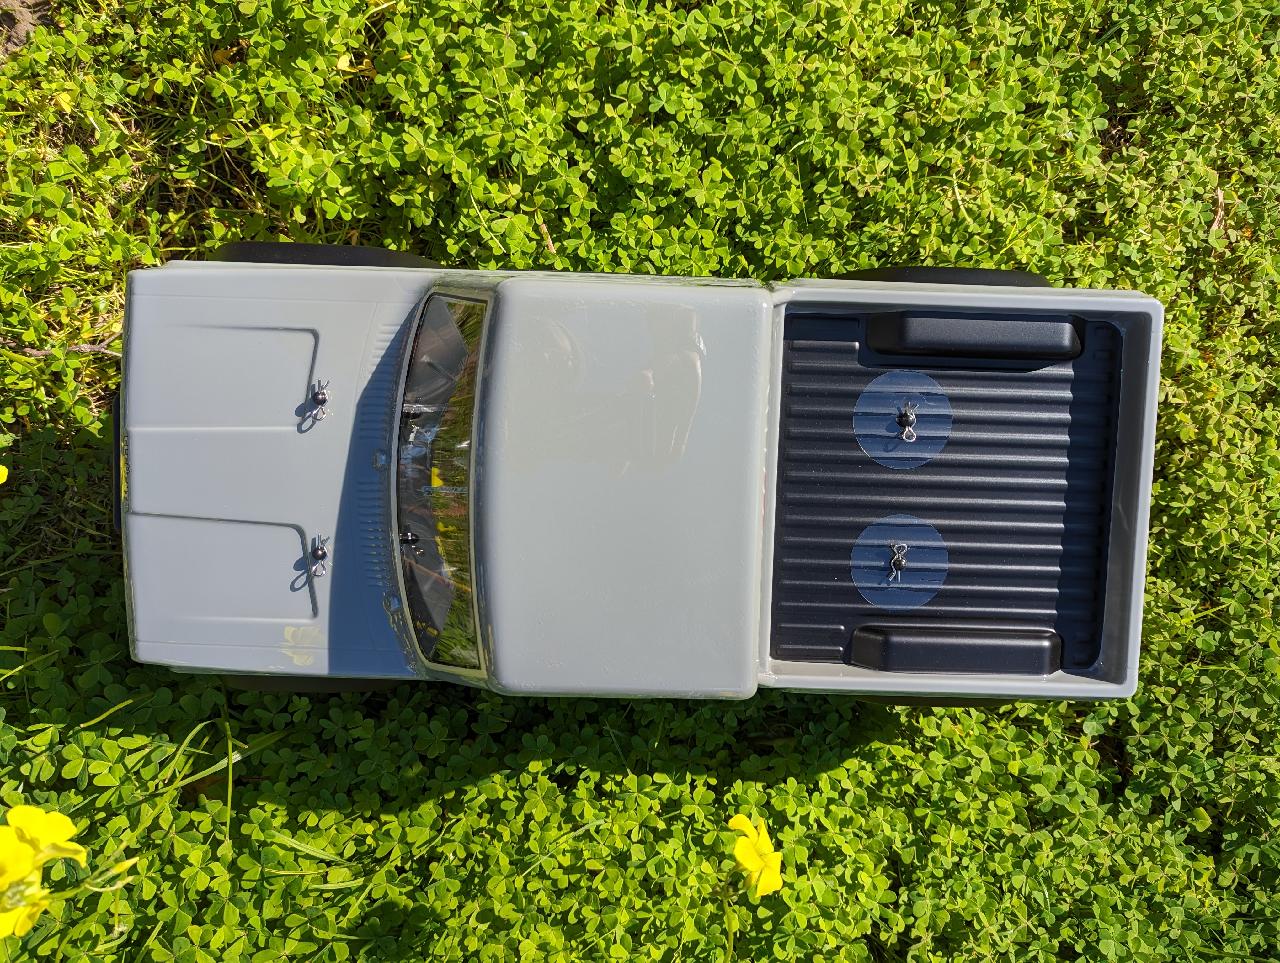
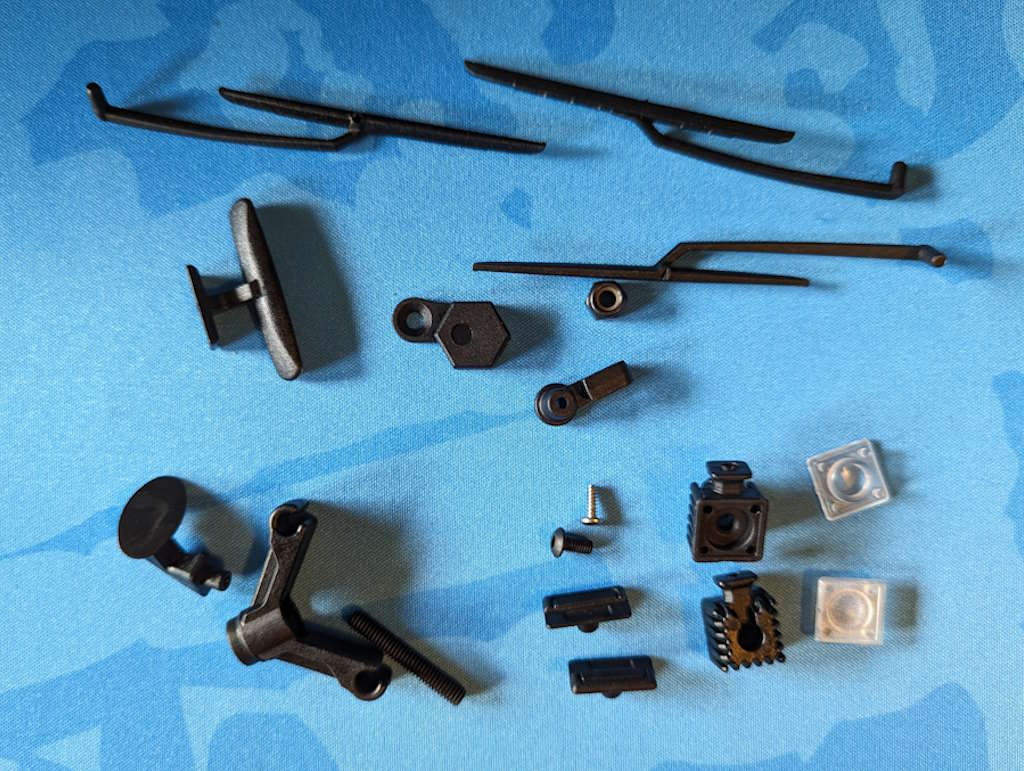
This model comes with some extra plastics for both the cabin and the exterior of the body, like a rear-view mirror, extra spotlight cases, wipers, and so on. You need to fit these yourself. The folding side-mirrors come installed though, as do the door handles and the rear pillar air vents. If you do nothing with the extras after you unbox it, the car is still very complete. I also appreciate the captured body pins – you won’t lose these during a battery change on the trail!
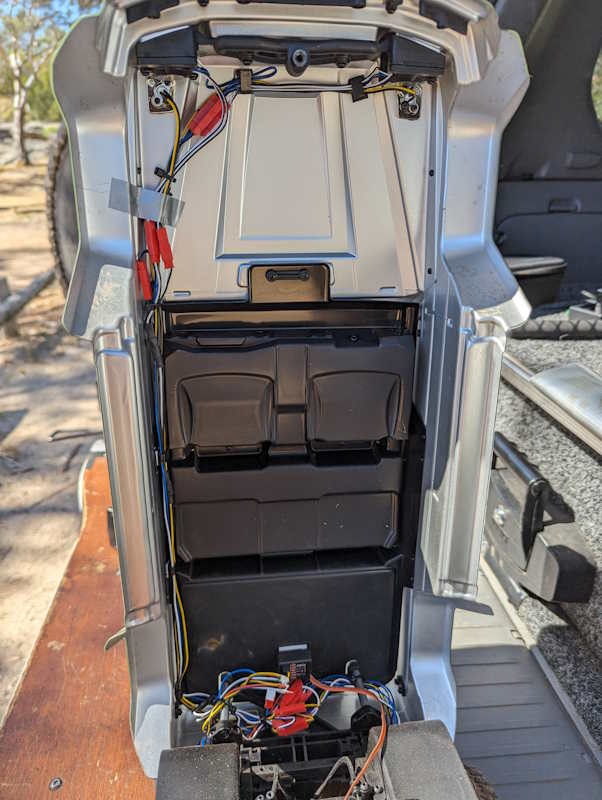
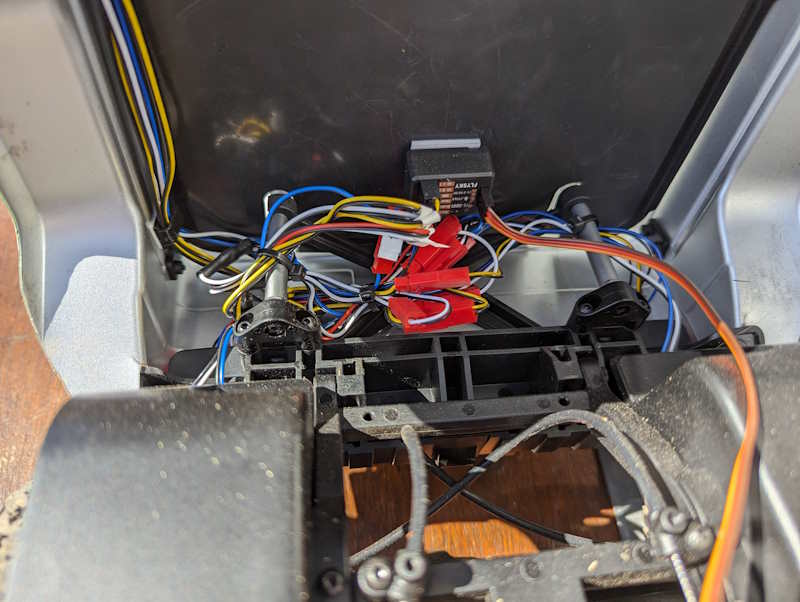
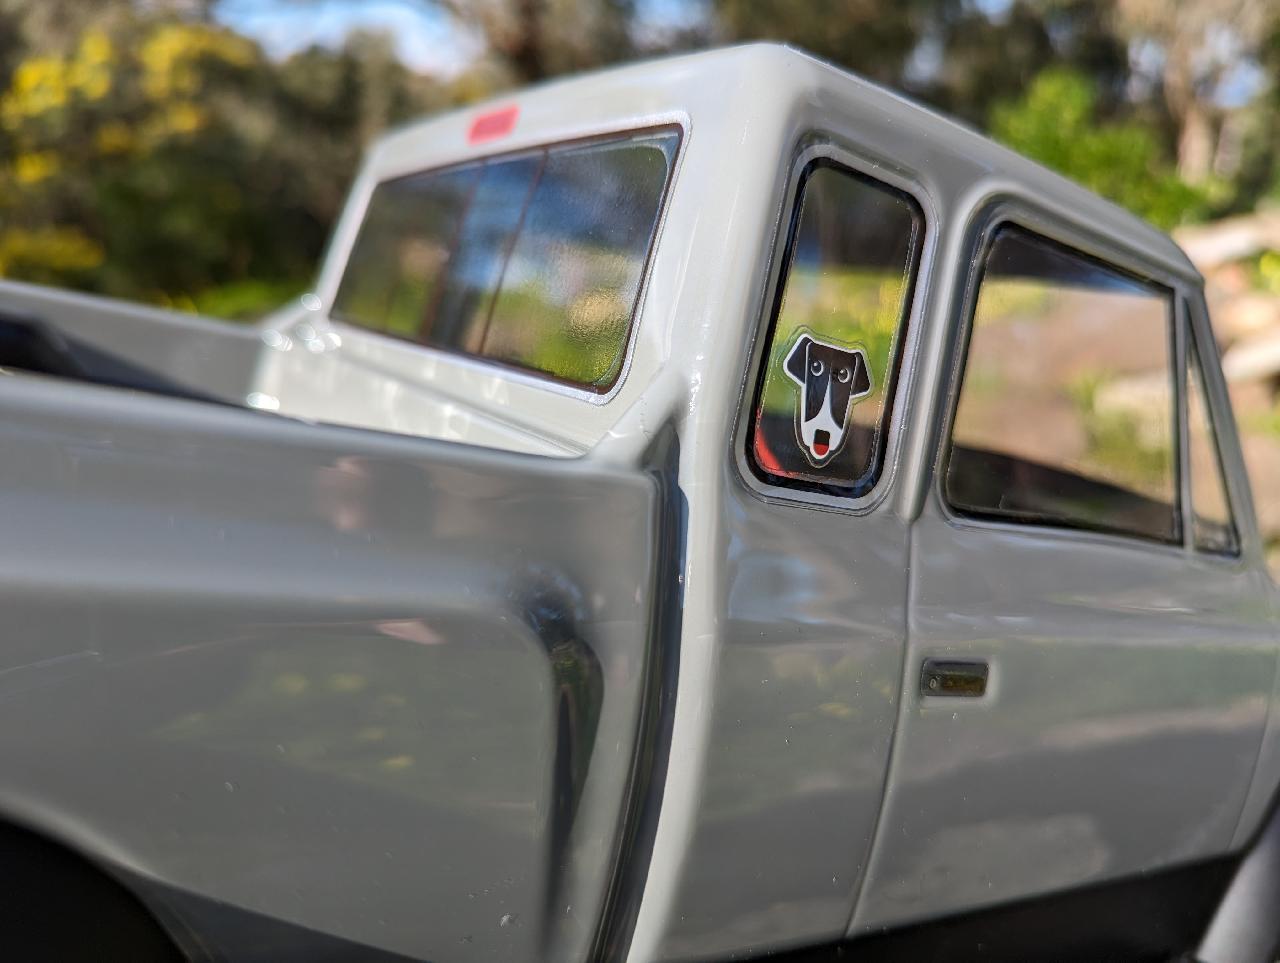
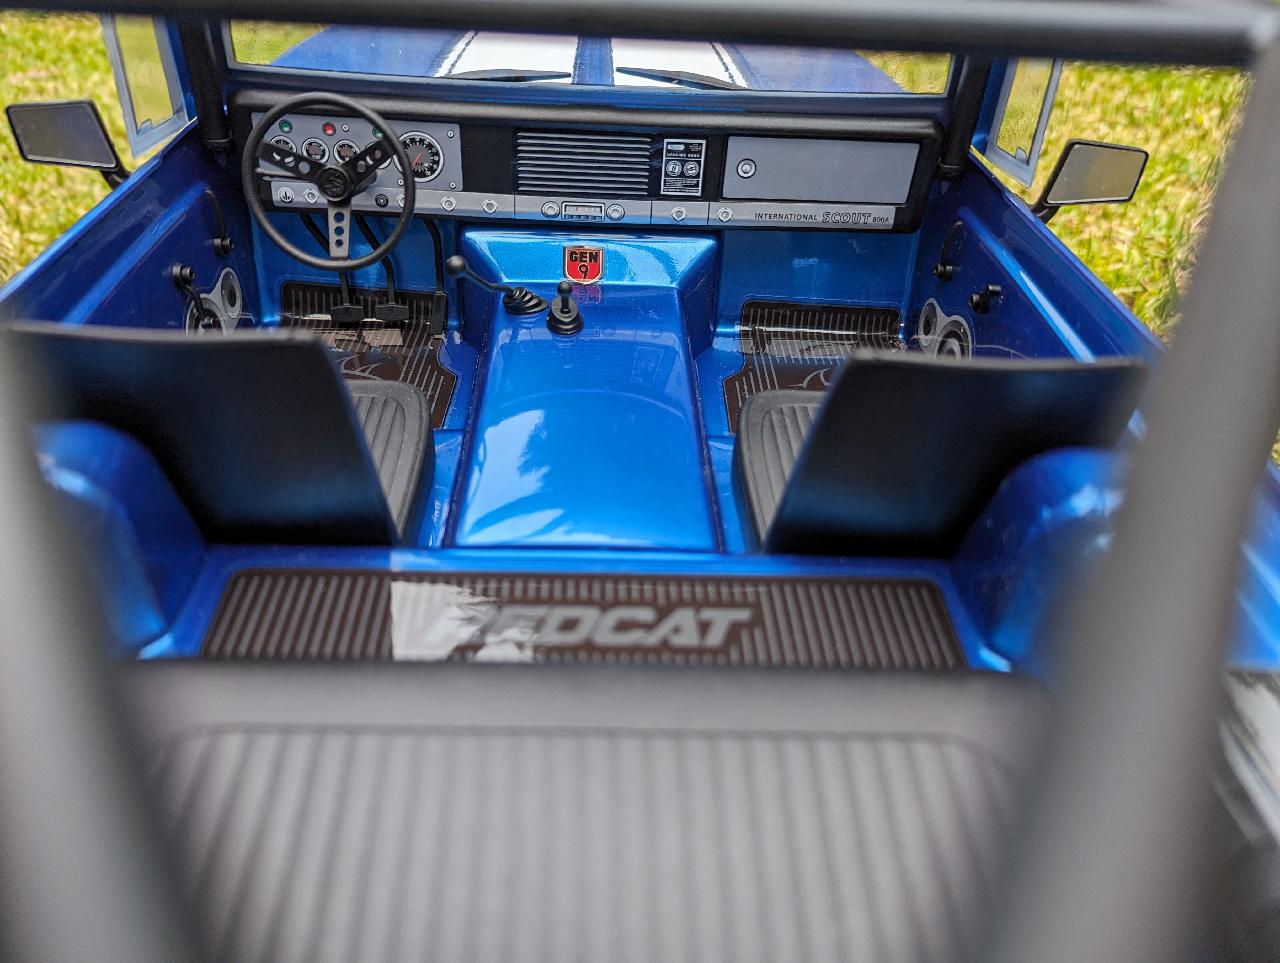
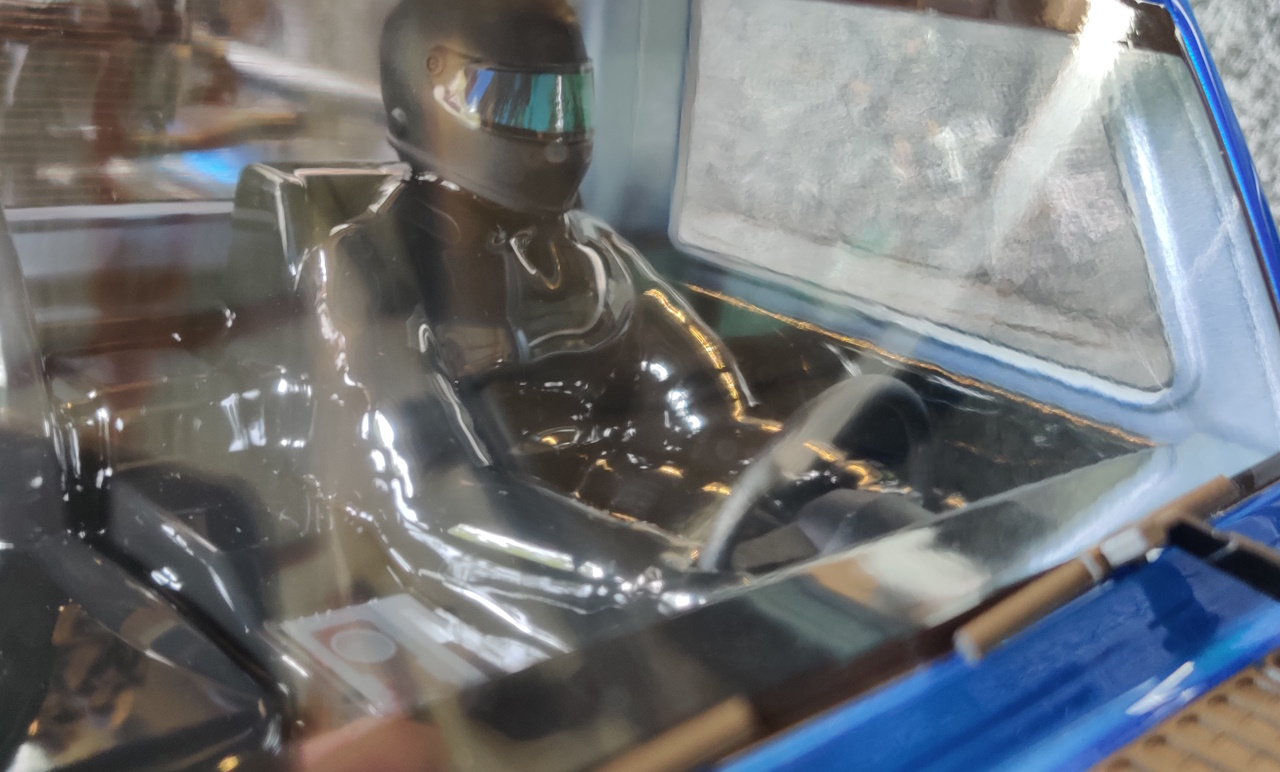
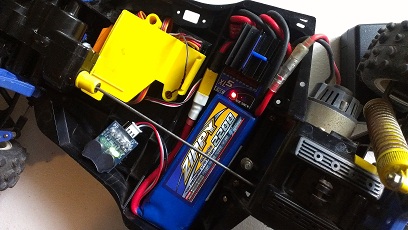
RGT Intruder Interior
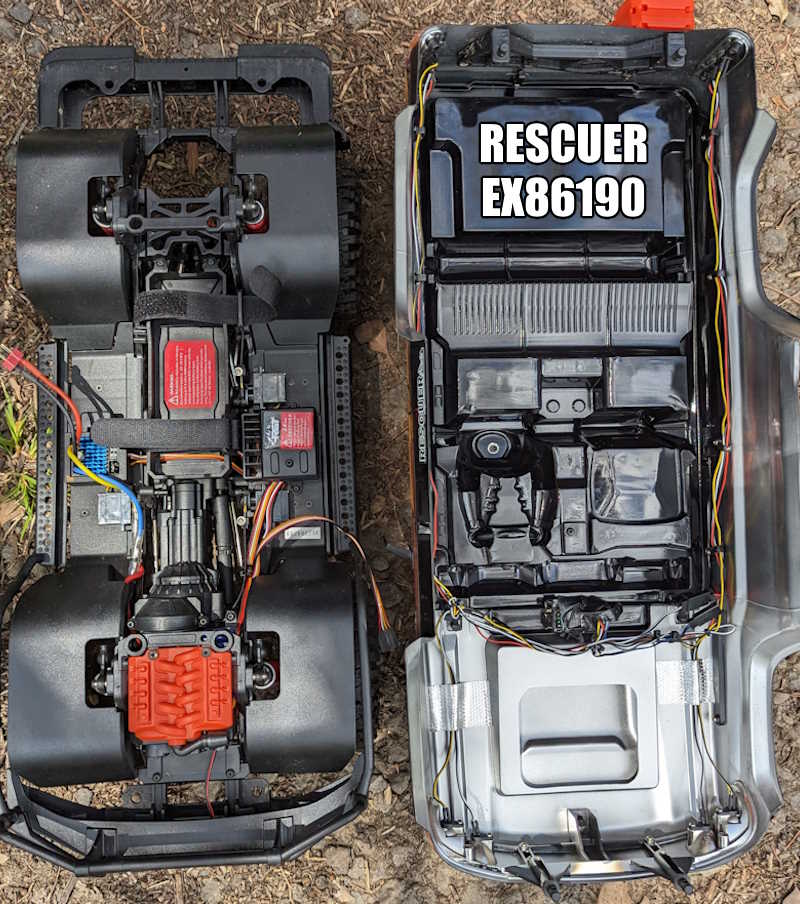
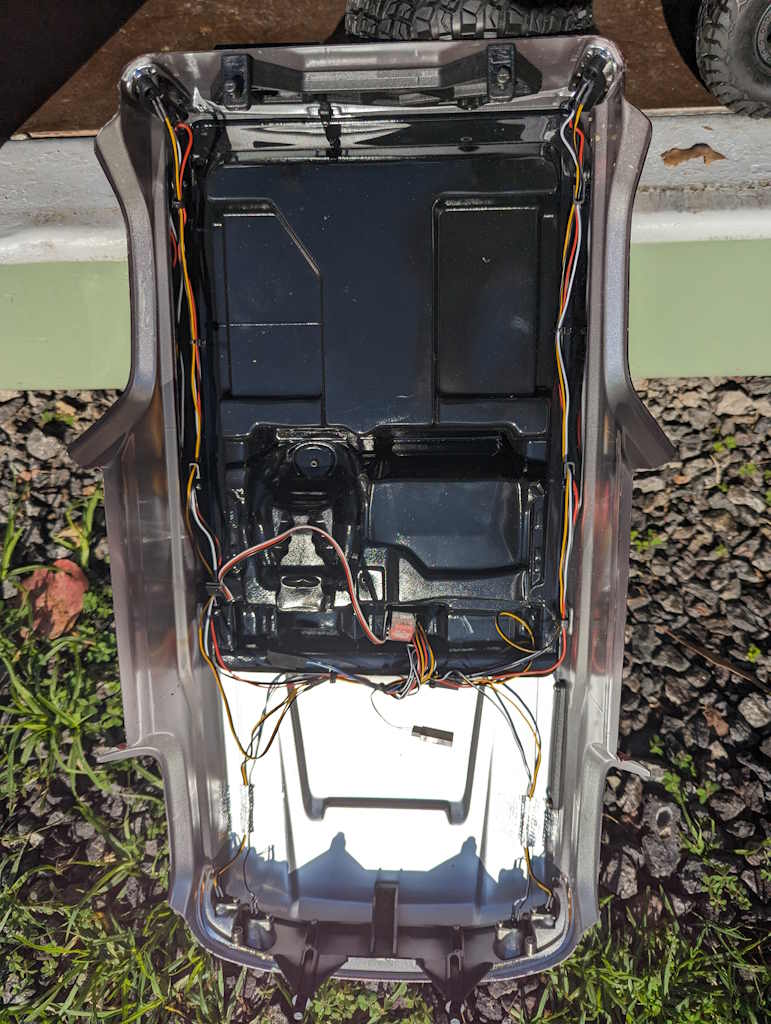
Well, it has one. My original RGT Rescuer did not have one (see? Even I’m comparing this car to the Rescuer! It’s inevitable!), though now the EX86190 does ship with an interior. I bought mine separately. The interior in the Intruder here is the same as the one I bought. This is a good thing, as it helps keep RGT’s costs down. It’s attractive, functional, and being polycarbonate, about as light as it could be. Good!
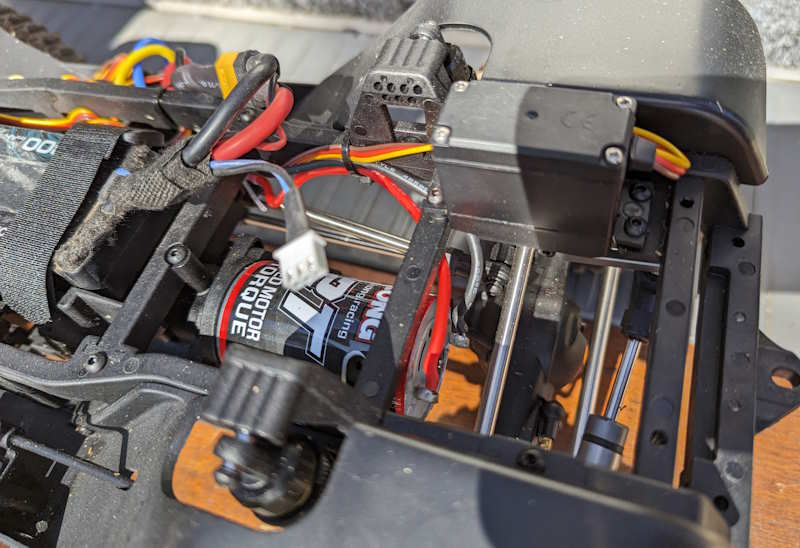
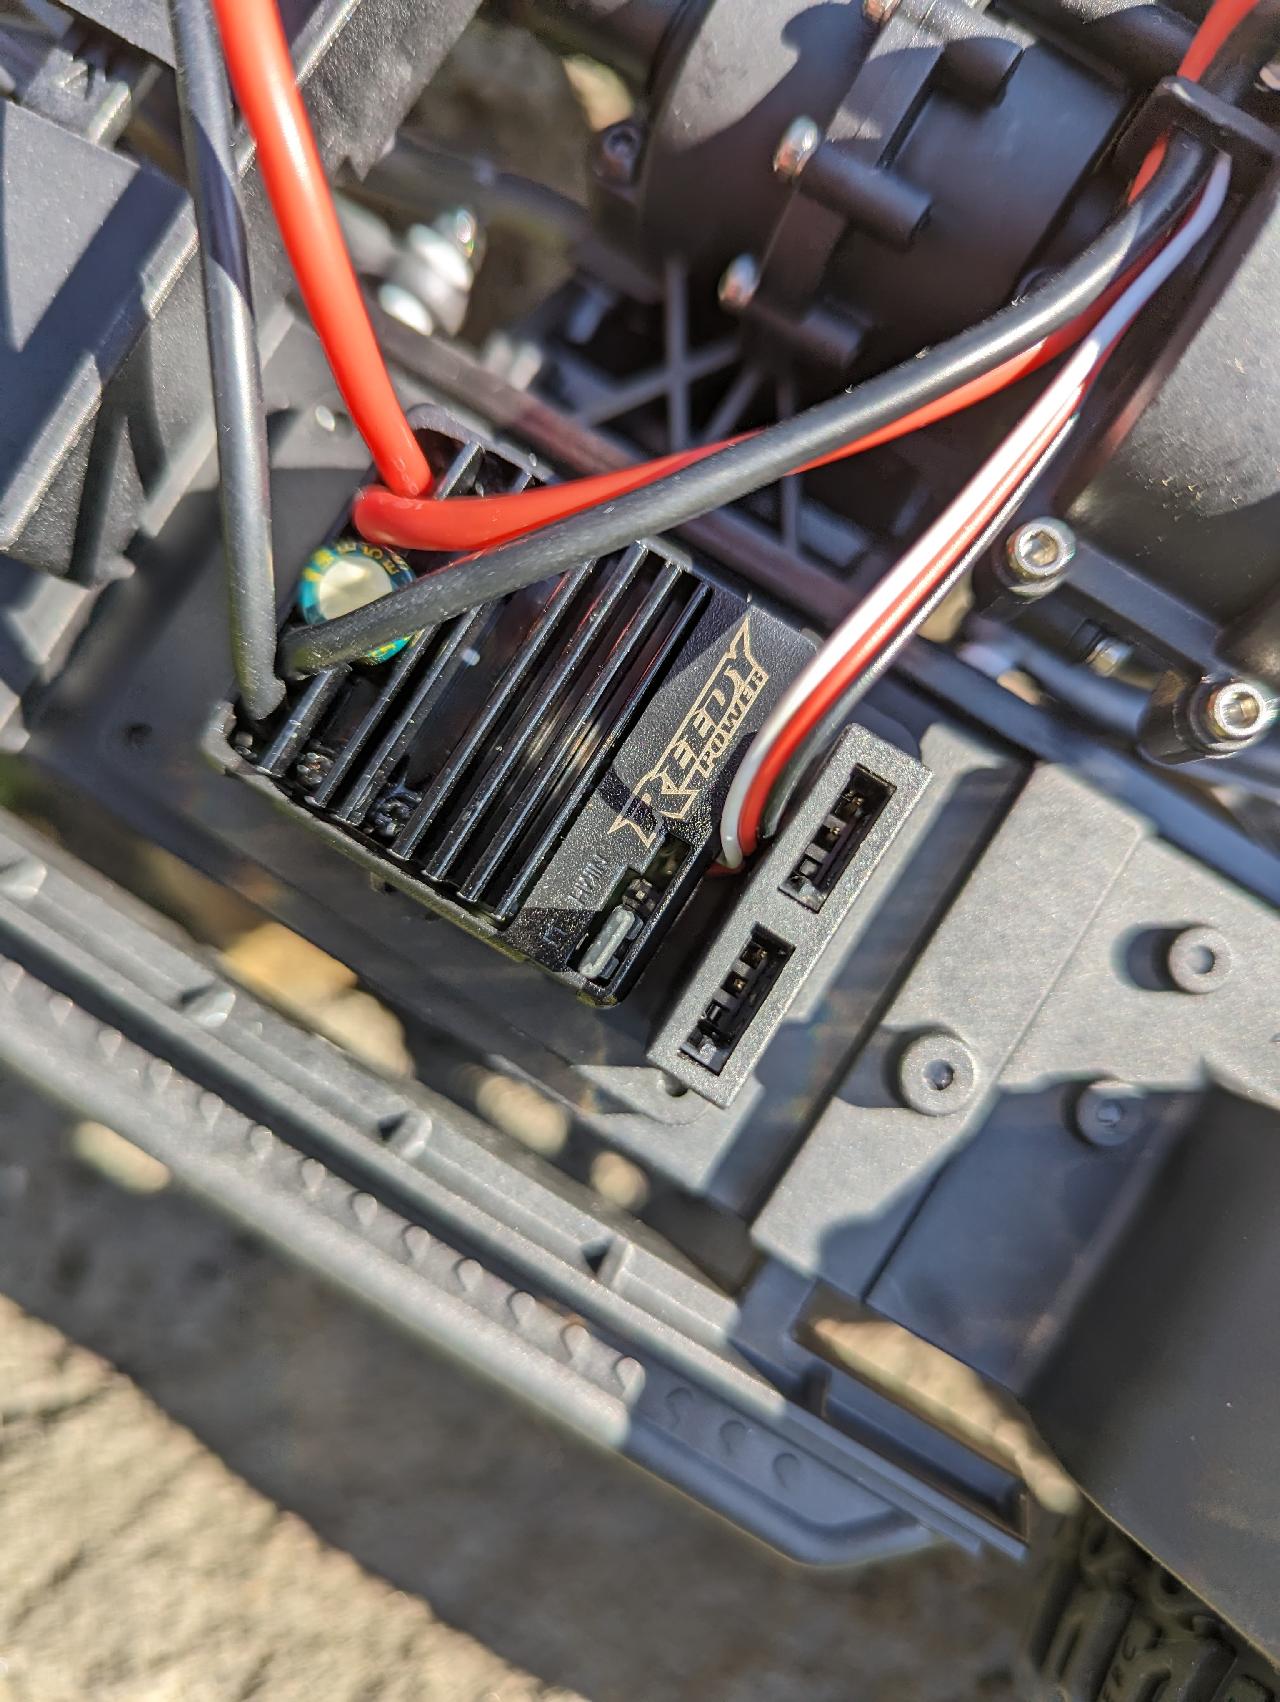
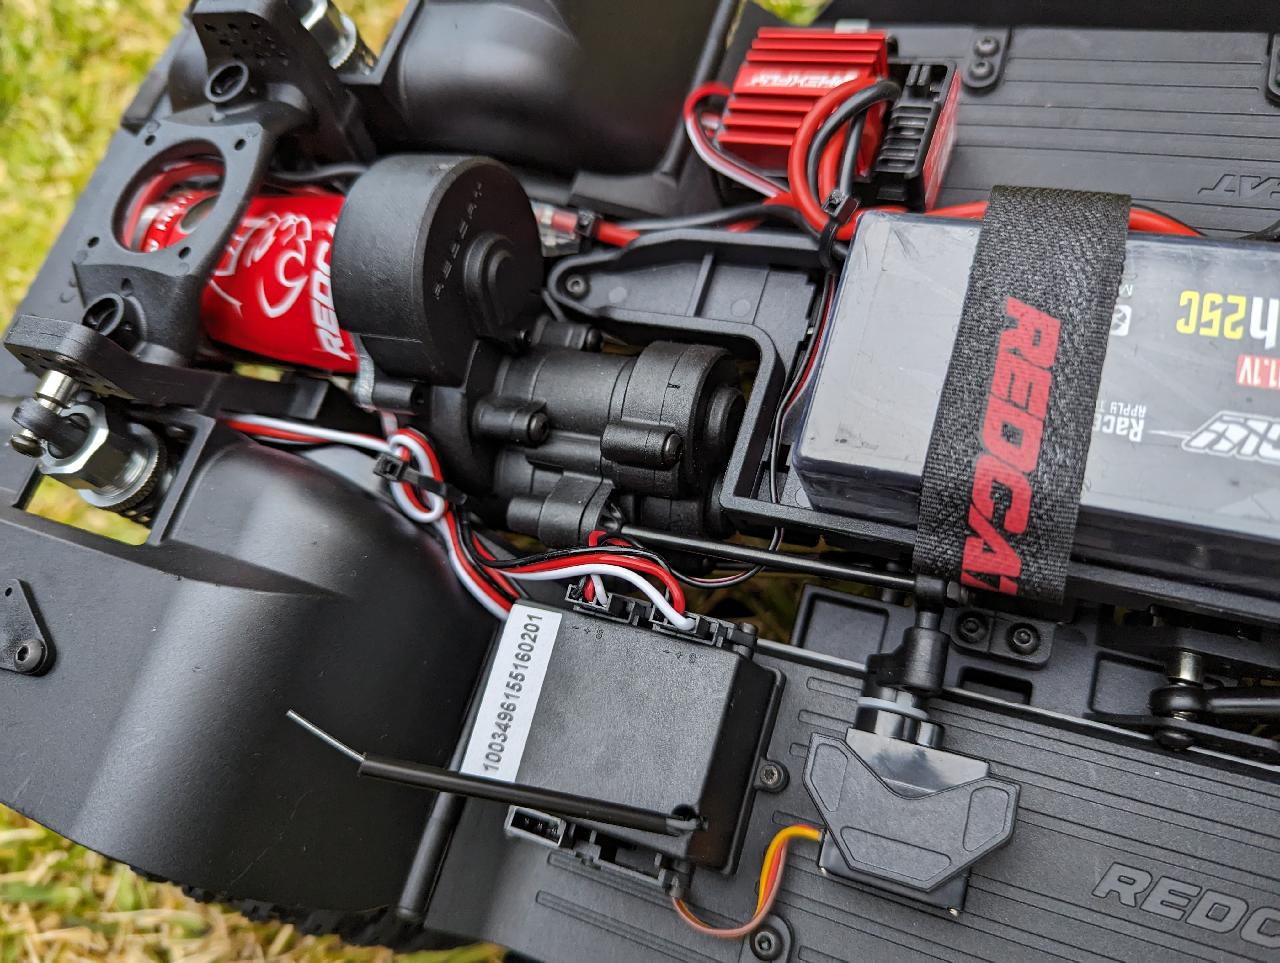
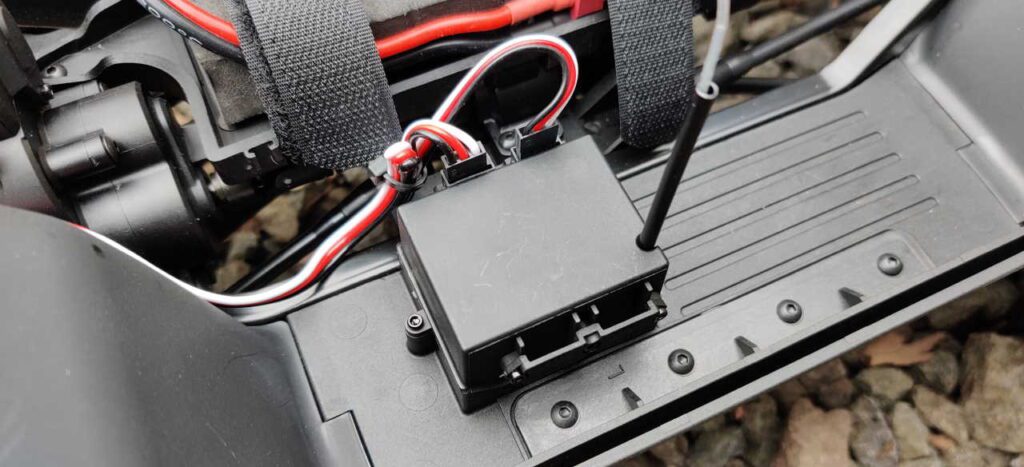
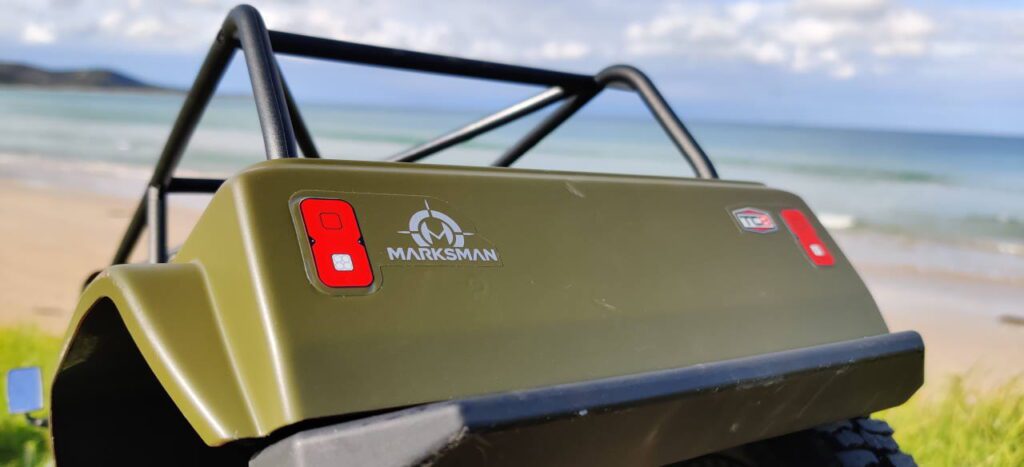
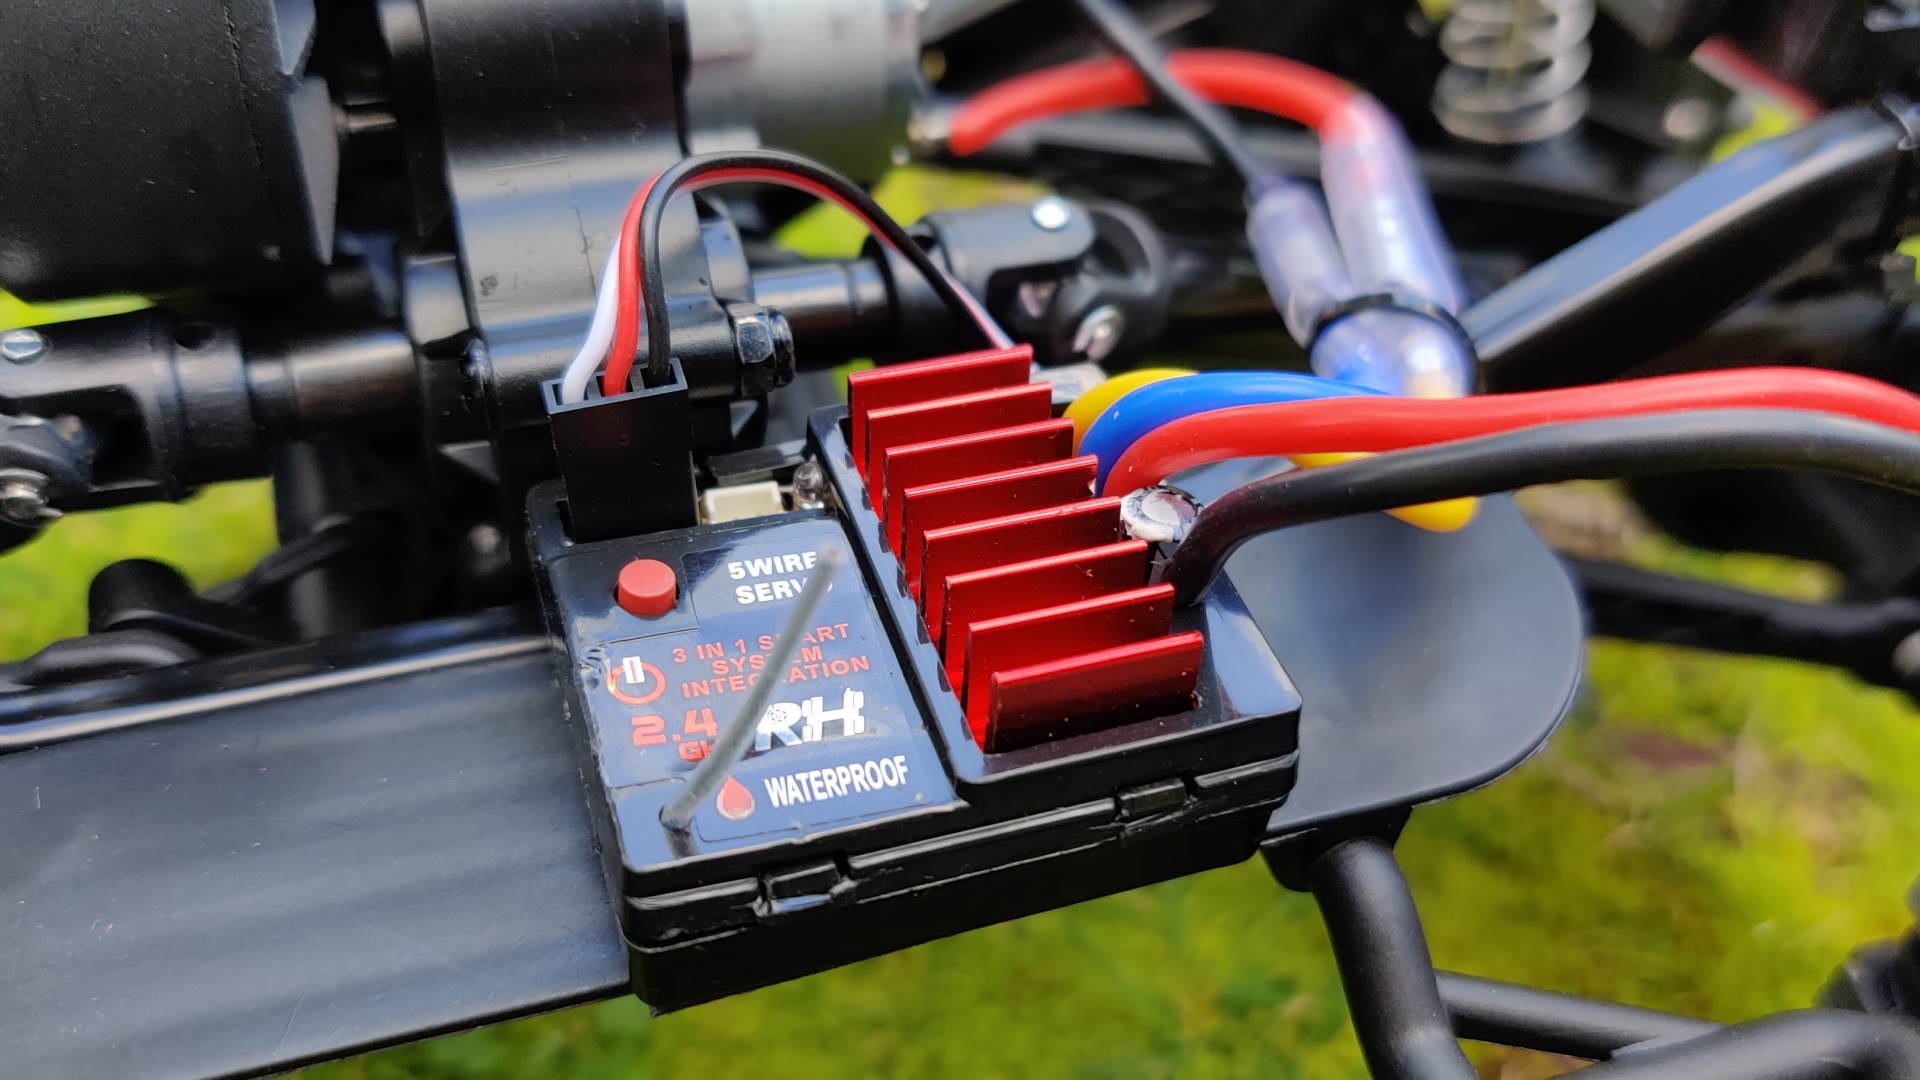
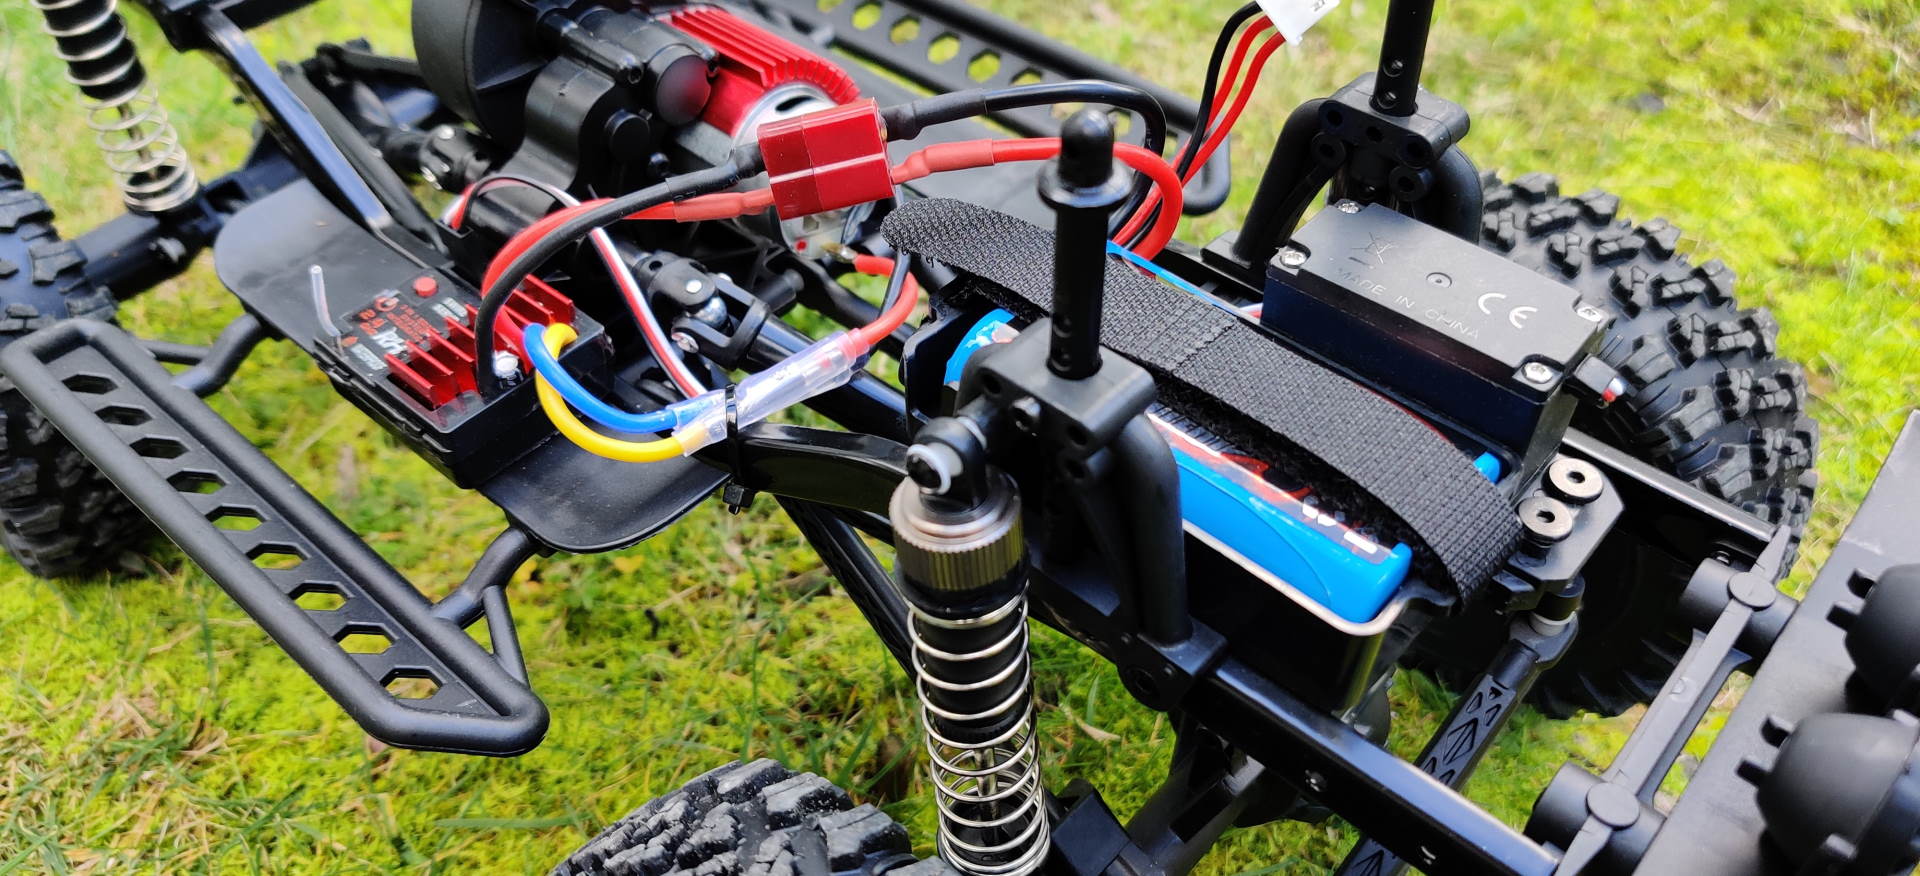
There are no lights in the cabin, but there are lights on all corners, controlled by a central module that’s attached to the underside of the body’s mold piece. It connects to the LED port on the all-in-one Receiver/ESC/Light Controller on the chassis. I’ll get to that further down.
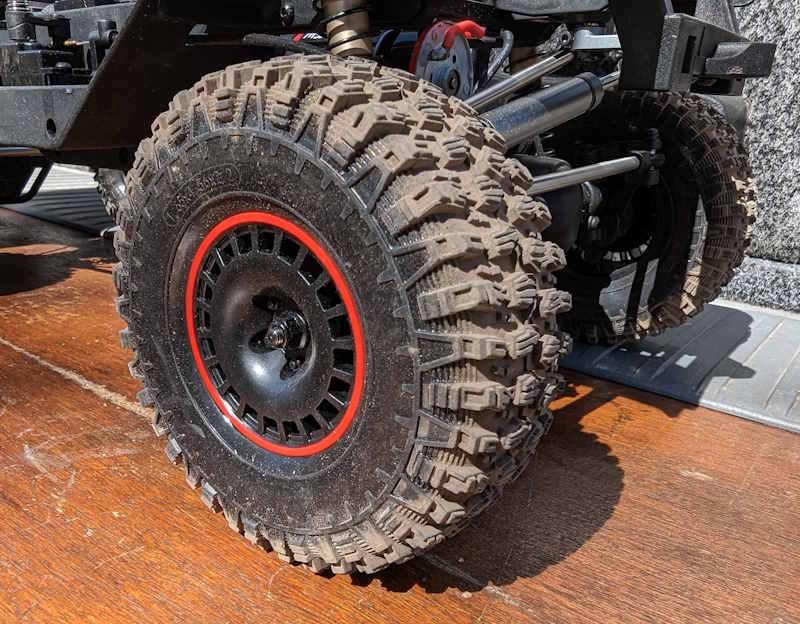
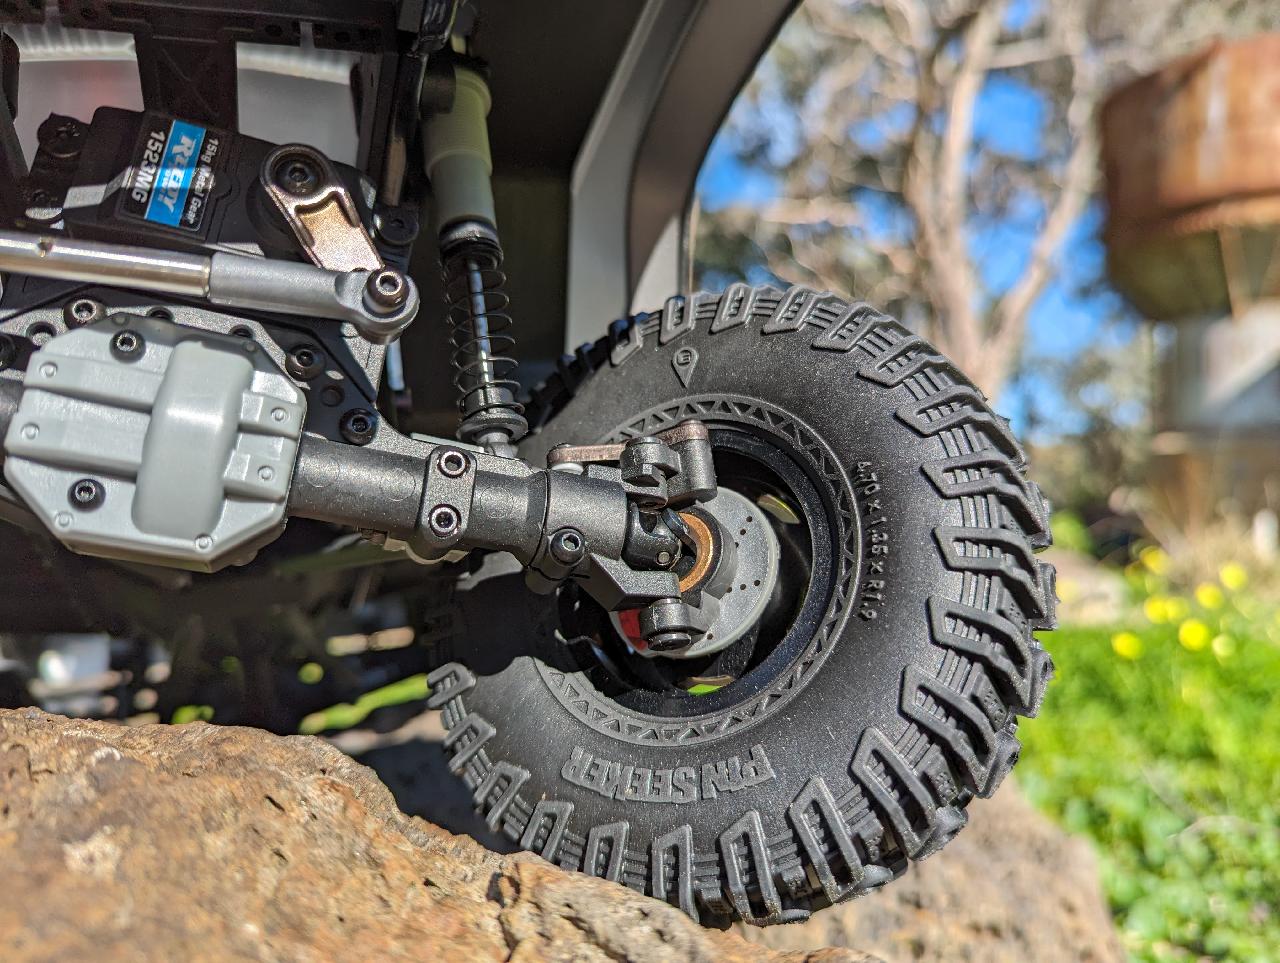
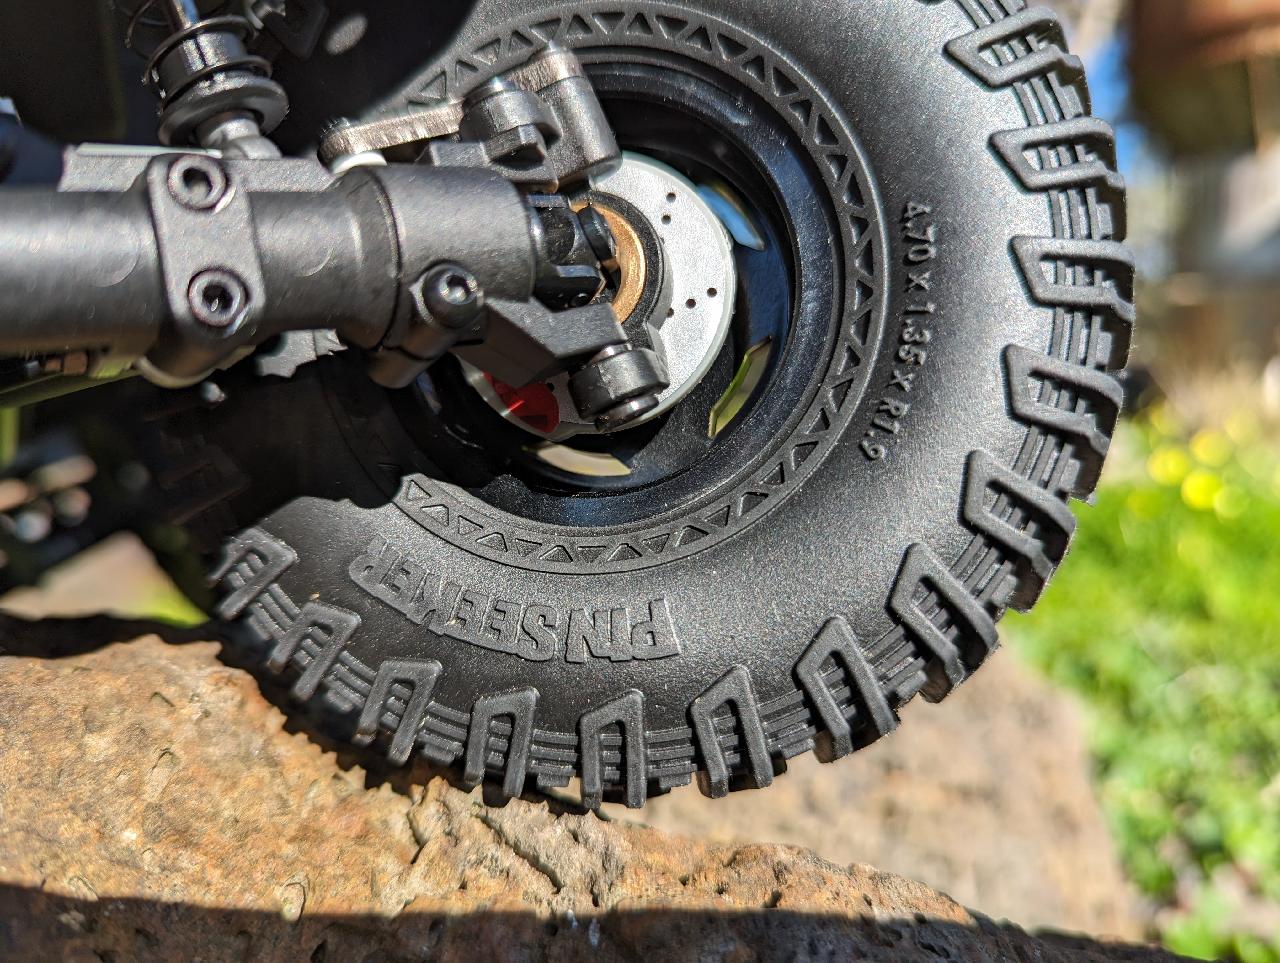
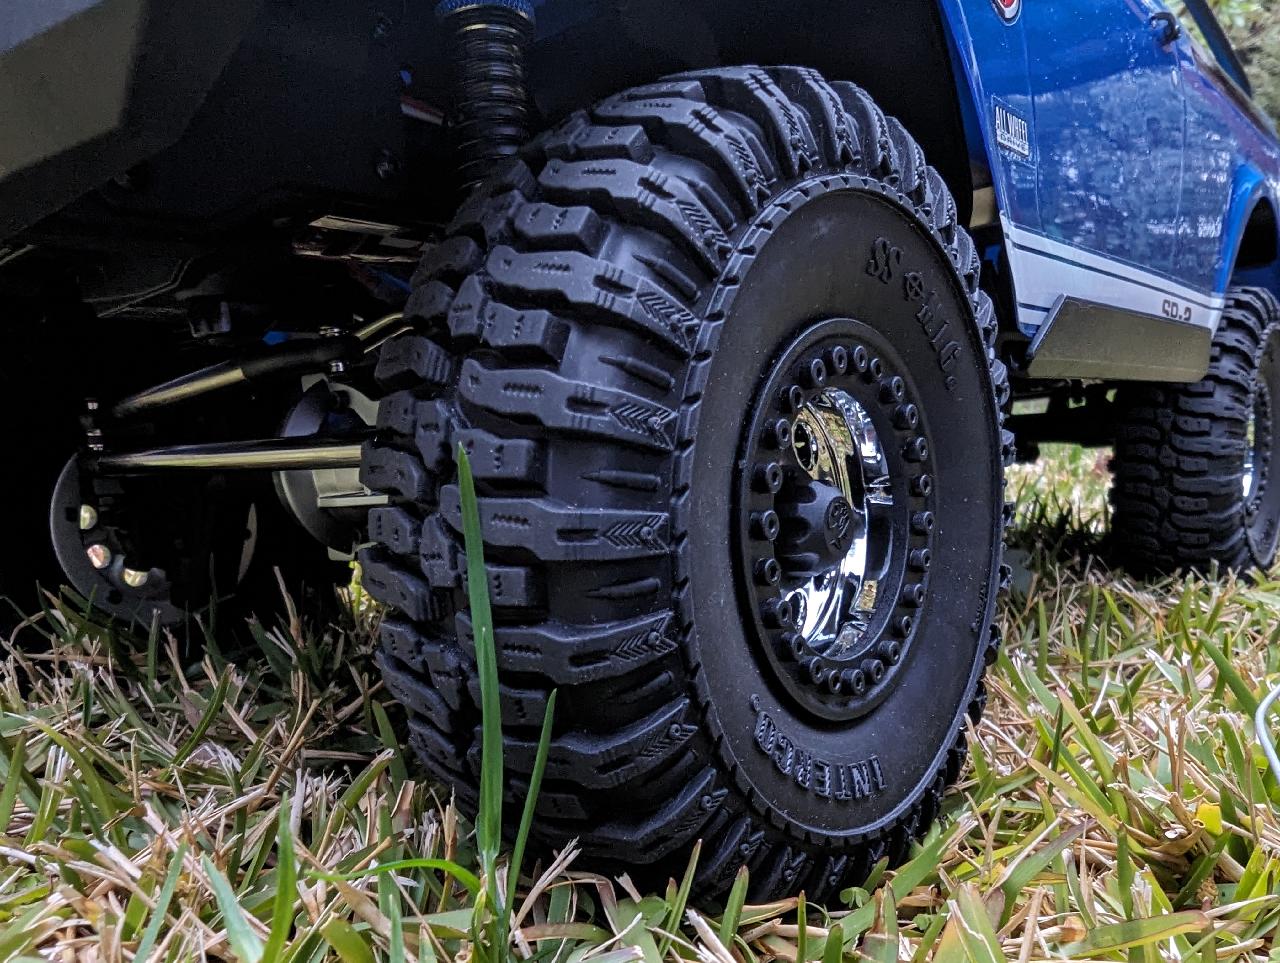
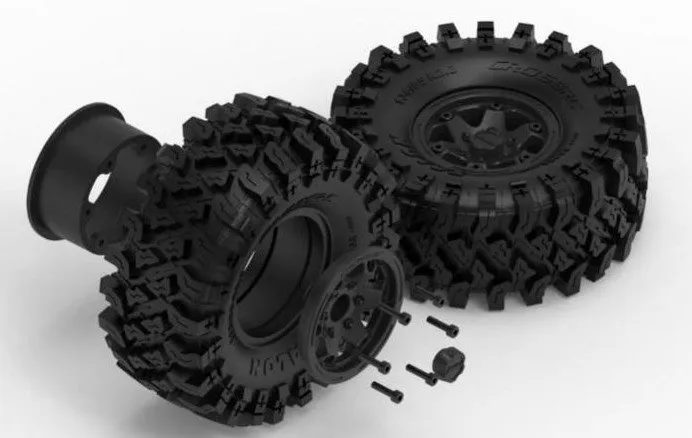
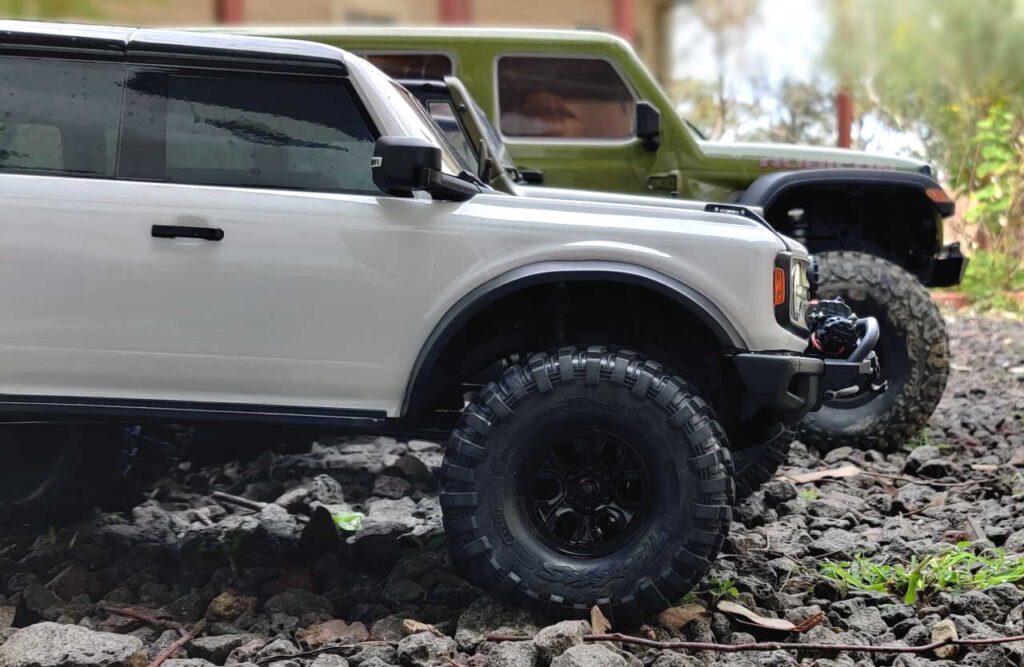
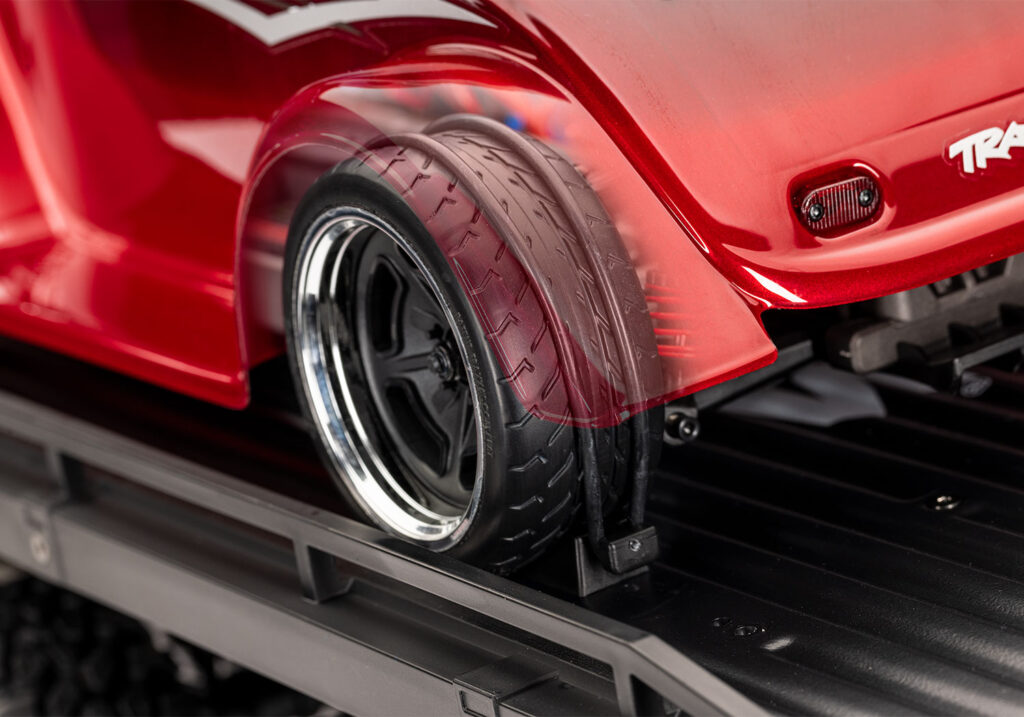
Wheels and Tires
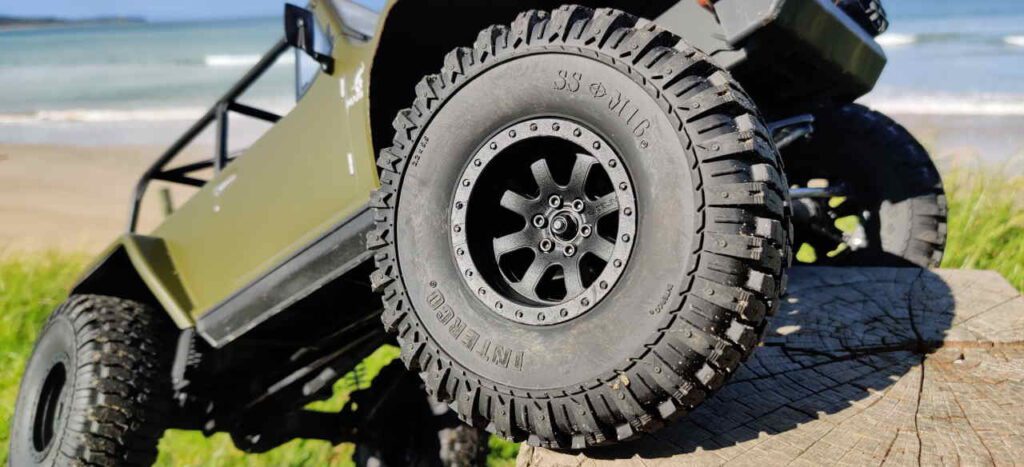
There’s the promise of performance, with vented tires (including foams), and they’re about as large as could reasonably fit under this scale of body. They’d be 43” tires in real life – and on this kind of vehicle, even something like 35” tires are BIG. So, RGT have pushed the performance there as far as they dare. It’s a compromise, scale vs capability, and I think it was the right move to max the diameter out.
They’re glued 4.31″ tires on plastic 1.9″ wheels. However, I do think the tire carcass is too stiff for the weight of this car. The foams feel about right, but the rubber in the tires is either too thick or too rigid, and to my feel, they don’t bend enough around rocks. Traction is lost that the car really needs. We’ll get to this shortly.

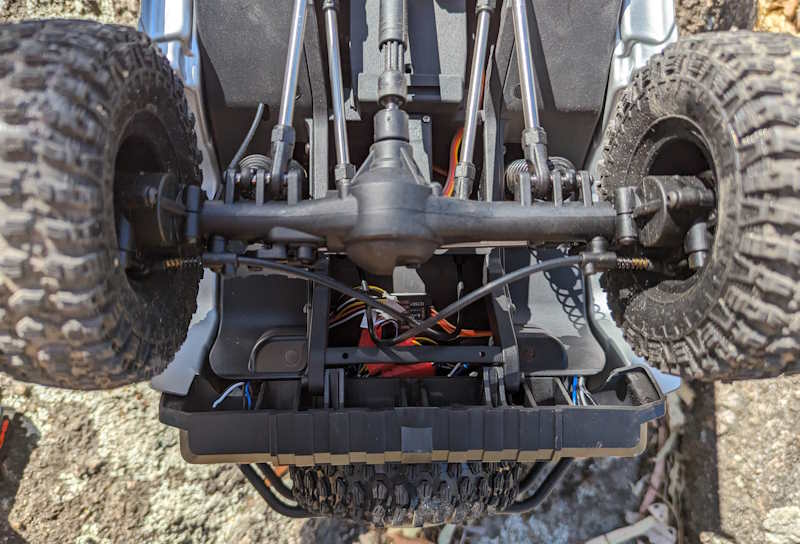
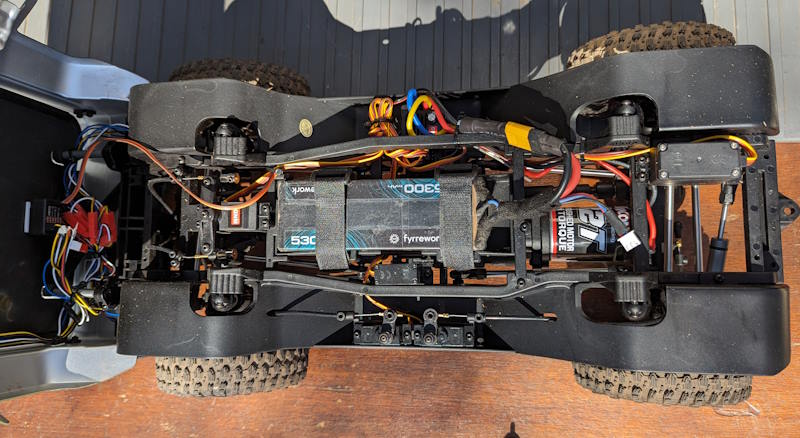
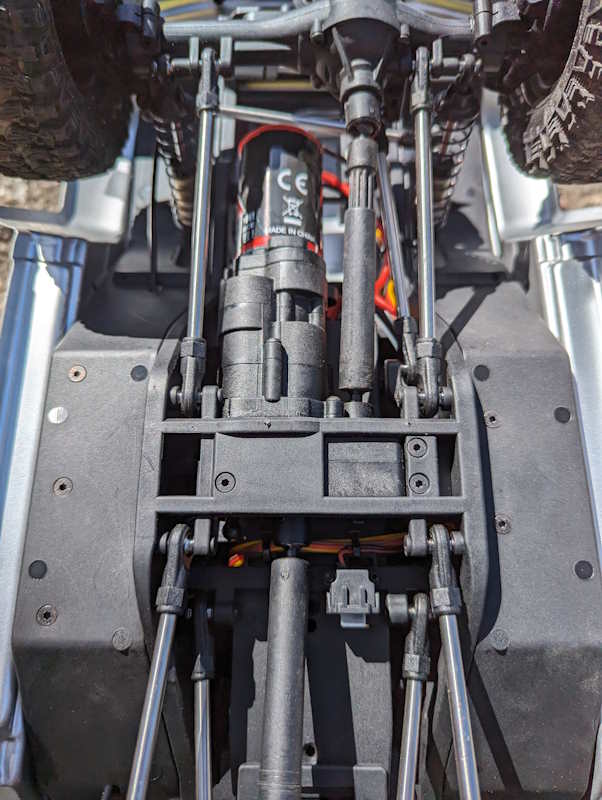
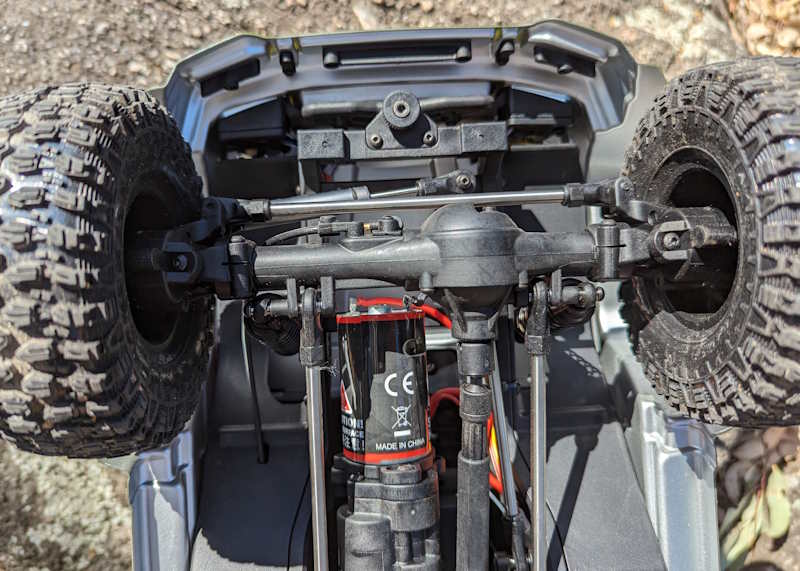
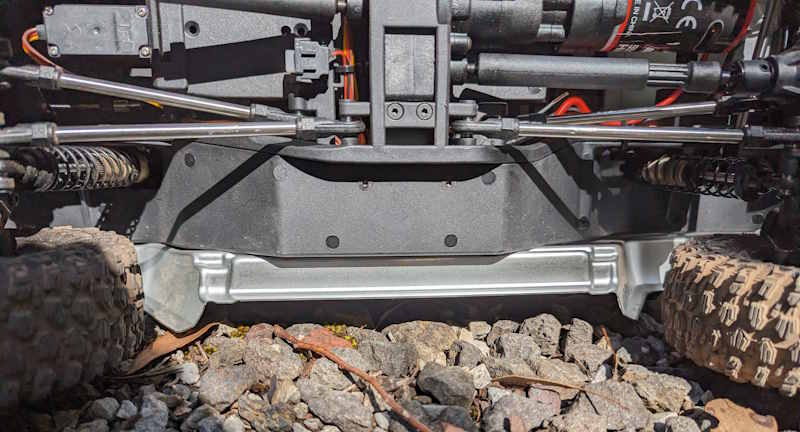
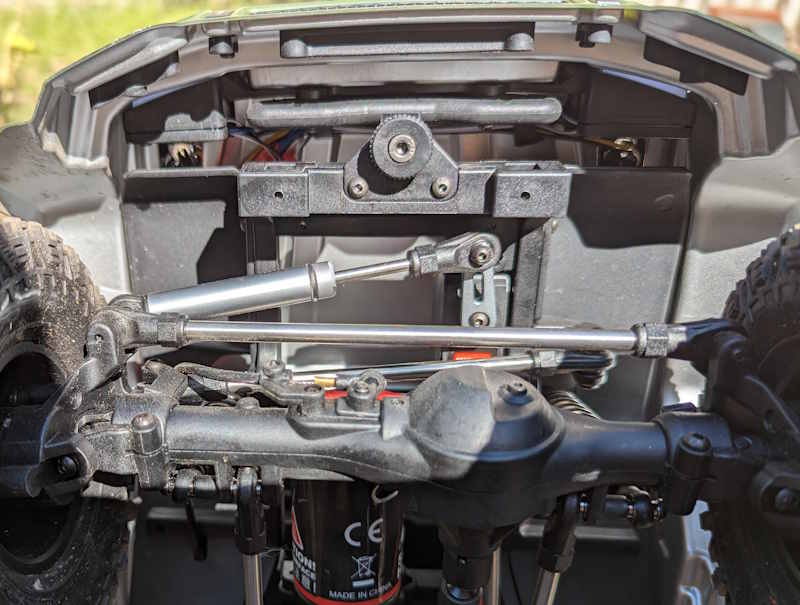
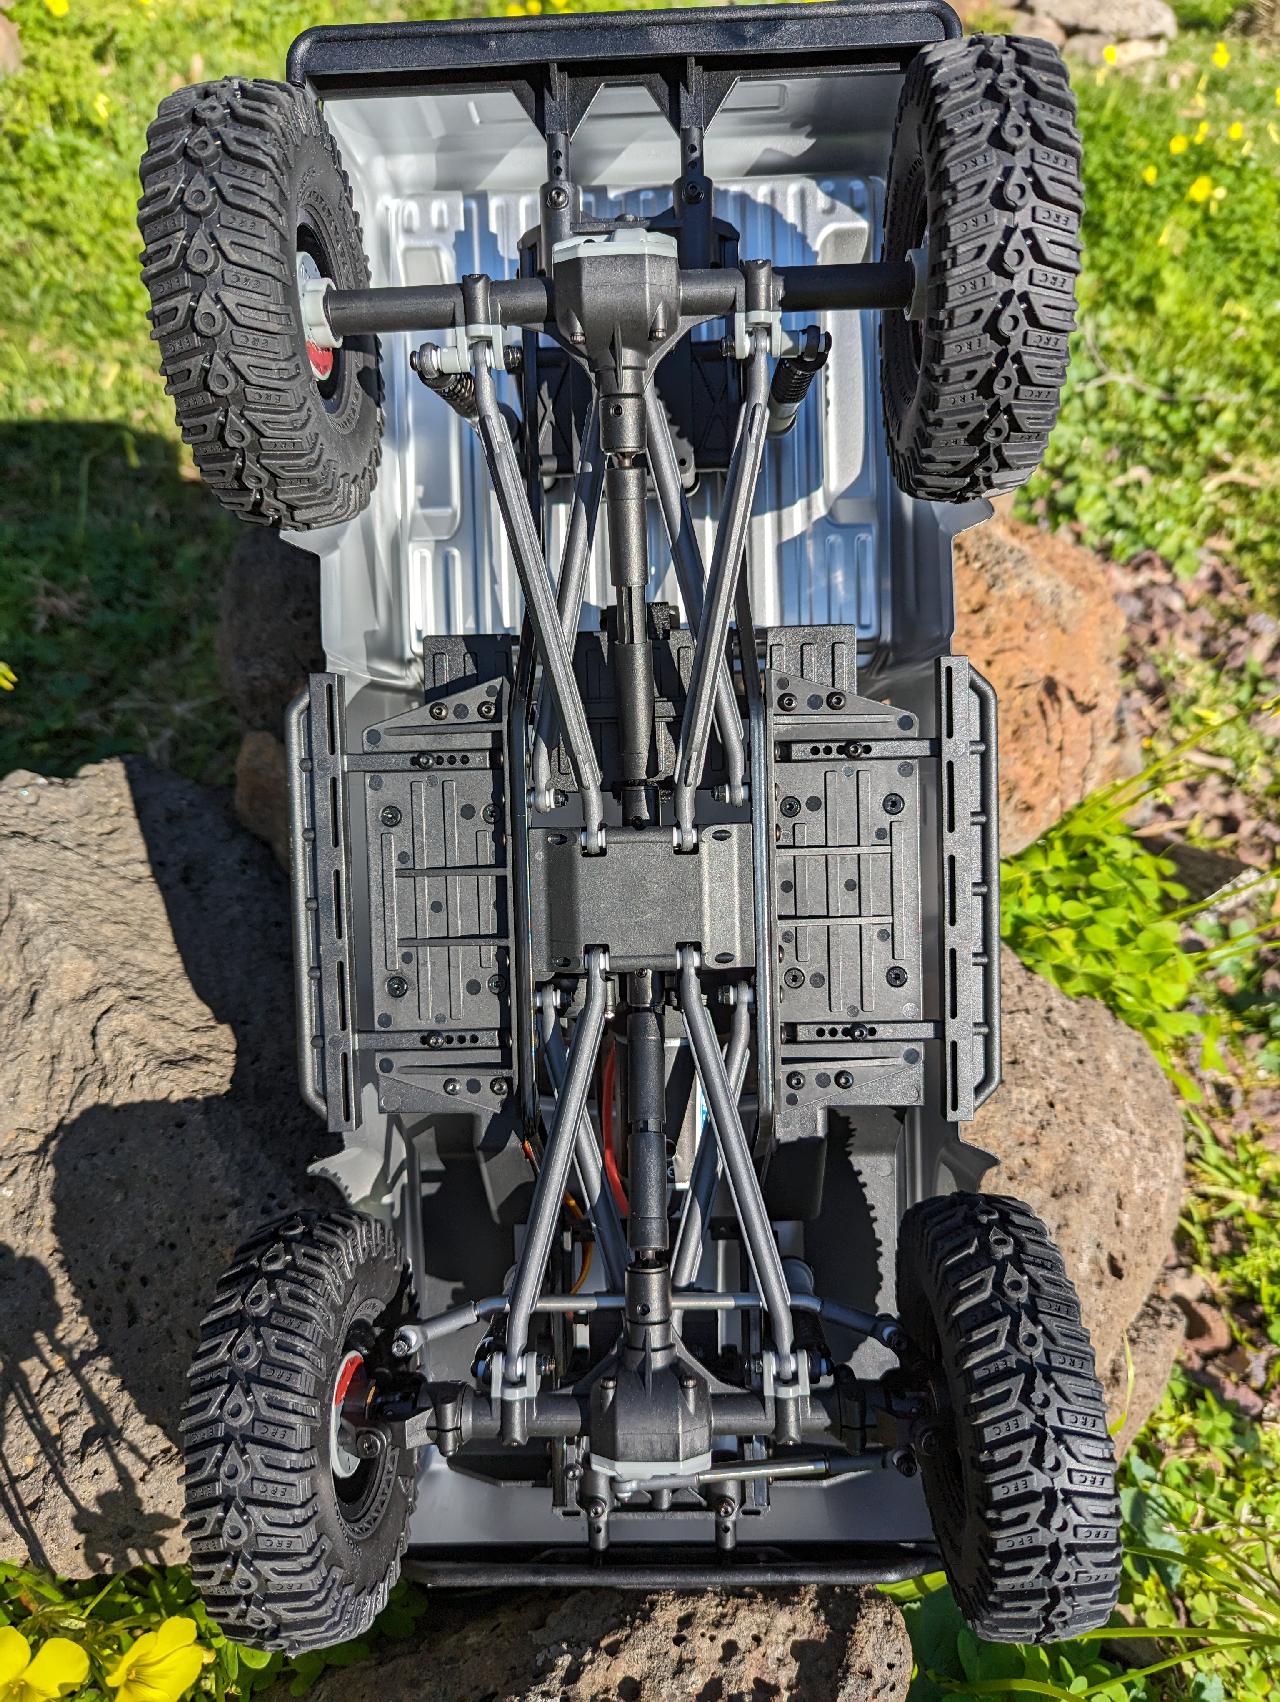
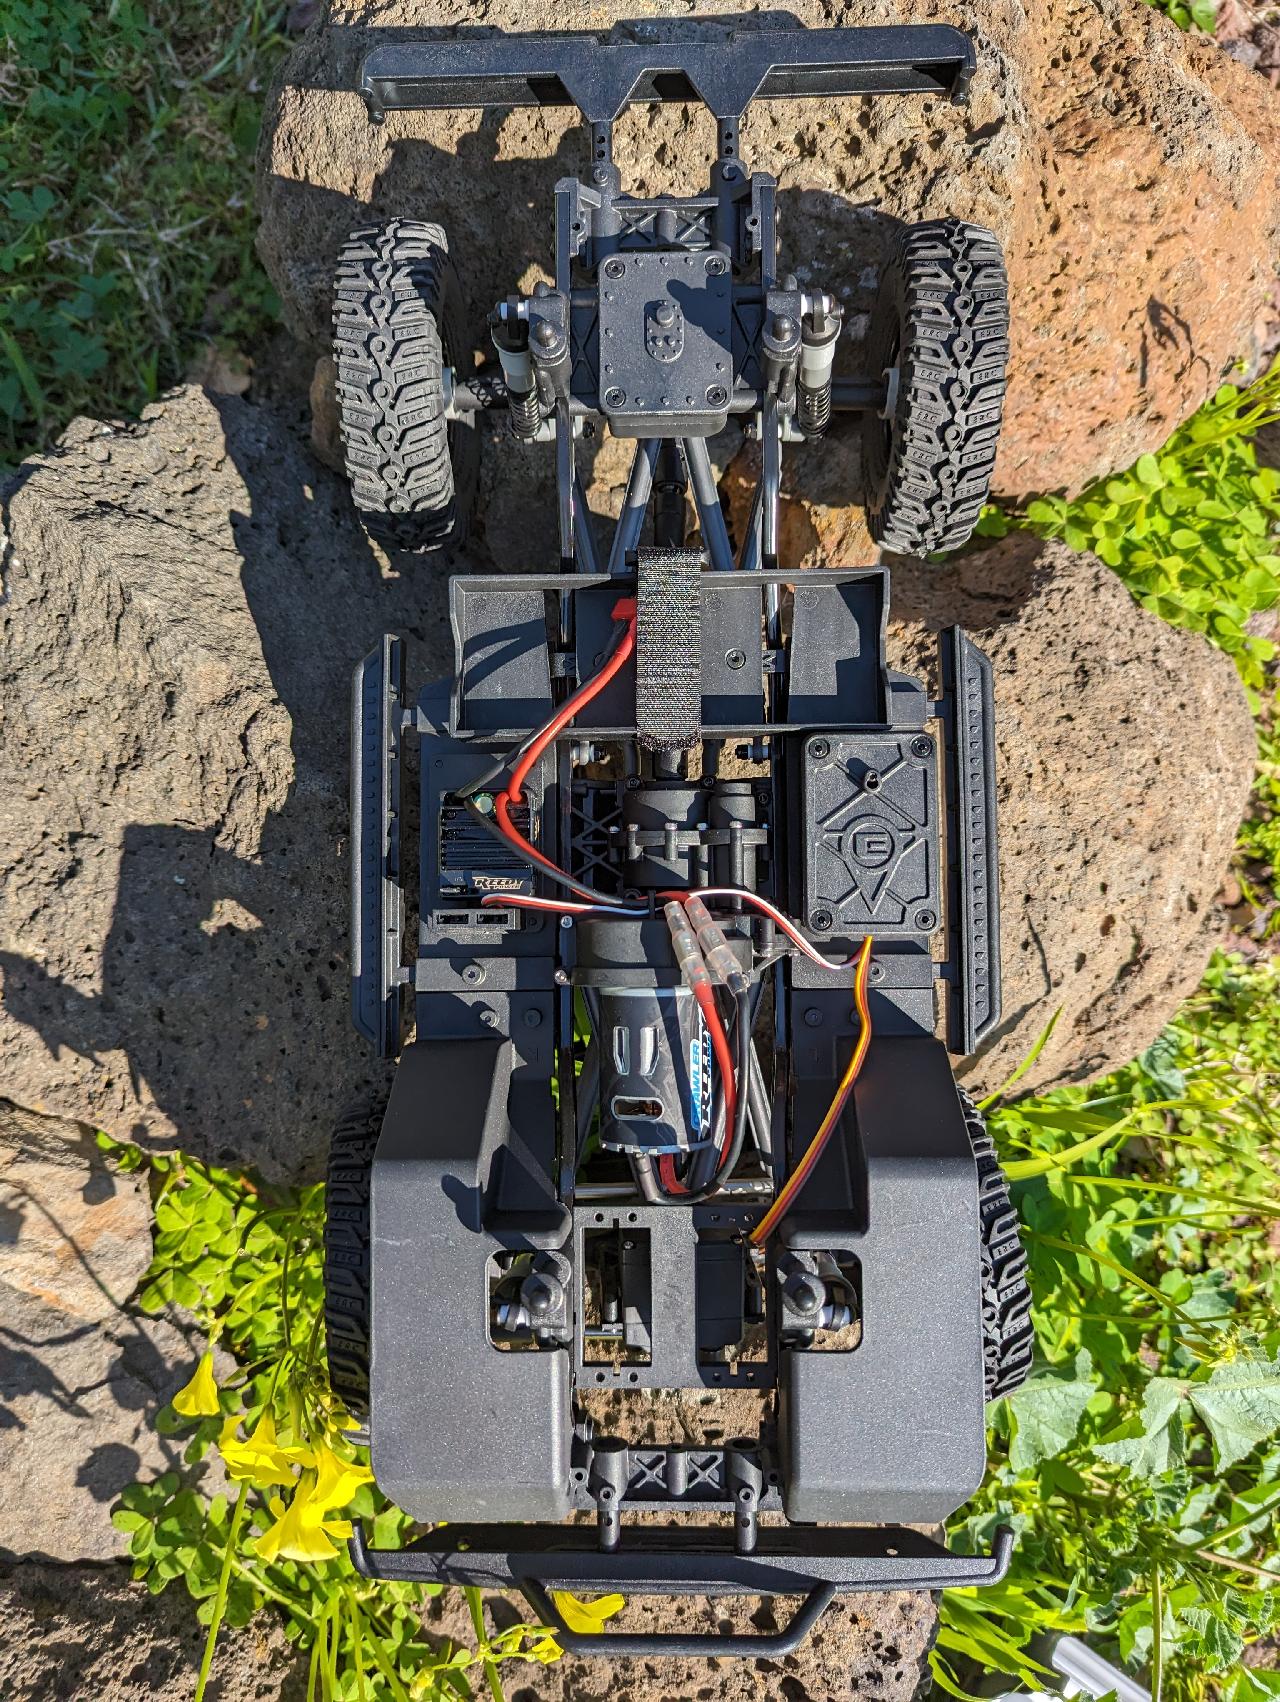
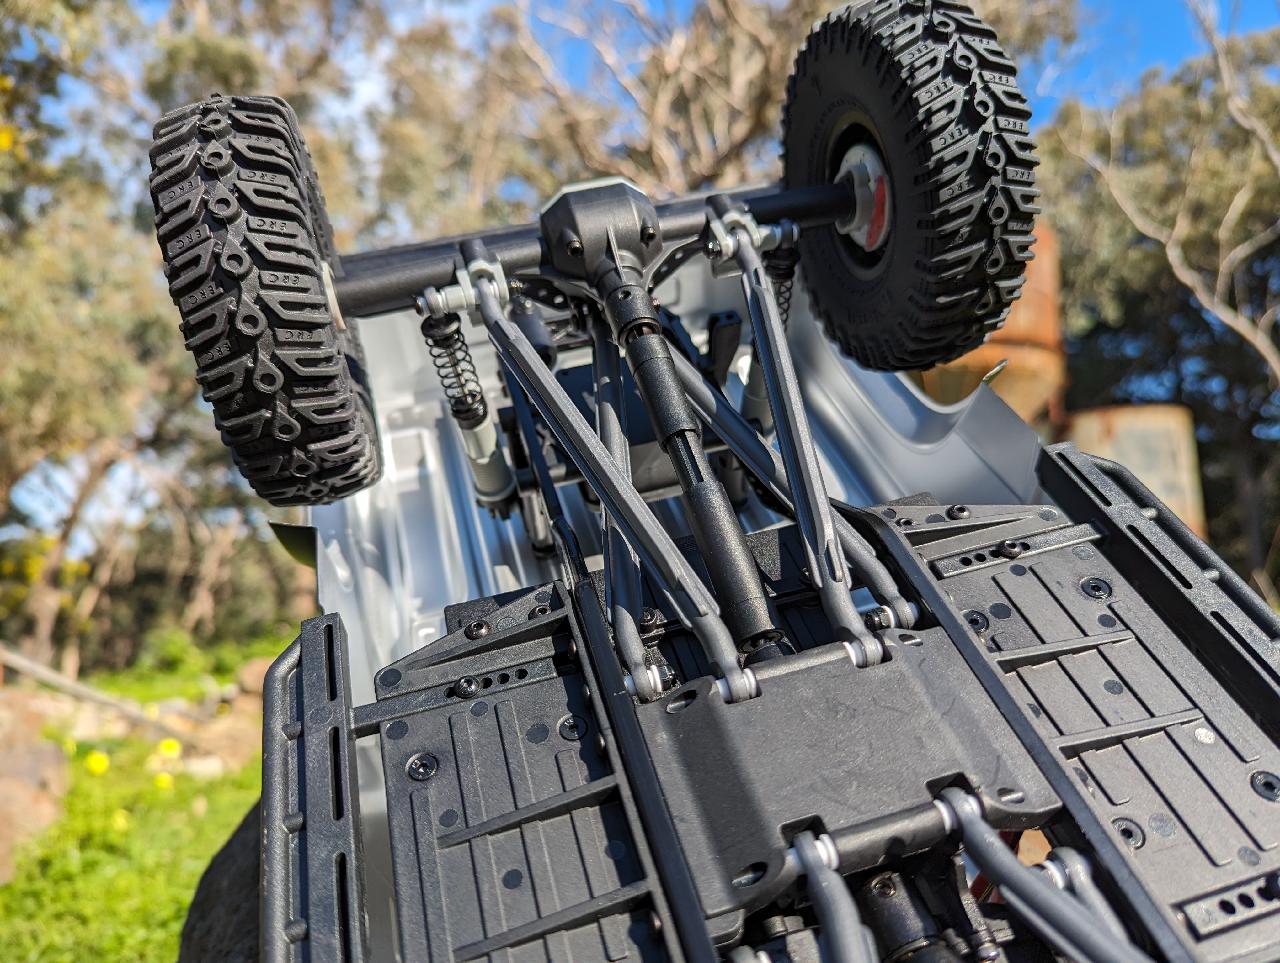
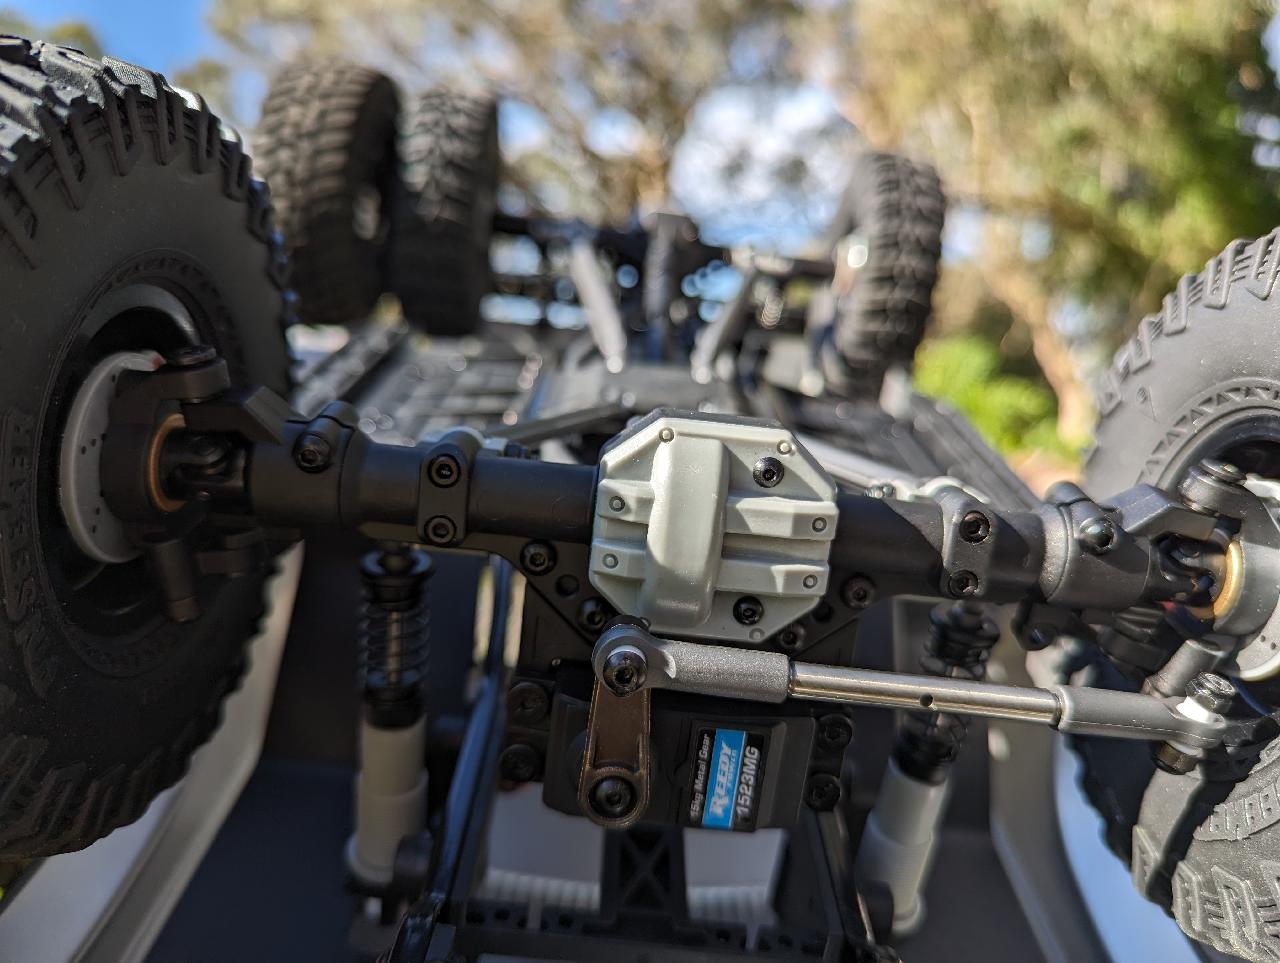
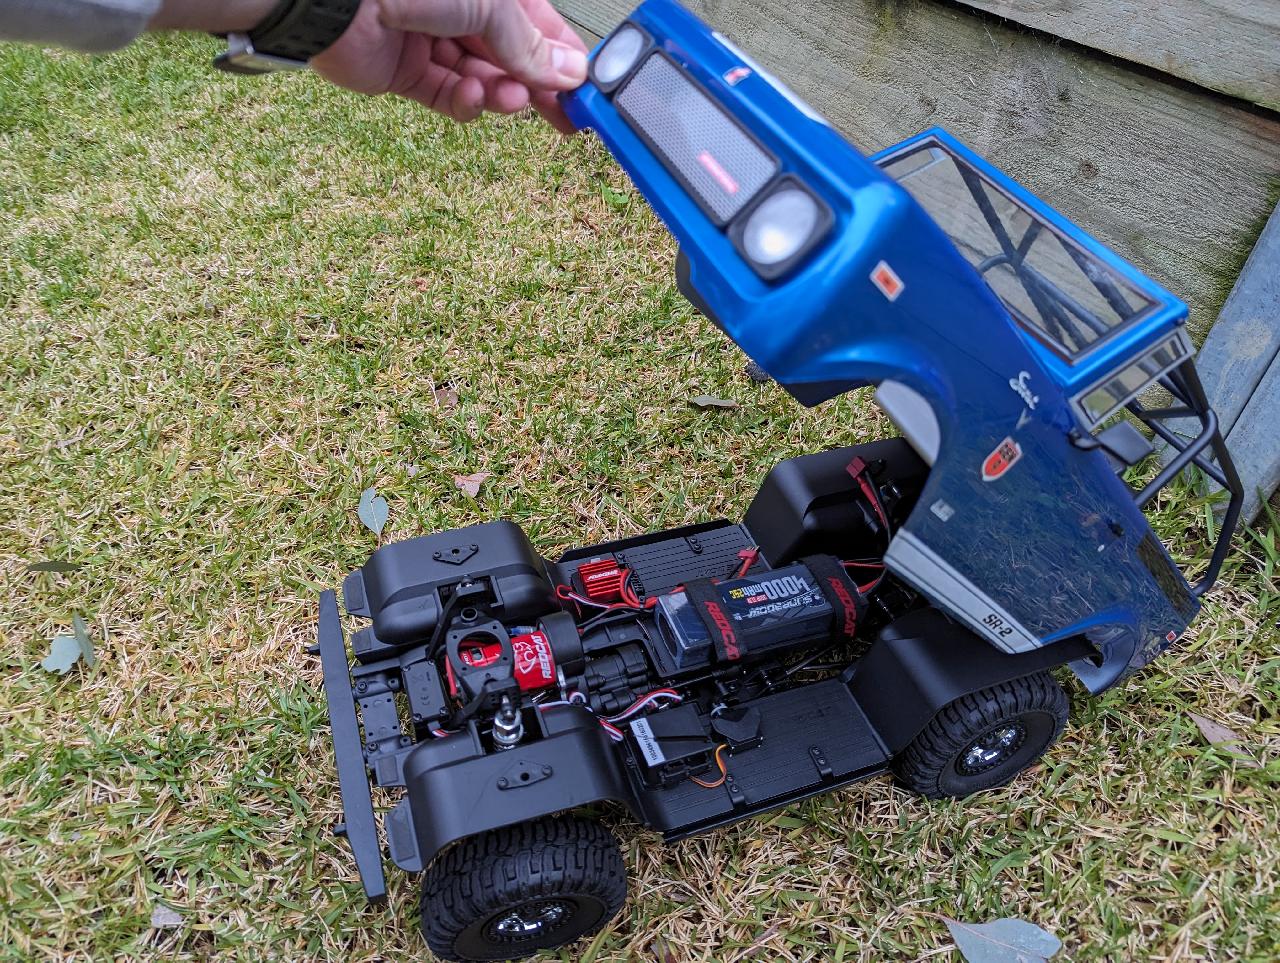
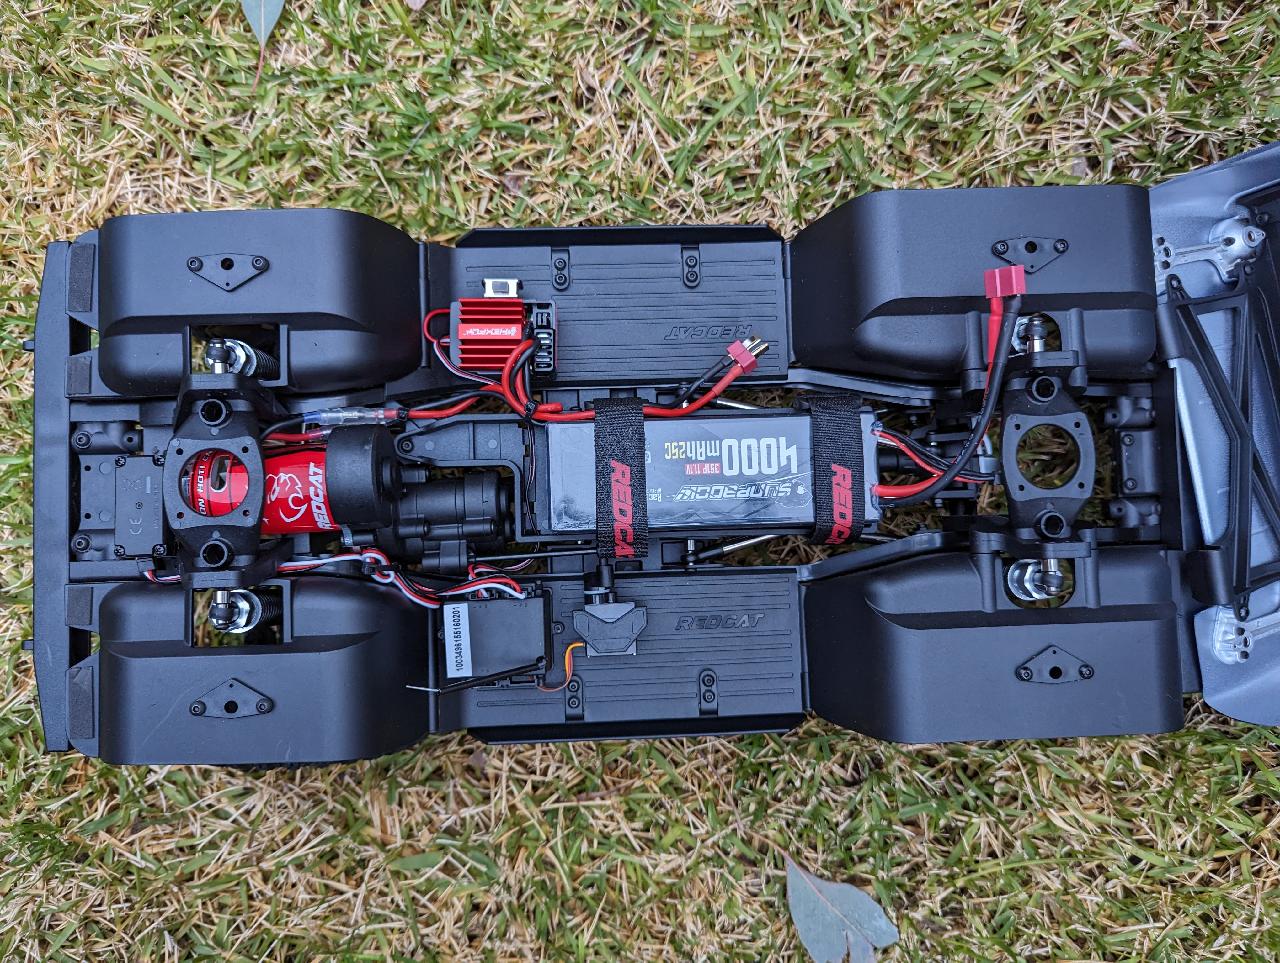
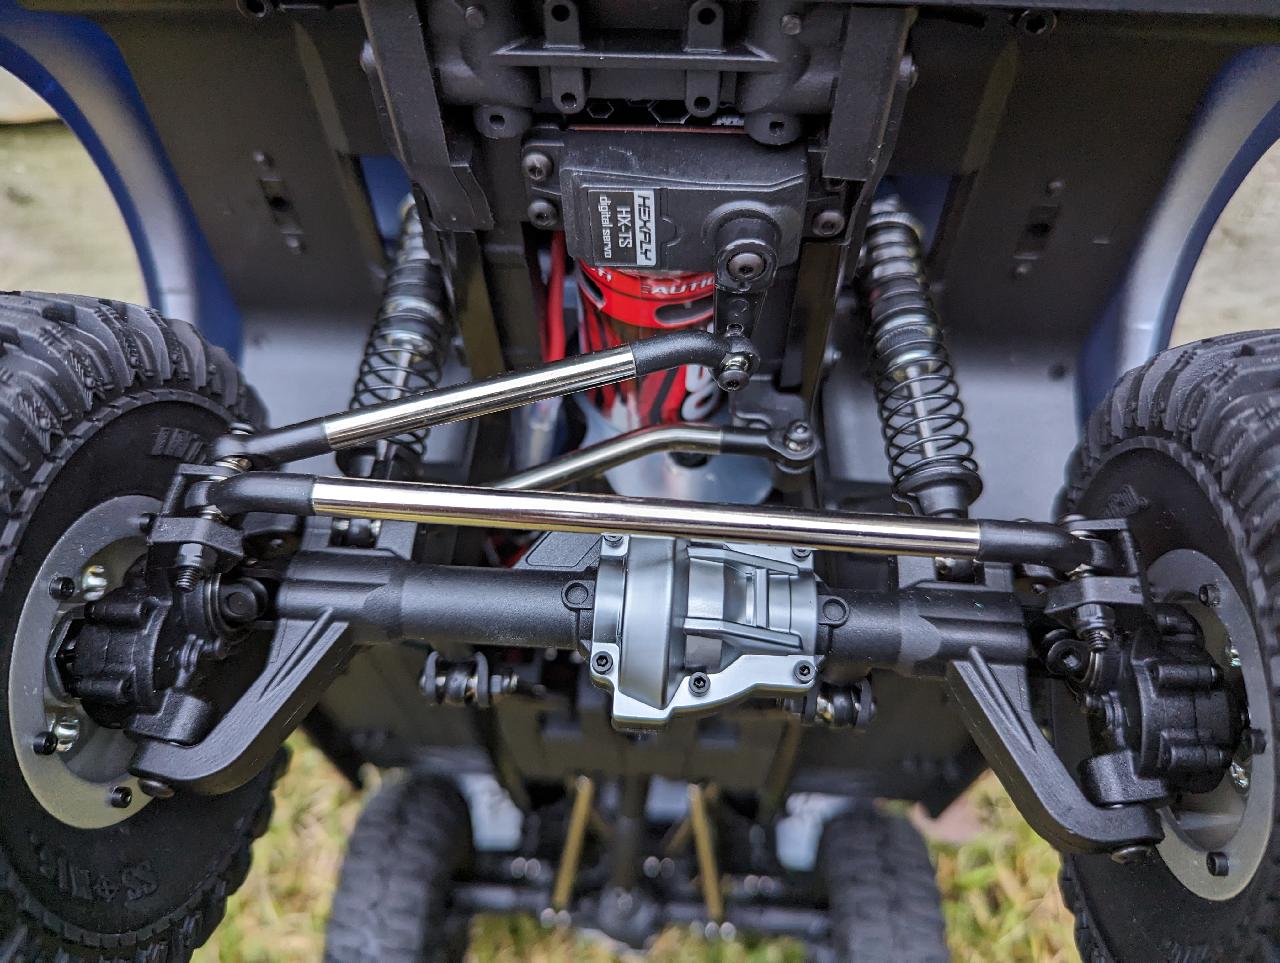
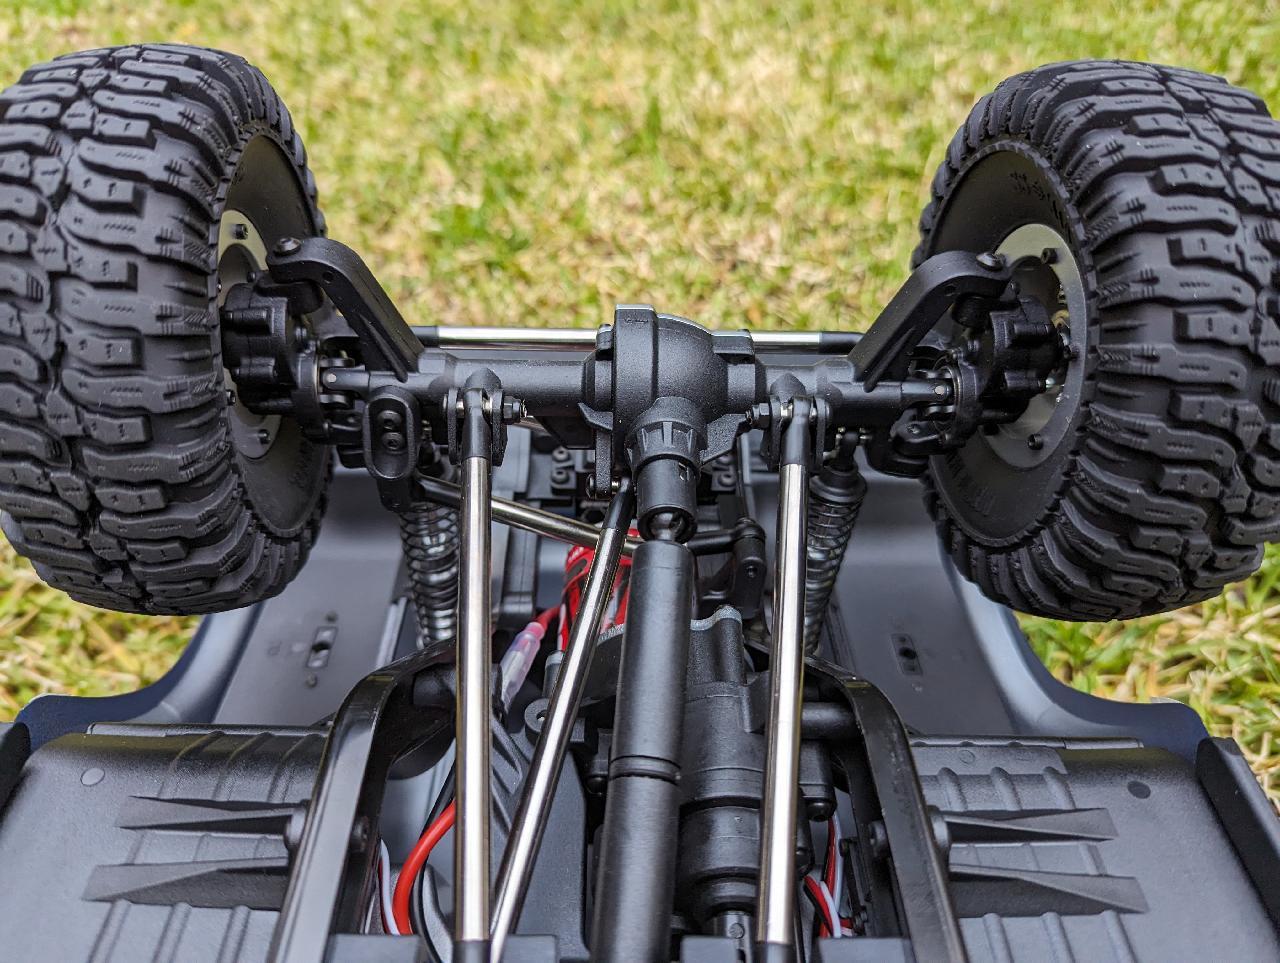
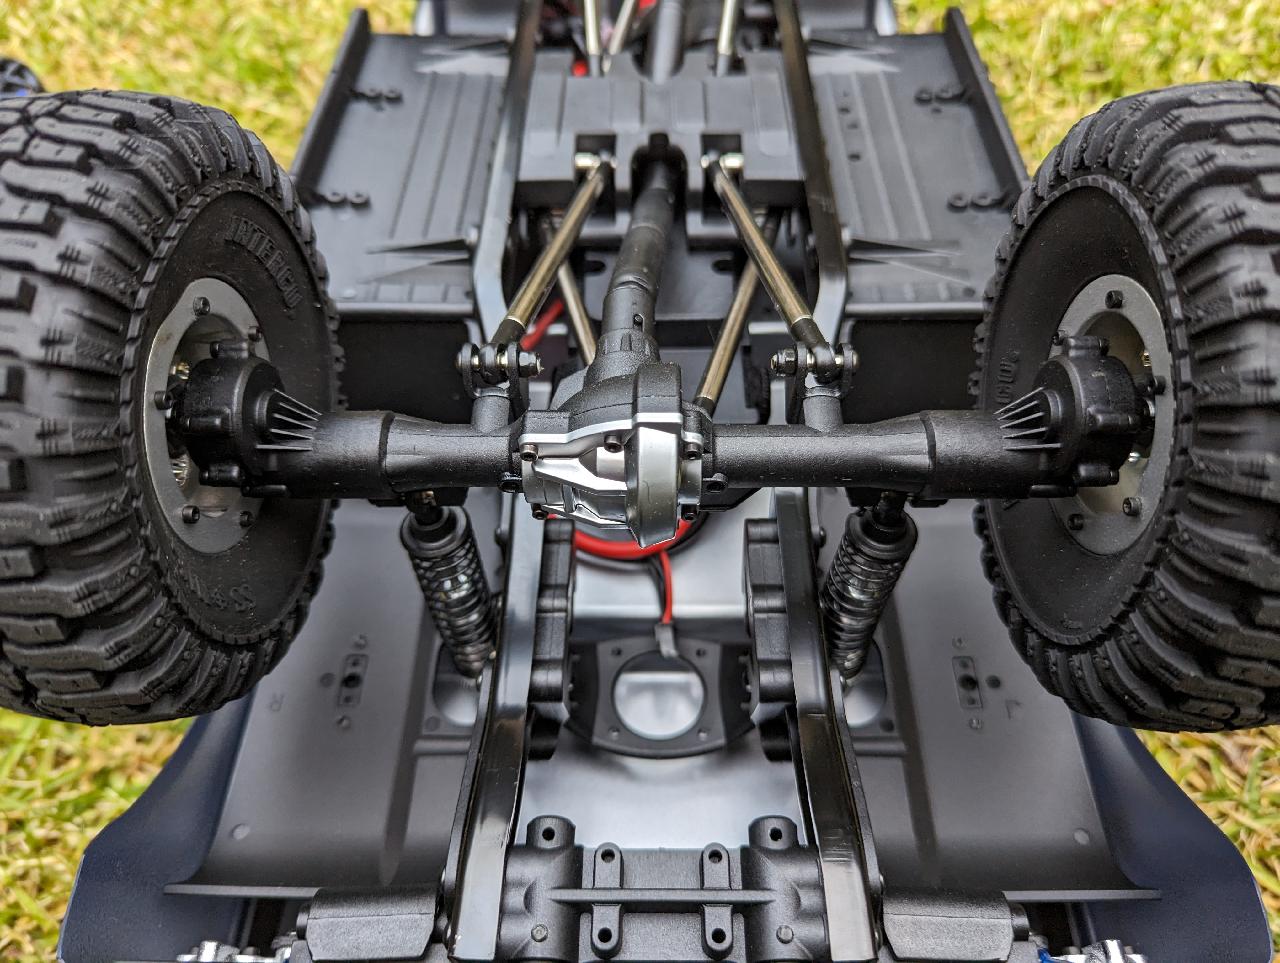
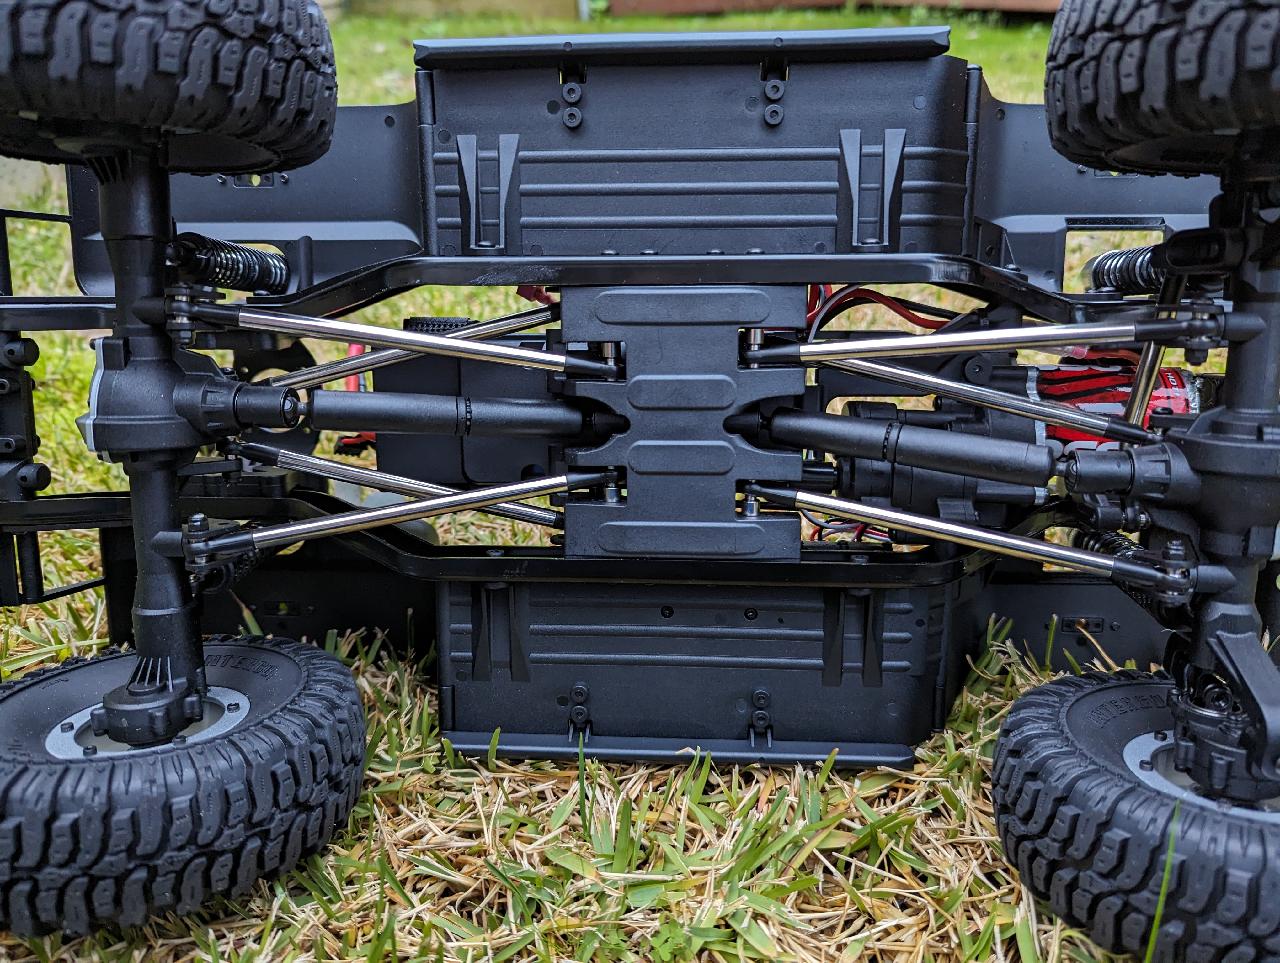
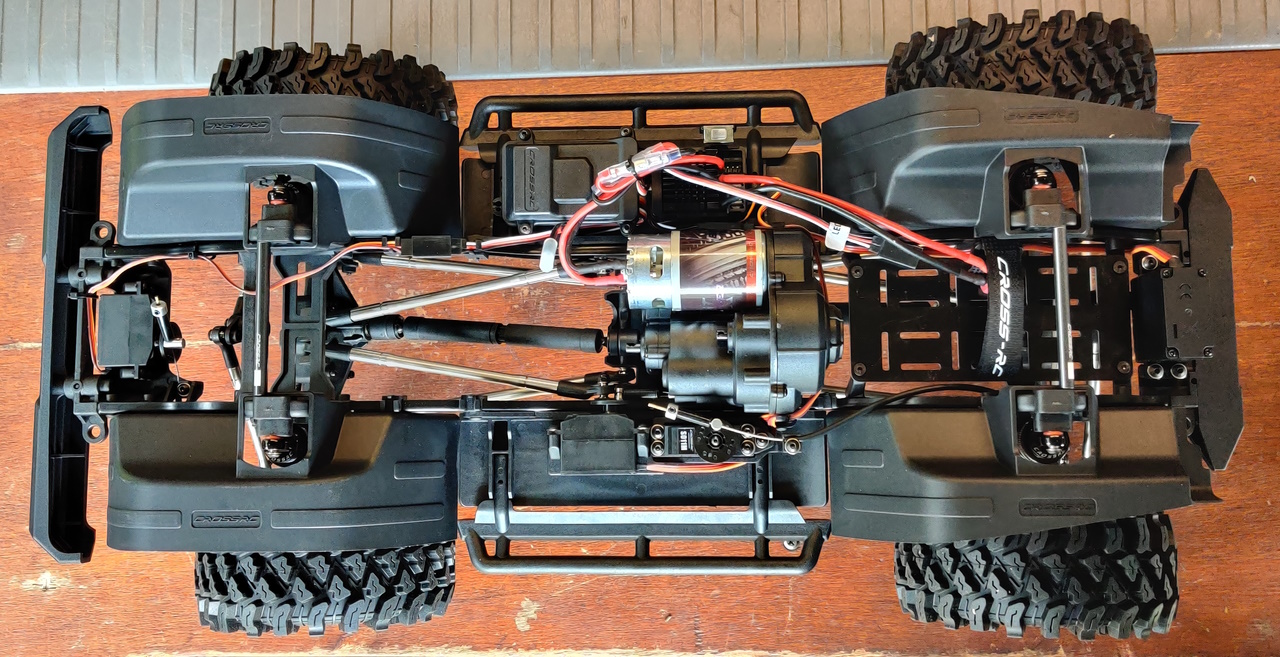
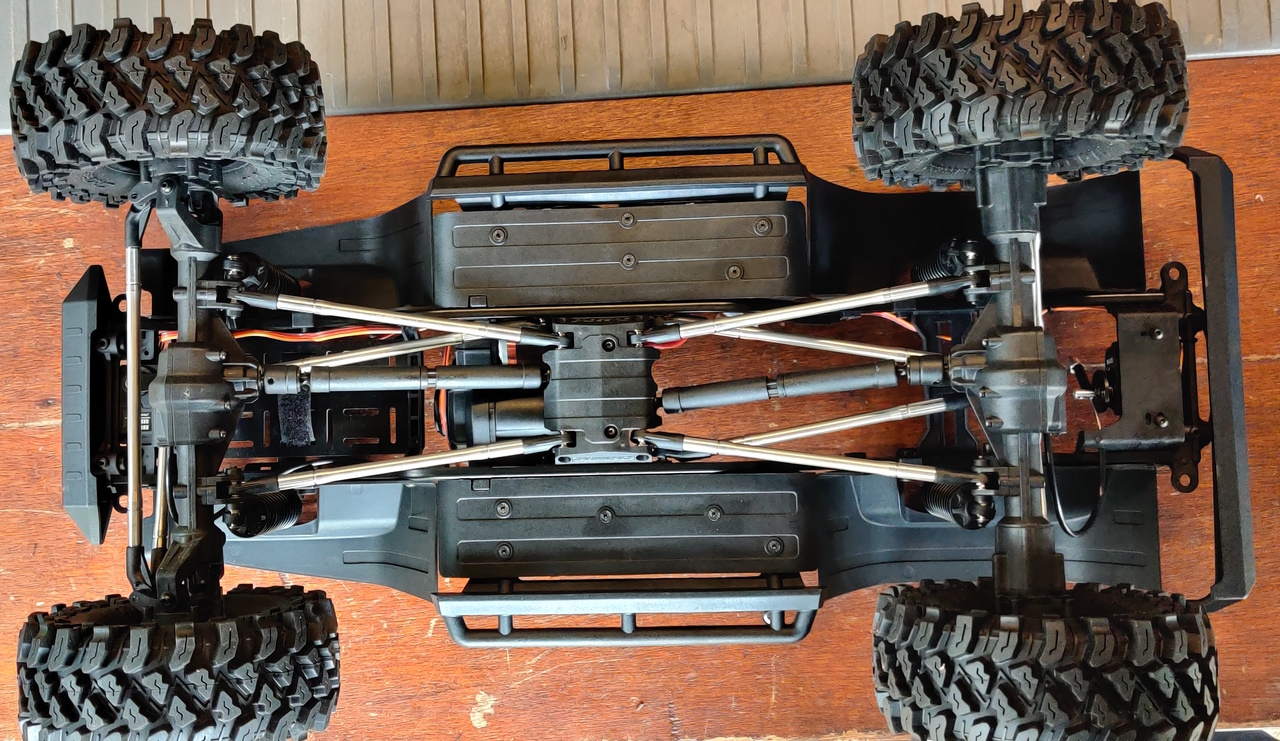
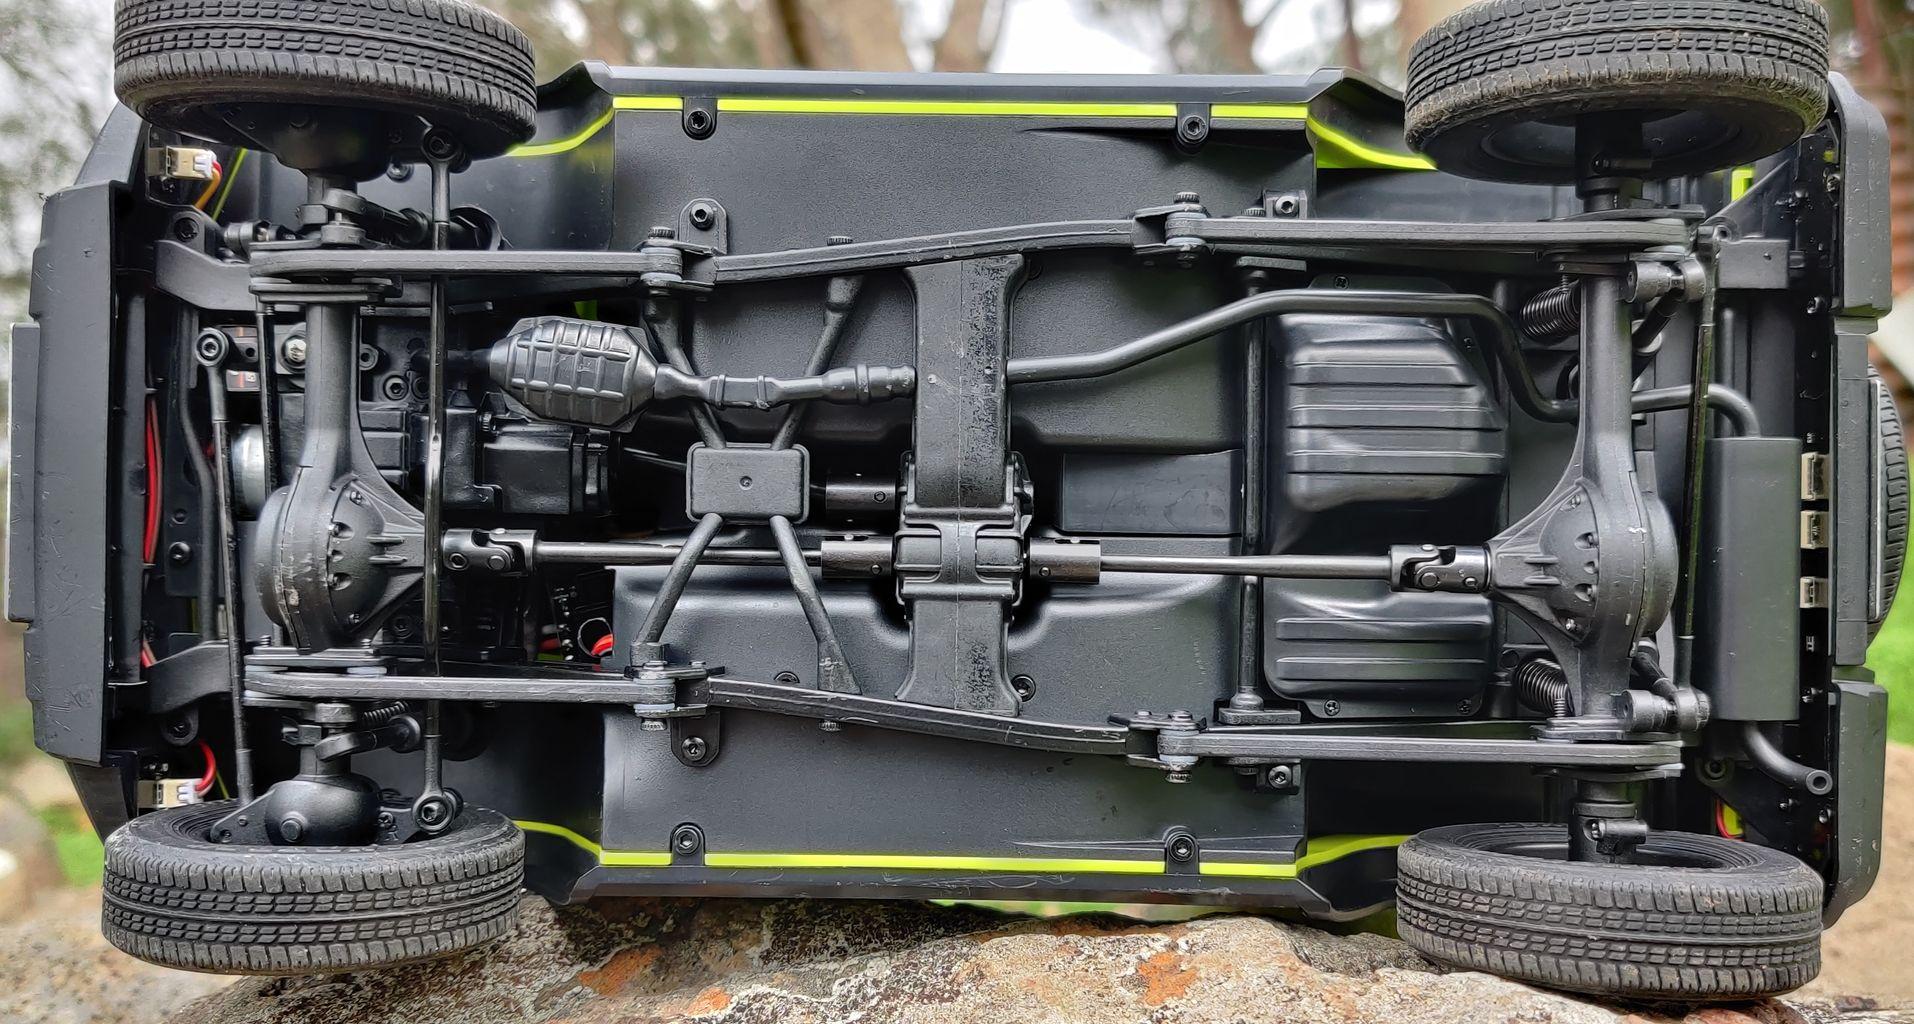
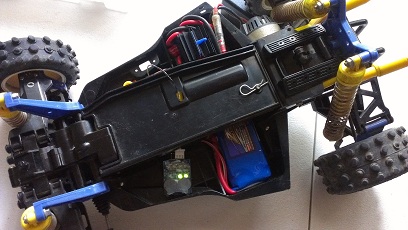
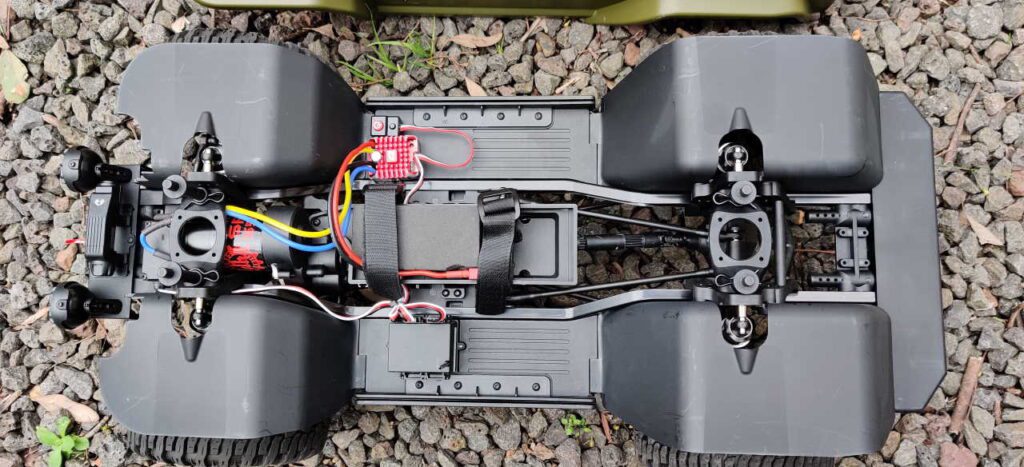
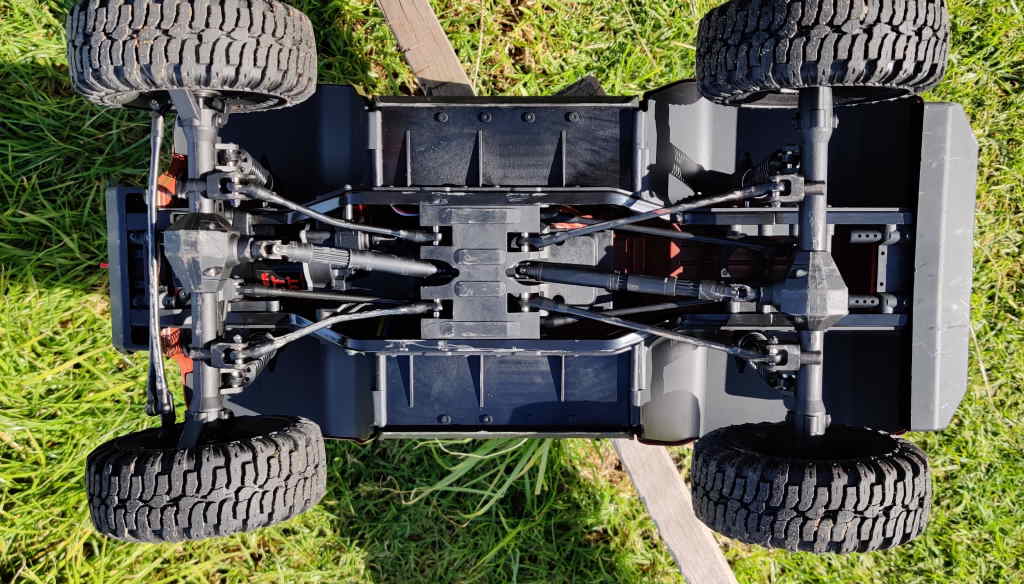
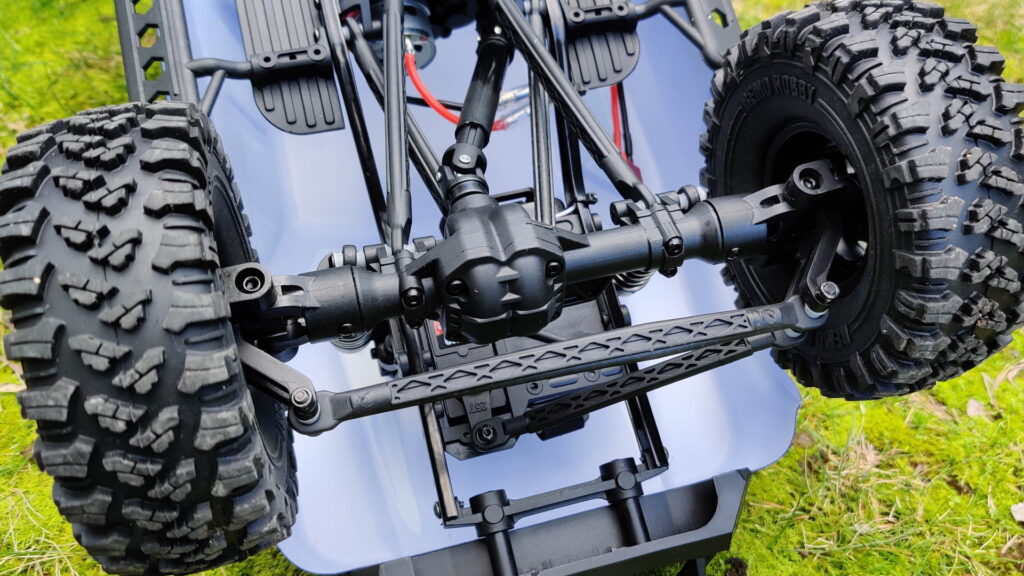
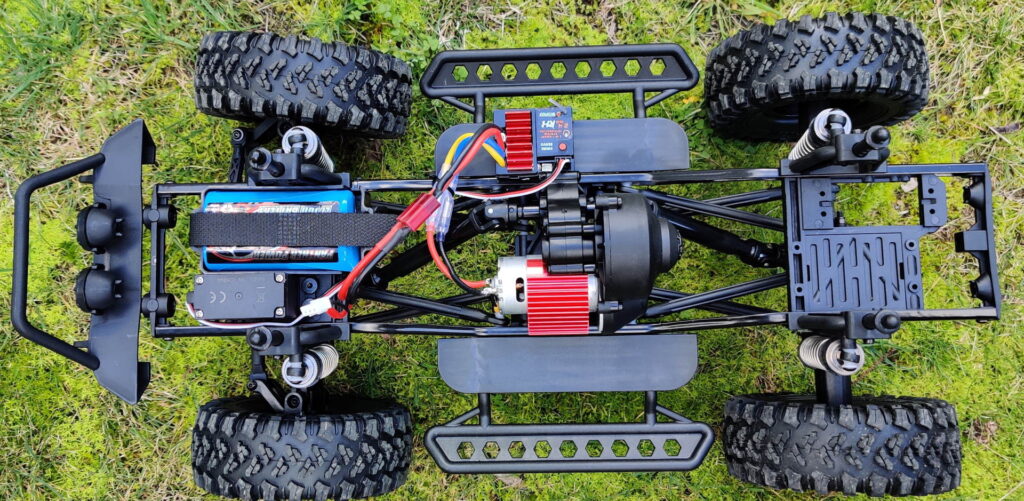
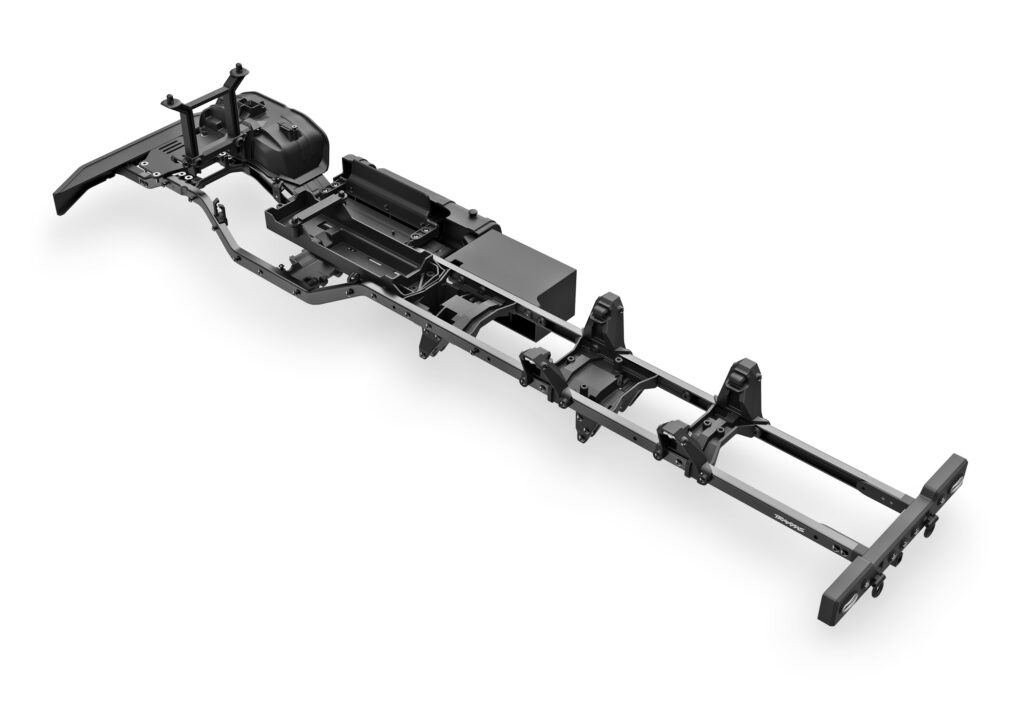
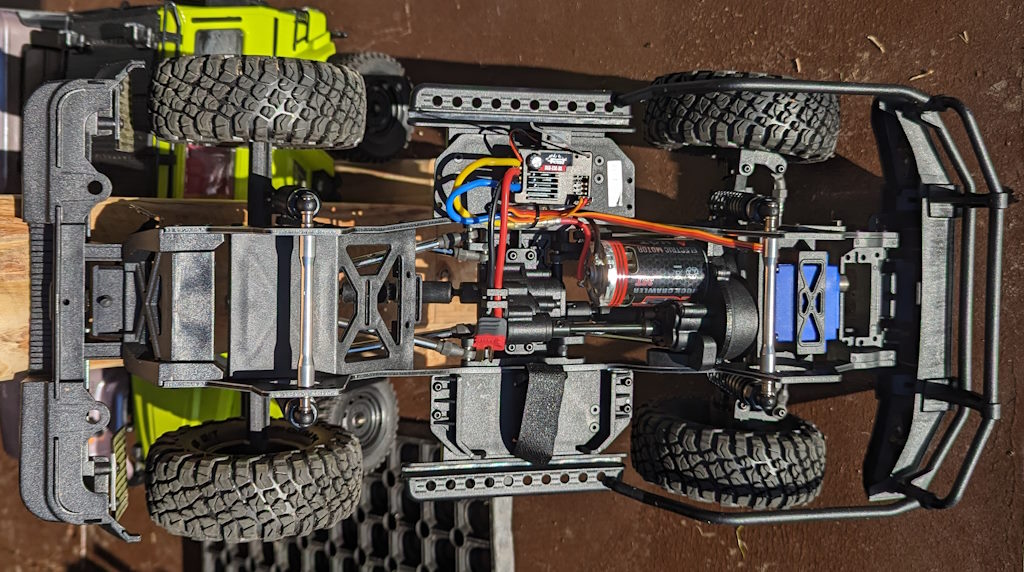
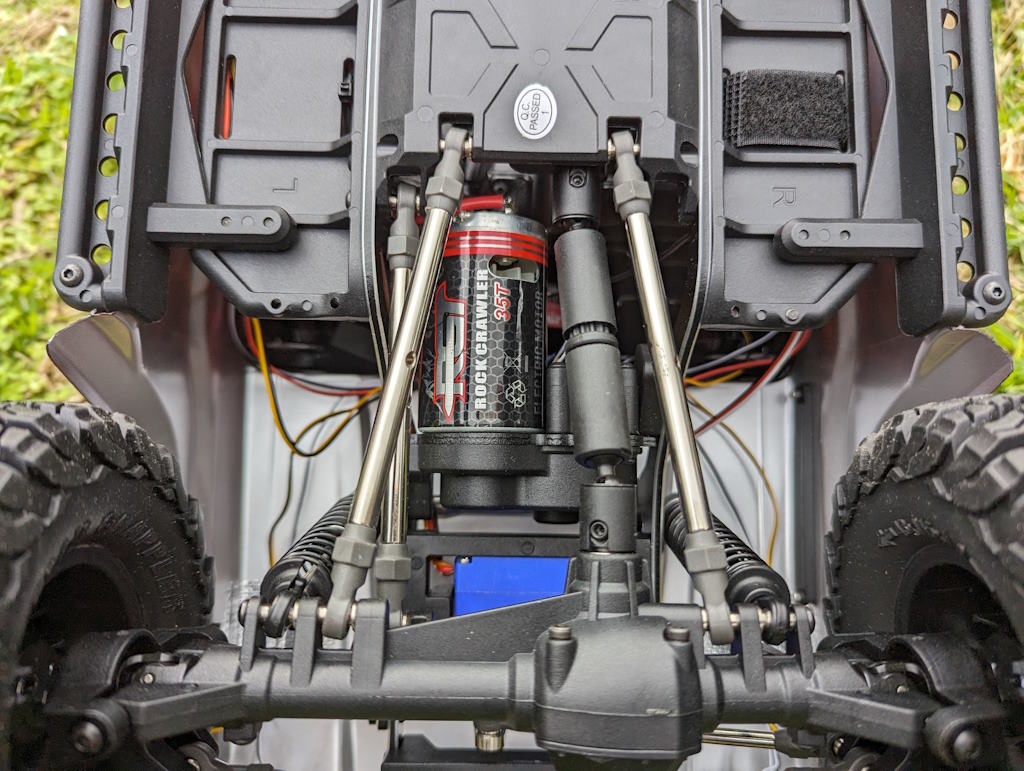
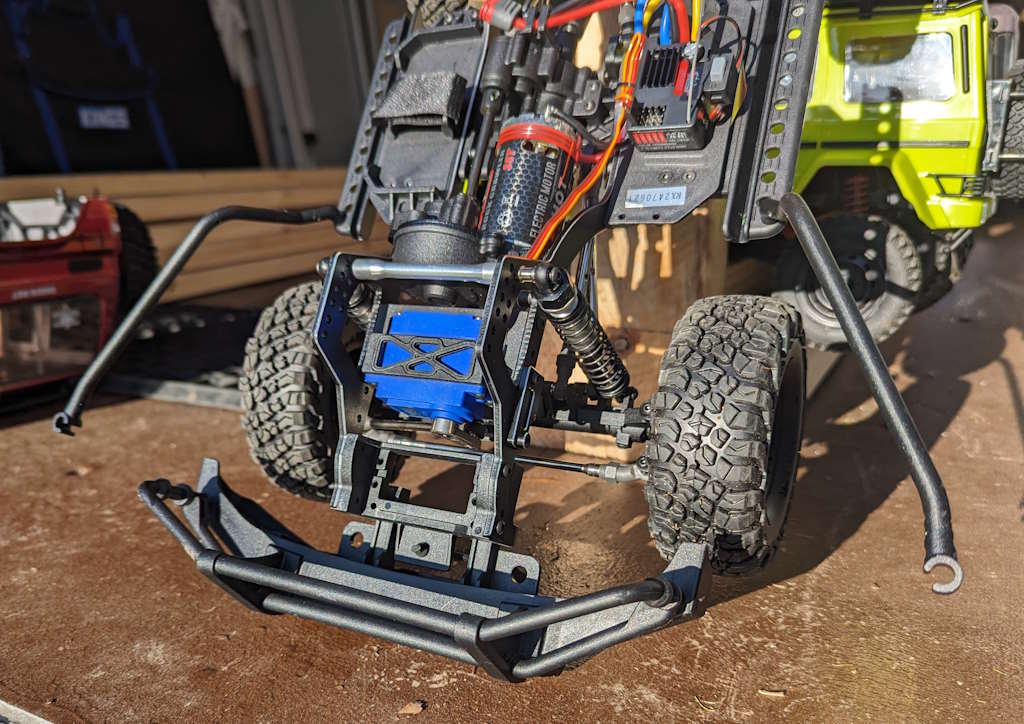
Chassis and Links
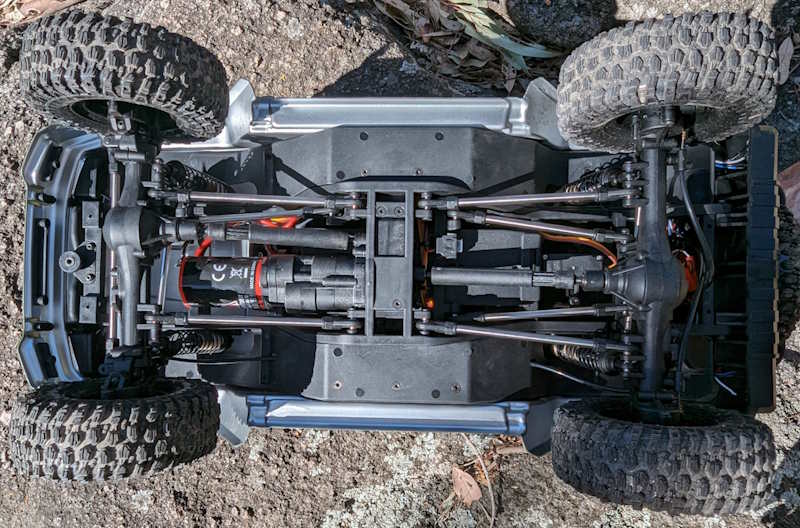
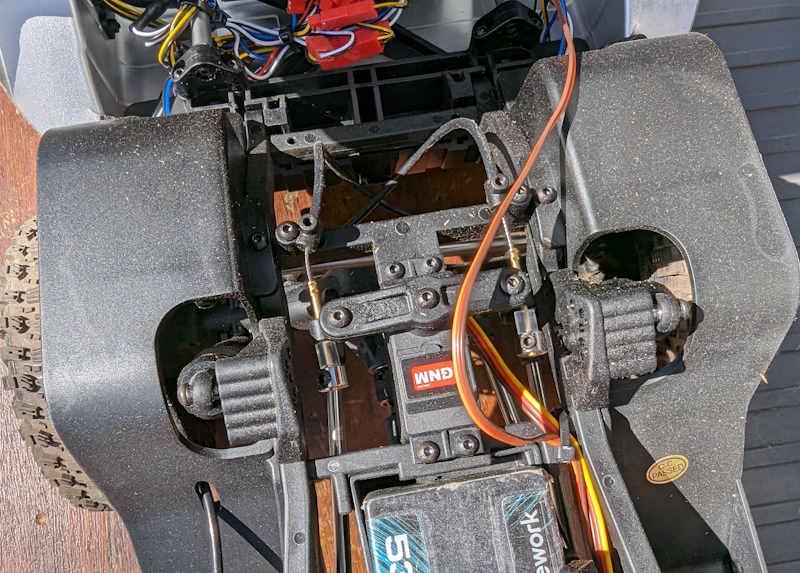
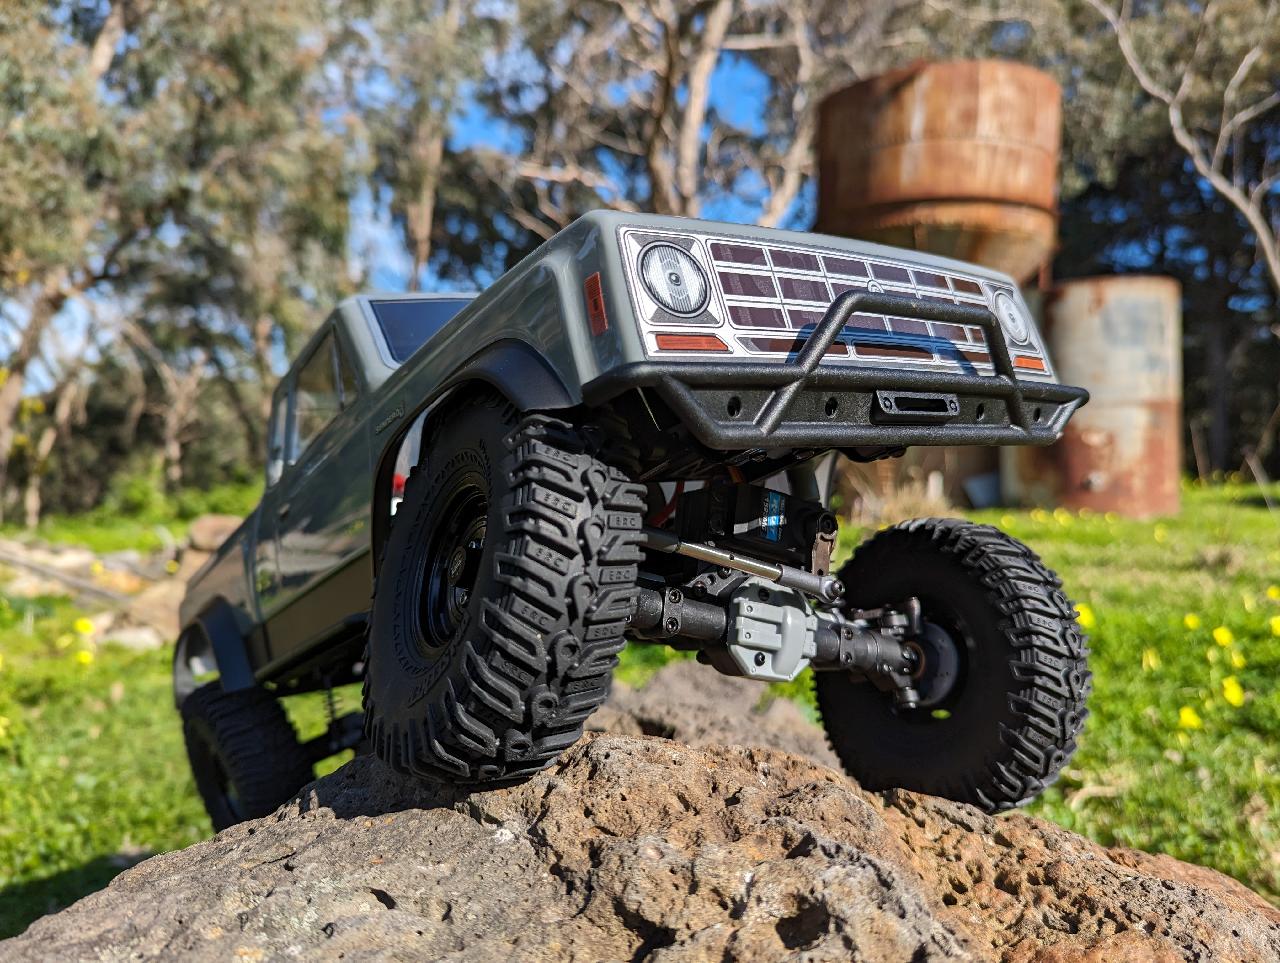
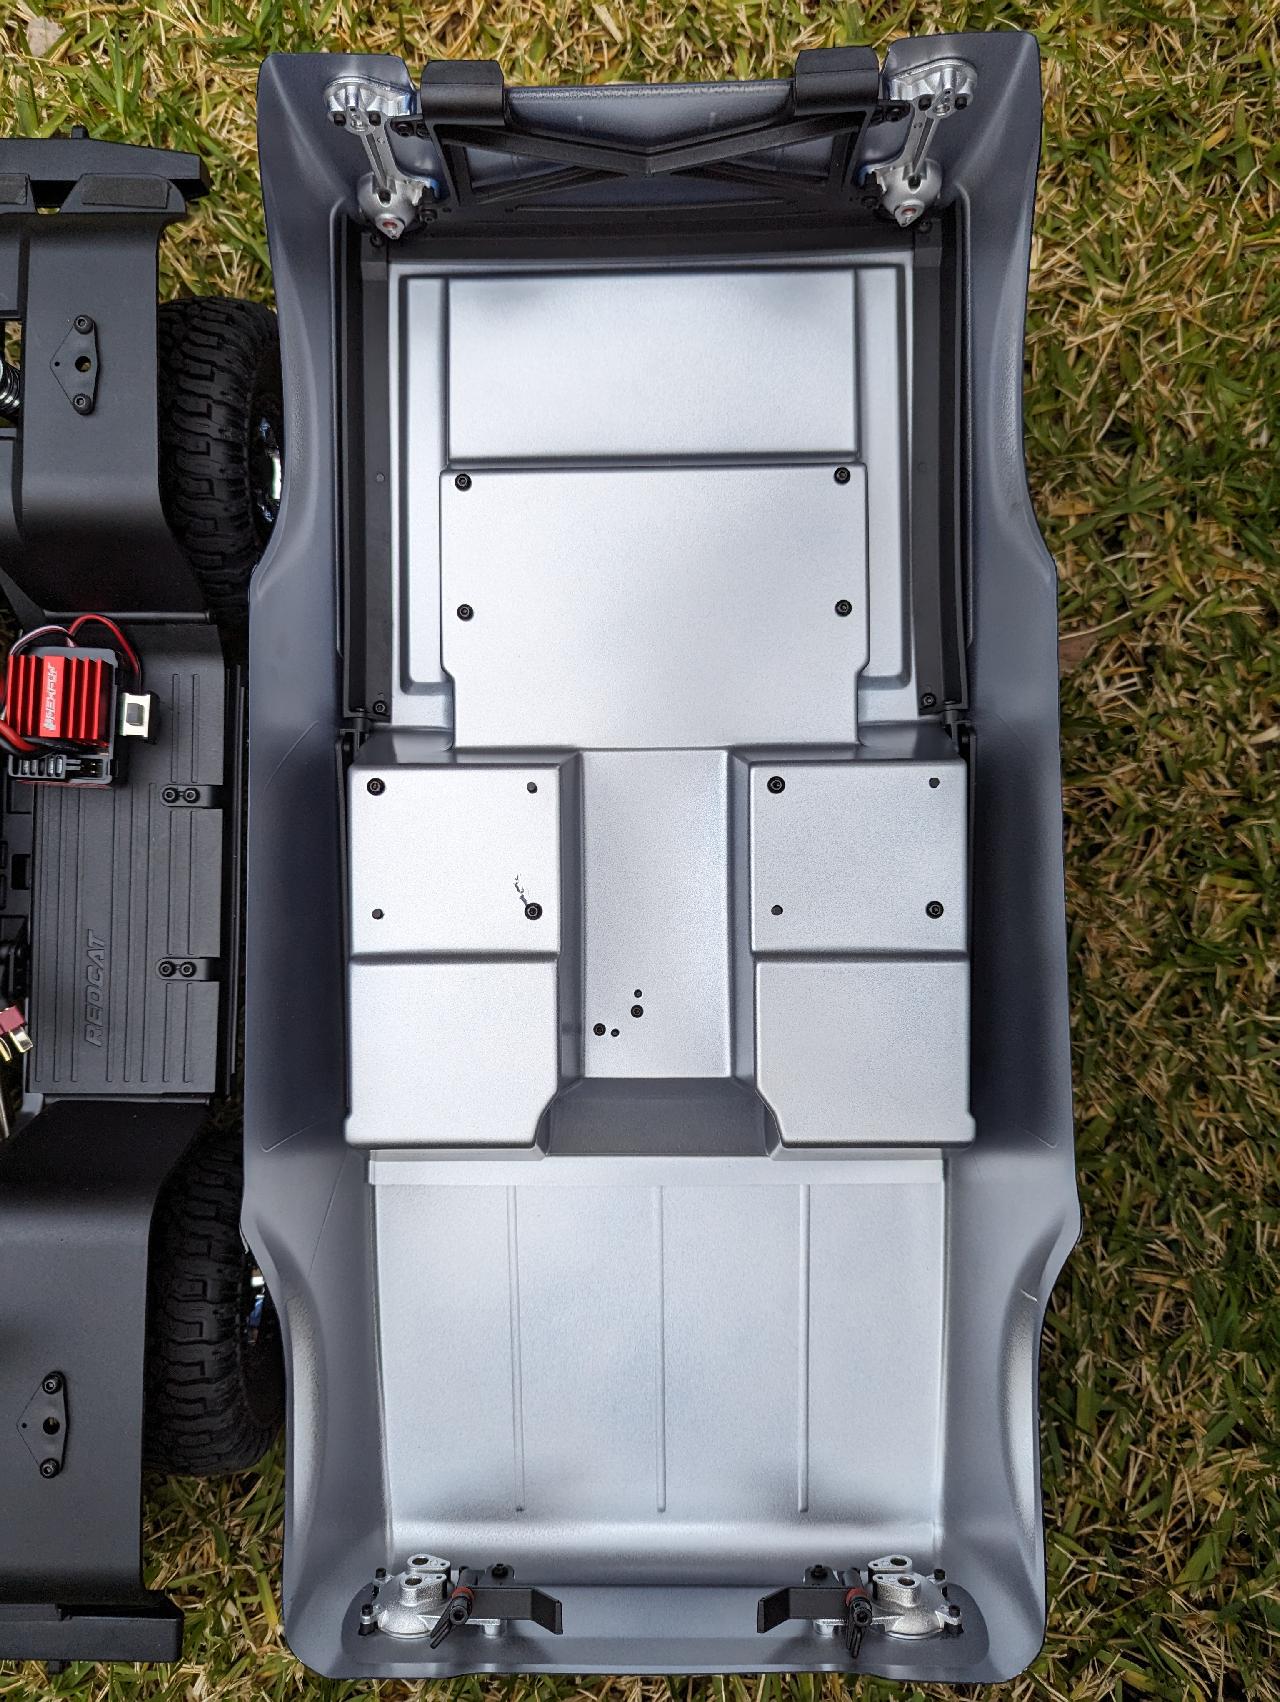
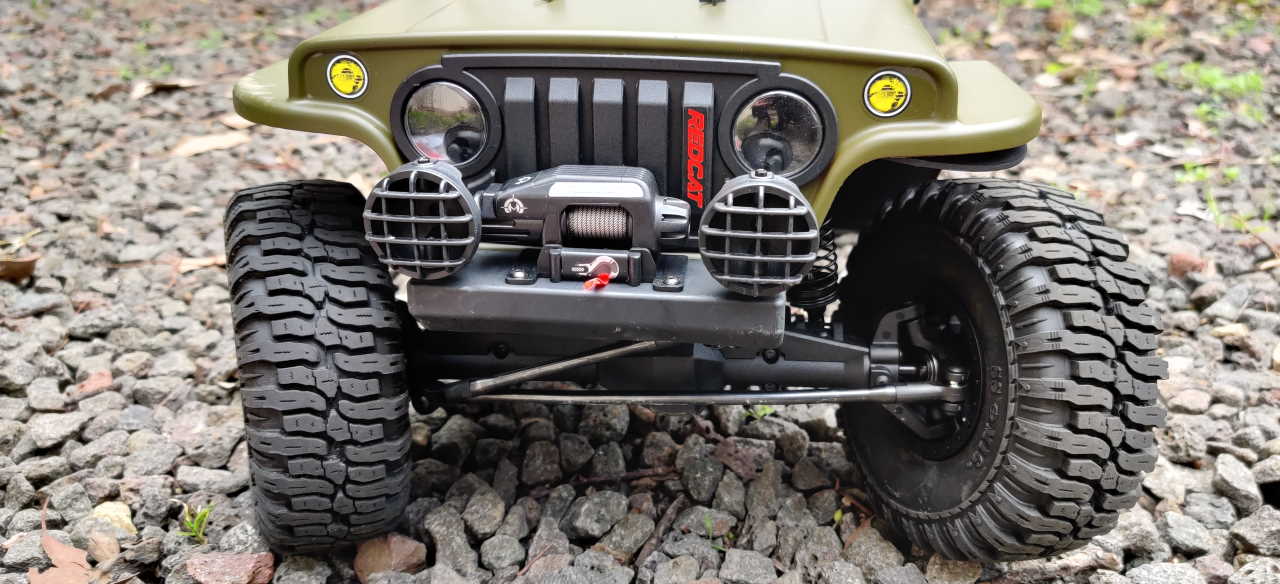
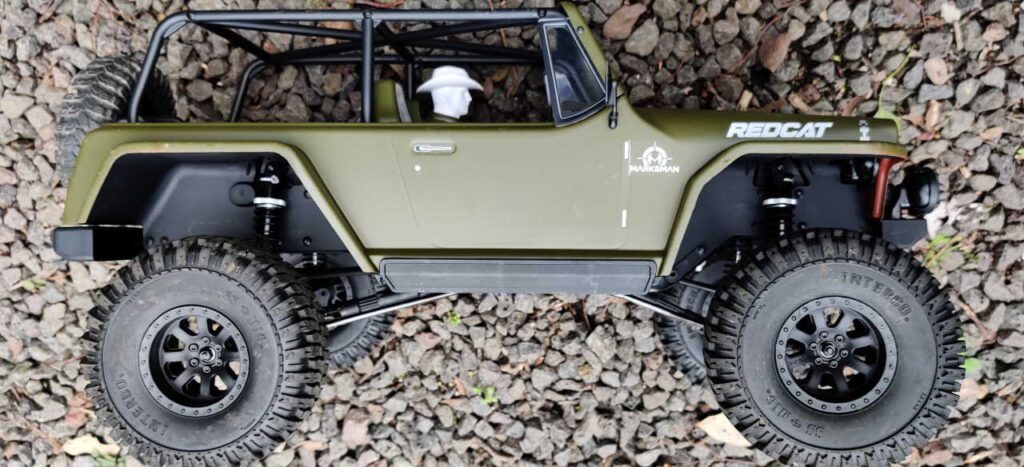
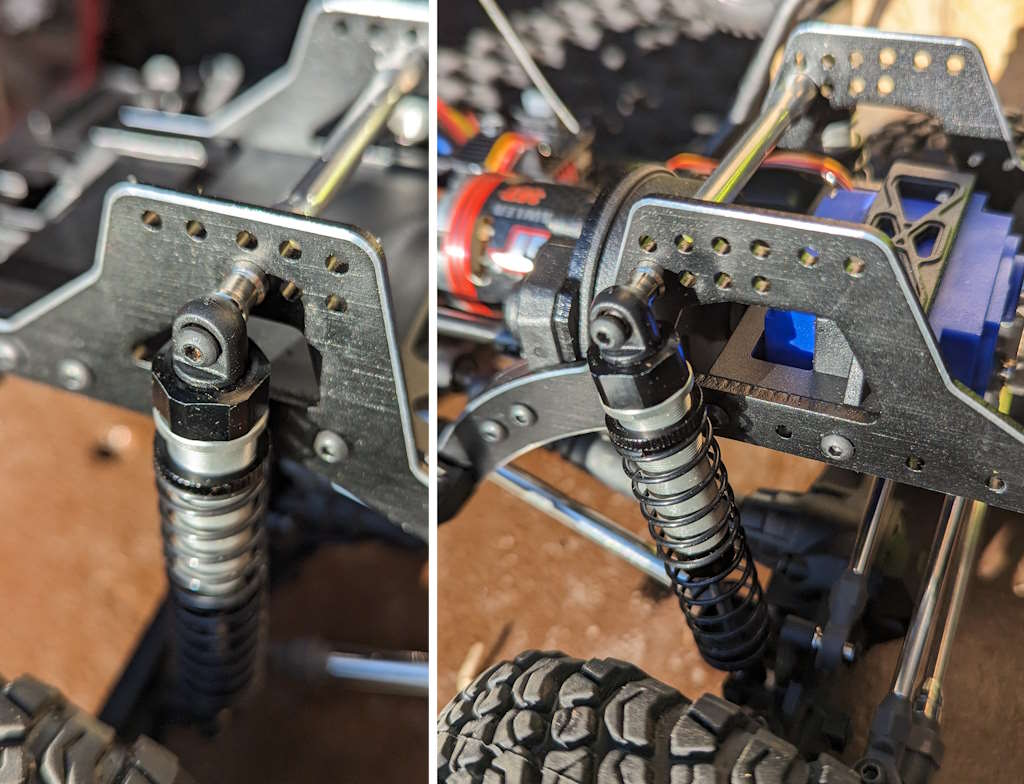
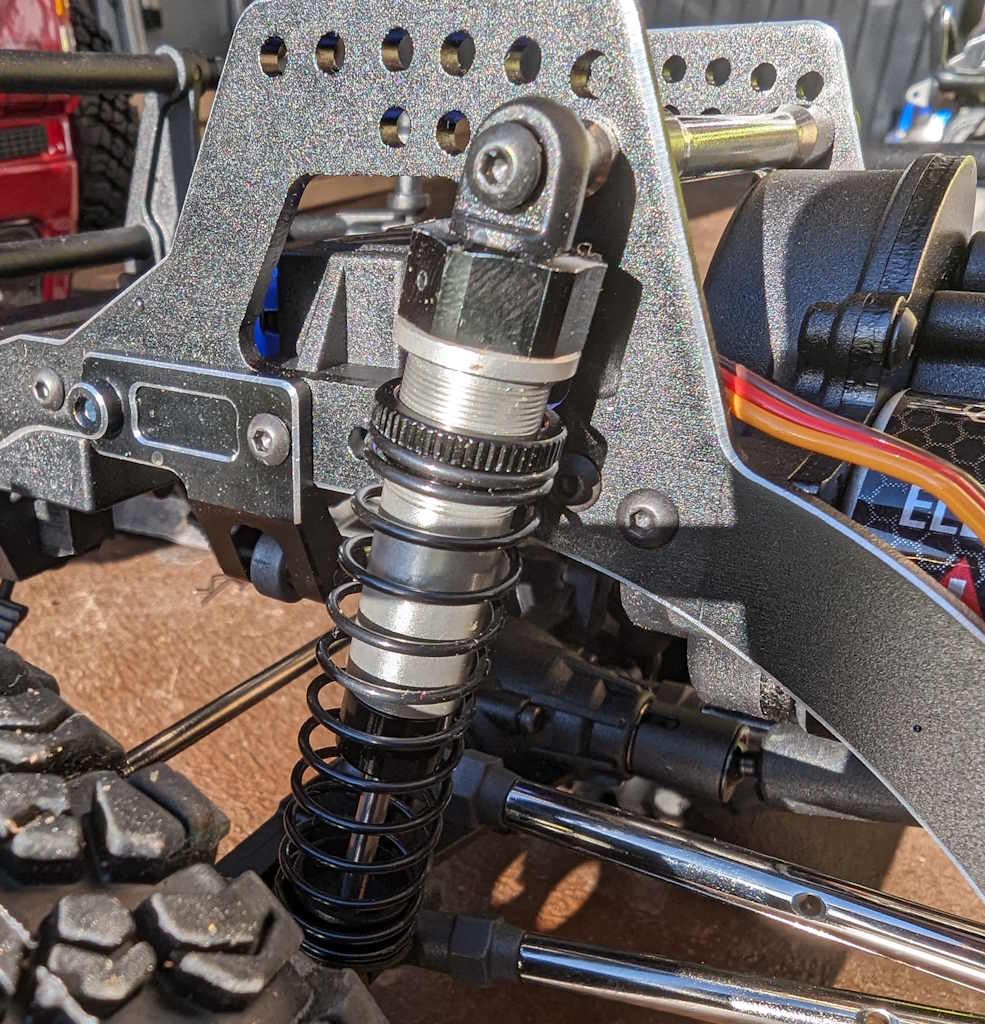
This is a talking point: the rails are 3mm CNC-milled aluminum with a stunning finish. They are really pretty! And the chassis is very stiff, too, thanks to the generous plastic-fiber cross bracing from nose to tail. The shock hoops are part of the rails and even the panhard mount is finished in the same lovely material. Full marks for that.
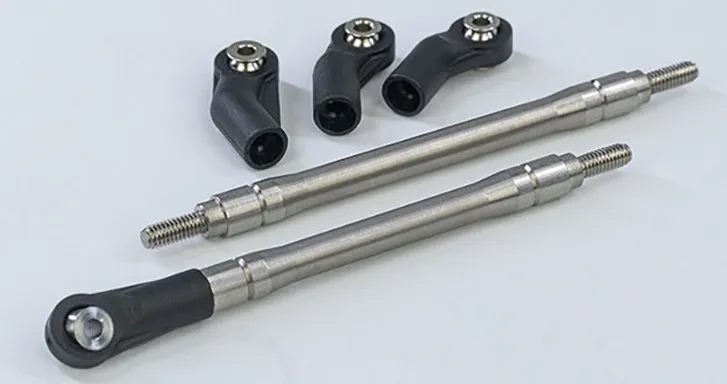
Links and geometry are also well designed. There’s full movement for both axles, no binding, and plenty of room for everything to move as it needs to. And the car isn’t heavy. These are all great things, too. Honestly, we’re off to a very solid start at this point.
Oh, those links are 6mm stainless steel with stainless steel ball ends, too. It’s so premium. Not everyone will appreciate how nice this is, but as an RC guy with ALL the cars and a lot of experience at this point, I want to emphasize just how high the quality is on this vehicle. RGT have not cut corners on chassis and links.
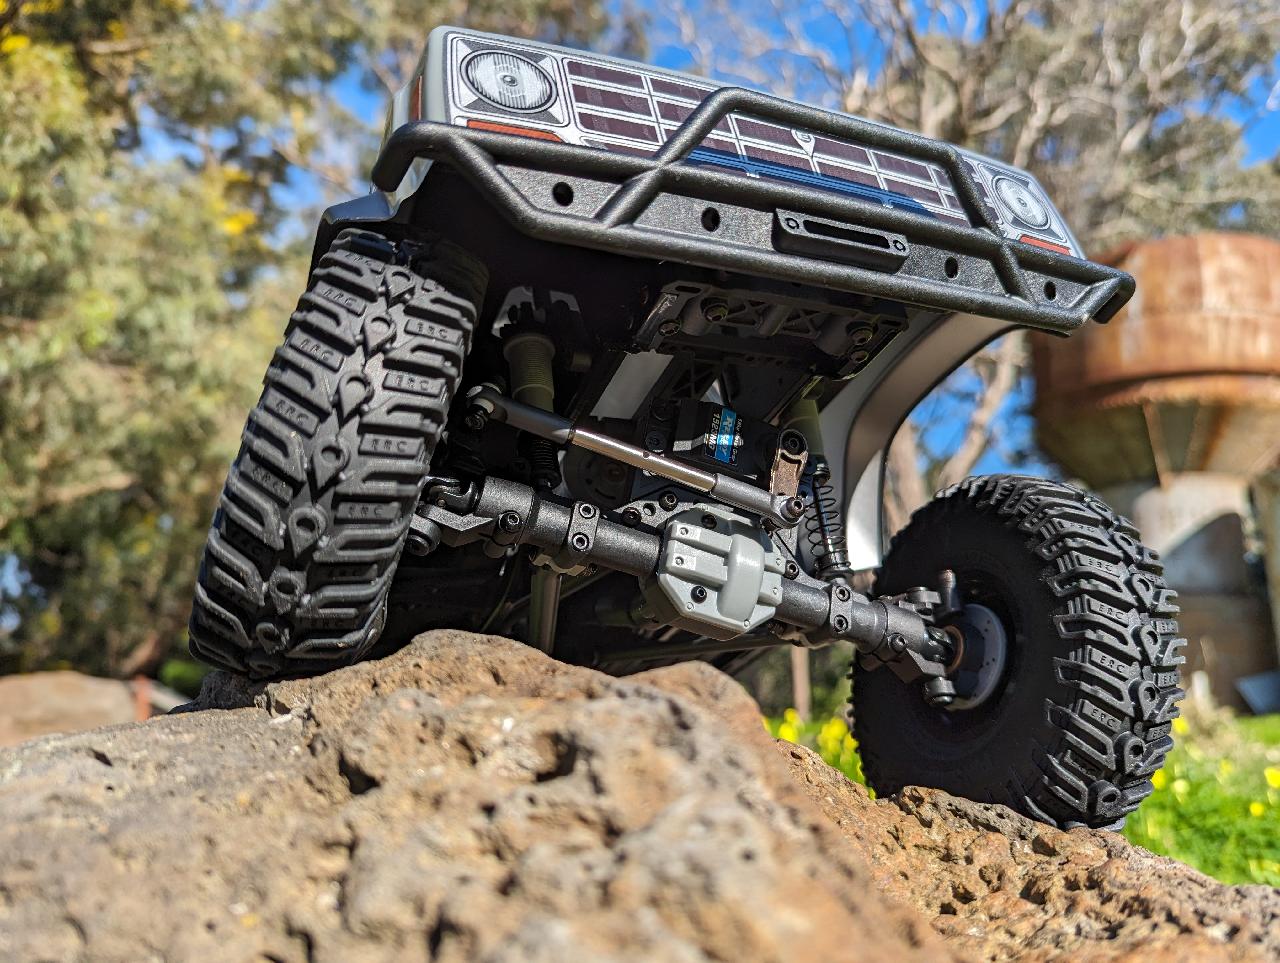
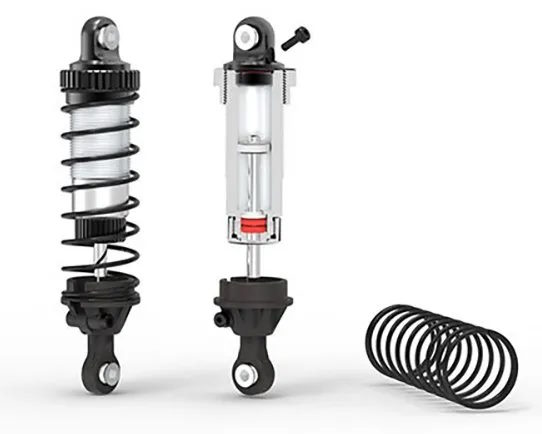
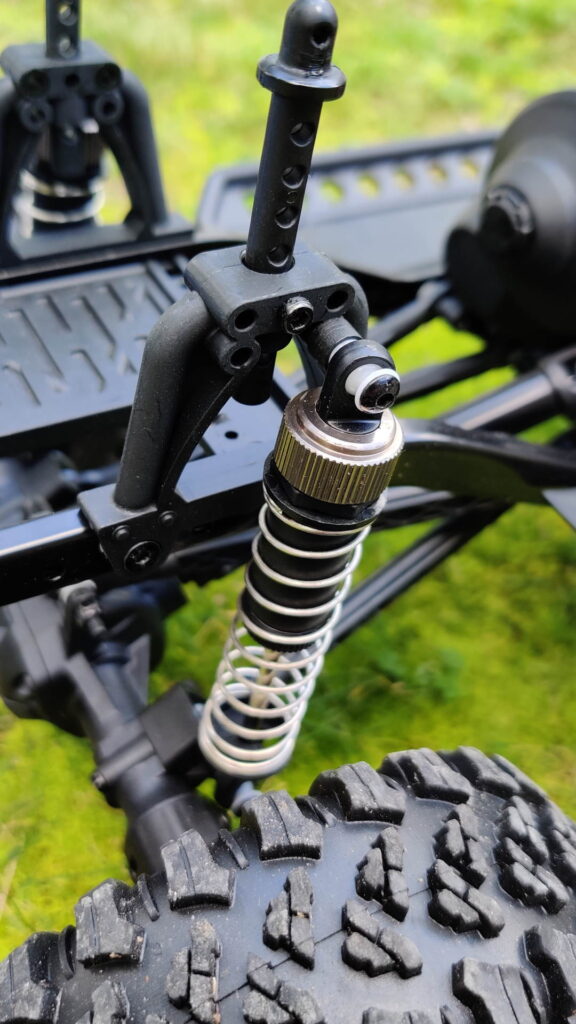
Suspension
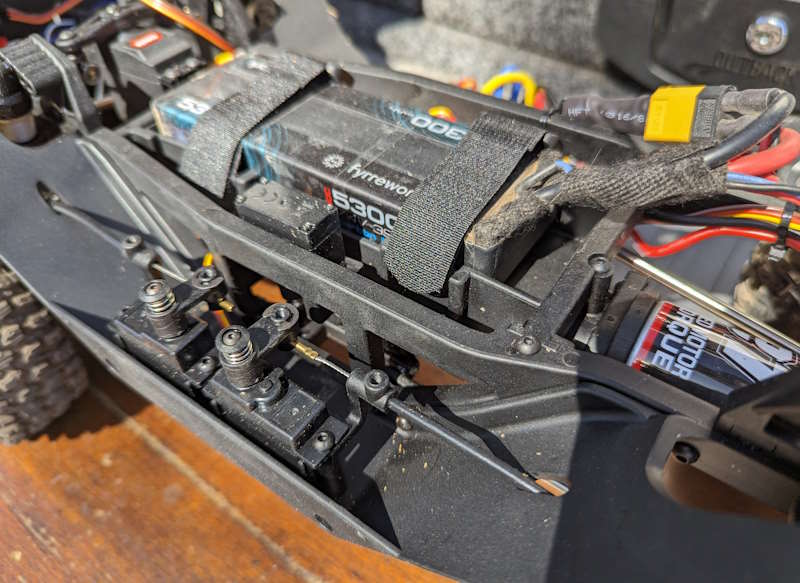
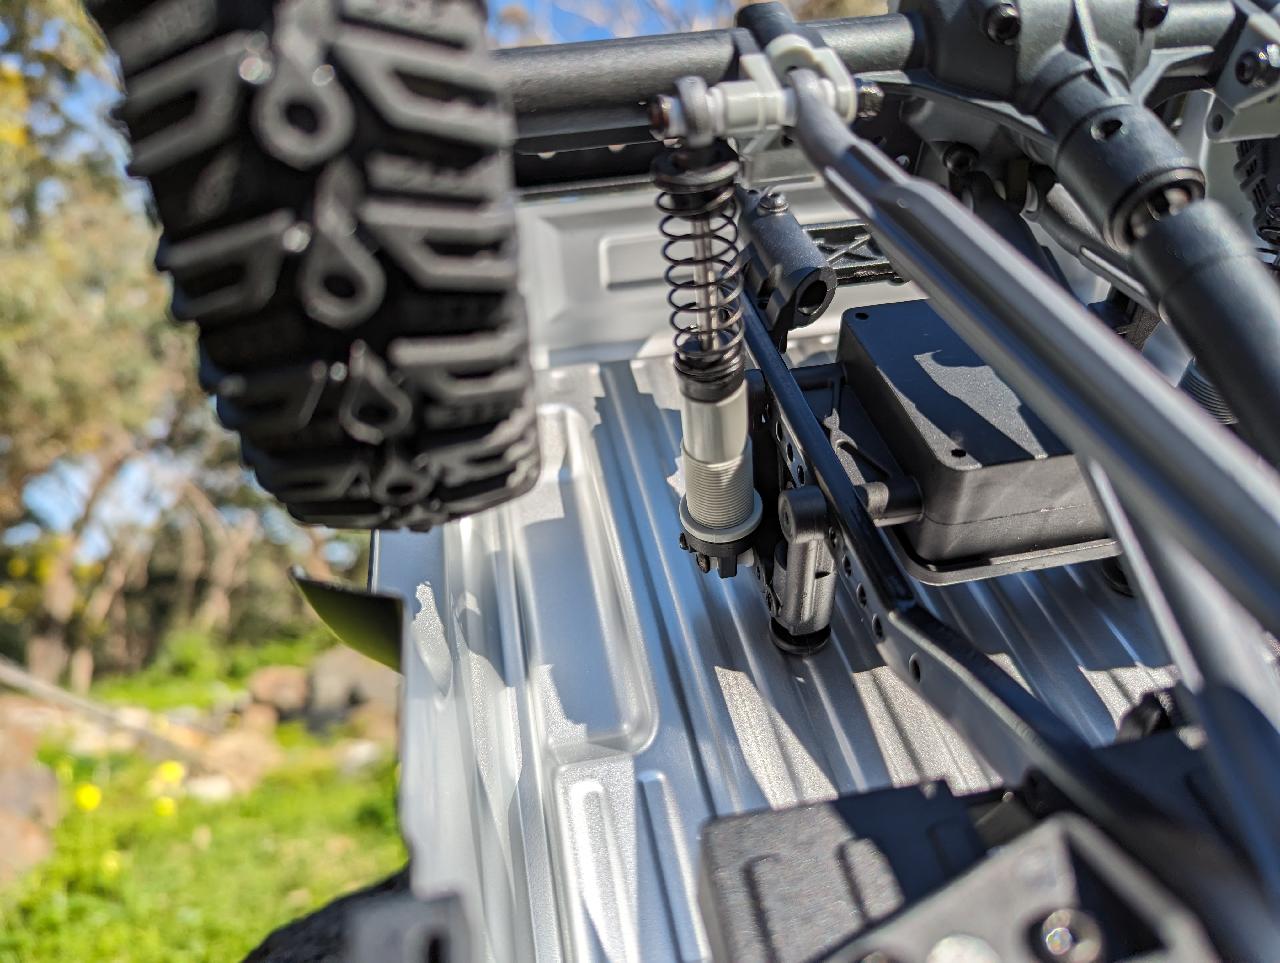
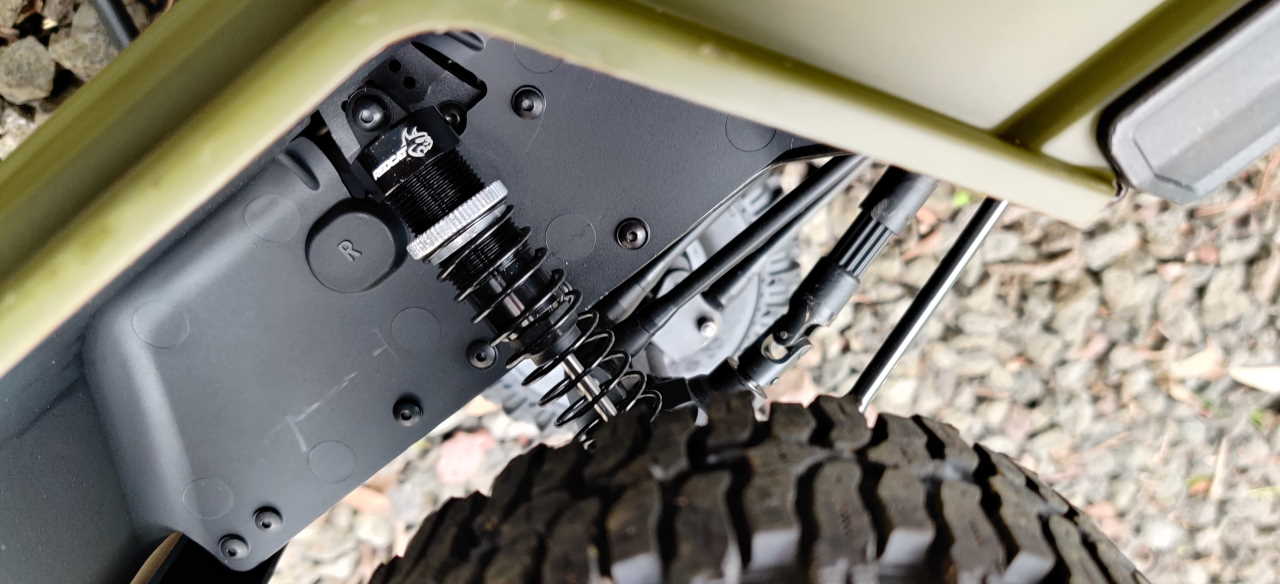
The coil-over shocks are also very nice. Aluminum body, thumb-screw adjustable pre-load, appropriately plush springs and intelligently mounted. I like these.
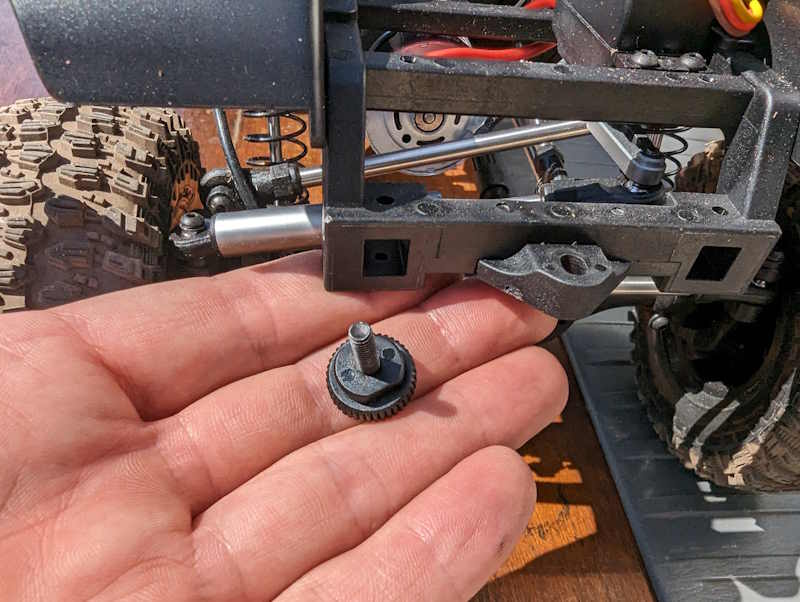
However, my unit arrived with empty shocks. Not everyone will notice this, and not everyone will care, but you want some oil in your shocks. It limits how bouncy they are, which limits how much the wheel reacts to changes in terrain at high or low speed. I’d recommend 30 wt. oil, give or take. Worth doing.
The shocks move well and the car is in good shape with this setup. Just don’t forget the oil like my car’s assembler did!
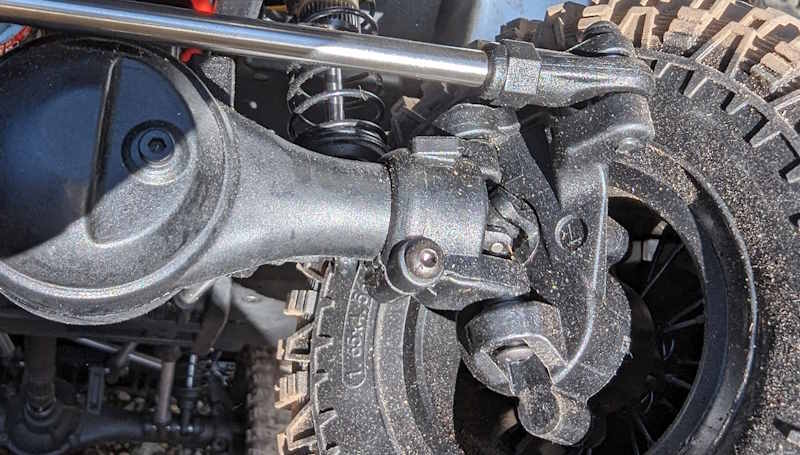
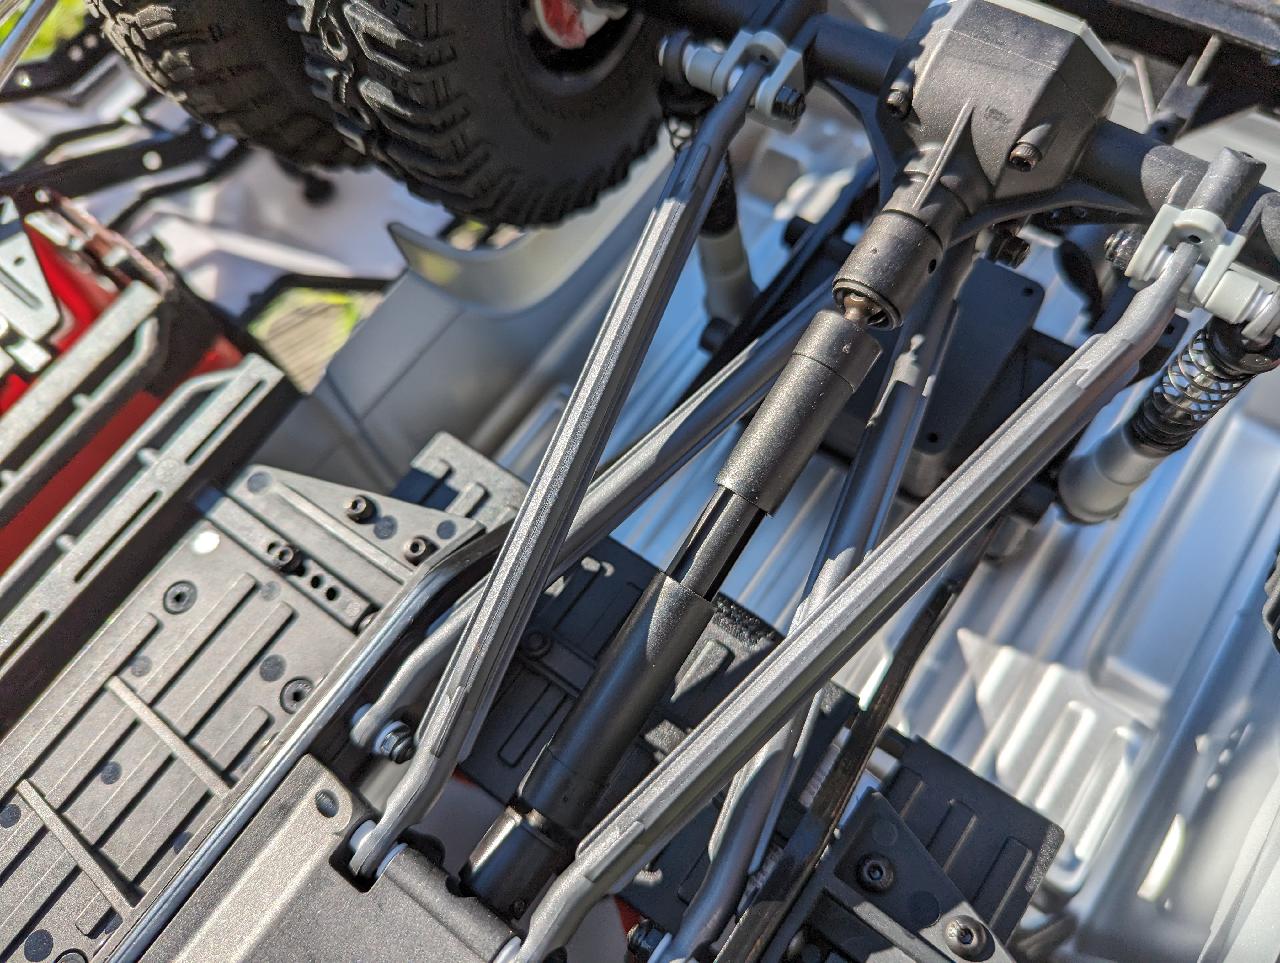
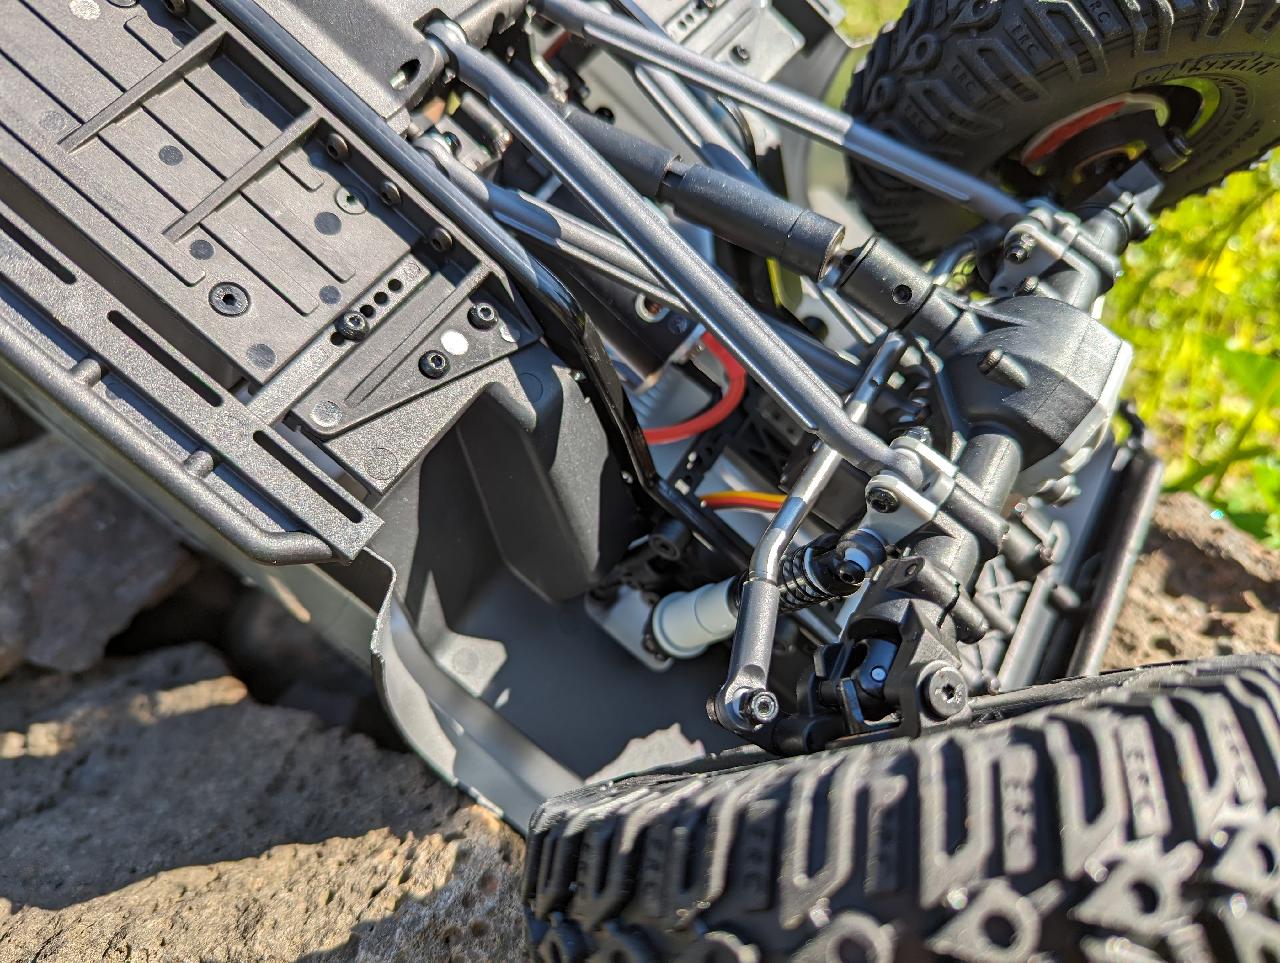
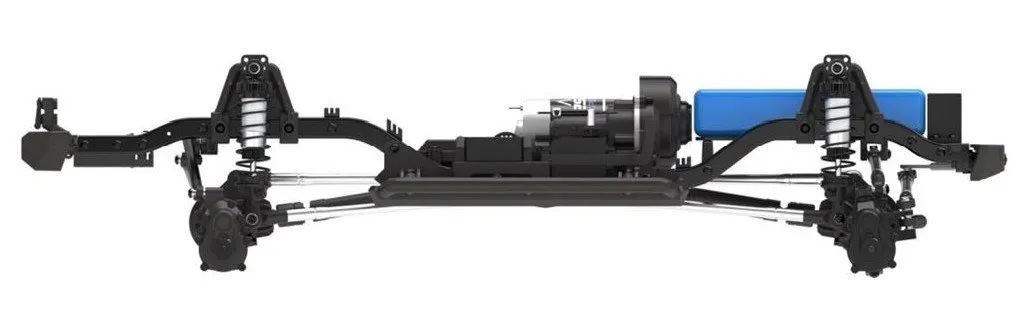
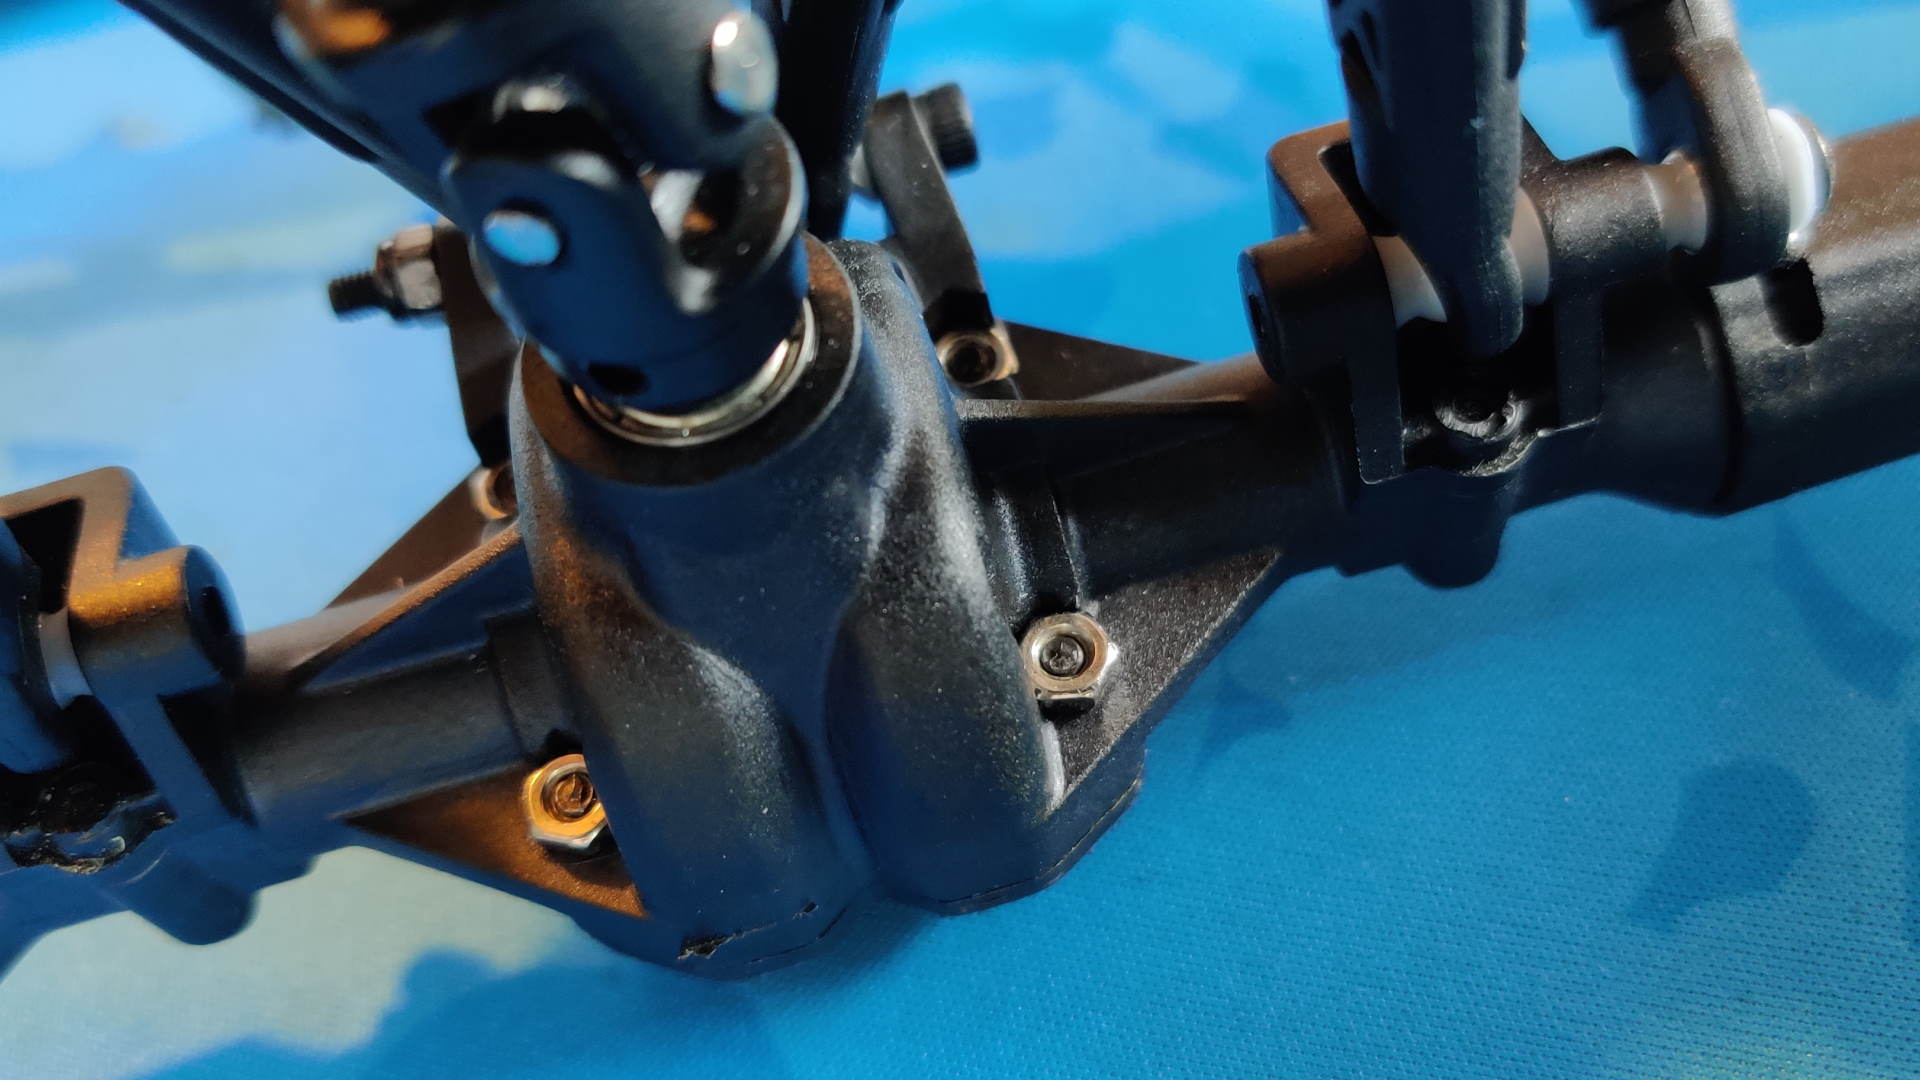
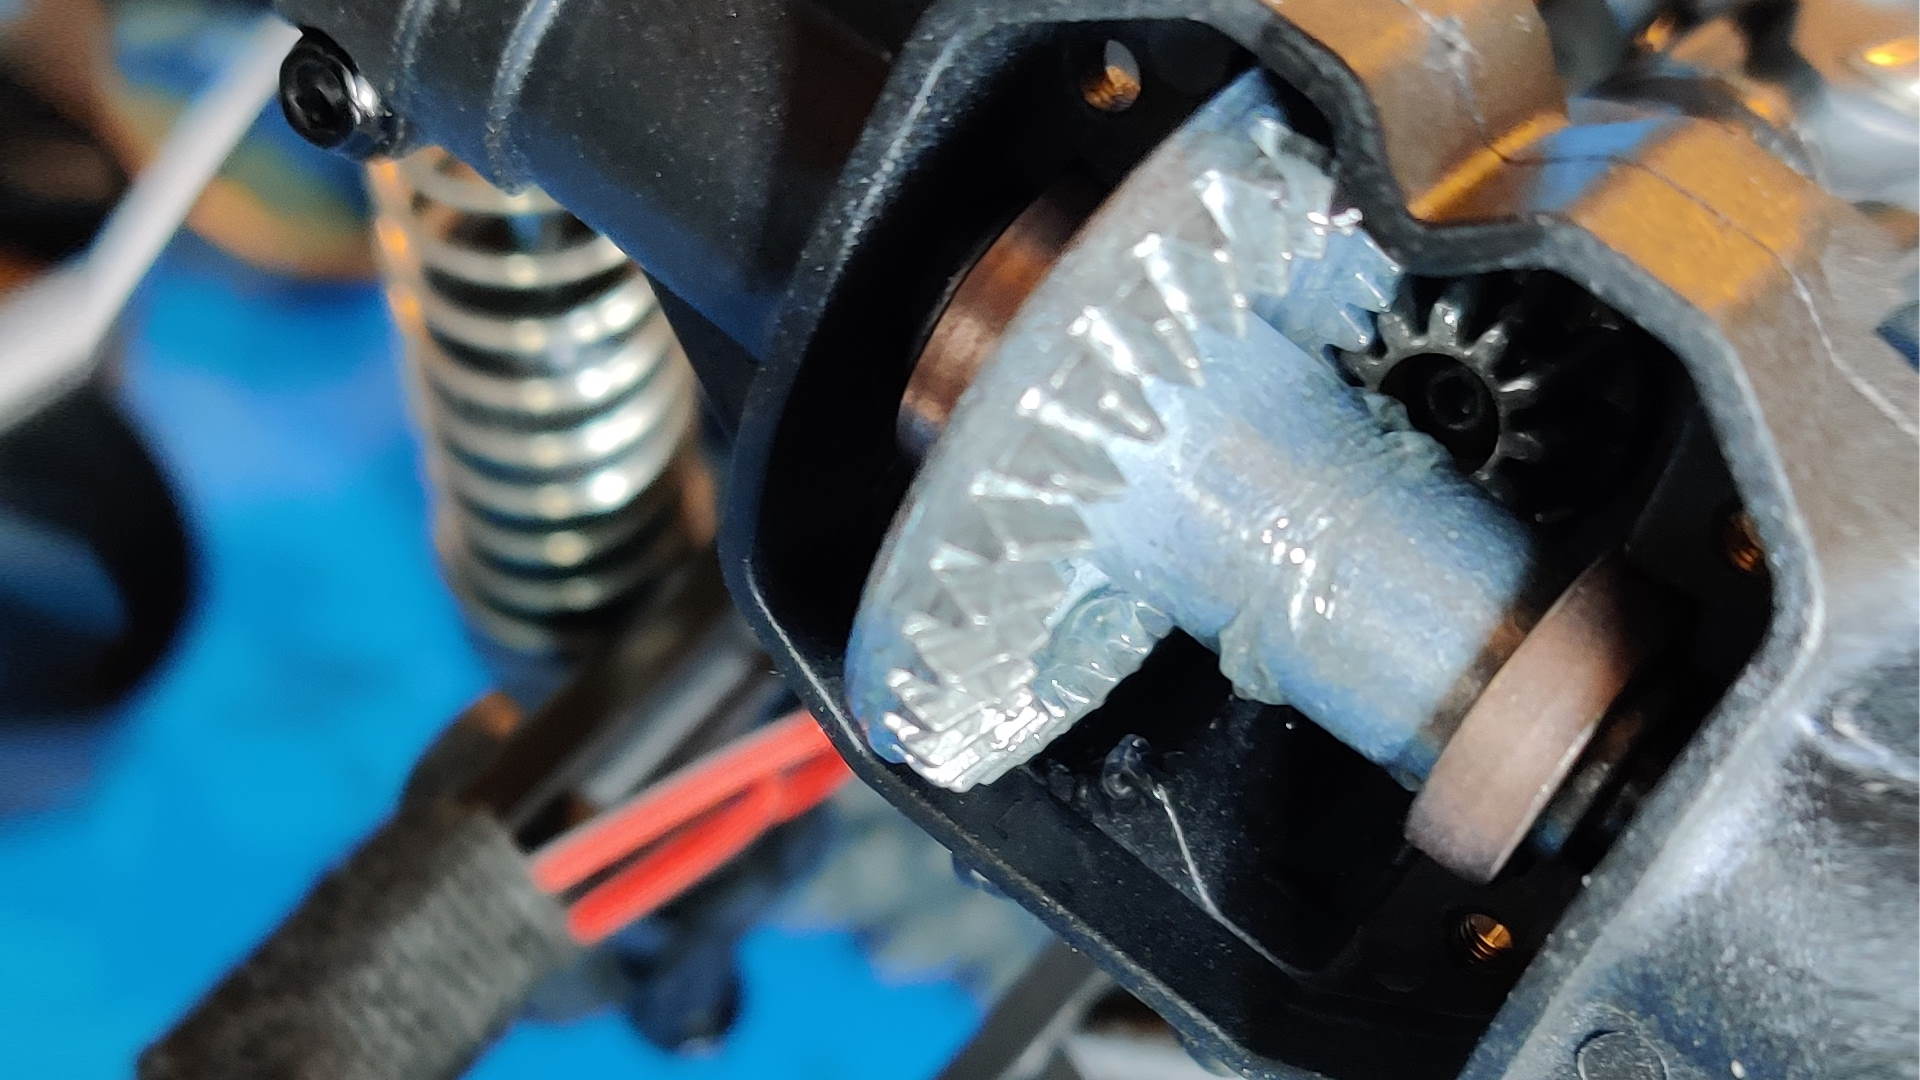
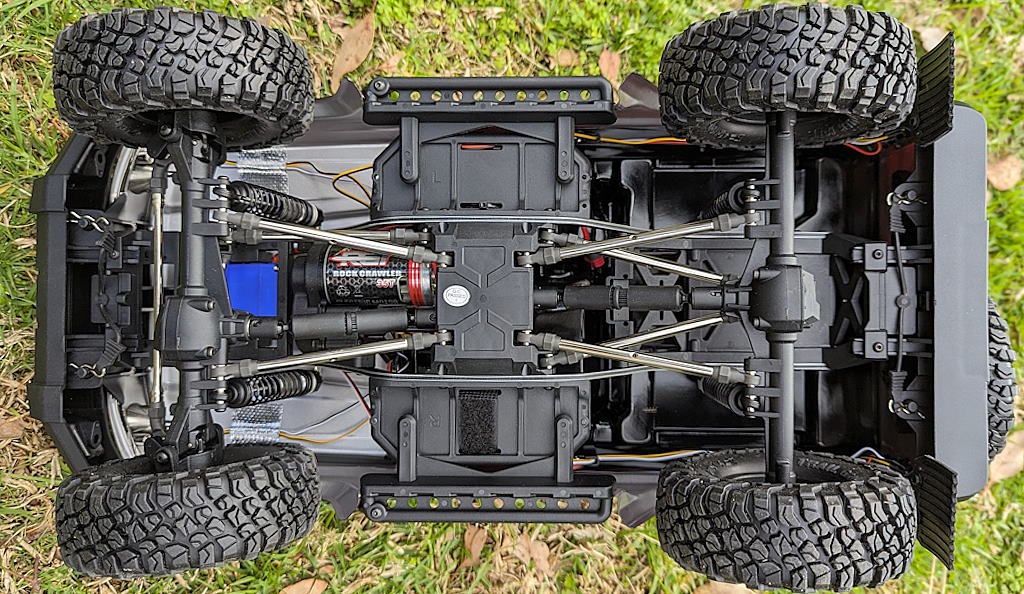
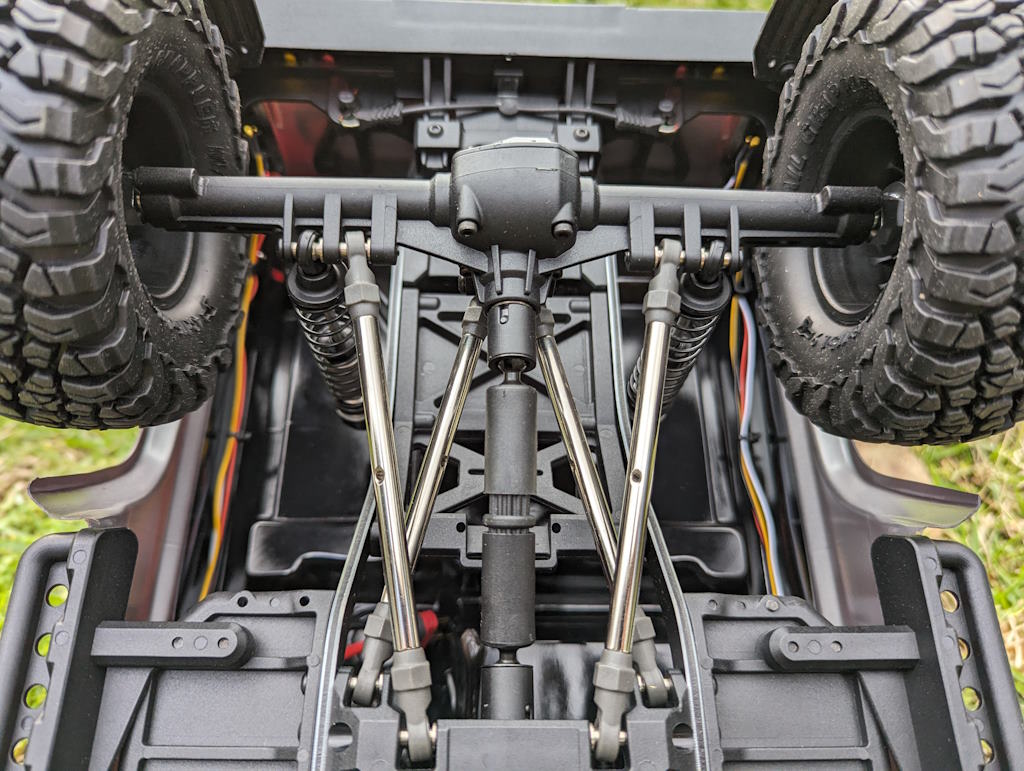
Straight Axles
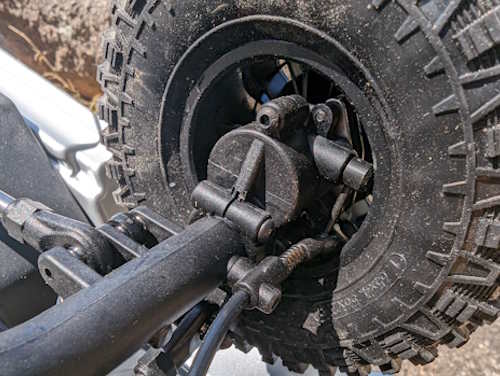
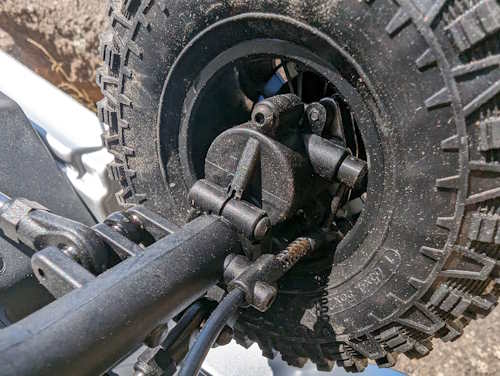
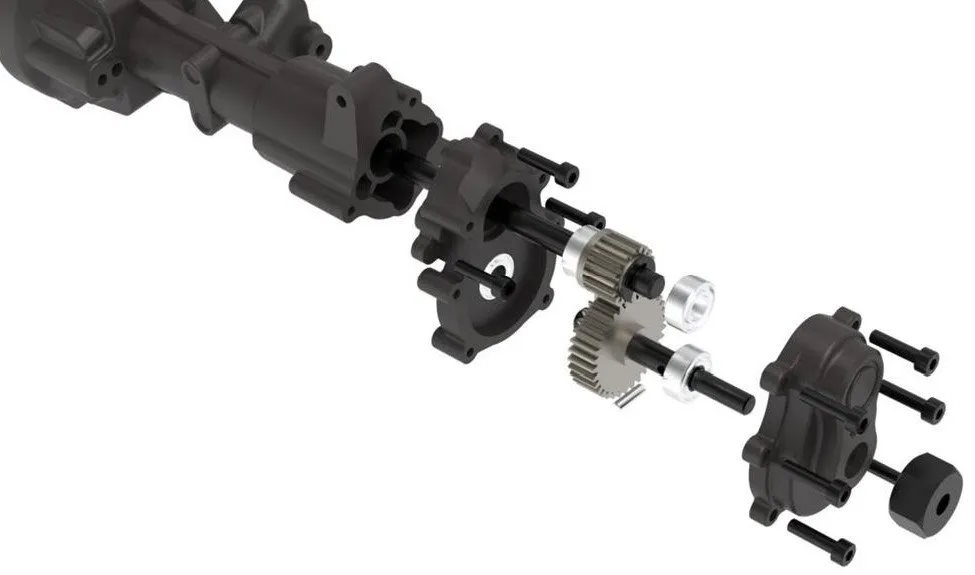
No portals here. But the best thing about these straight axles is how tough they are. I love seeing steel universal joints on front steering axles in a crawler. It’s really the only way to go for performance and strength. Yes, they’re not as smooth as CVDs and similar, but the extra steering angle the unis afford you make the trade-off well worth it.
The housings themselves aren’t particularly scale, but the size is small and they are attractive. It’s a high-pinion position like Axial’s AR45 axles and the gears are helical cut (or spiral? Can’t quite tell from the photos). Either way, they’ll be strong, and with the default tooth count of 30/8, overdriving/underdriving using the diff gears for better crawling and steering should be a straightforward undertaking. (I’m confident these will fit, though I haven’t tested them yet!)
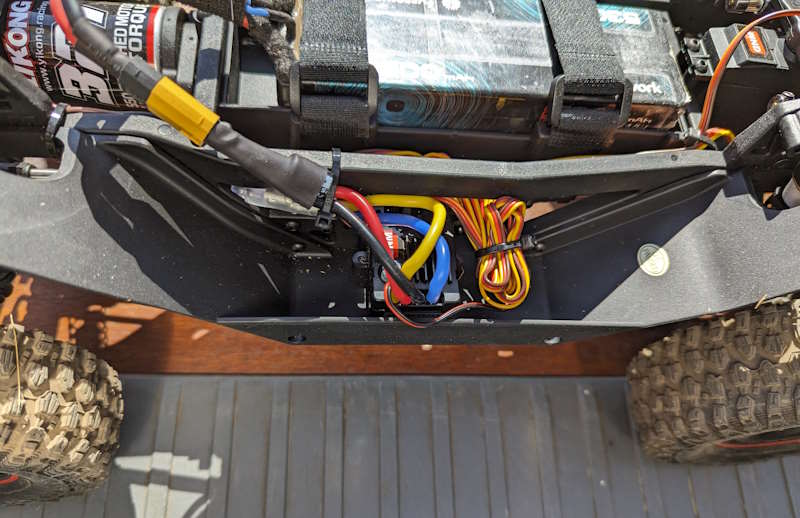
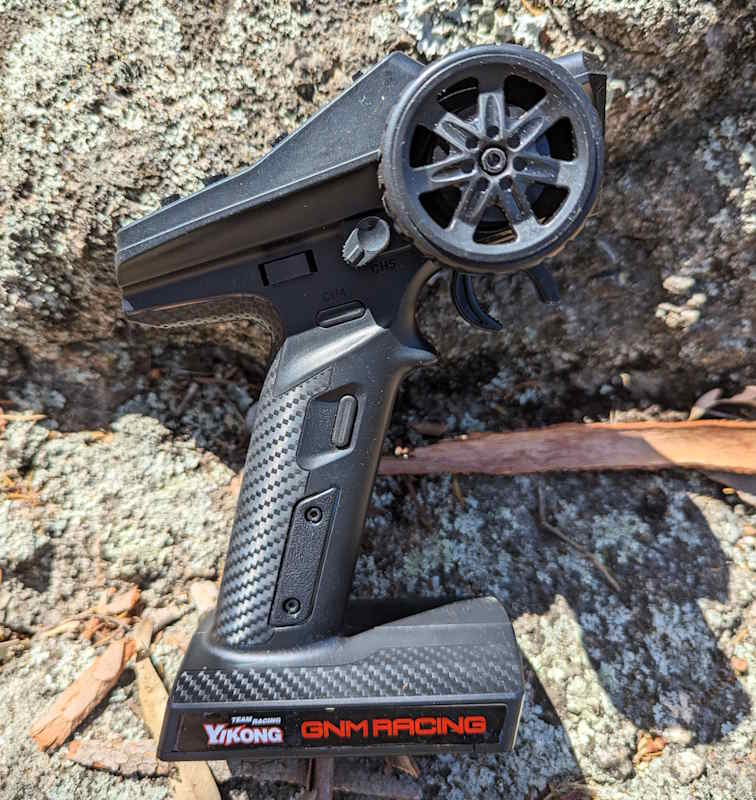
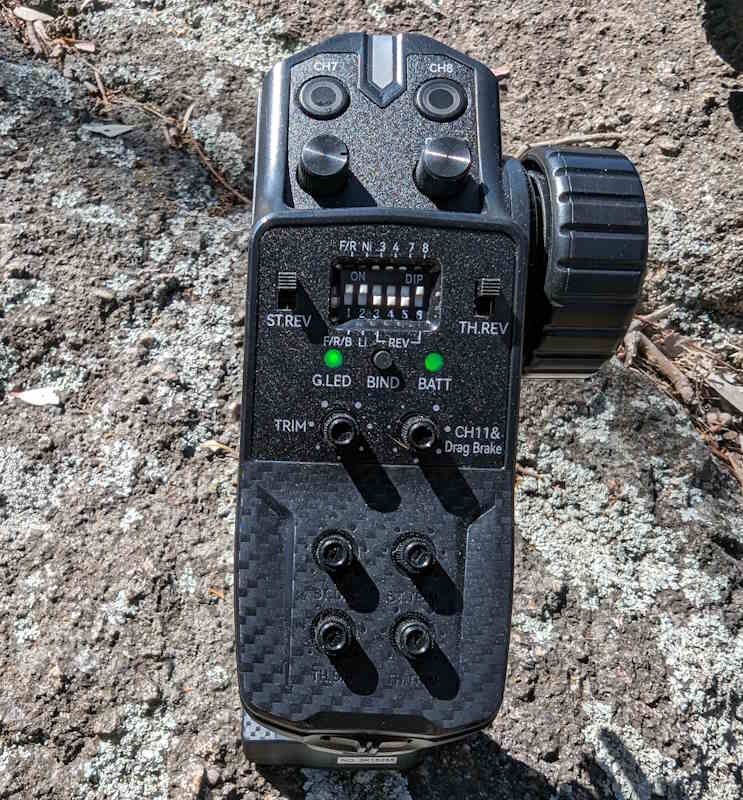
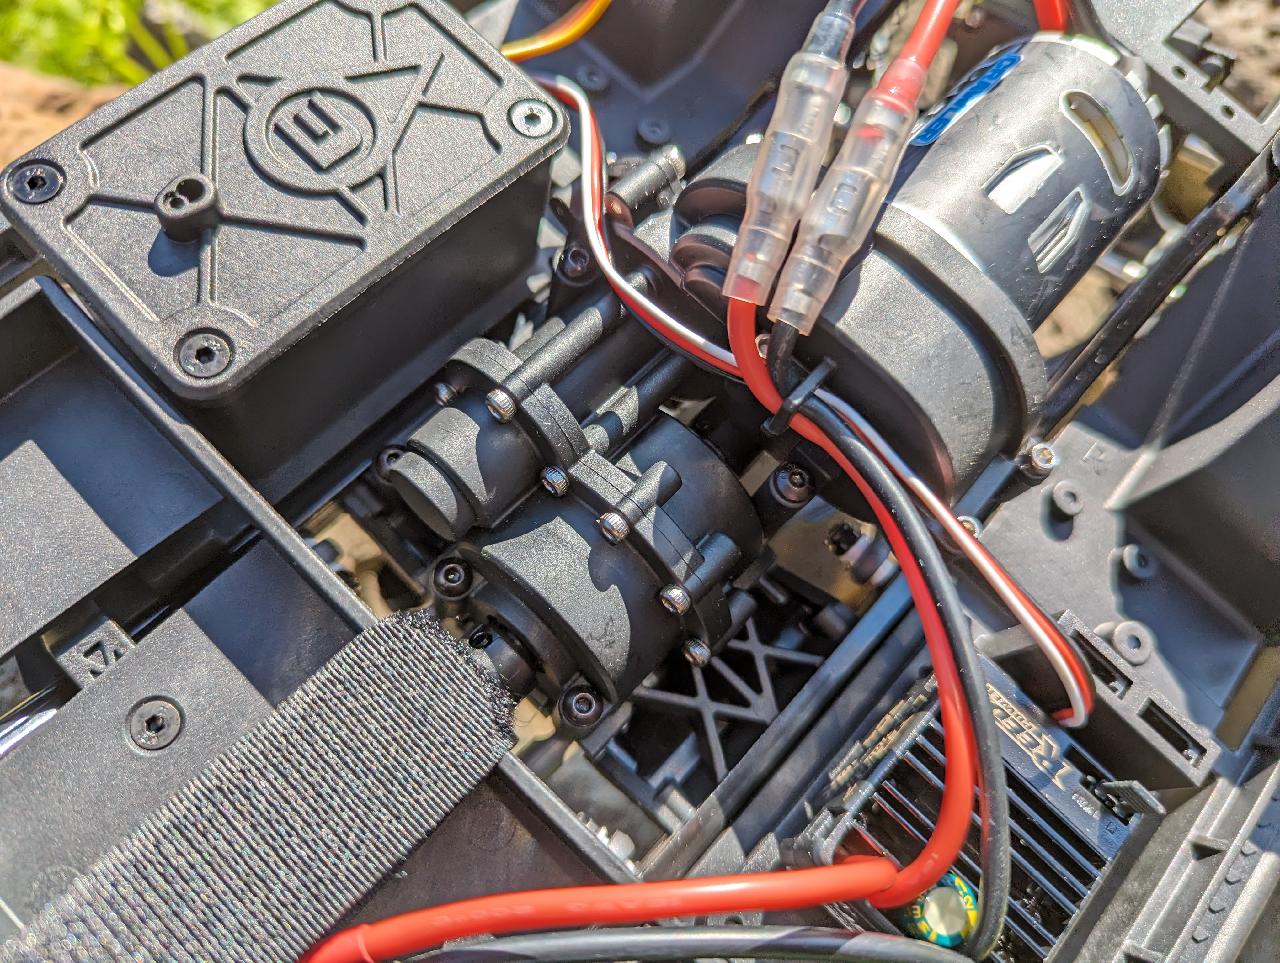
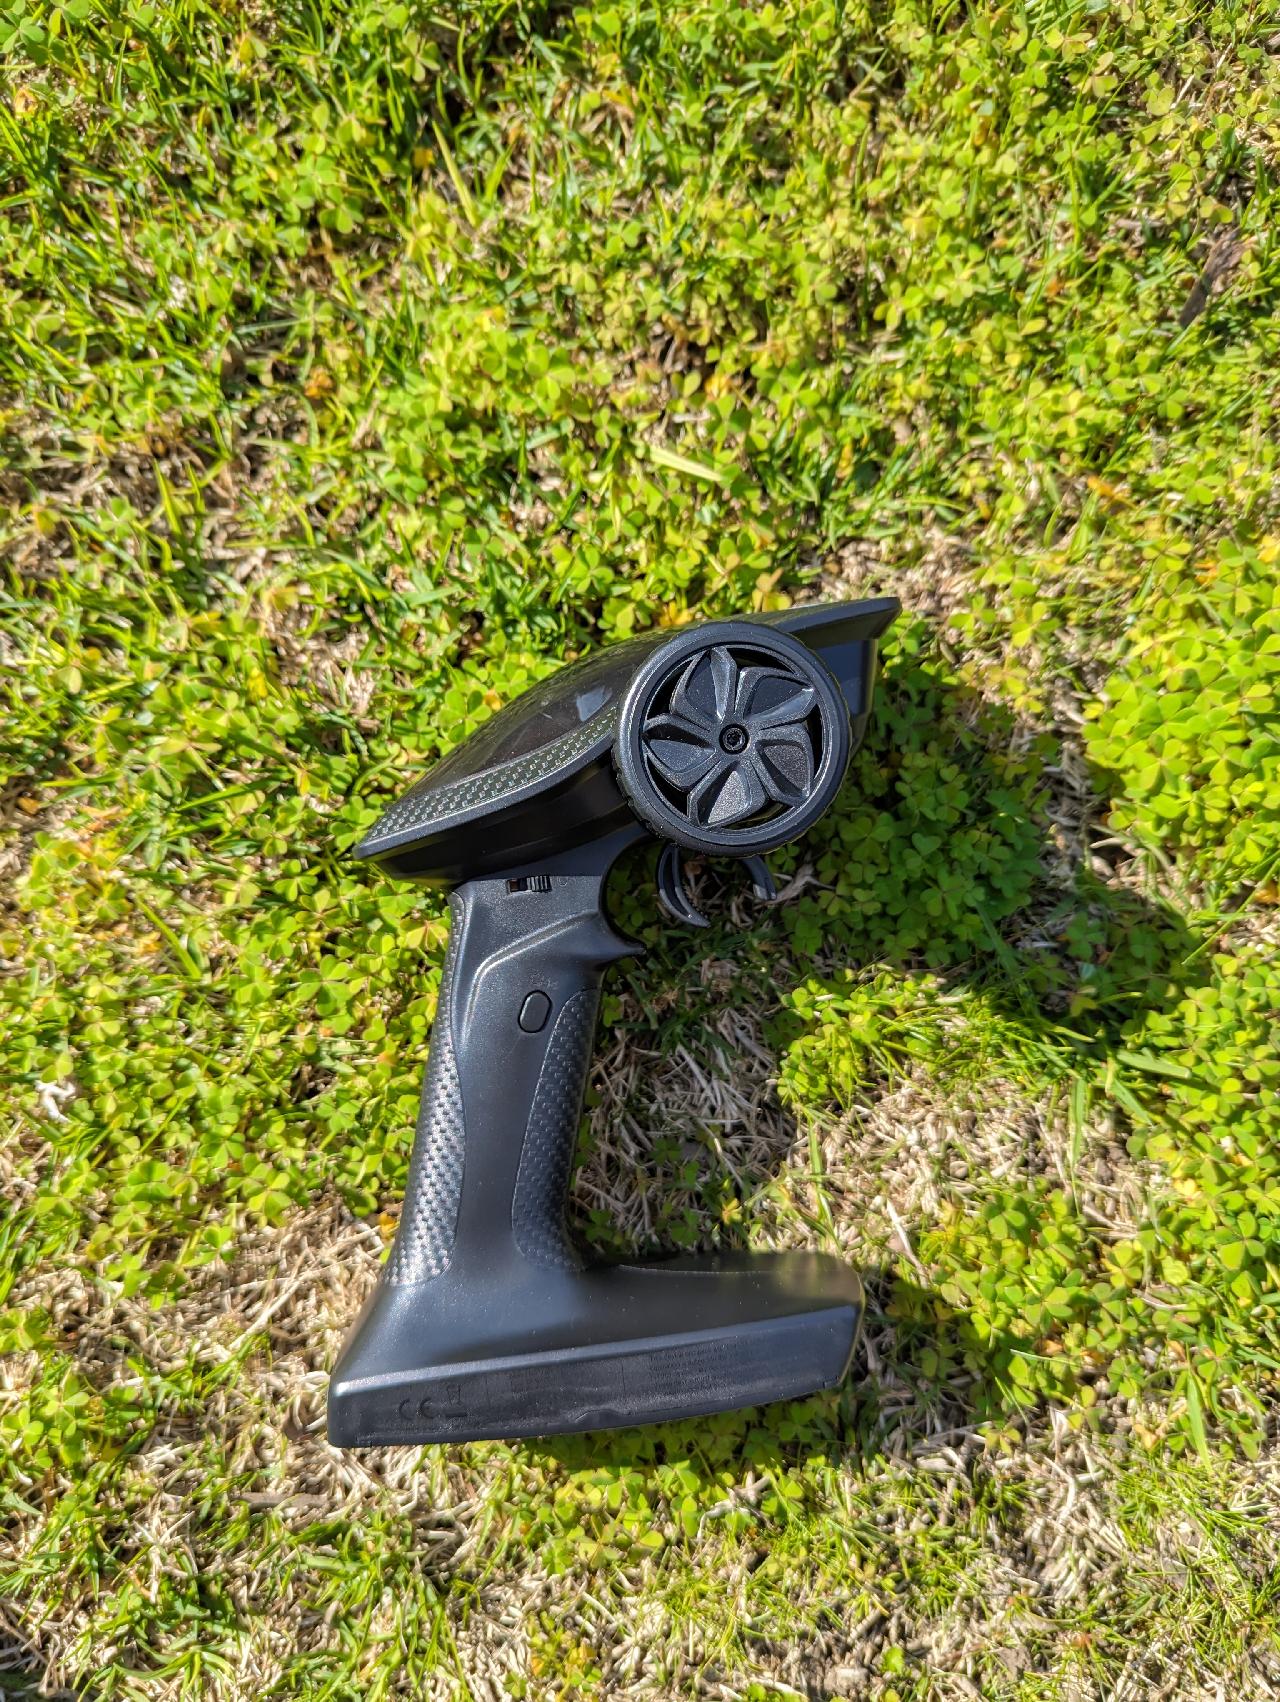
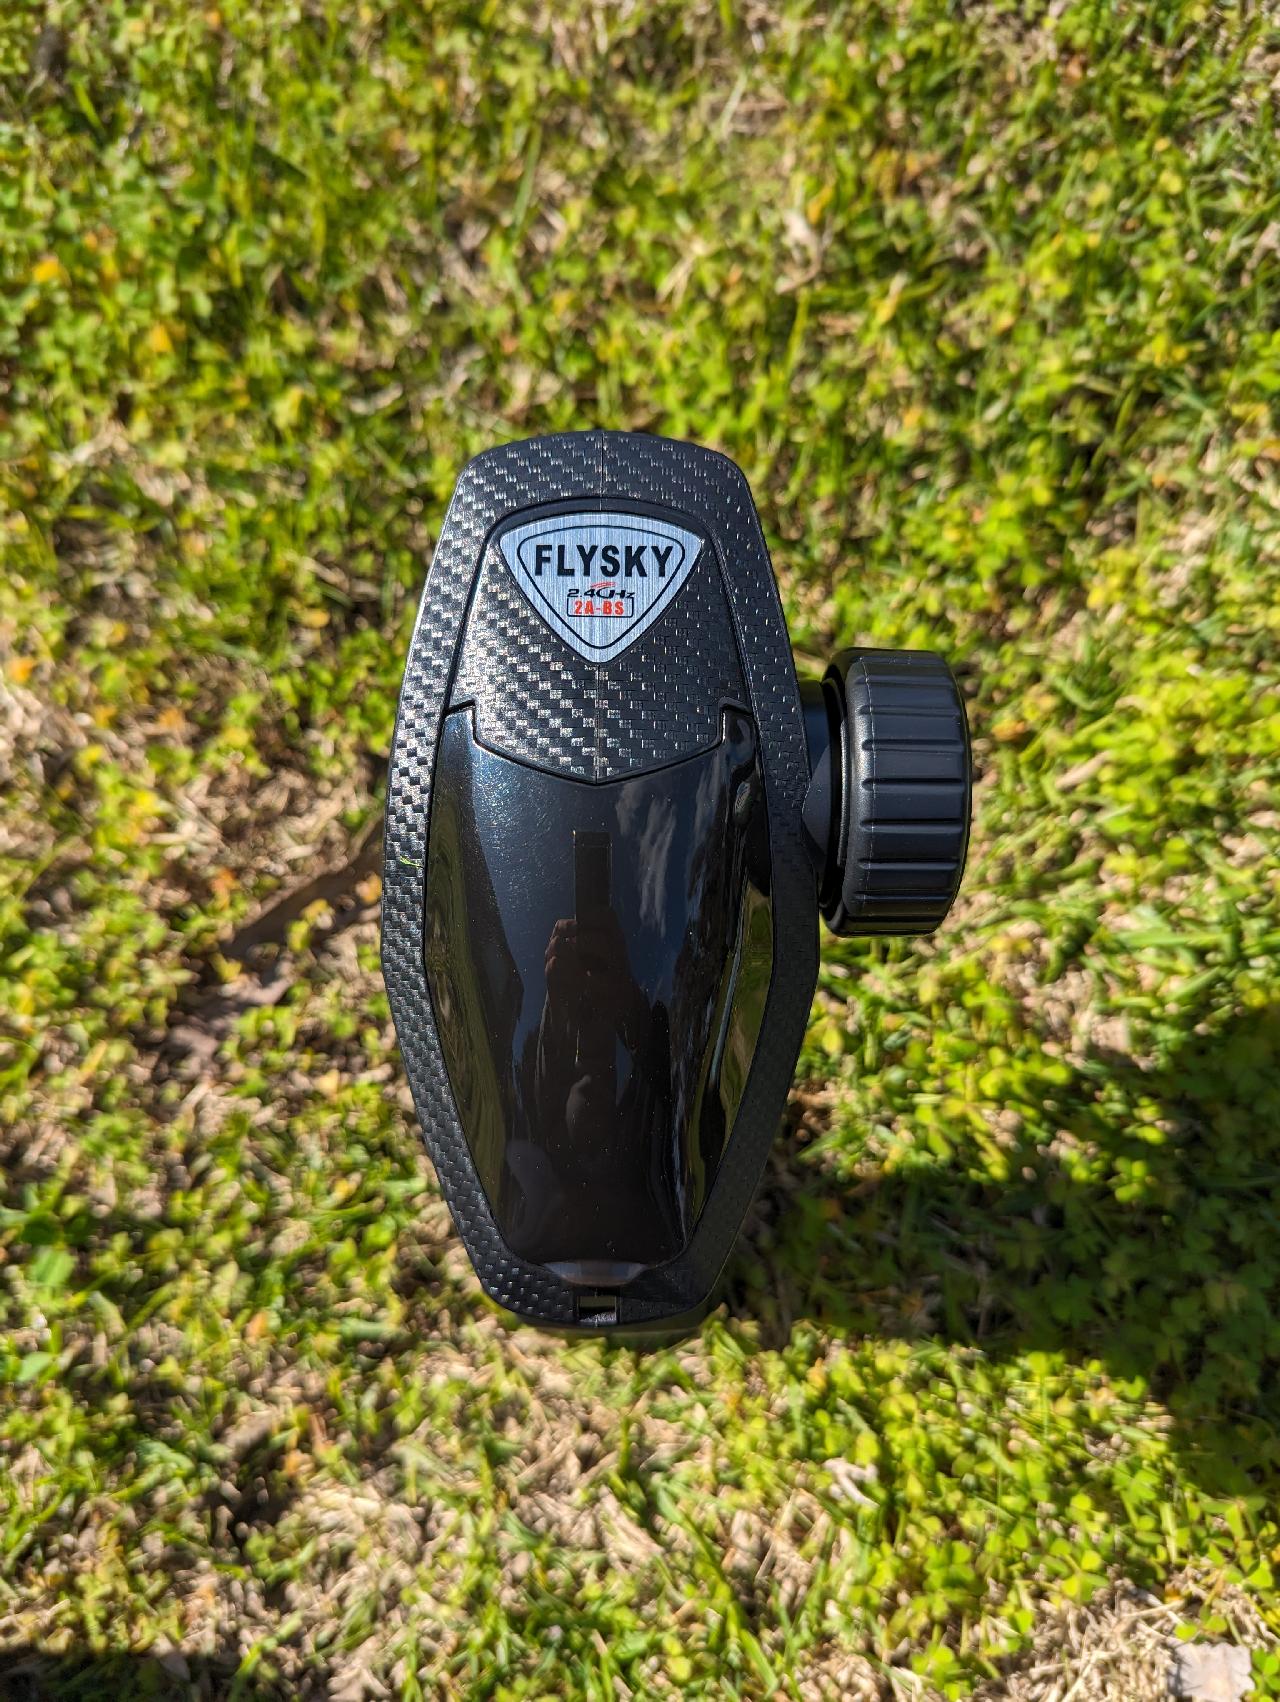
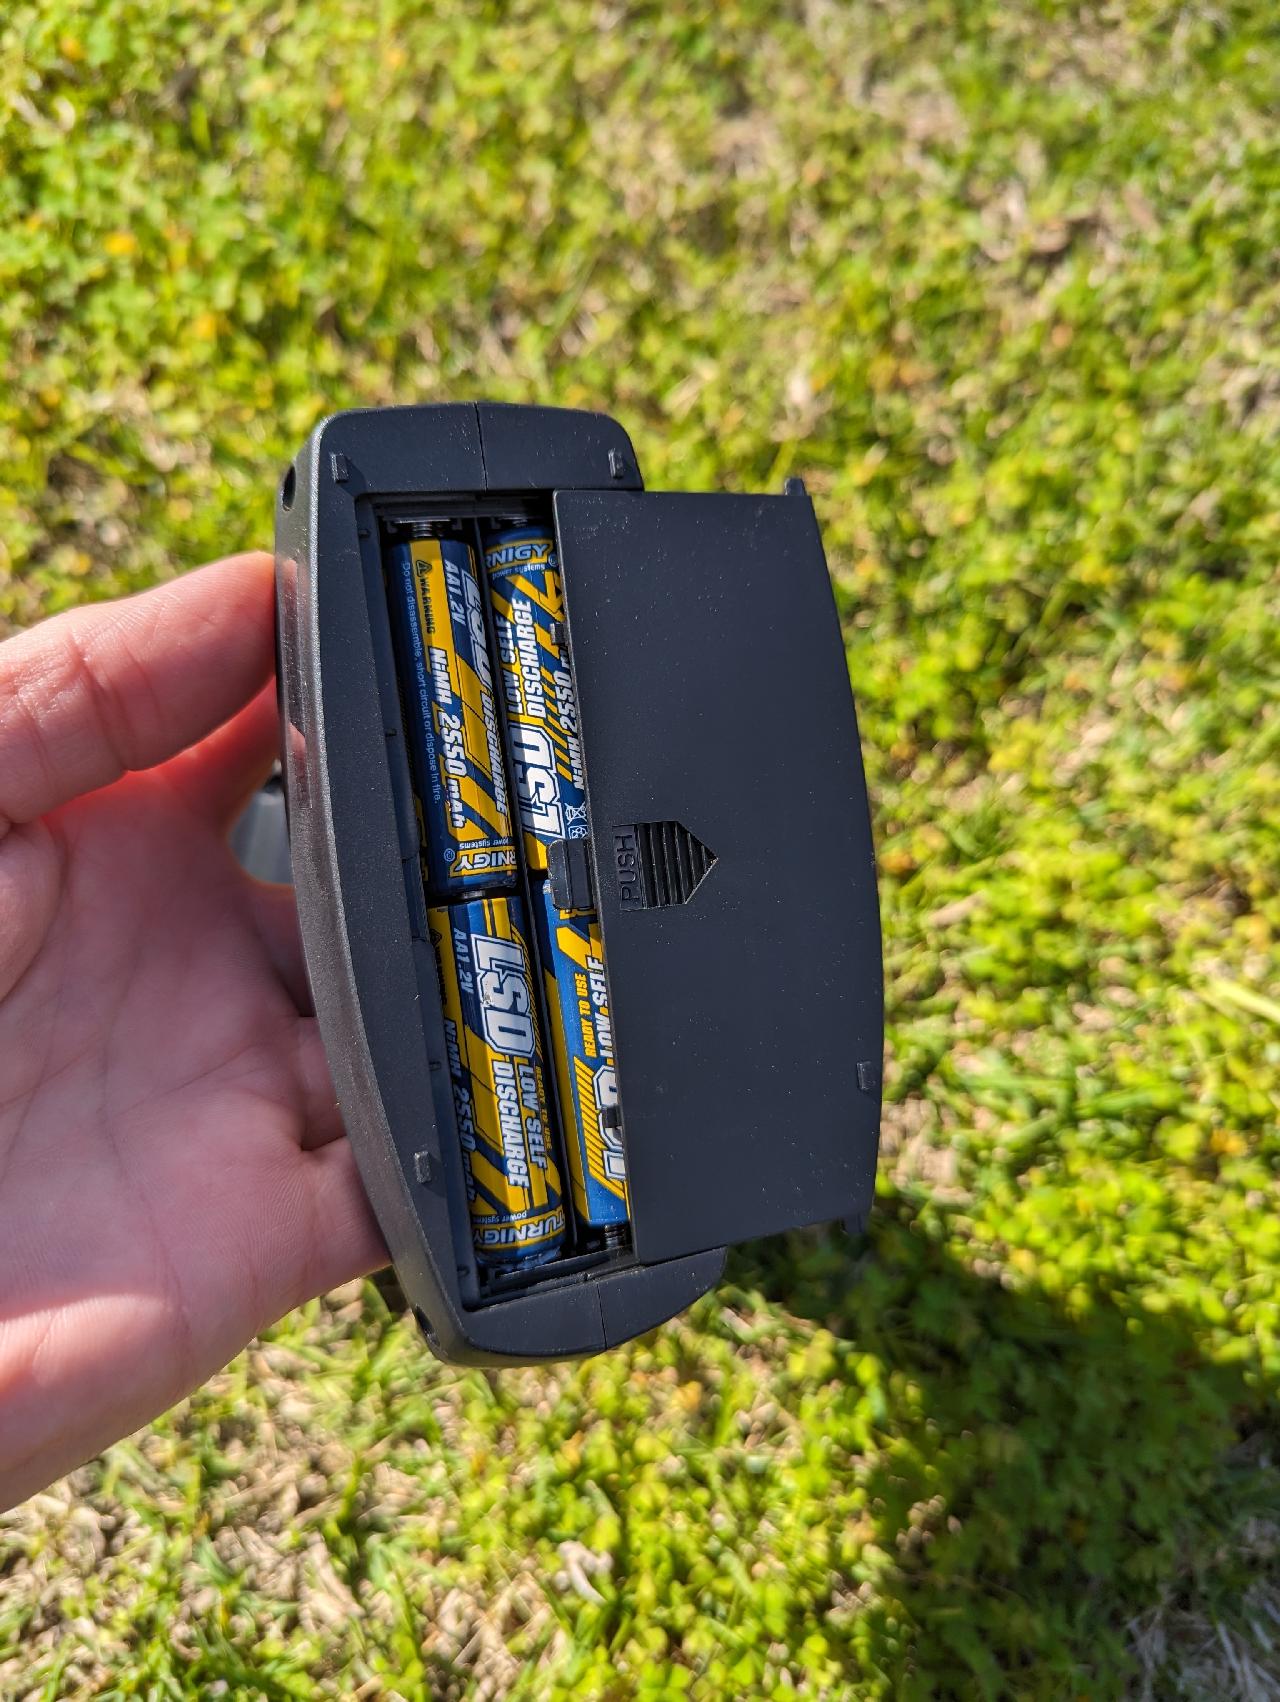
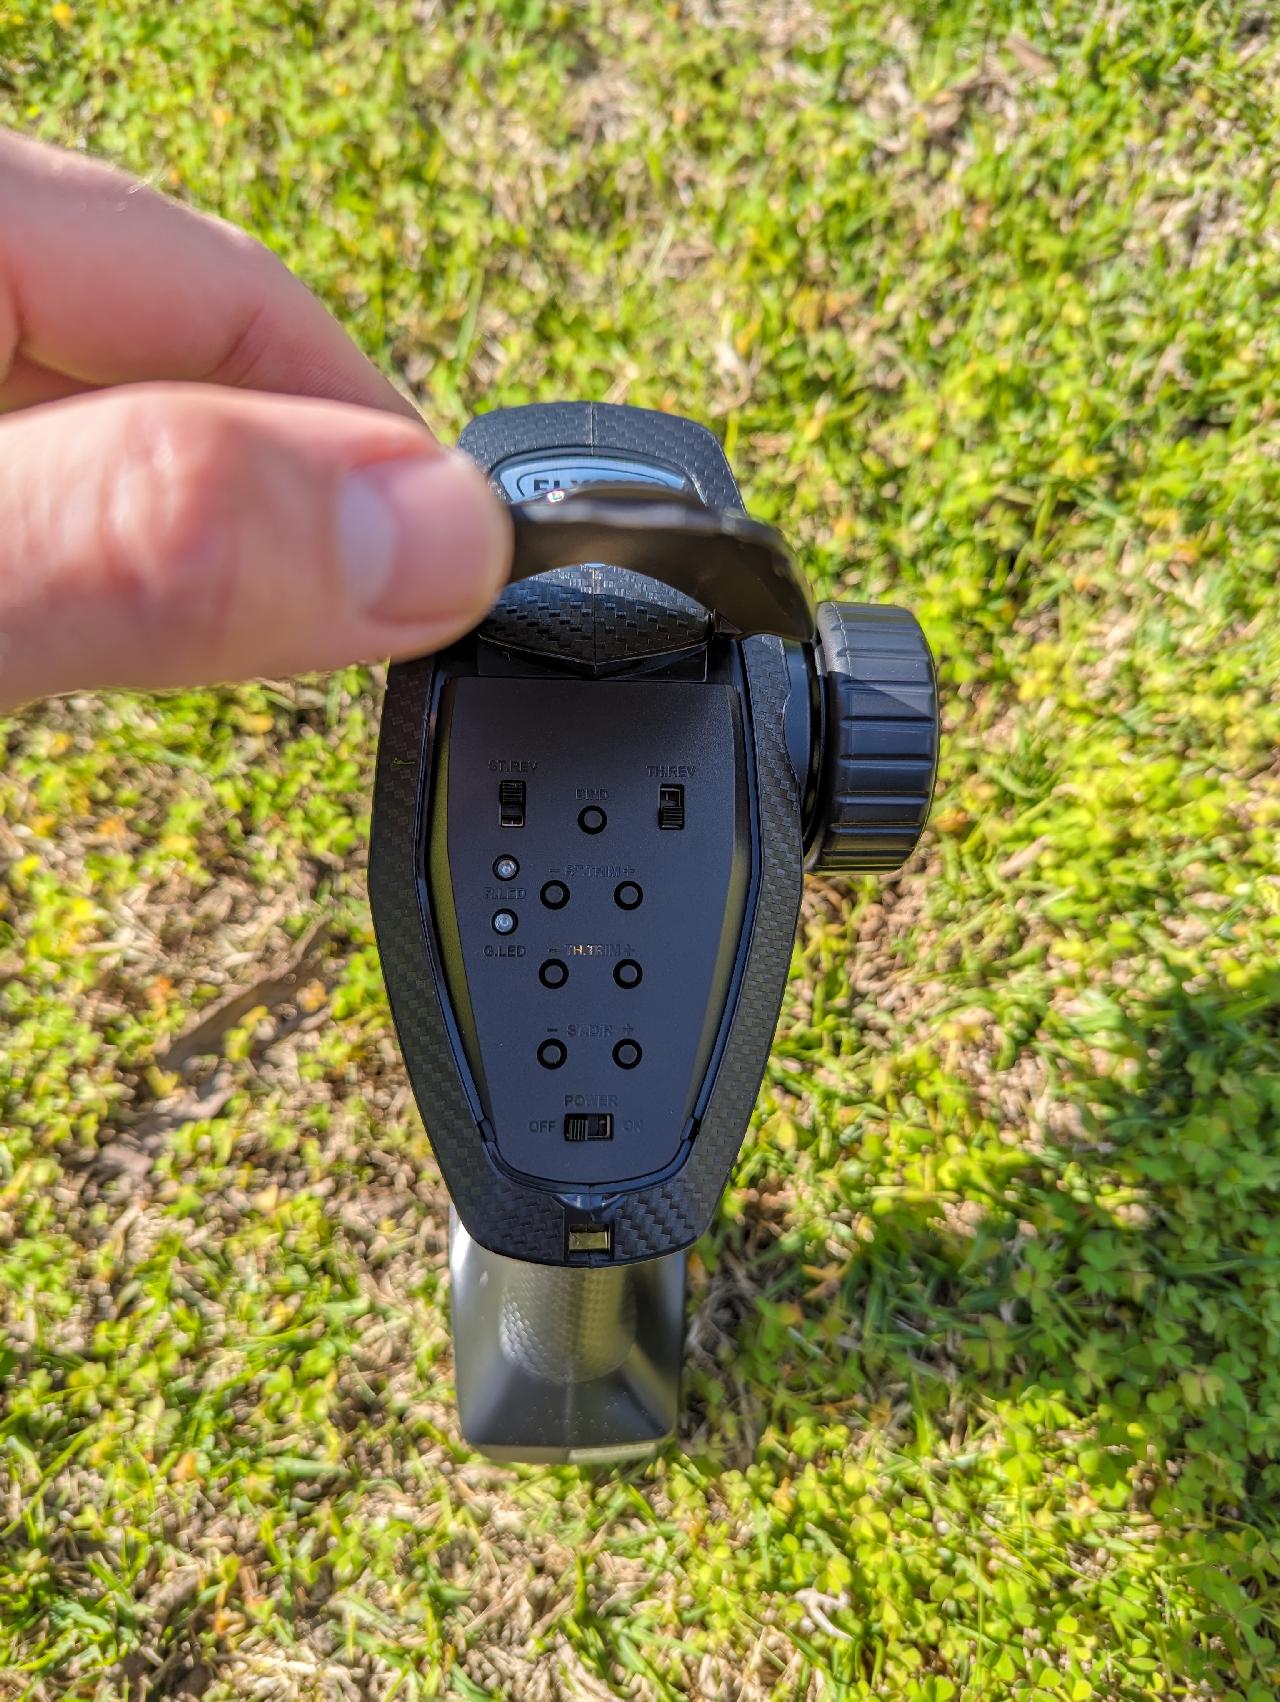
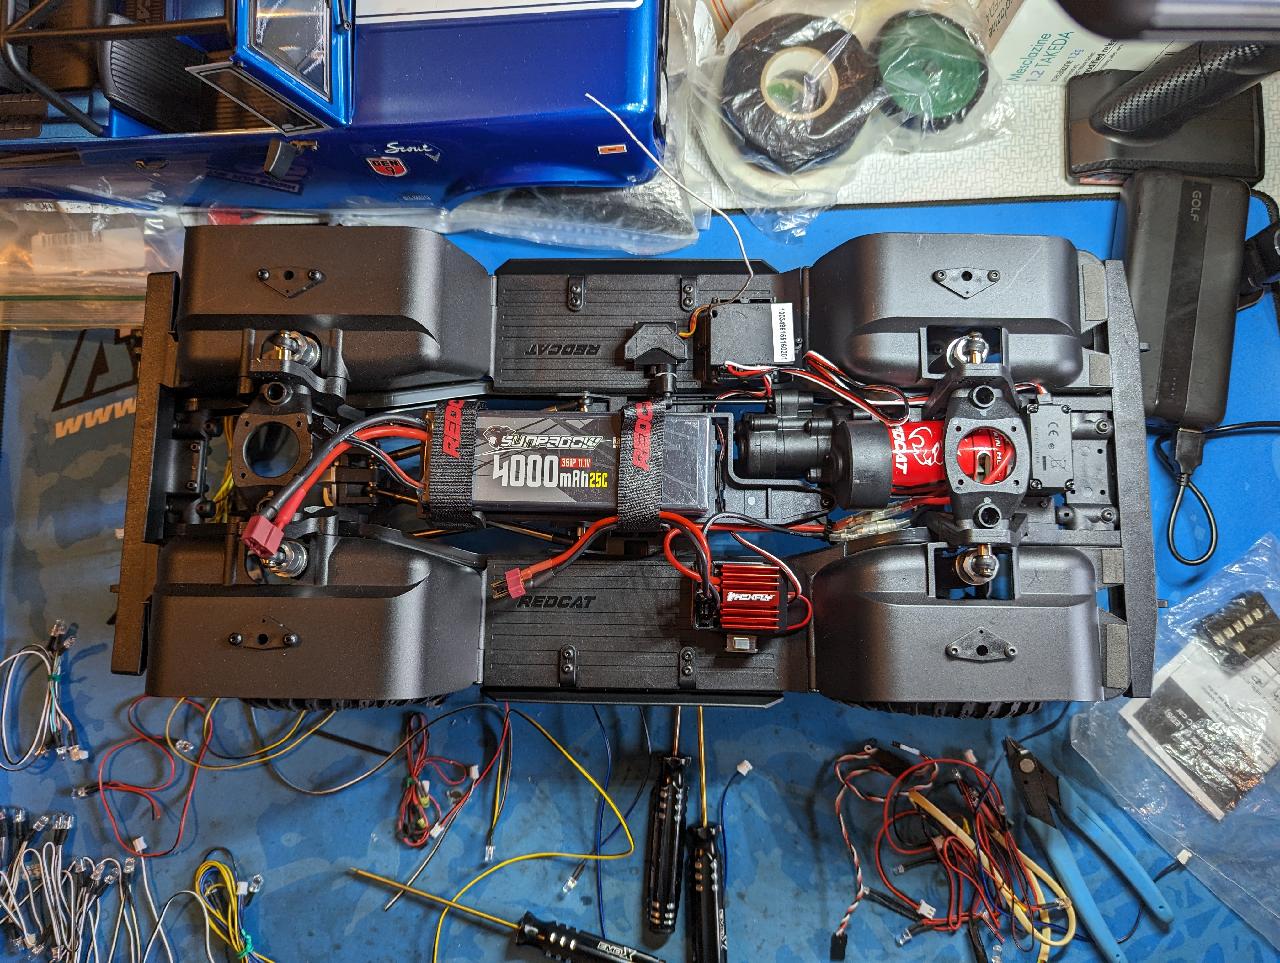
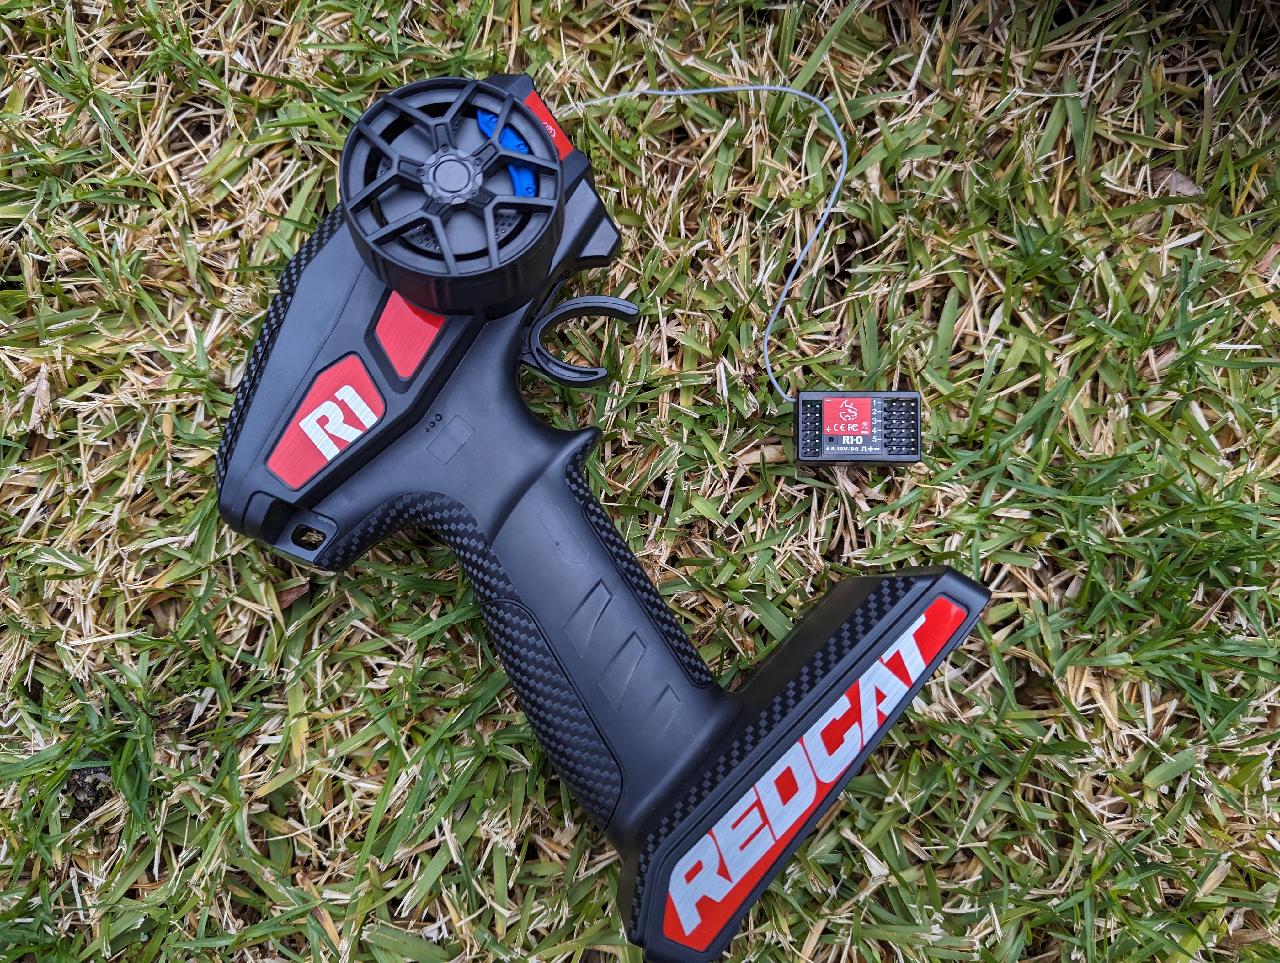
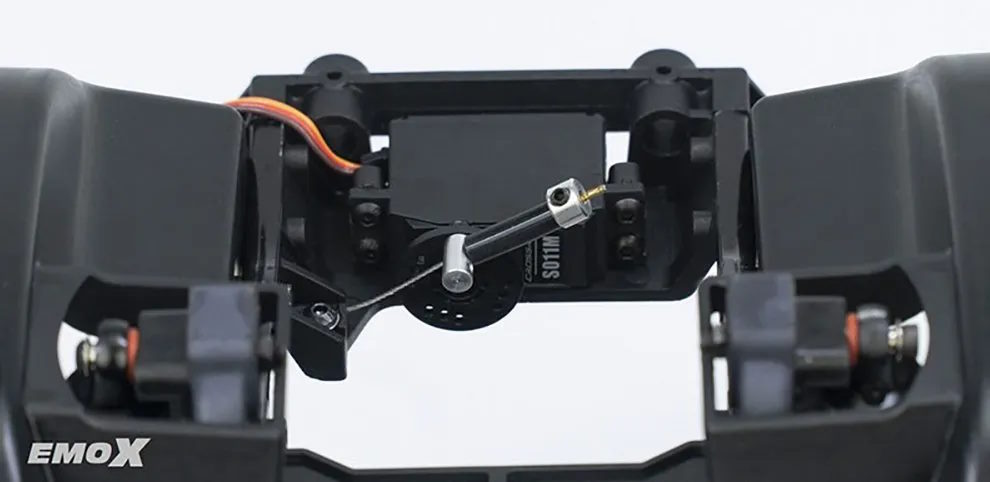
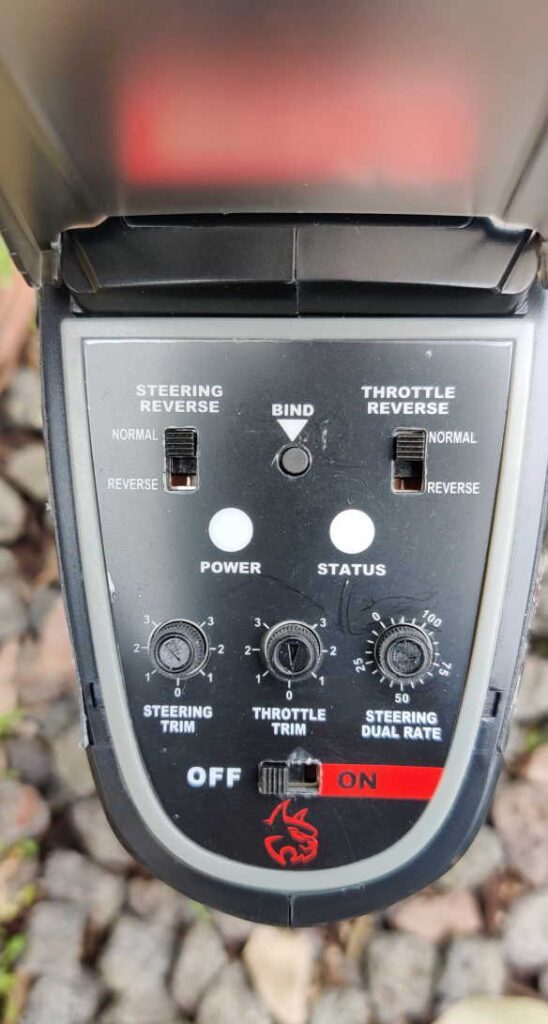
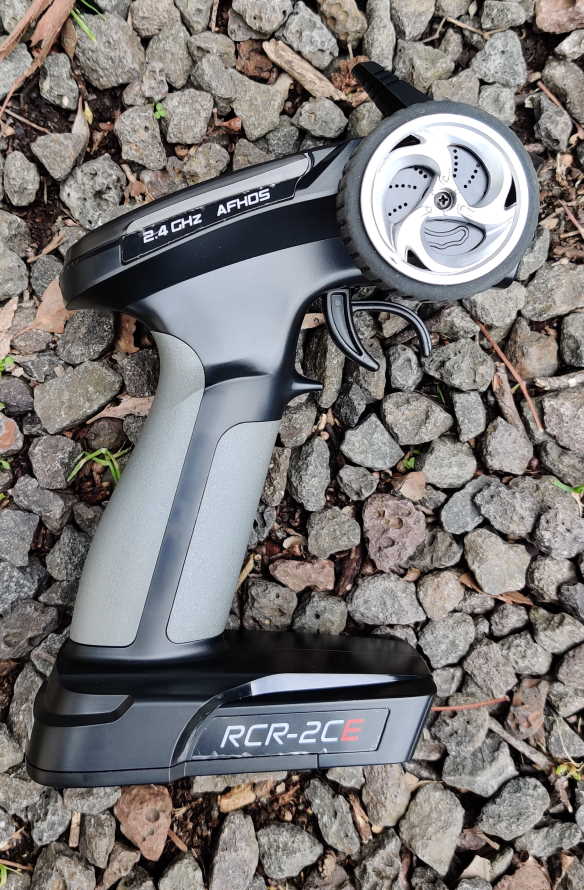
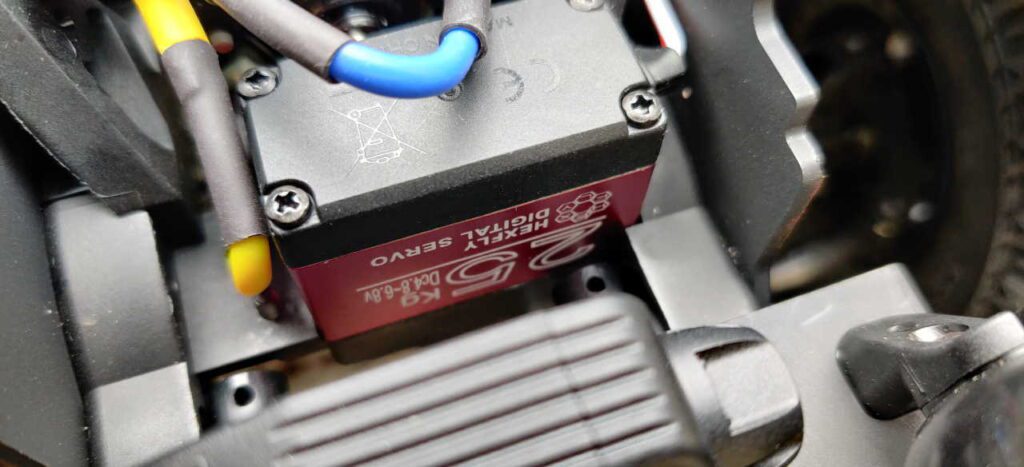
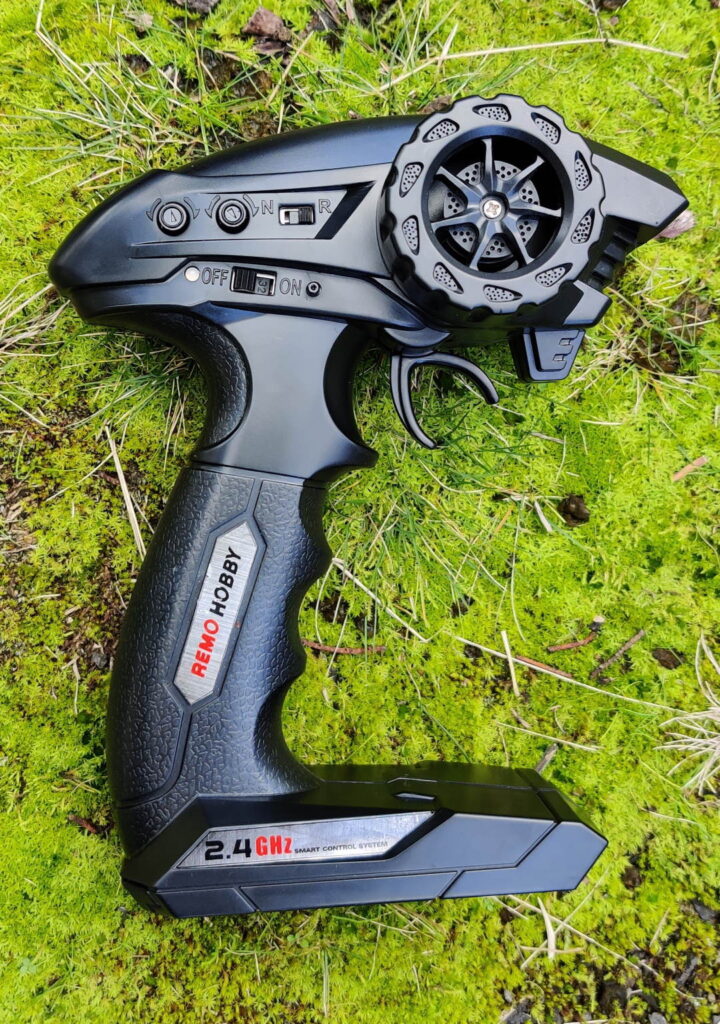
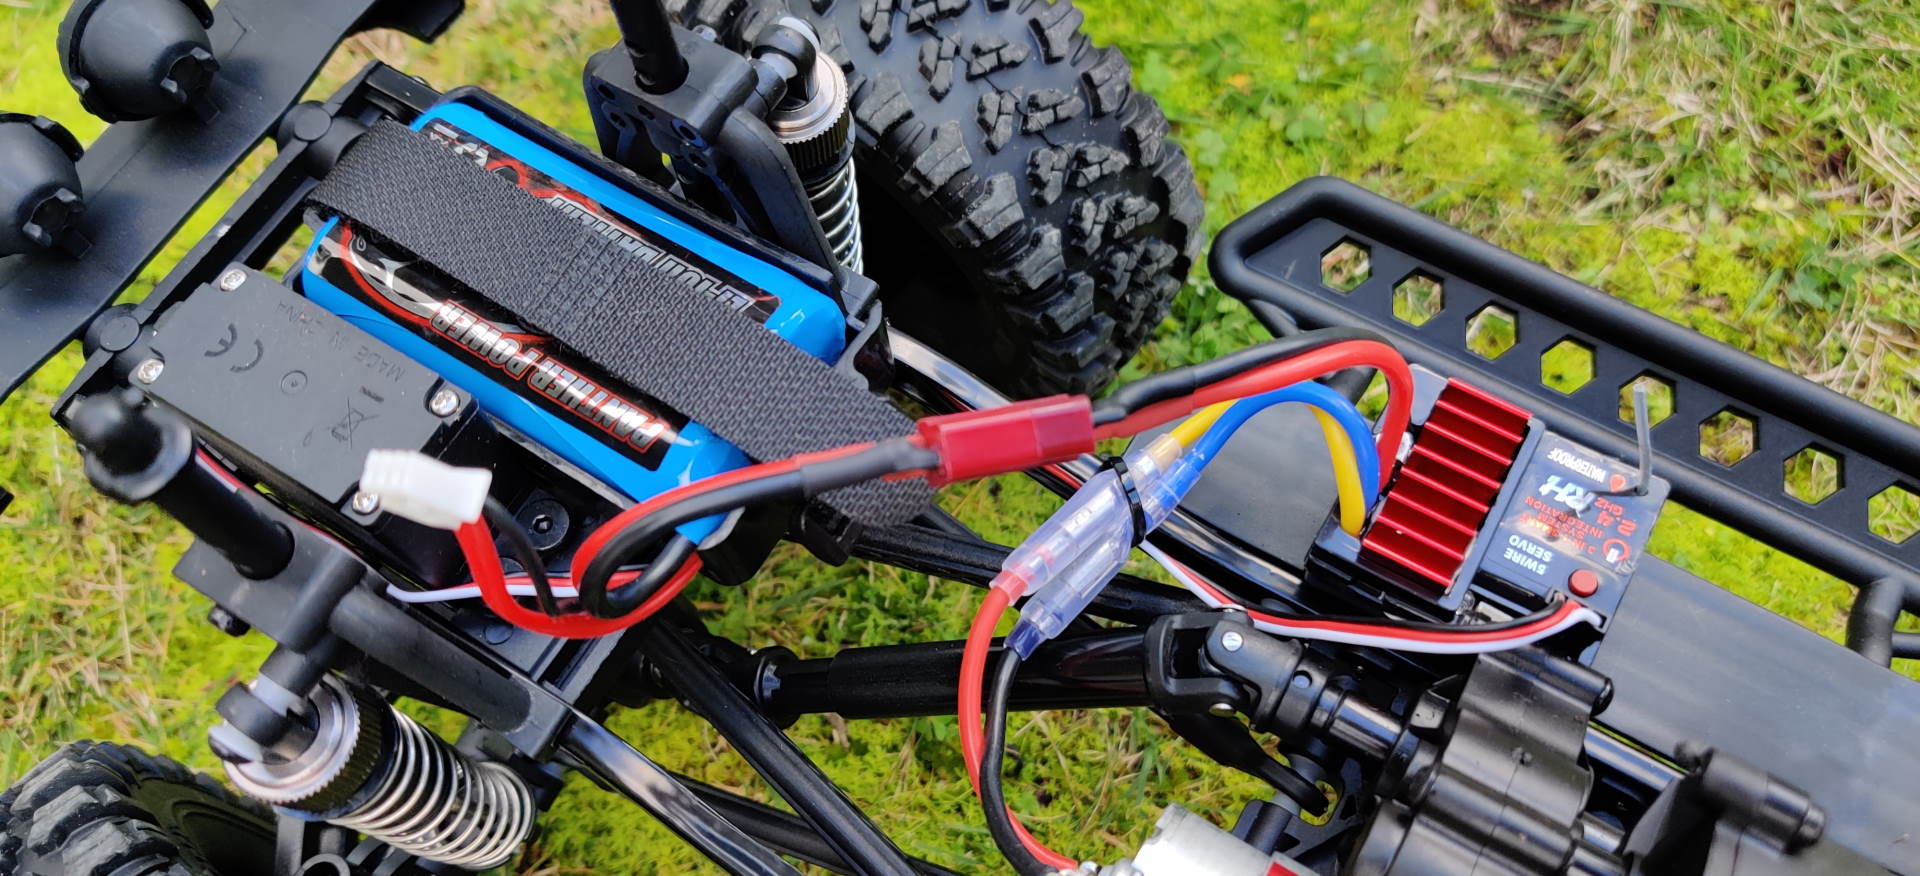
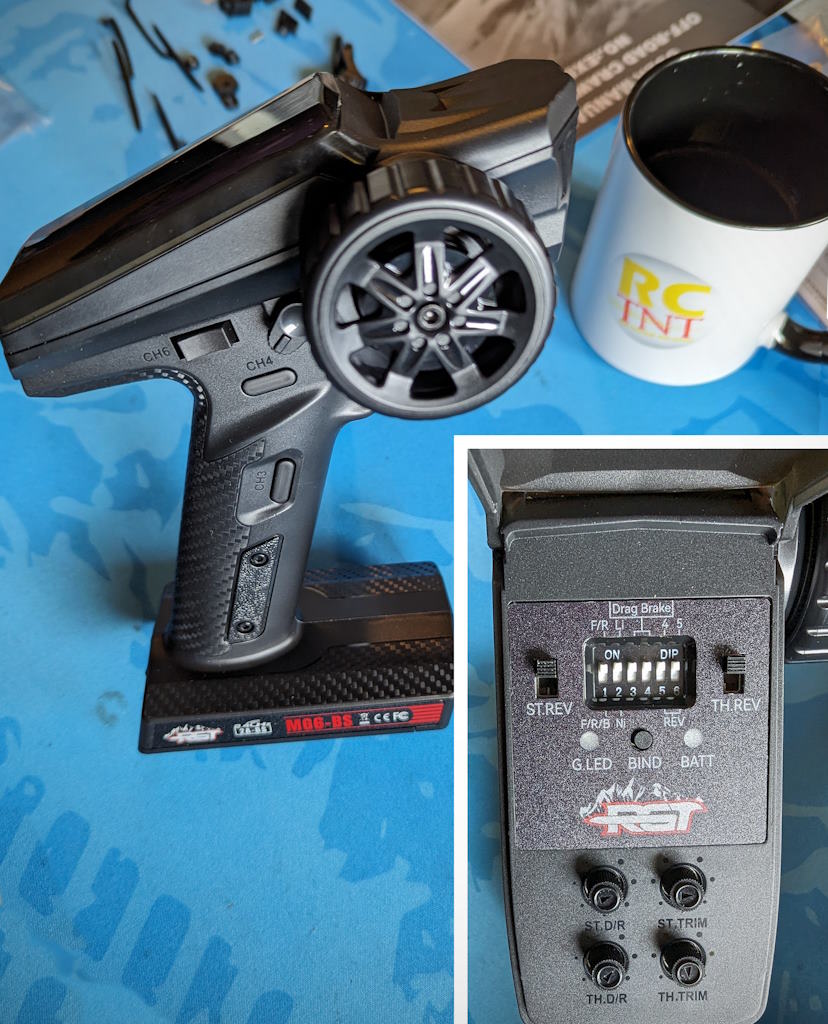
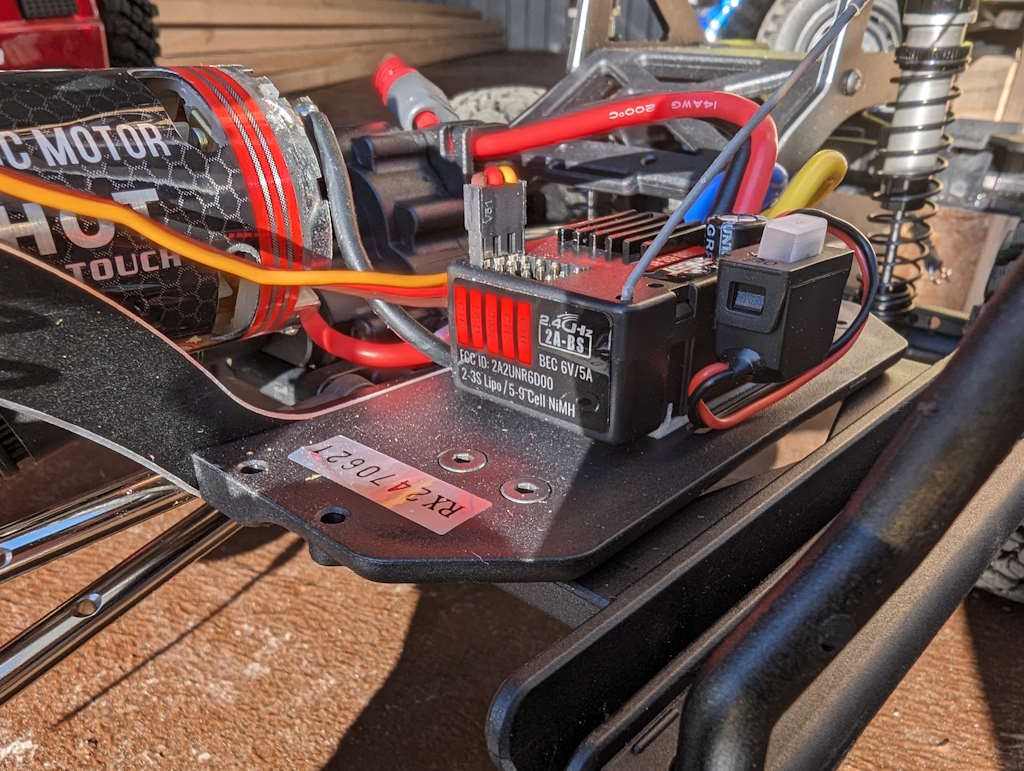
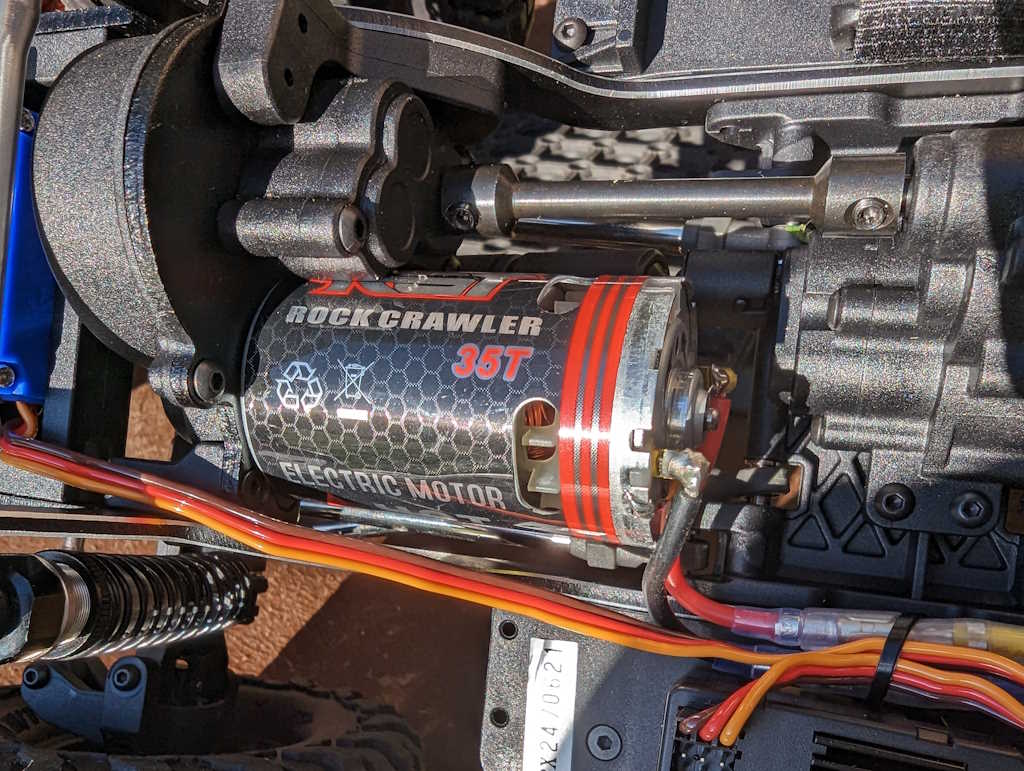
Radio & AIO Rx/ESC/Lights
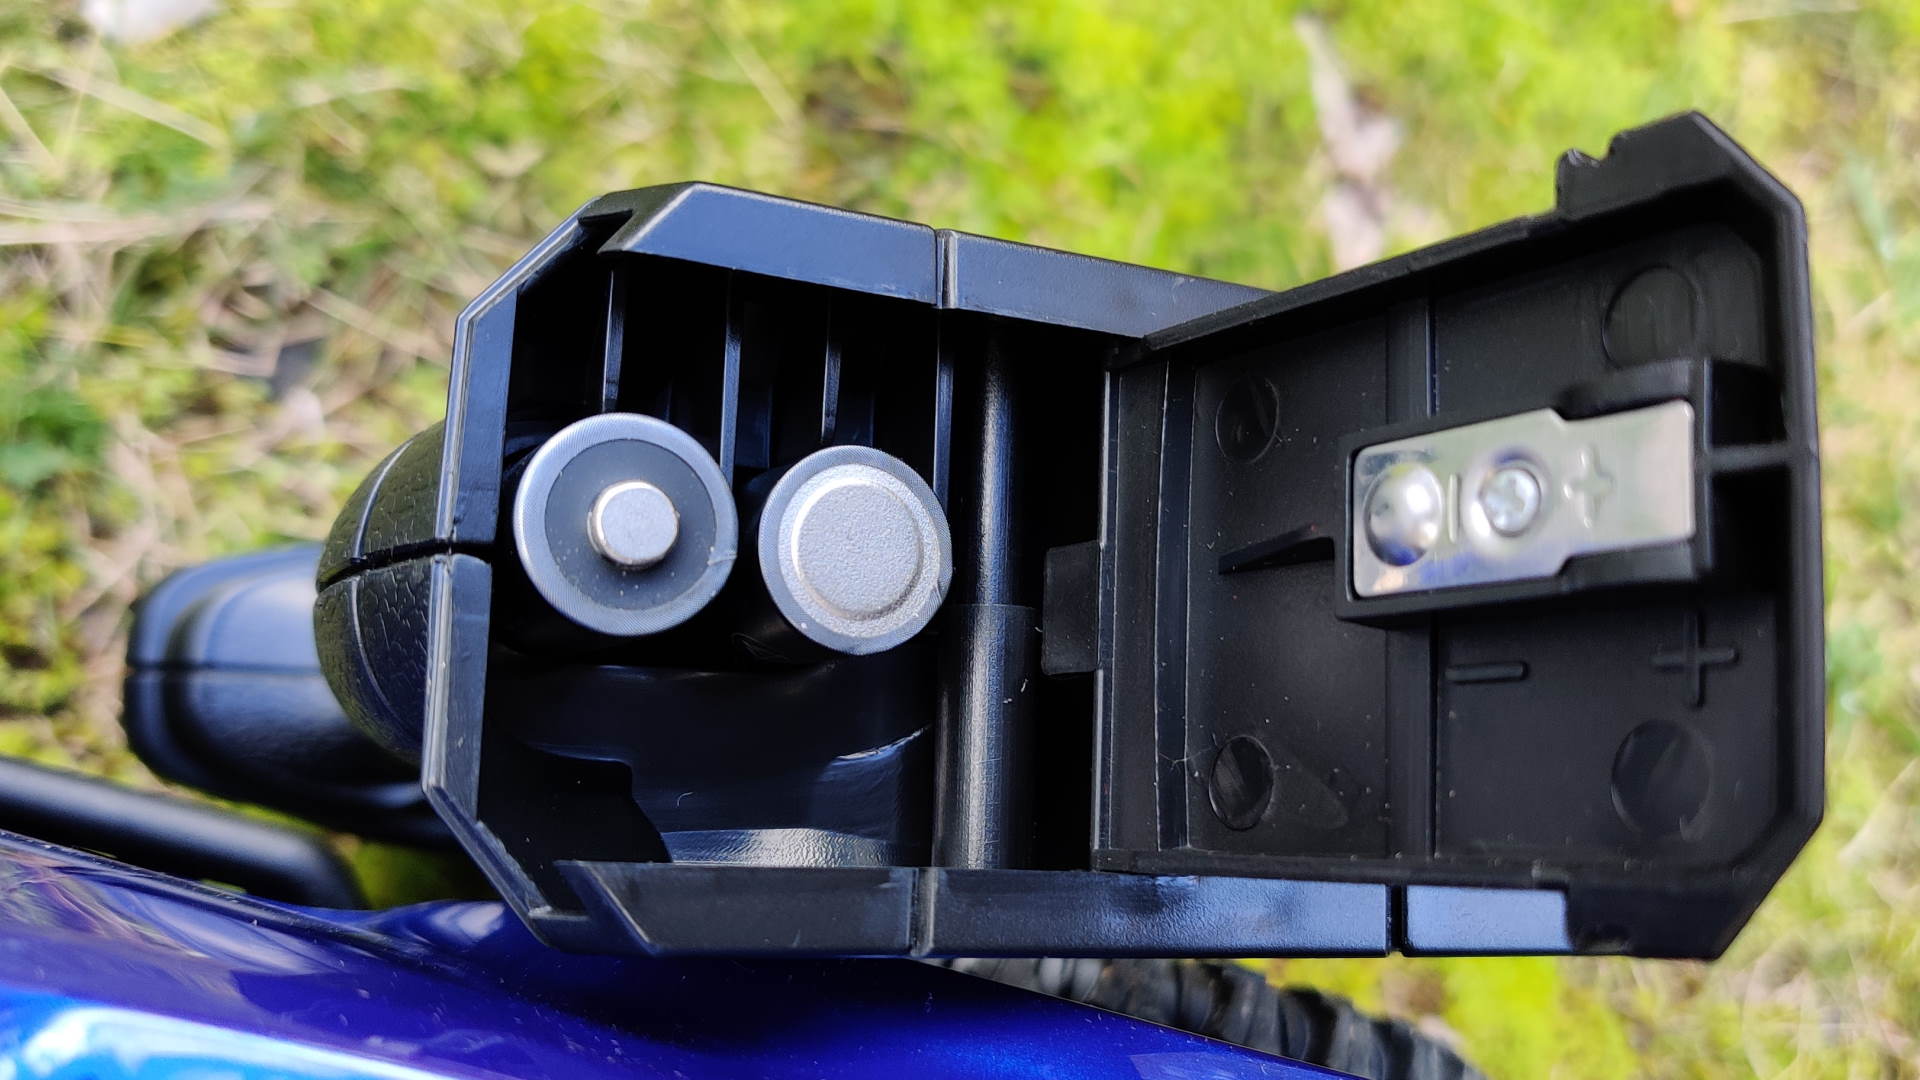
After a couple of vehicles with the new FlySky MGXX-BS radio systems, this is my first one with the middle-spec option, the MG6-BS. It’s a 6-channel radio (4x AAs) and an AIO (All-In-One) receiver, 60A ESC and light controller with discrete light hub for body-mounting. The radio is comfortable in the hand, all plastic, and with two stand-out features/design elements:
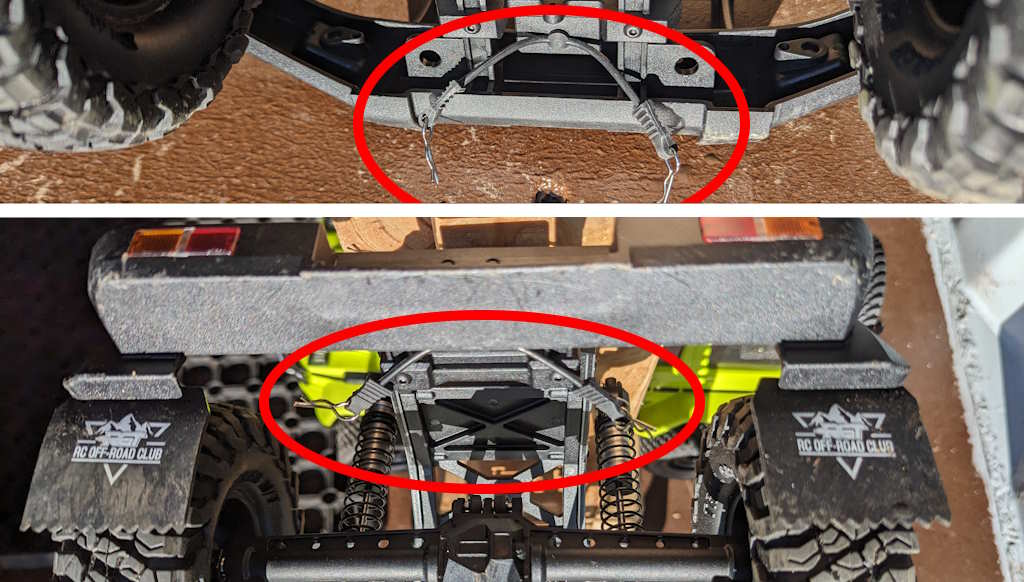
- Channel 5 is a spring-loaded thumb dial that returns to center. What a perfect controller for a winch! (The chassis and bull-bar have a mount point and fairlead respectively for exactly that, too!); and,
- A set of DIP switches on the radio that give you control over drive mode (Fwd/Brk/Rev and Fwd/Rev); LiPO/NiMH; Drag Brake (0%, 25%, 50%, 100% – though it’s weak even at 100%); and all the channel reverse options.
It’s a good system. Be aware the light kit is a cut-down version that gives you headlights or no headlights, and indicators and reverse being always enabled based on steering and throttle inputs respectively.
The biggest drawback is that Reverse is WEAK. Slow and underpowered, it seems to have been a cost-saving choice, as you need less MOSFETs in the ESC for reverse for this outcome. Saved FlySky a buck or two, though you miss it on the trail. Apart from this one drawback, I like the whole system.
Our Test Course
If you’re not familiar with how we test RC rock crawlers, we have a course that challenges any 4x4 RC crawler in many ways:
- Approach and departure angle: these are challenged on Problems 2 and 3;
- Side-hill ability: tested on Problems 1, 3 and 5;
- Breakover (skid clearance): tested on Problems 4 and 6;
- Suspension articulation and centre of gravity: challenged on problems 2 and 5; and lastly,
- A punishing ascent on problem 6 tests all of balance, break-over, articulation, tire traction and approach and departure angles.
Put together, we have a gnarly, challenging set of problems that challenge all crawlers. If a rig can conquer 3 or more of them, chances are you have a reasonably high-performance rock crawler. There are some machines that can claim all success on all six in stock form – but not many!
Driving Woes
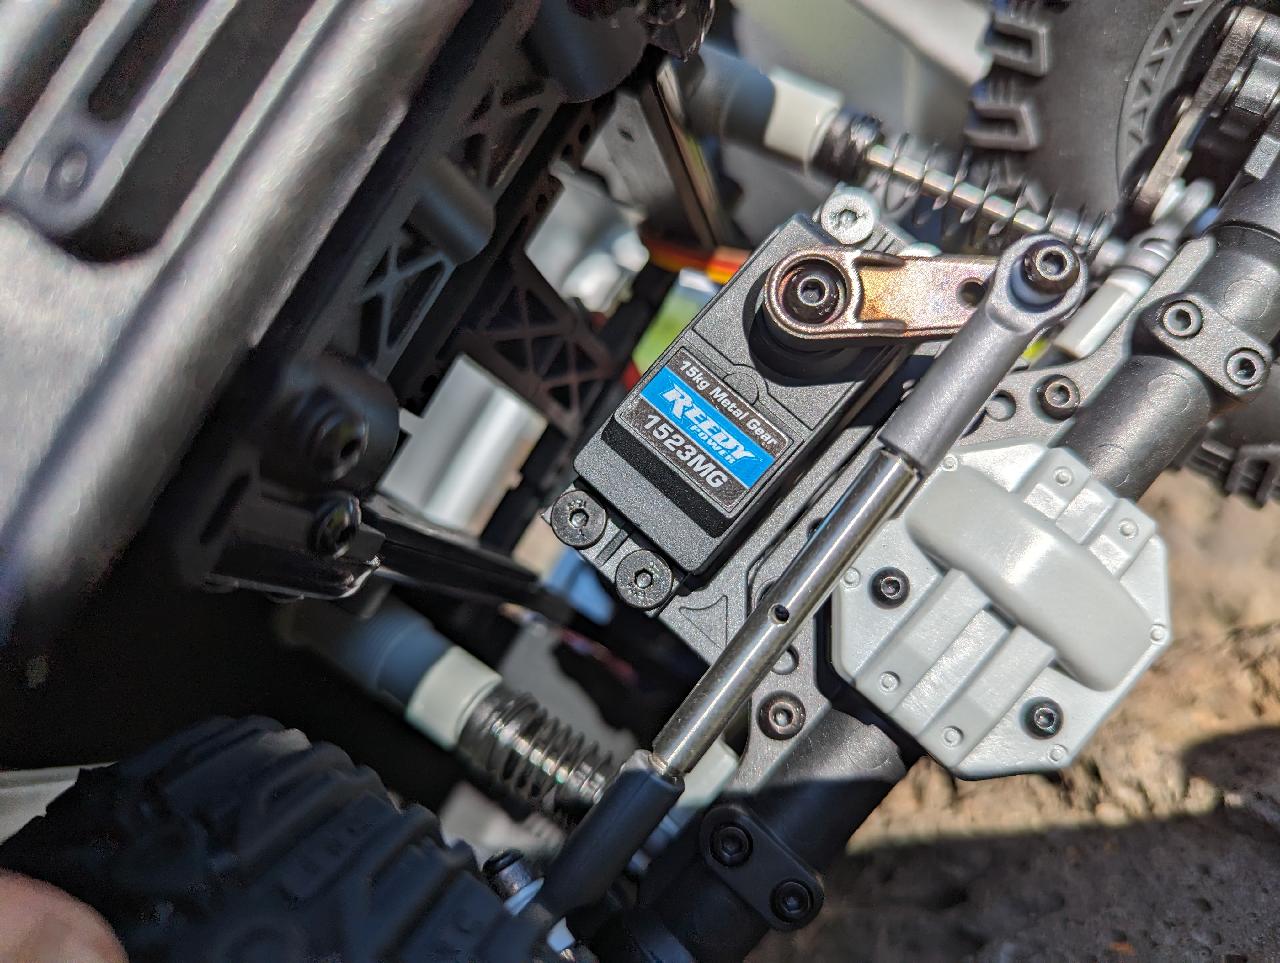
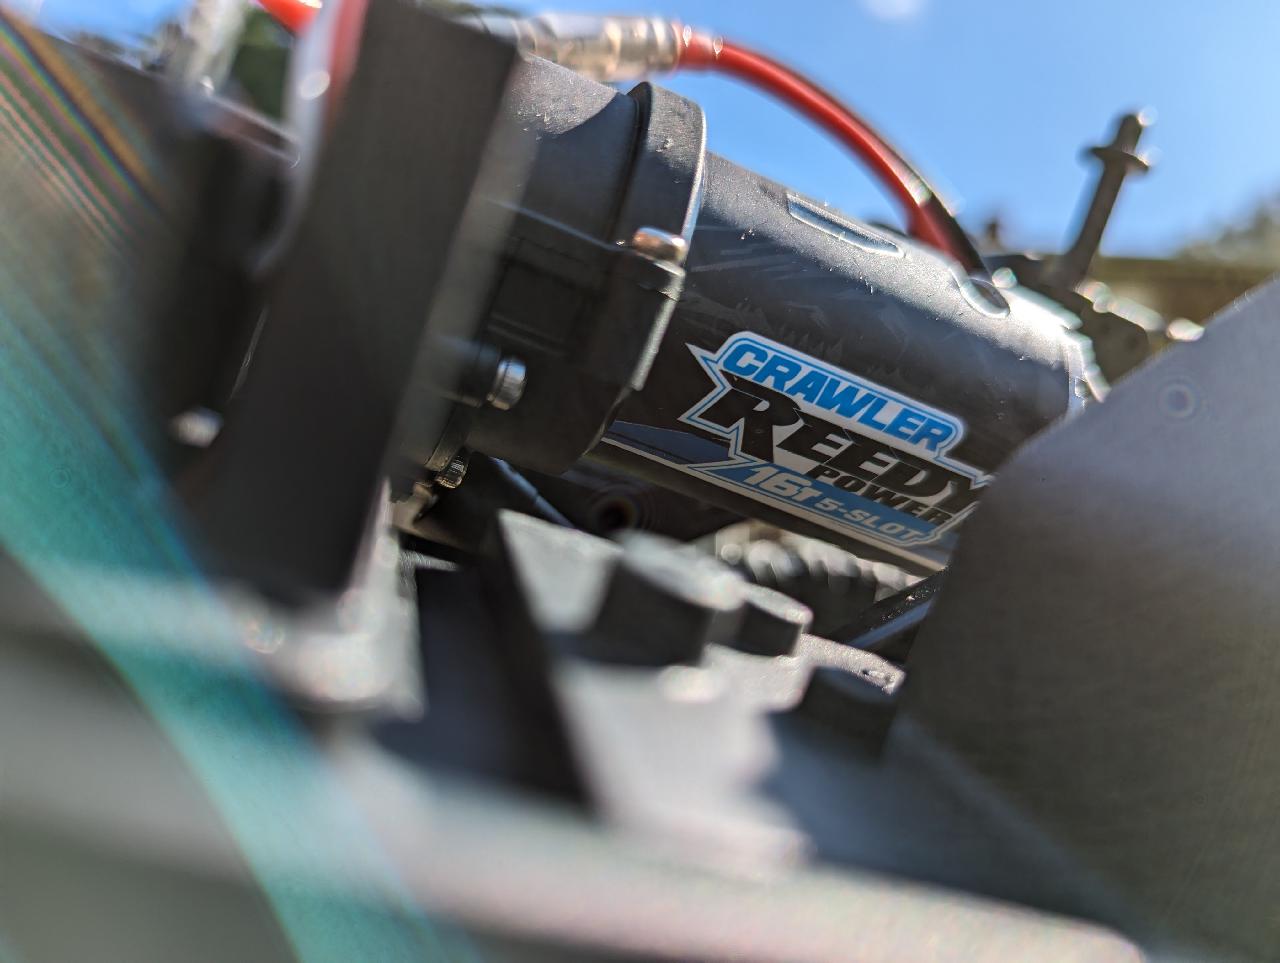
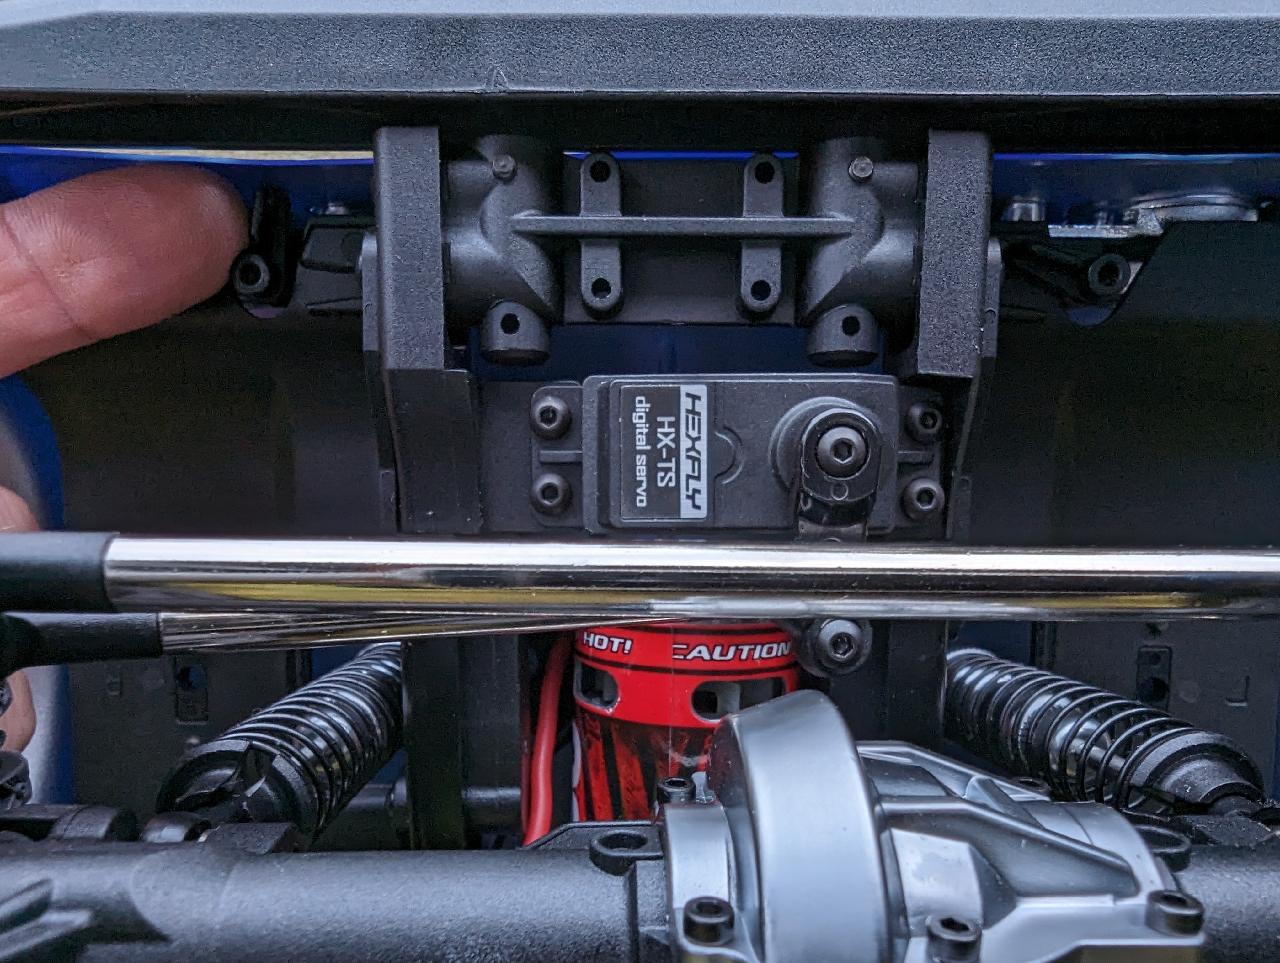
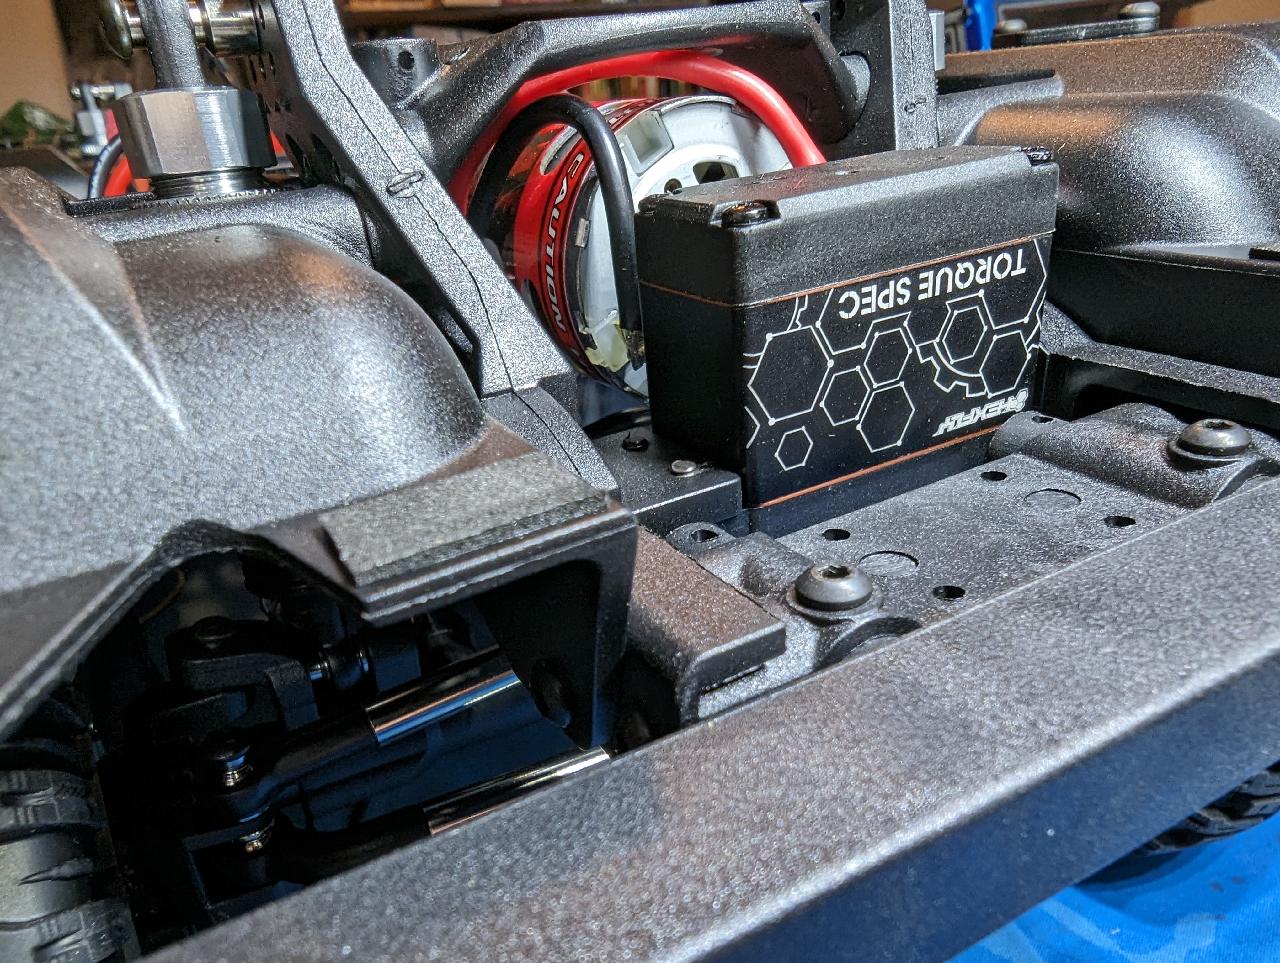
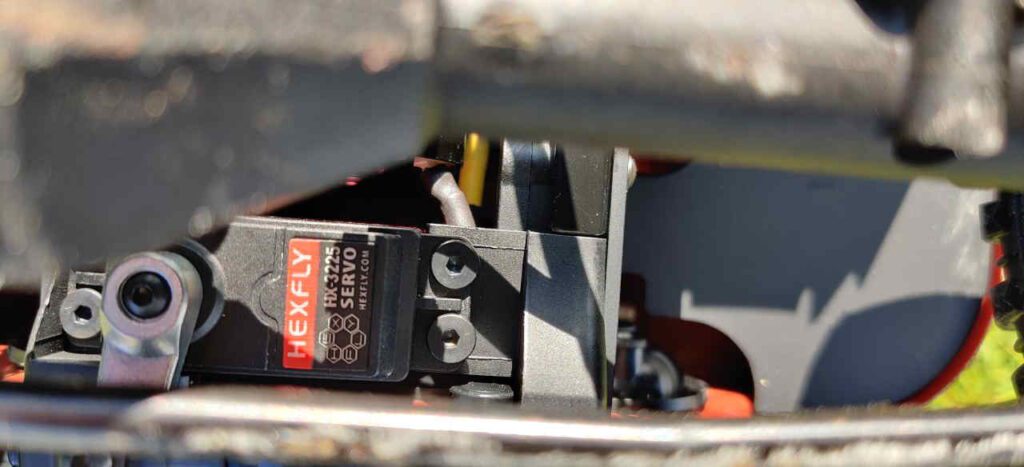
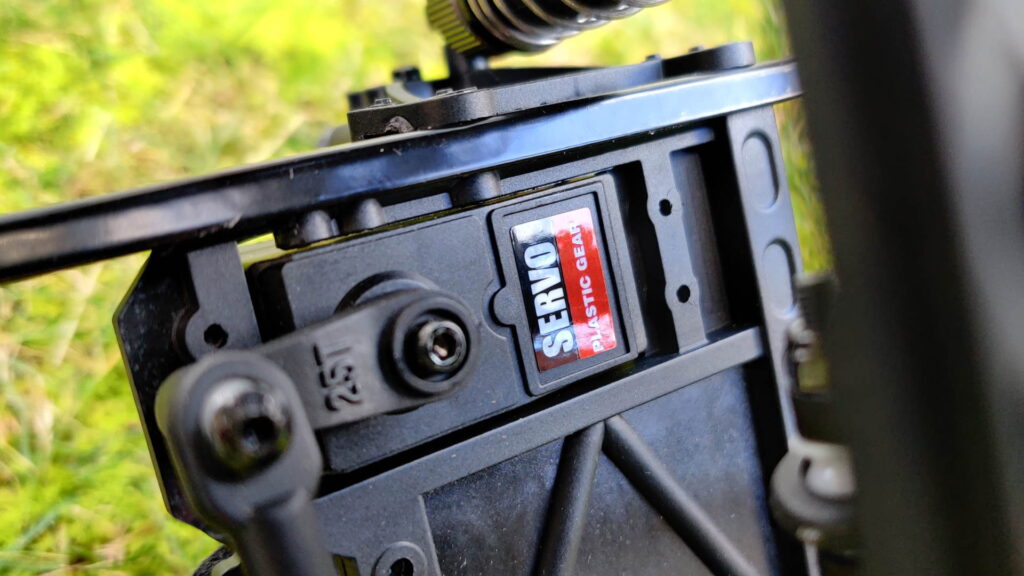
I tested it on my 6-Problem course. Bad news first: that slow and underpowered reverse is a big enough drawback to be quite noticeable. I also found the steering servo to be slow and it faded under heavy crawling within a few minutes (though it didn’t fail outright).
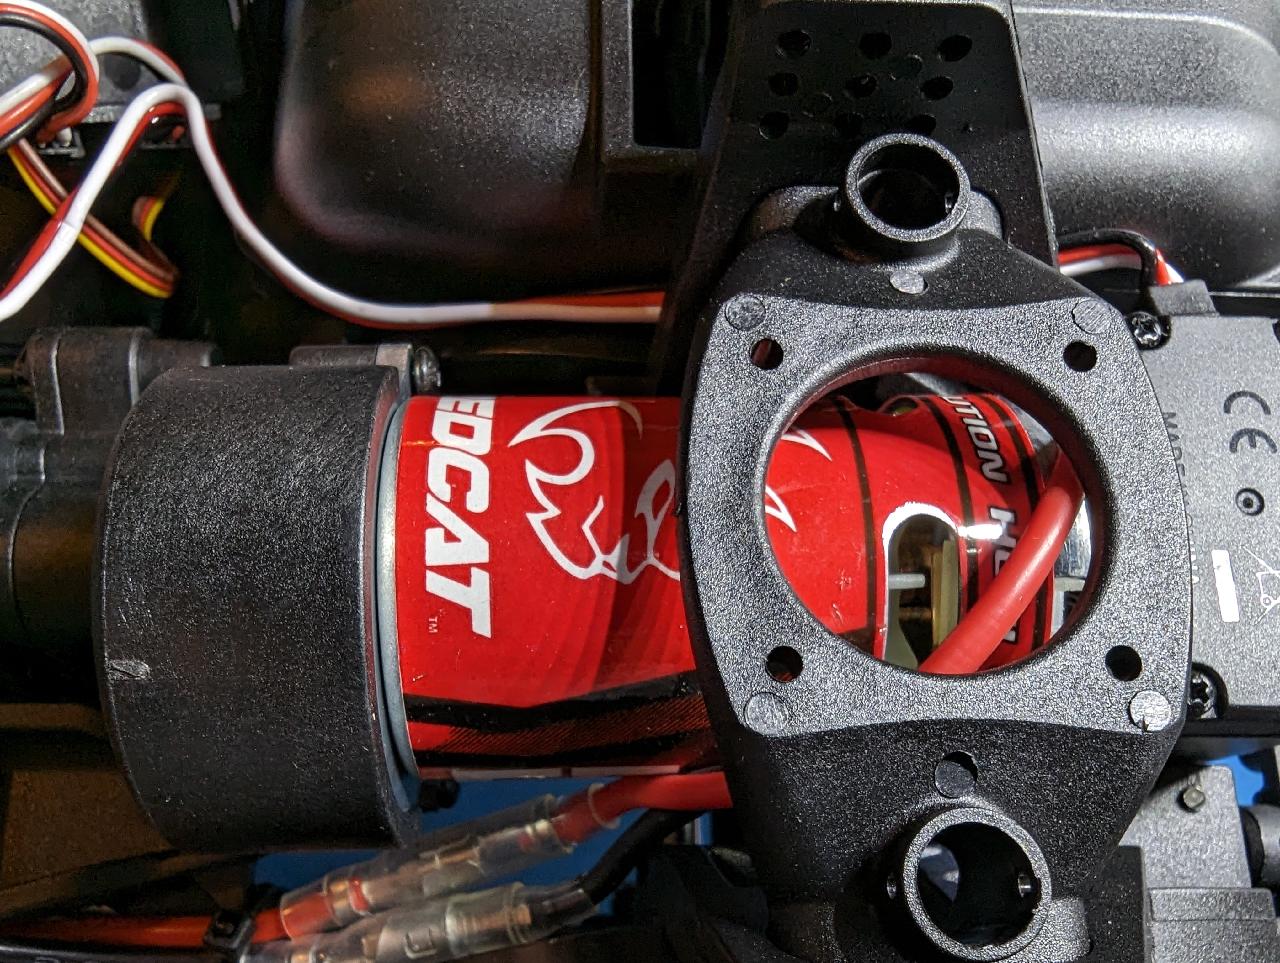
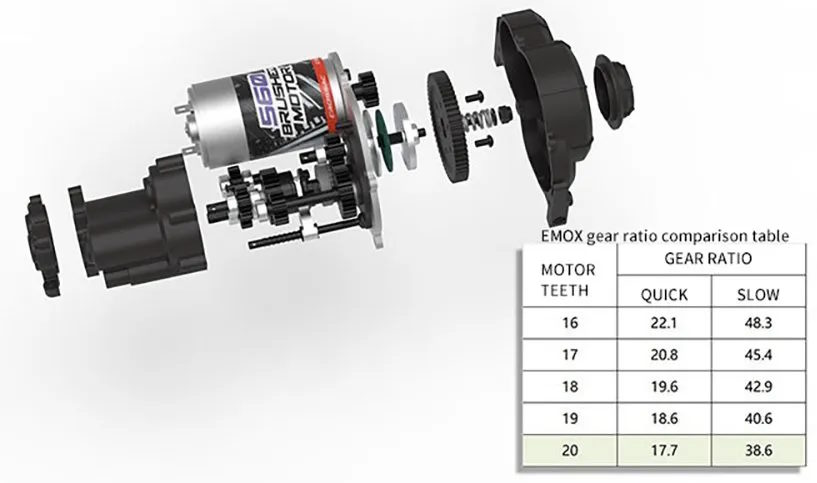
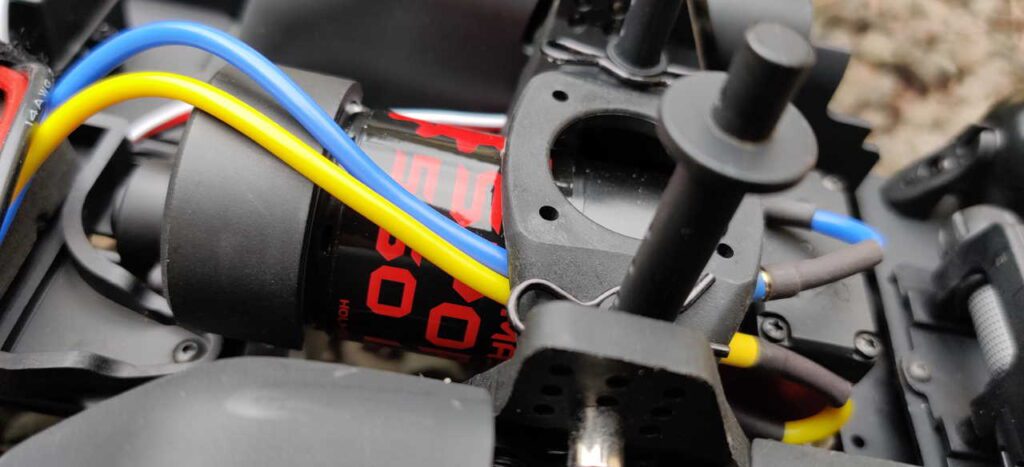
The motor and gearing is too fast for crawling and too slow for trail driving. There’s no second speed here, so unlike the Rescuer (there’s that comparison again!!), you’re stuck with your gearing, battery and motor choice. This feels just like comparing the TRX4m to the FCX24 with its 2-speed, actually!
The tires are too stiff. The suspension moves like it should, though being filled with oil would have helped. The car is top-heavy and it tips over easily.

Driving Wins
On the bright side, this car looks magnificent on the trail. It looks amazing on the rocks. It moves nicely, with plenty of scale body roll without being too much. It’s quiet, and very pleasant to watch it work over the ground.
Without upgrades, in stock form, this will be a frustrating car to drive if you’re going beyond basic obstacles. The waterproofing is a nice touch, as are the lights, but that capability limitation will make itself known regularly.
With upgrades, though? Yeah, I think this could easily become one of my favorite cars. I’ll get back to you on that, as I’m planning on doing all of the upgrades I list below. The car drives okay. Could be better. 4/10.
Value Proposition
So, did they pull it off? Is the car worth the asking price? For a bigger, established brand name, the price is good. Although, newer names have been creeping in with very durable and very capable options in recent times – just look at the Ecto if you’re not convinced (review here)!
I think this car represents real potential for the owner who loves the Landcruiser body and has plans to improve it. As a stand-alone crawler, it’s not as good as a similarly priced rig from Element, such as the Sendero HD. But as a scale crawler with potential to go ultra-scale at low speeds, it leaves the more expensive TRX4 and Axial CJ7 in its dust. But those crawlers will be better on the trail with their second speeds, and better on the rocks, with their better tires and overall performance. So, what to do here? Buy it if you love the body, but be prepared to upgrade as you’re able.
Upgrades?
Open your wallet for this one. I try to be reserved in my upgrade recommendations usually, but this rig really wants a list of things. Ready?
Wheels & Tires
First, the tires need to go. They aren’t great. And since they’re glued, go with a weighted beadlock wheel too. I’m quite partial to the Boom Racing Hustlers – check them out (and I even found some period-correct steel ‘Sunraisia’ style beadlocks that go *perfectly* with this car)!
Also, you’ll want to install wheel wells (I’ll design some soon to download and print).
Electronics
The slow, weak servo needs replacing. Try my favorite budget crawler servo and you can even run it directly off the 2S battery (signal and ground wires to receiver, positive wire to battery connector, via a switch if you want). Or, my fave 7.4v brushless all-rounder is this guy.
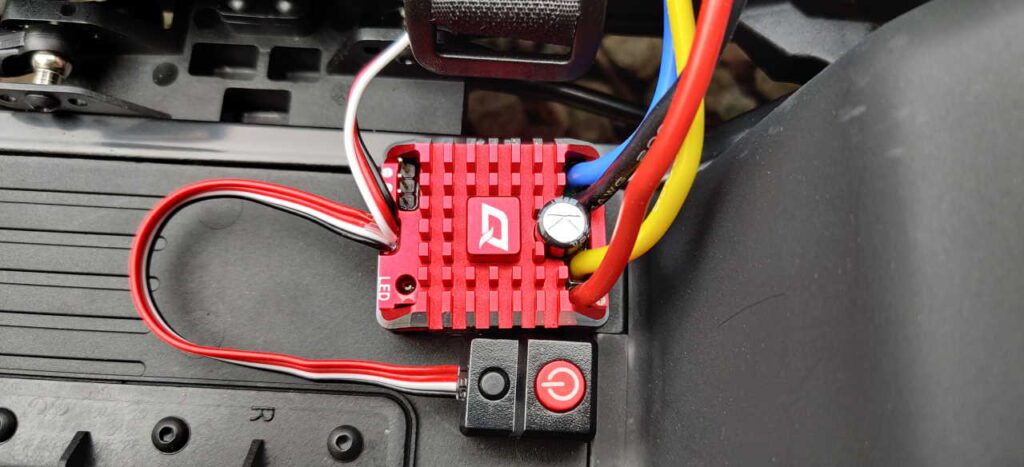
While we’re on electronics, the AIO Rx/ESC and motor combo is sufficiently lacklustre that you’ll eventually throw your hands up and slap in a Fusion system instead.
You’ll want a radio system too, in that case – buy a receiver for any other radio you have, or consider the ever-reliable FlySky GT5.
Banggood sells really cheap 6-ch receivers so you can use this handset for up to 20 models, which is handy.
Lights & Accessories
Lastly, lights: use a Y-splitter for the light control module on the throttle channel and hope for the best (I will try to make an Arduino-based adapter for this to piggy-back off throttle and steering channels soon).
Down the track, you may consider a servo winch – the car is certainly ready for one! And perhaps also some scale accessories and you’ll be sorted!
Bottom Line
It’s a worthy body on a basic car. With upgrades, it’ll be a SWB beast! Without em, it’ll be a bit frustrating to drive. Pick obstacles appropriate to its capability and you’ll enjoy yourself. Just keep the limitations in mind if you’ve got your heart set on this gorgeous model.
My thanks to Banggood for providing RC-TNT with this model to review. I’d have purchased it myself if they hadn’t, because, just look at it! But they made the investment and have my thanks. Grab your own RGT Intruder EX86020 from Banggood here.

Craig Veness
RC-TNT
Craig has been into radio control since the 90s and into RC crawling since about 2010, when a Losi MRC started the obsession! Now it's all rocks this and crawl that and upgrade all the things! ...You know how it is, right? Welcome home 🙂
A note on affiliate links: we were provided with this car by the manufacturer for review purposes. The Amazon and AsiaTees links in the above article are affiliate links, which means we may be paid a small commission if you choose to click on them to make a purchase. As always, we make effort to ensure that no review is impacted by this – we still report on bugs and issues encountered during product testing, and our fixes or solutions if found. Thank you for reading and happy RC-ing!
More RGT Articles…
RGT Intruder: An Important Release!

Which RGT Trail Rig is Best for YOU?
Three epic trail rigs from RGT: Rescuer EX86190, Challenger EX86170 & Pro Runner EX86130. They’re all great, but which one should you buy?
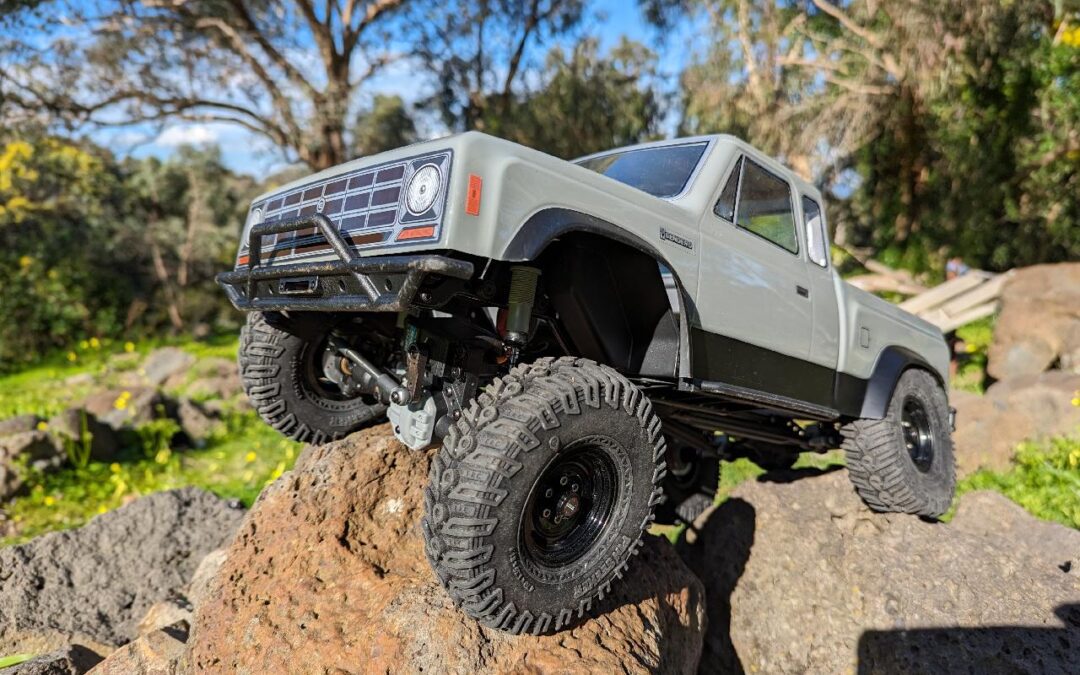
RGT 136100V3 Rock Cruiser RC-4 V3
The RGT 136100V3 is a fun RC crawler with potential for better performance. It looks great on the trail and debuts some trick new electronics!
TRX4 Alternative? RGT Rescuer Review
The new RGT Rescuer (EX86190) is RGT’s latest and greatest premium RC rock crawler. Does it have what it takes to challenge the Traxxas TRX4?

RGT Adventurer V2 Review
The RGT Adventurer V2 136240 is a brilliant little 1:24 RC rock crawler. We’ve properly tested it, including in water. Video review too!
RGT Pioneer EX86110 1/10 4WD RC Rock Crawler
The RGT Pioneer EX86110 is cheaper than competitors and has a respectable specs list that suggest it’s a serious 1:10 RC crawler. Let’s test!