Yikong 4106 Pro Has a Party Trick!

Yikong 4106 Pro Has a Party Trick!

Inspiration, Not Imitation

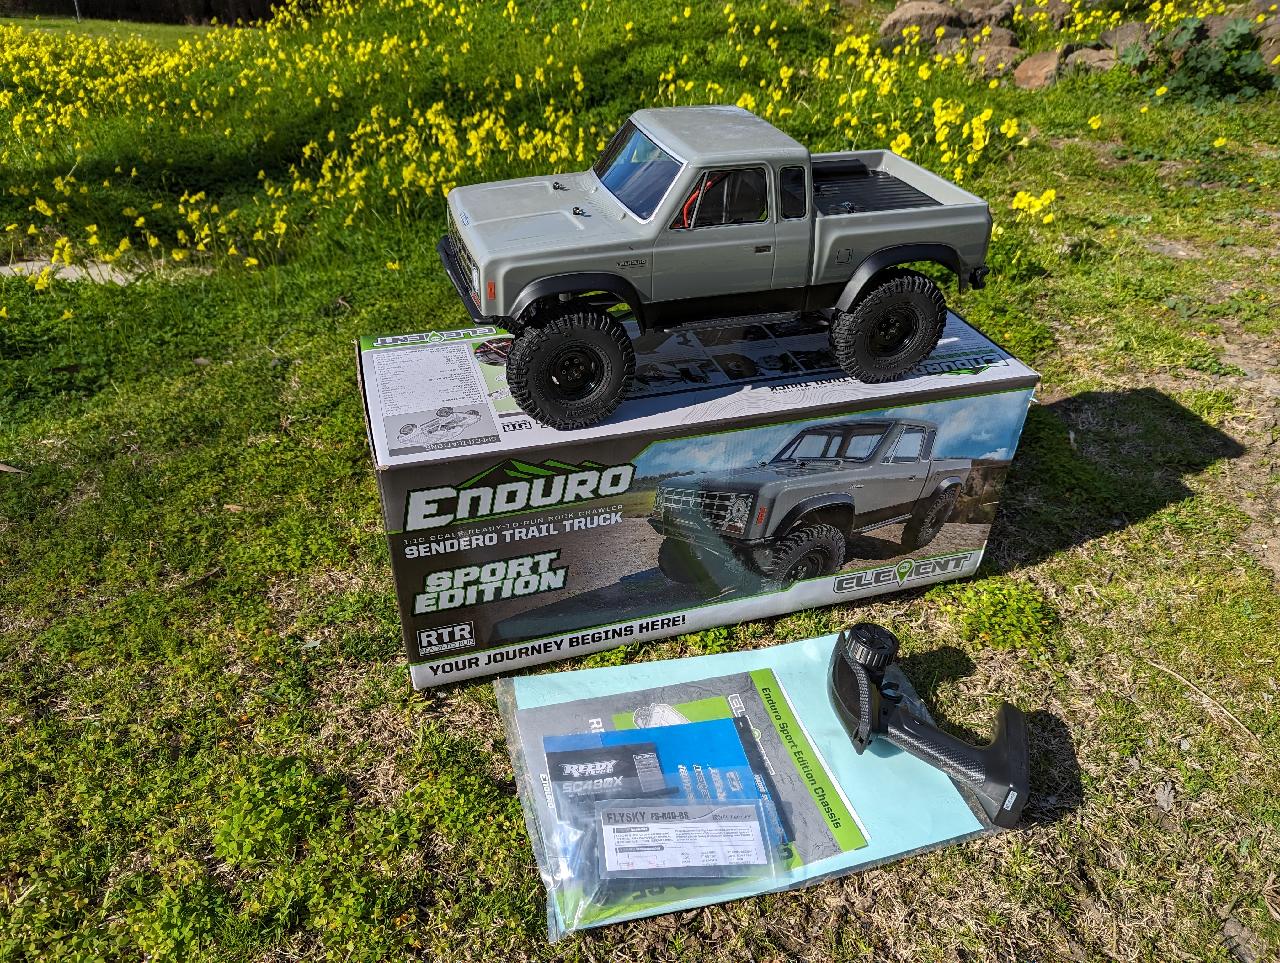
Yikong 4106 Pro is a 1/10 RC crawler with an ability we have not yet seen in the RC crawling world. You may not have heard of Yikong before, but they’ve been quietly making some interesting models over 2023 and now 2024. This latest one will knock your socks off, once you consider the ramifications of what they’ve made. But first, some details.

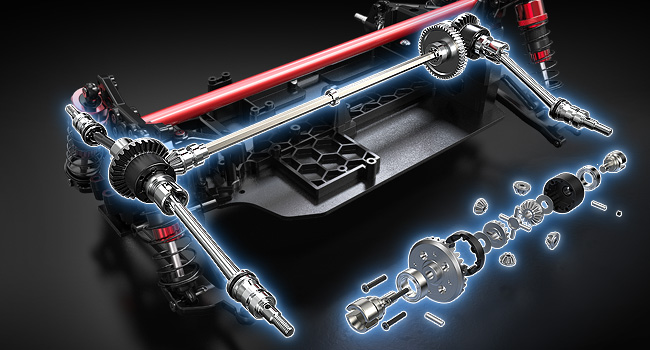
This is a model that combines the best features of the offerings of the likes of Axial’s SCX10 III with 2-speed transmission and DIG (disengages drive to the rear, then locks the rear, for tight turning and improved rock crawling ability) and the Traxxas TRX4 with its remotely activated locking diffs.
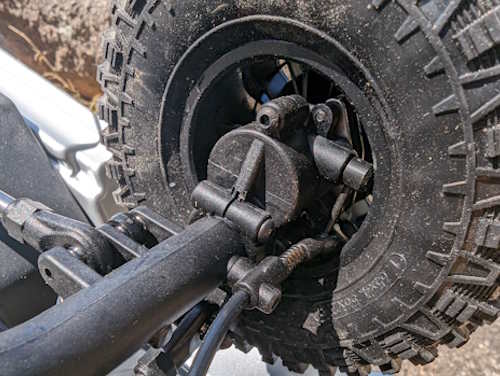
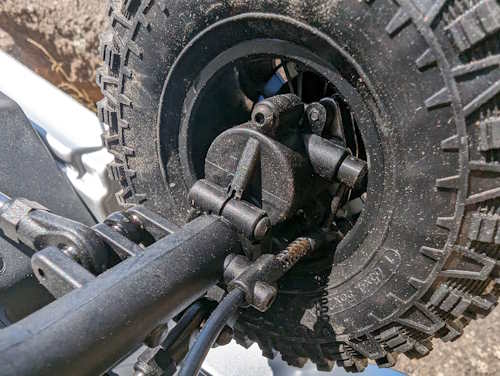
4106 Pro Undercarriage

The Killer Feature

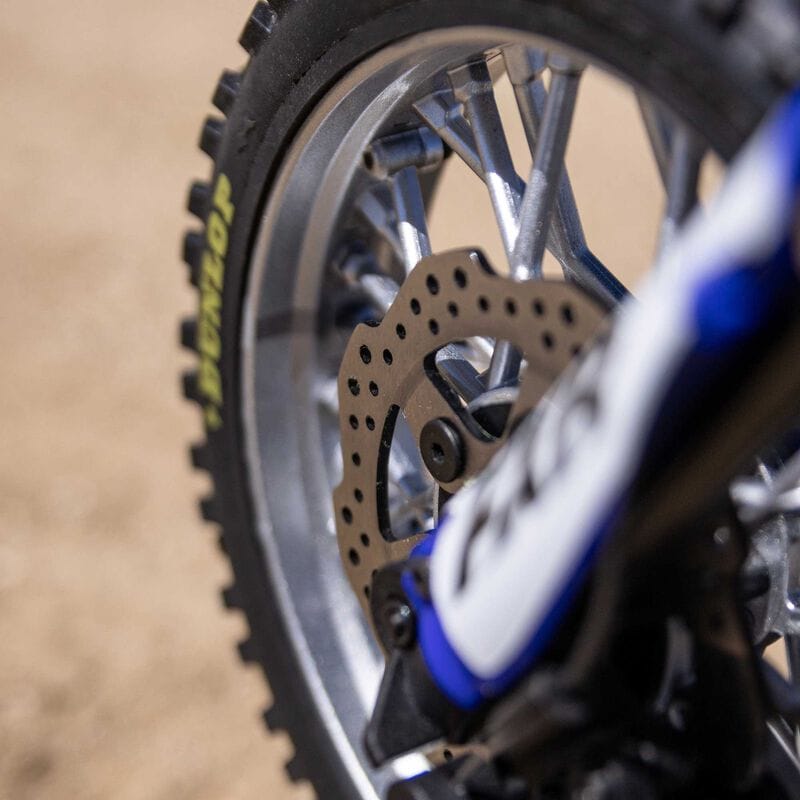
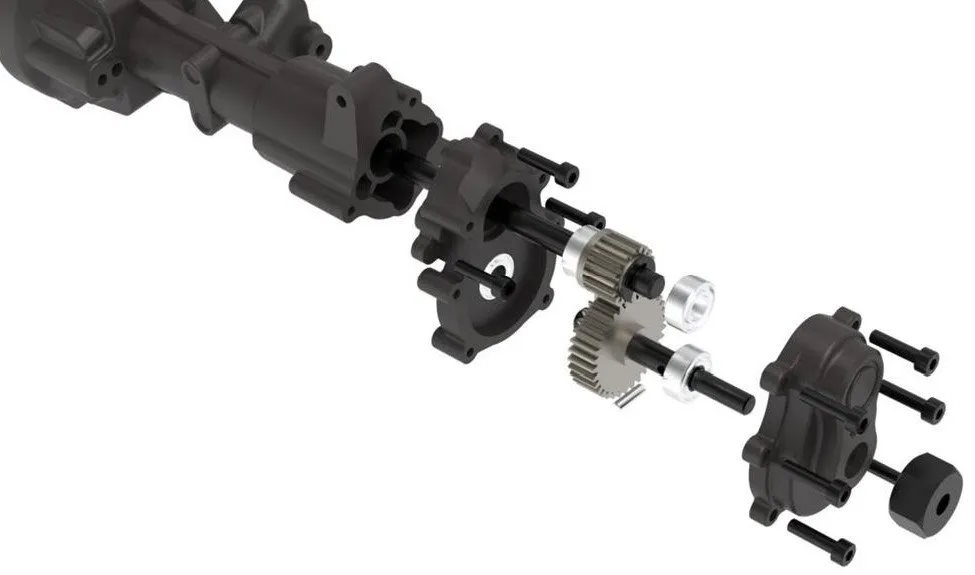
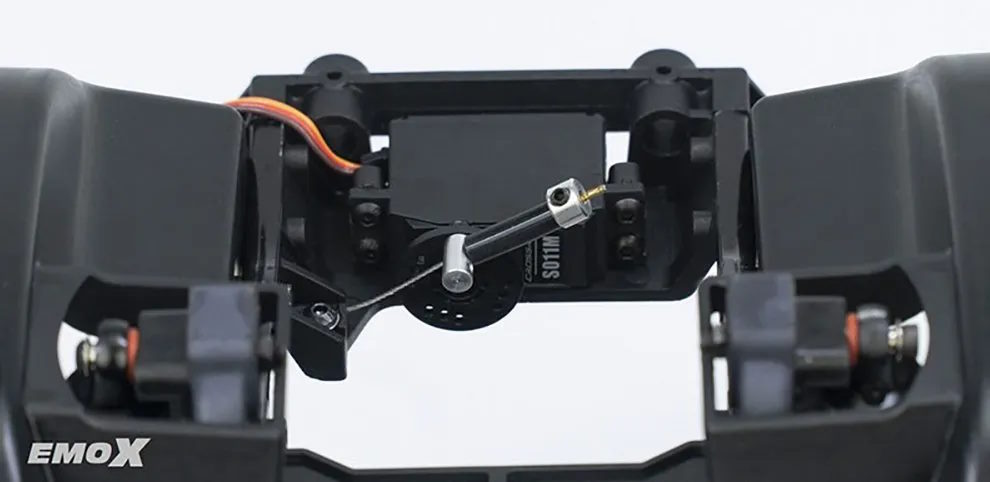
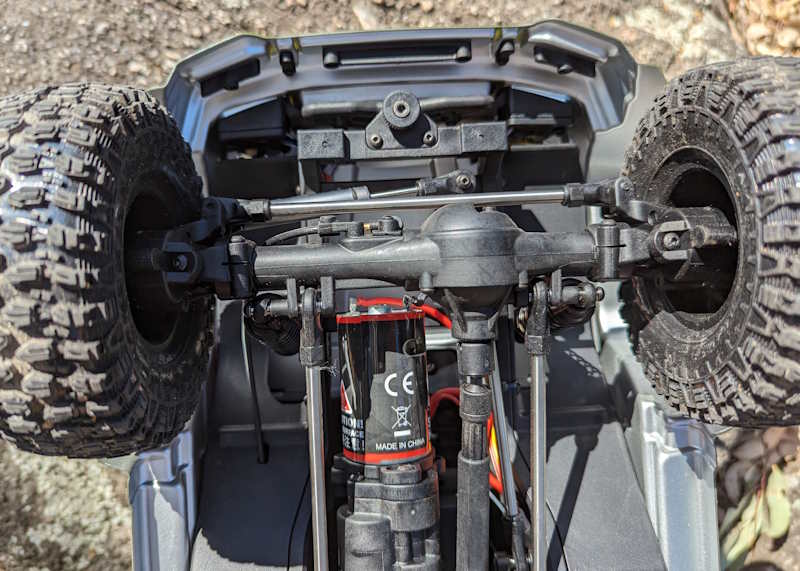
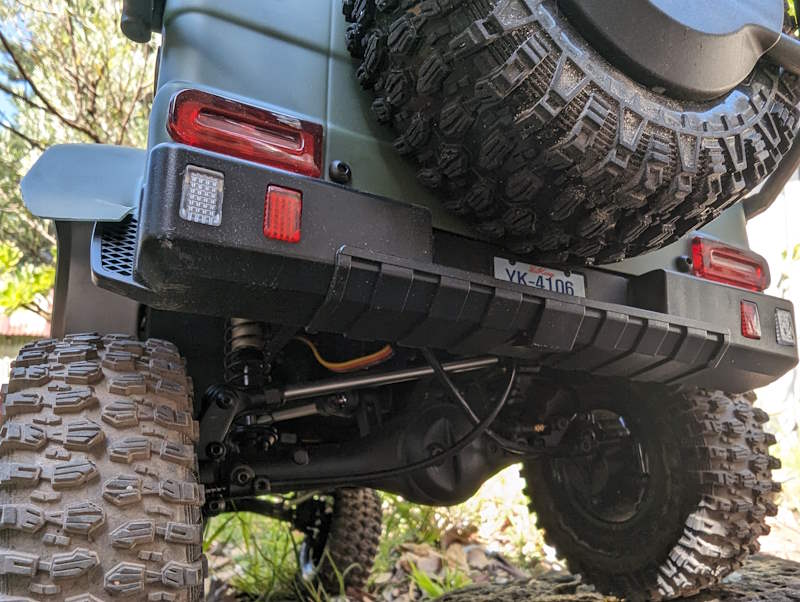
But what makes the Yikong 4106 Pro special is something new that we haven’t seen in RC cars ever before: independent disc brakes! They’re only in the rear and they activate via a button that mixes their function with the vehicle’s steering. They work by clamping the inside wheel on a turn, when activated. So, when you turn left, for example, the rear-left wheel is braked, helping to really tighten the vehicle’s turning circle. Genius!

4106 Pro Disc Brake Engaged
4106 Pro Rear Axle

On the Floaty Side

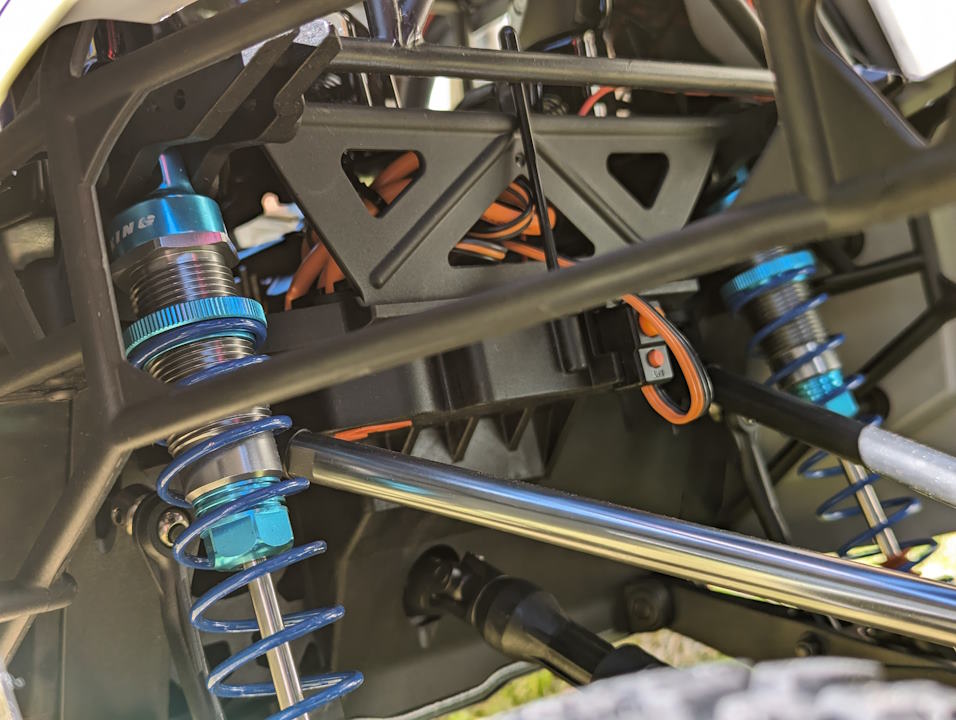
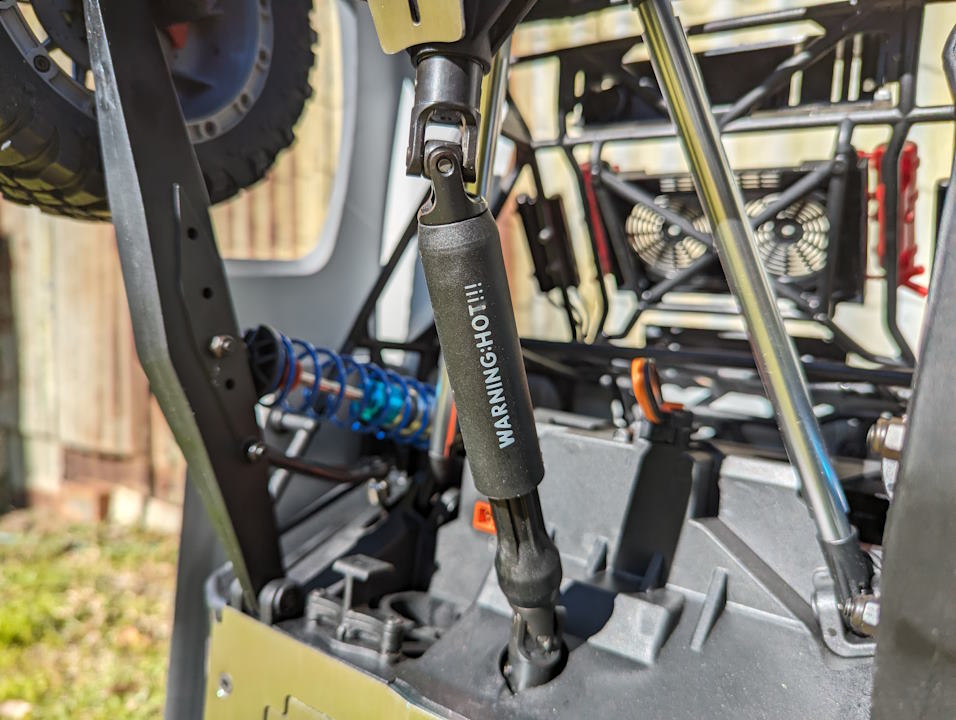
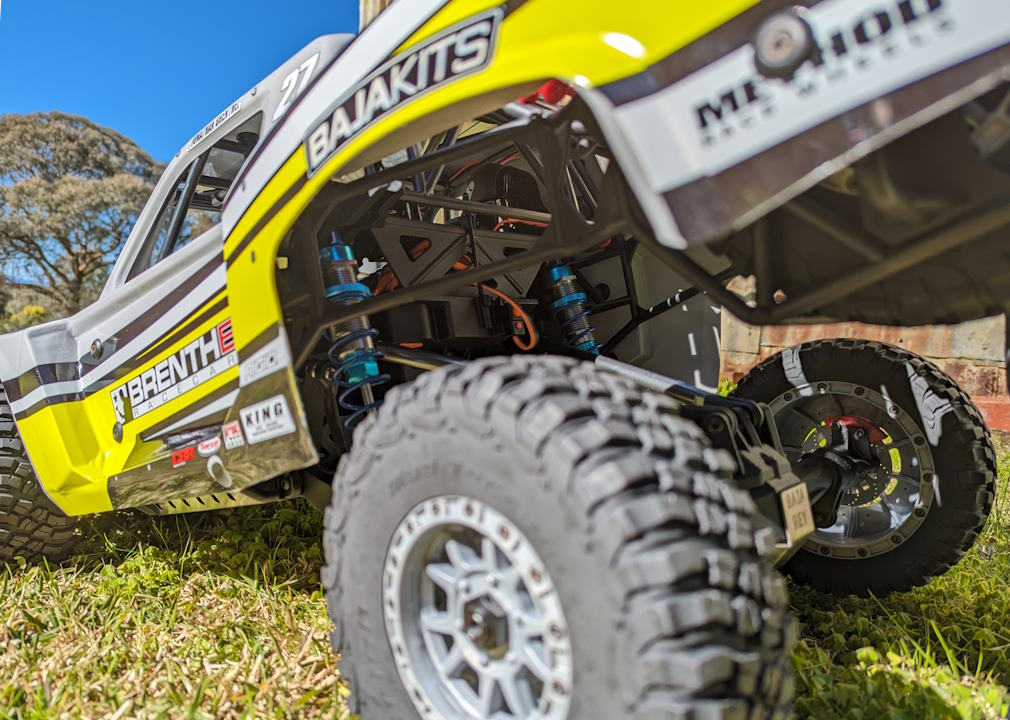
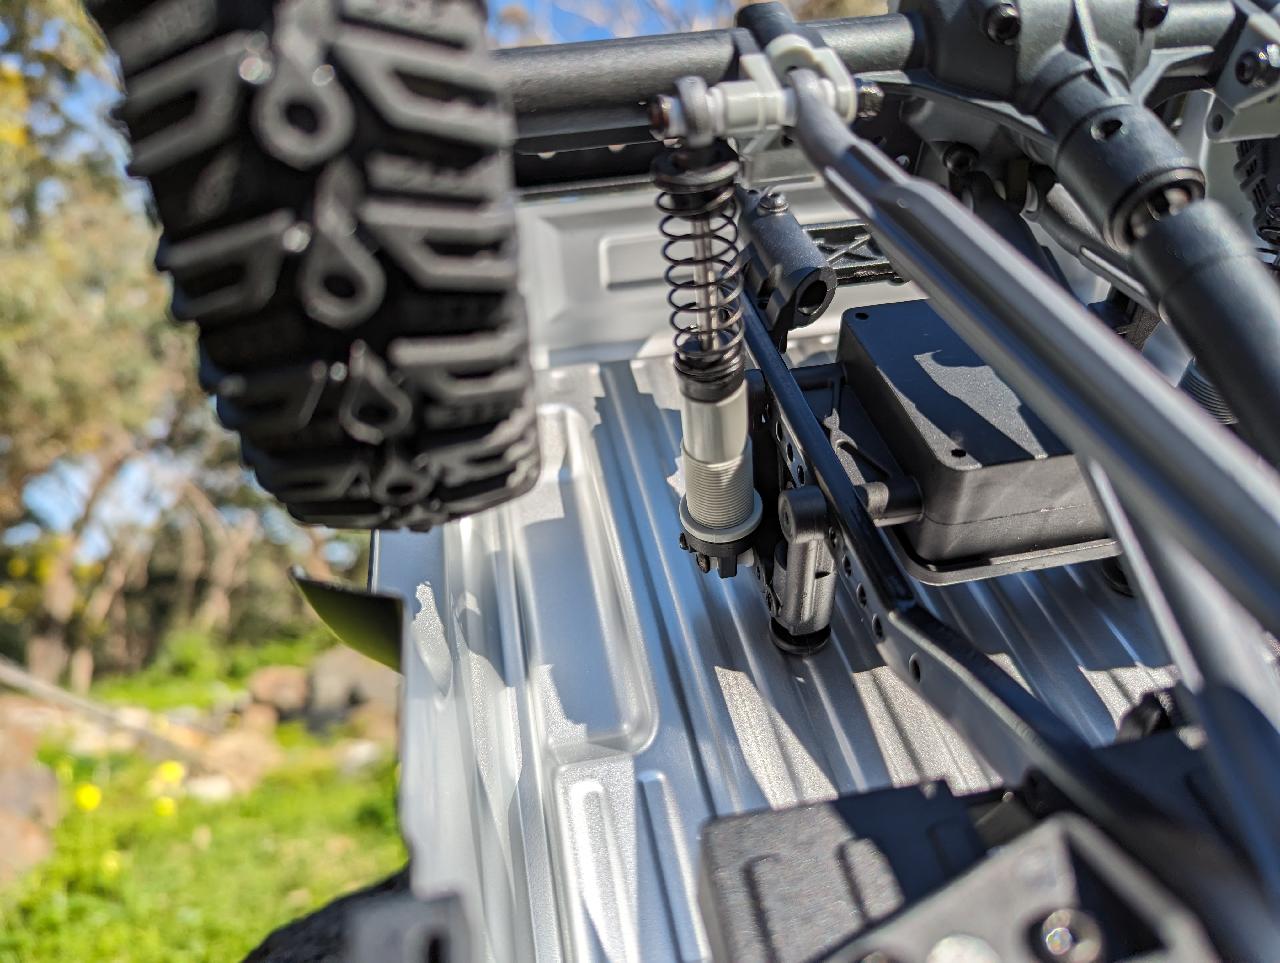
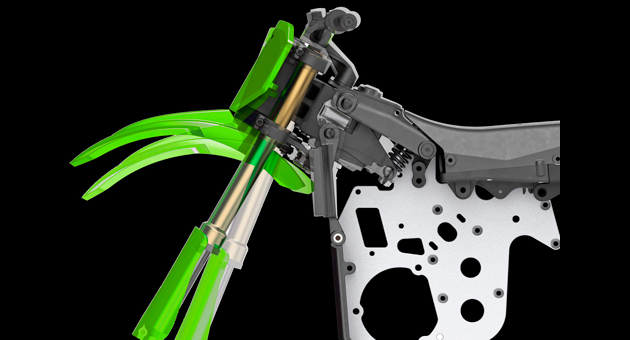
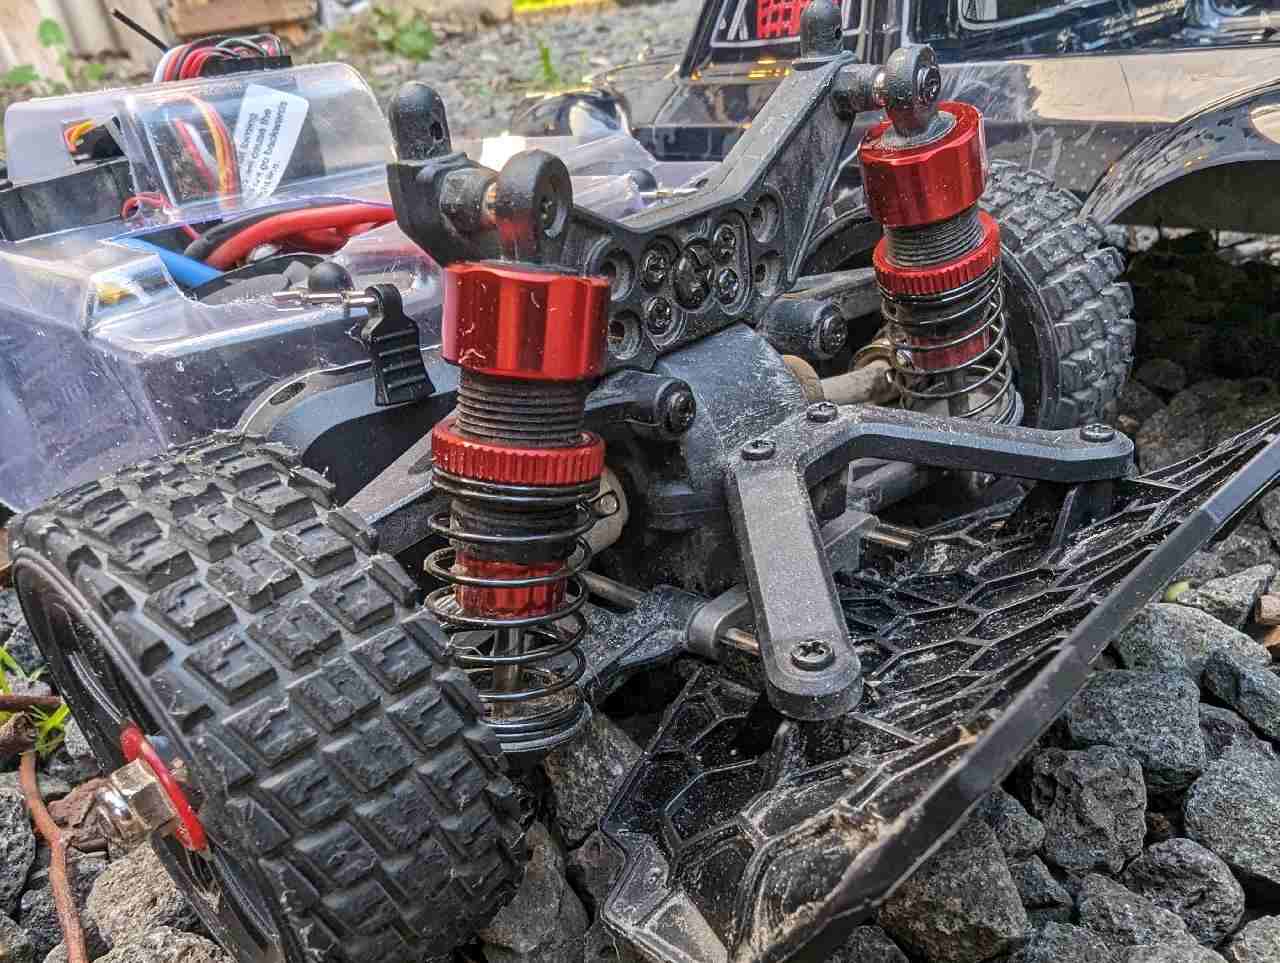
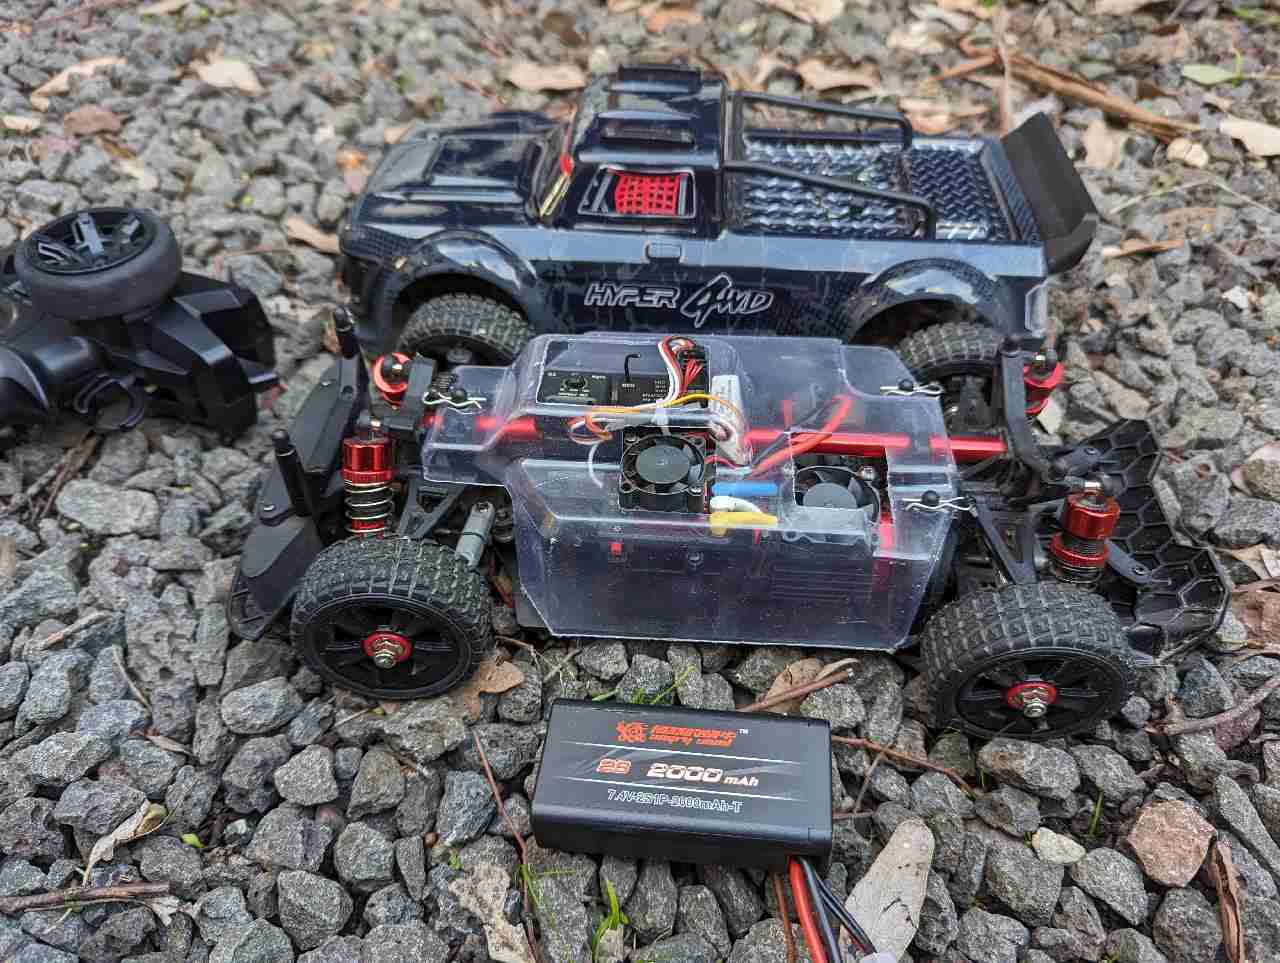
The suspension is a bit on the floaty side, with considerable body roll. The vehicle has portal axles, which helps cancel out torque twist while also increasing undercarriage clearance on rough terrain. The shocks are “oil-filled” but the unit I received had “oily” but empty shocks. I’d suggest adding 30wt oil to create some needed damping.

Shocks can be mounted in a variety of positions, which is very welcome. They’re neutral, by default, and I like them there for trail and light crawling. Shock preload is adjustable by thumbscrews, and I found that winding on about 8mm in the rear really helped it with crawling. Now it isn’t so fast to lift a front wheel on steep ascents.
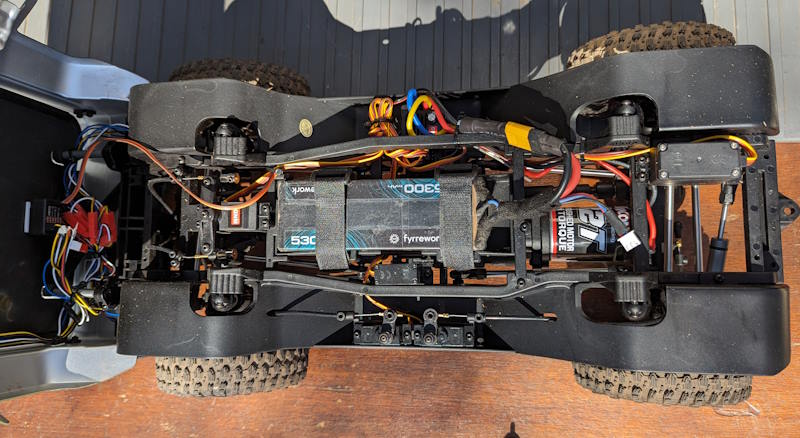
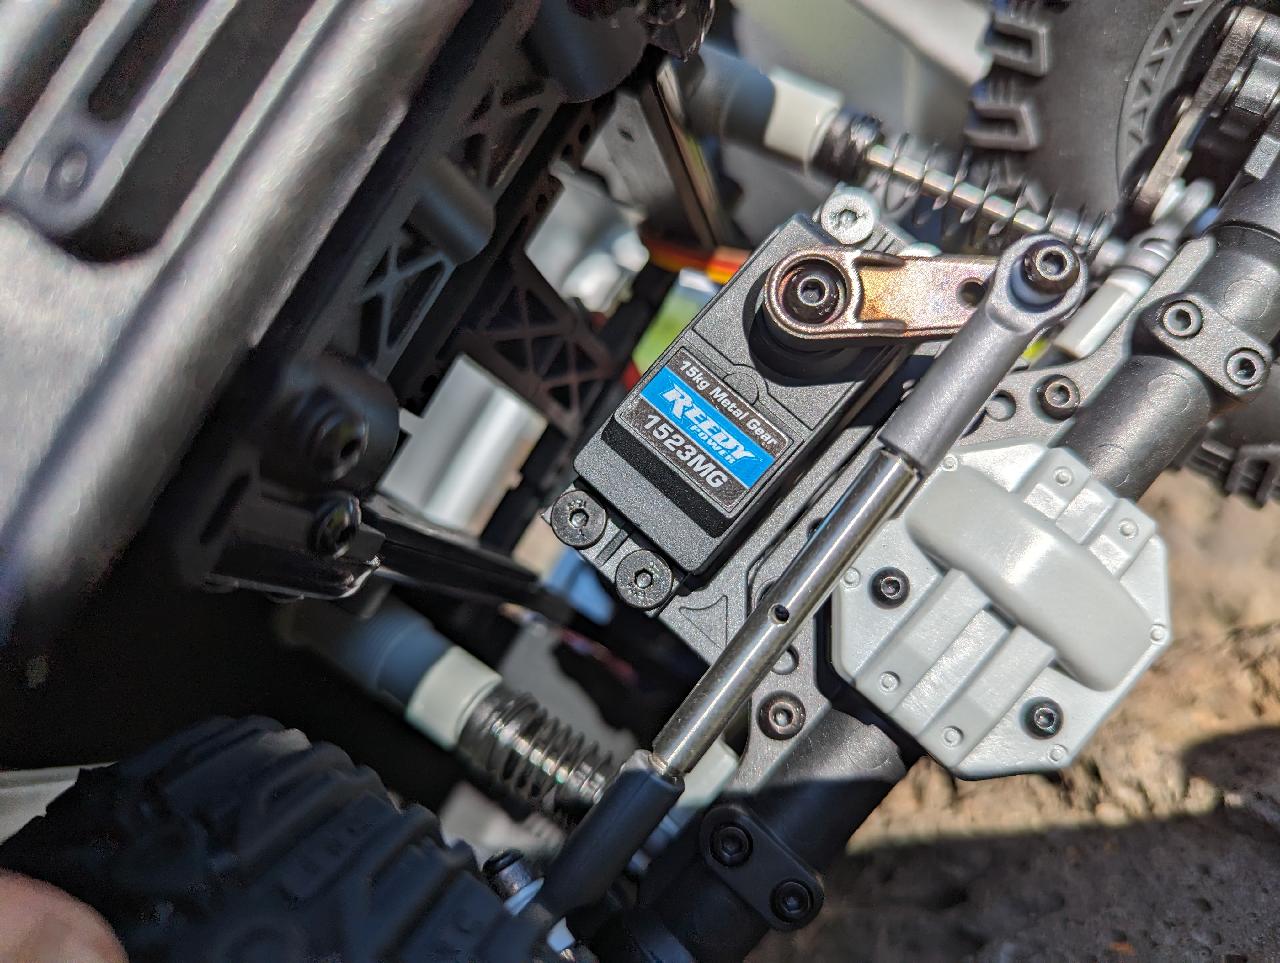
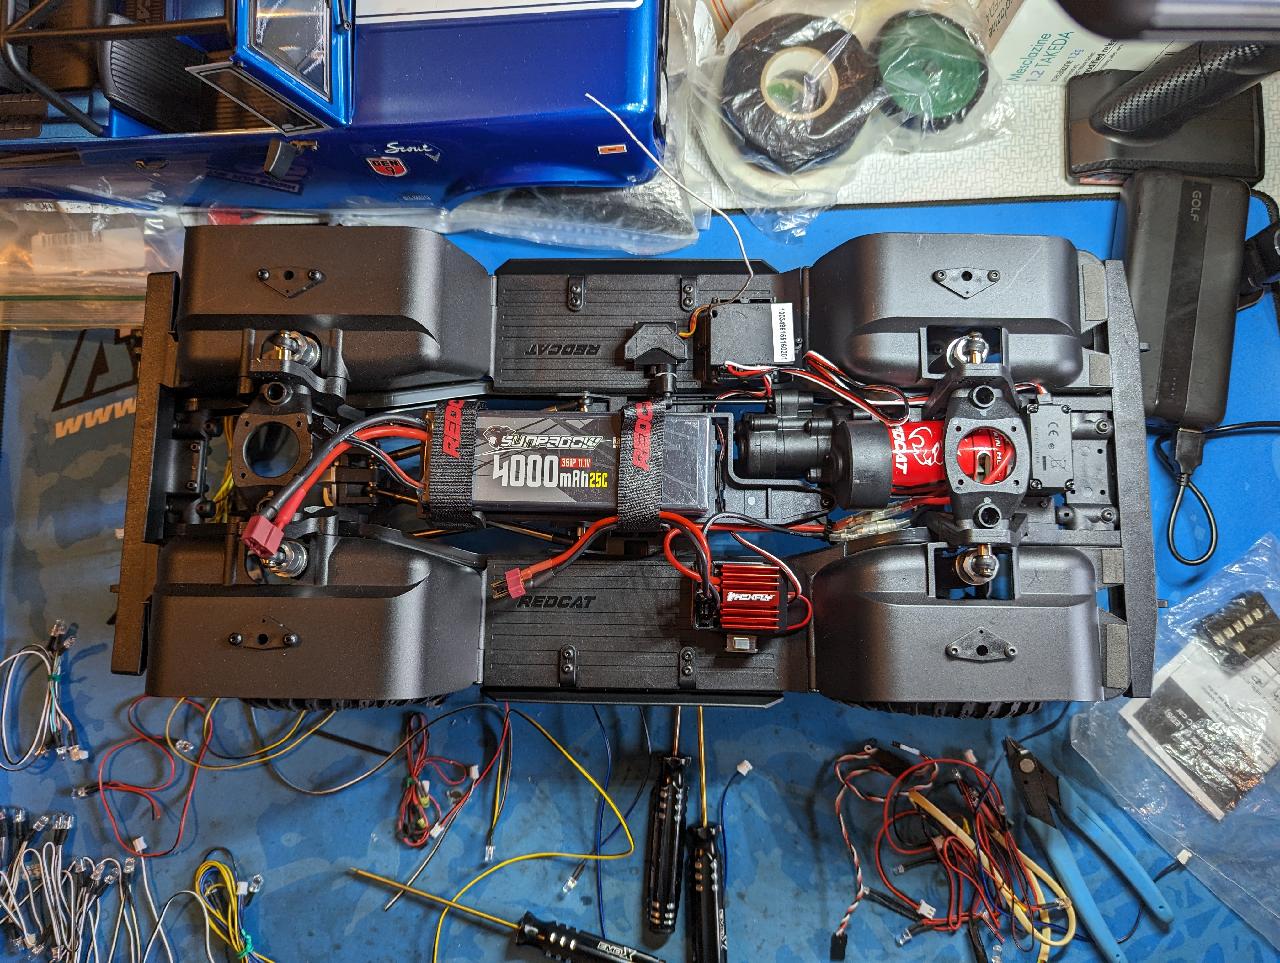
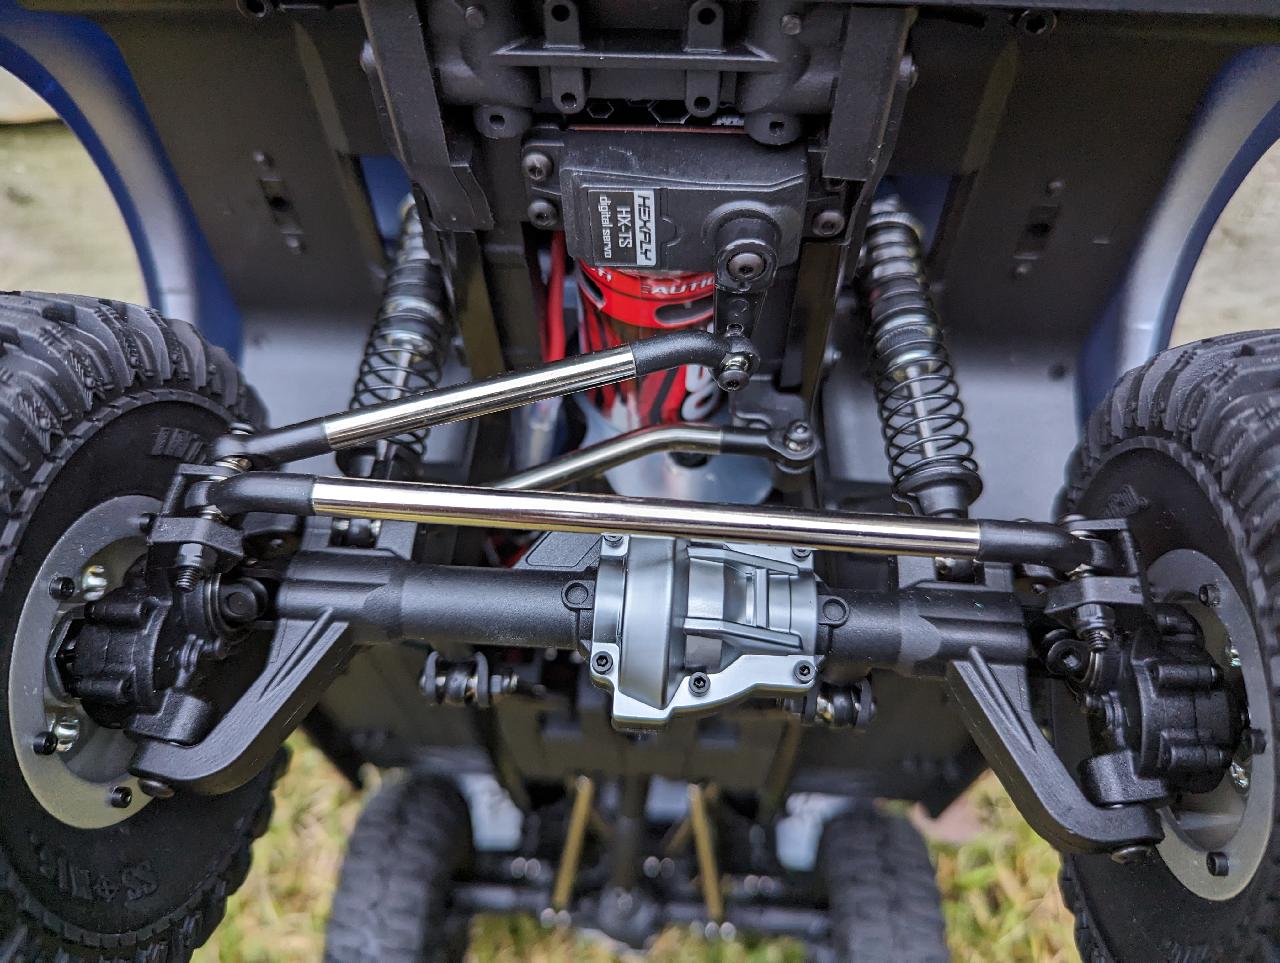
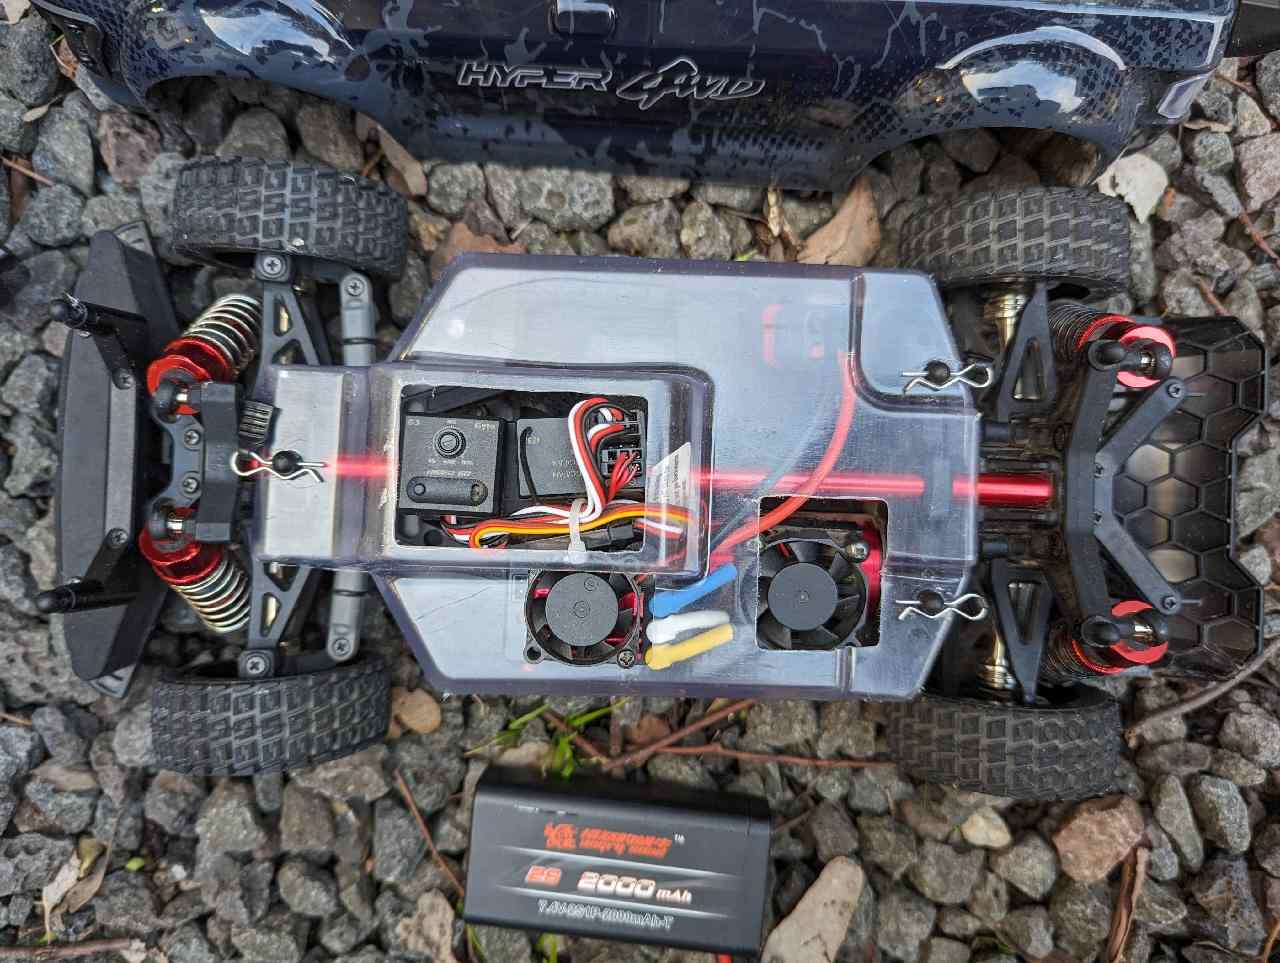
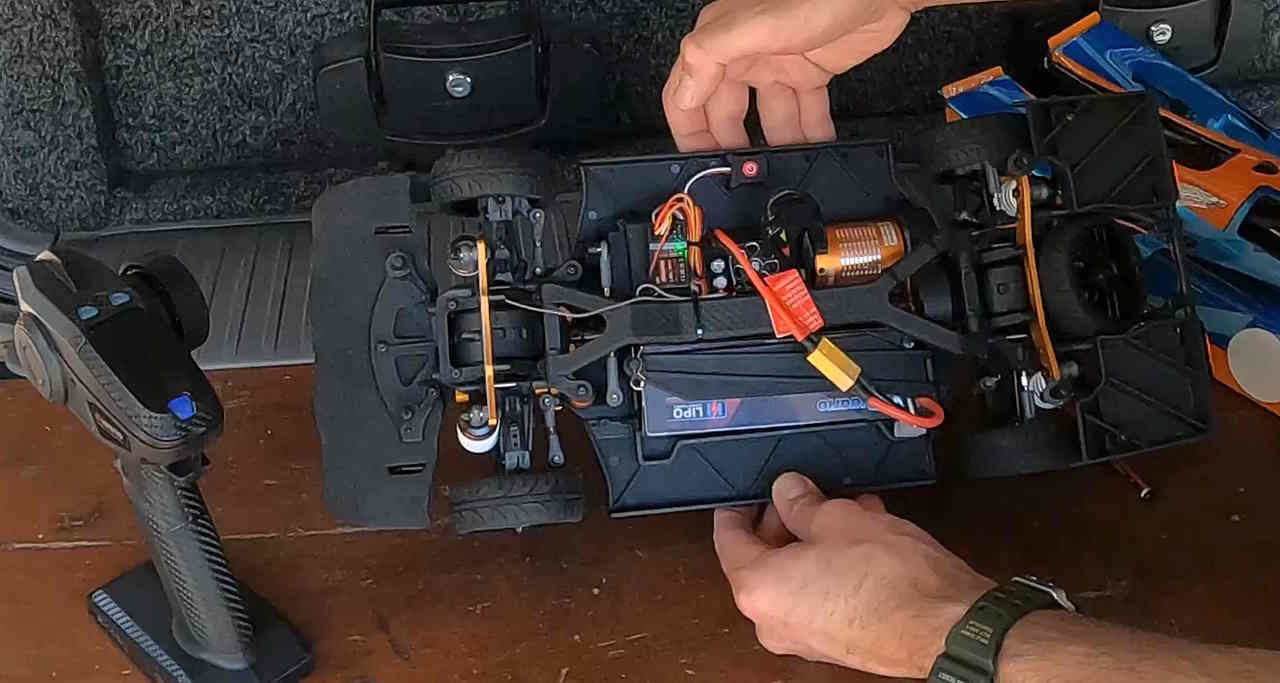
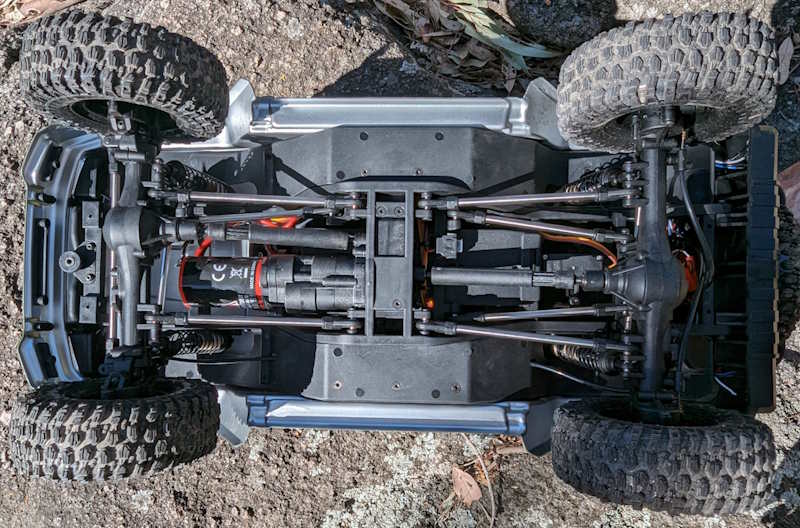
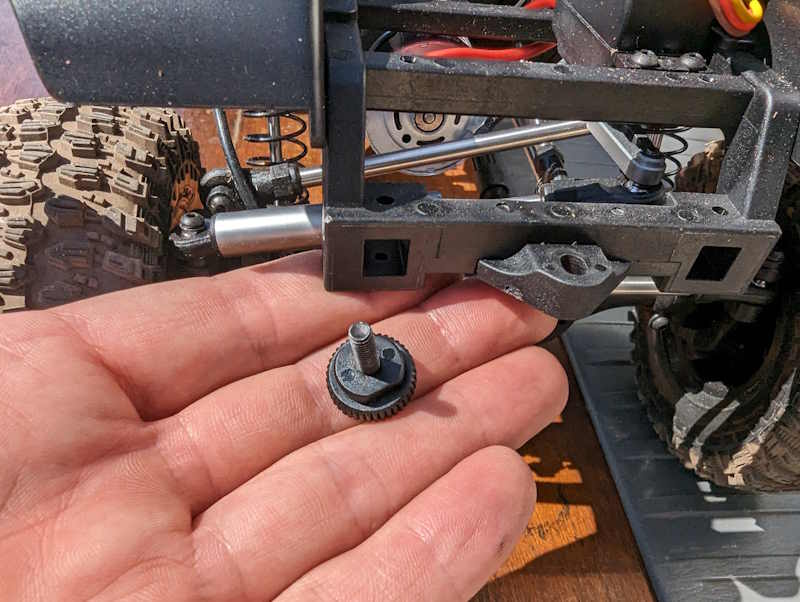
4106 Pro Chassis

4106 Pro Servos

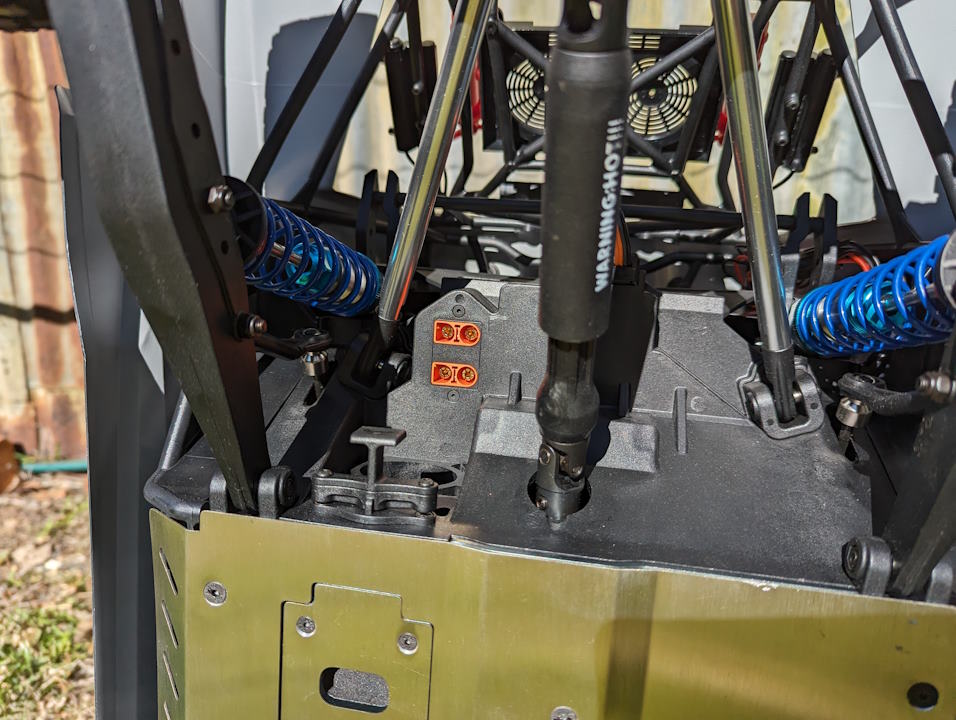
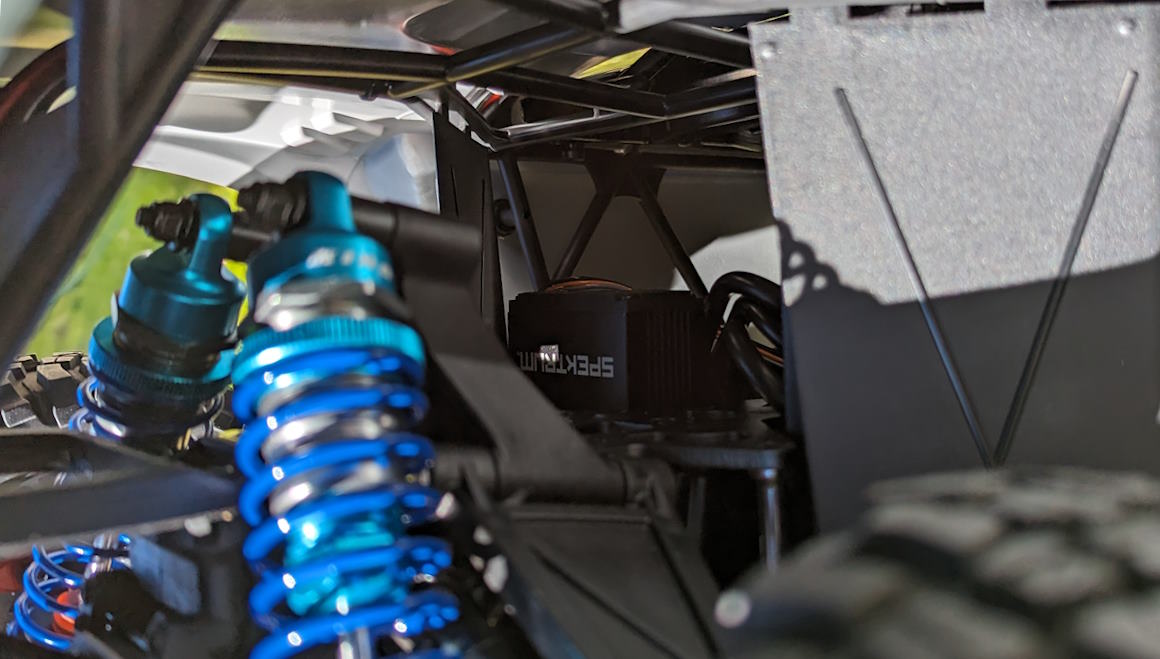
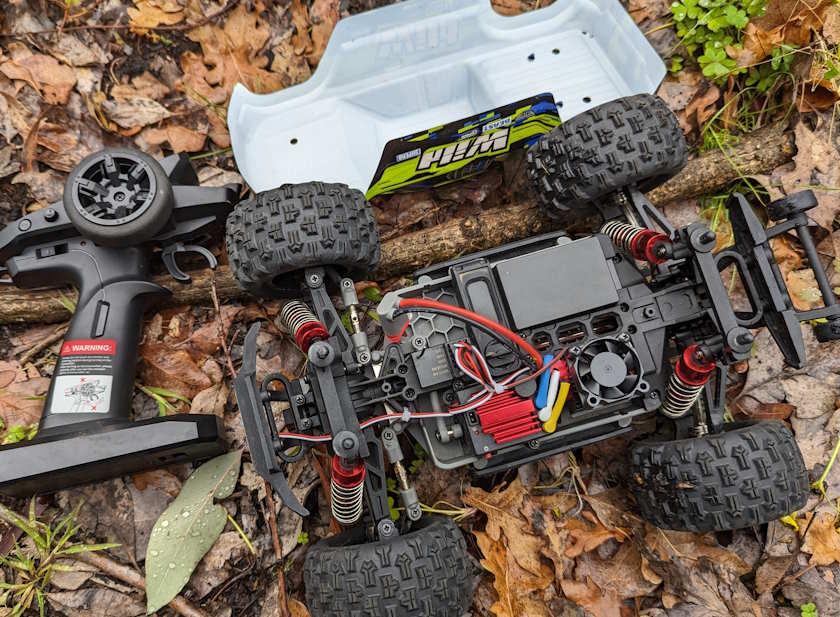
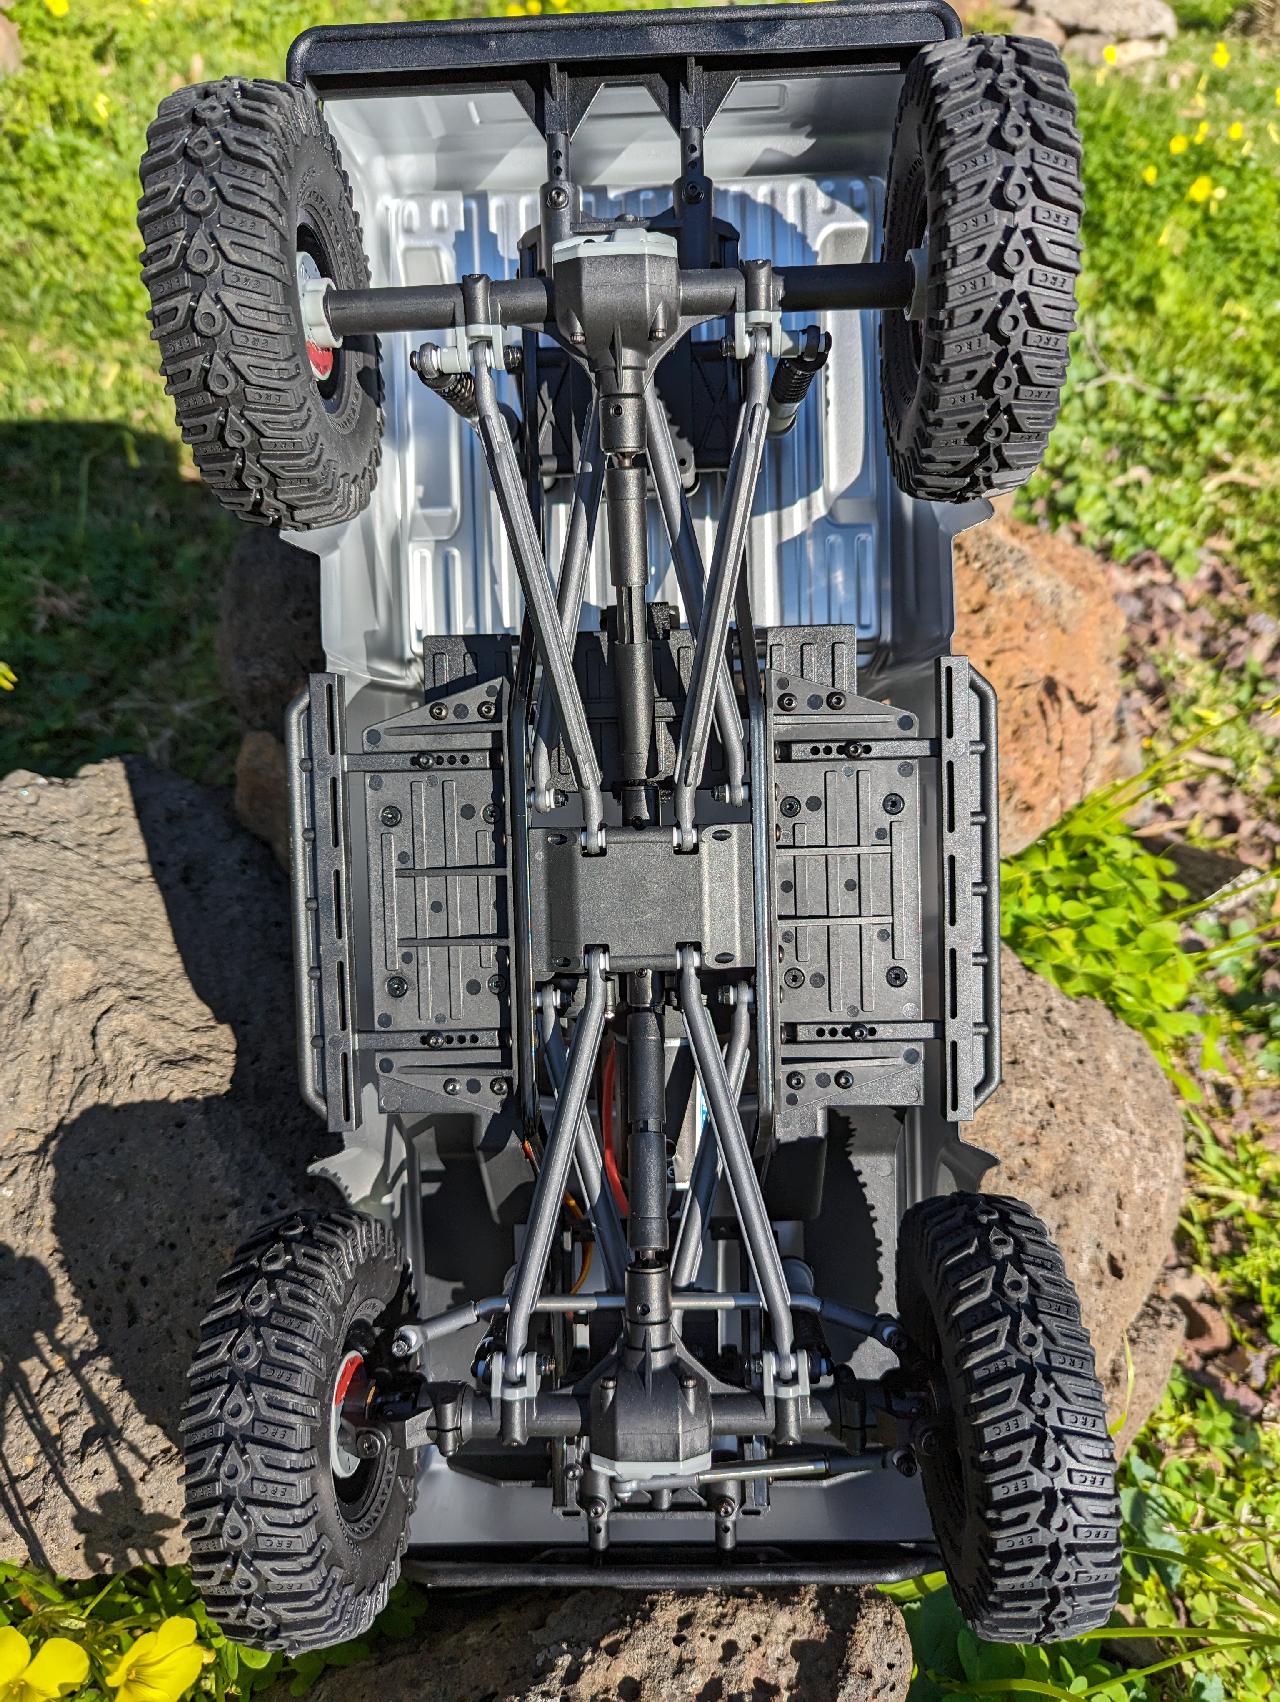
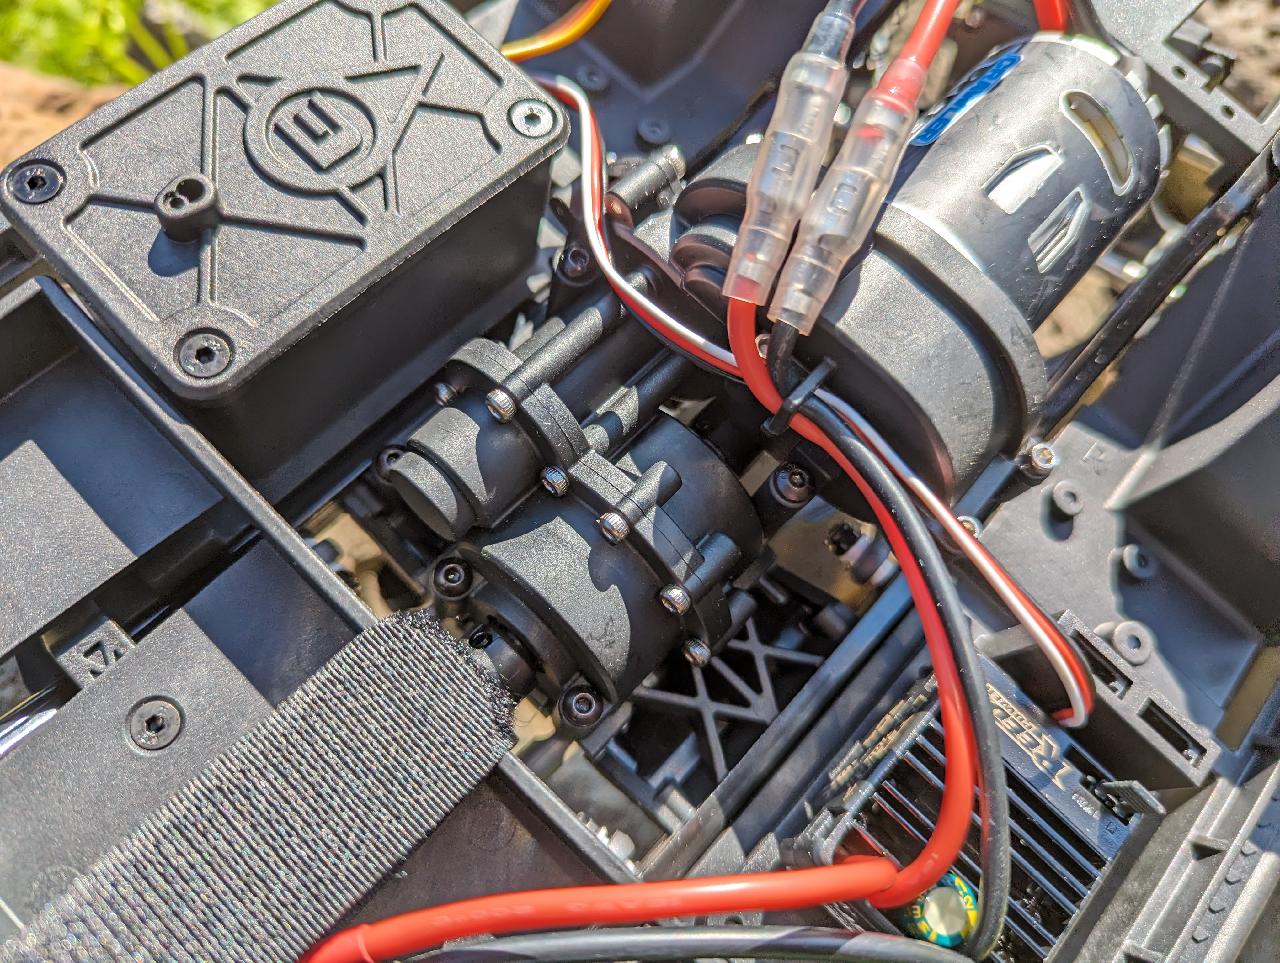
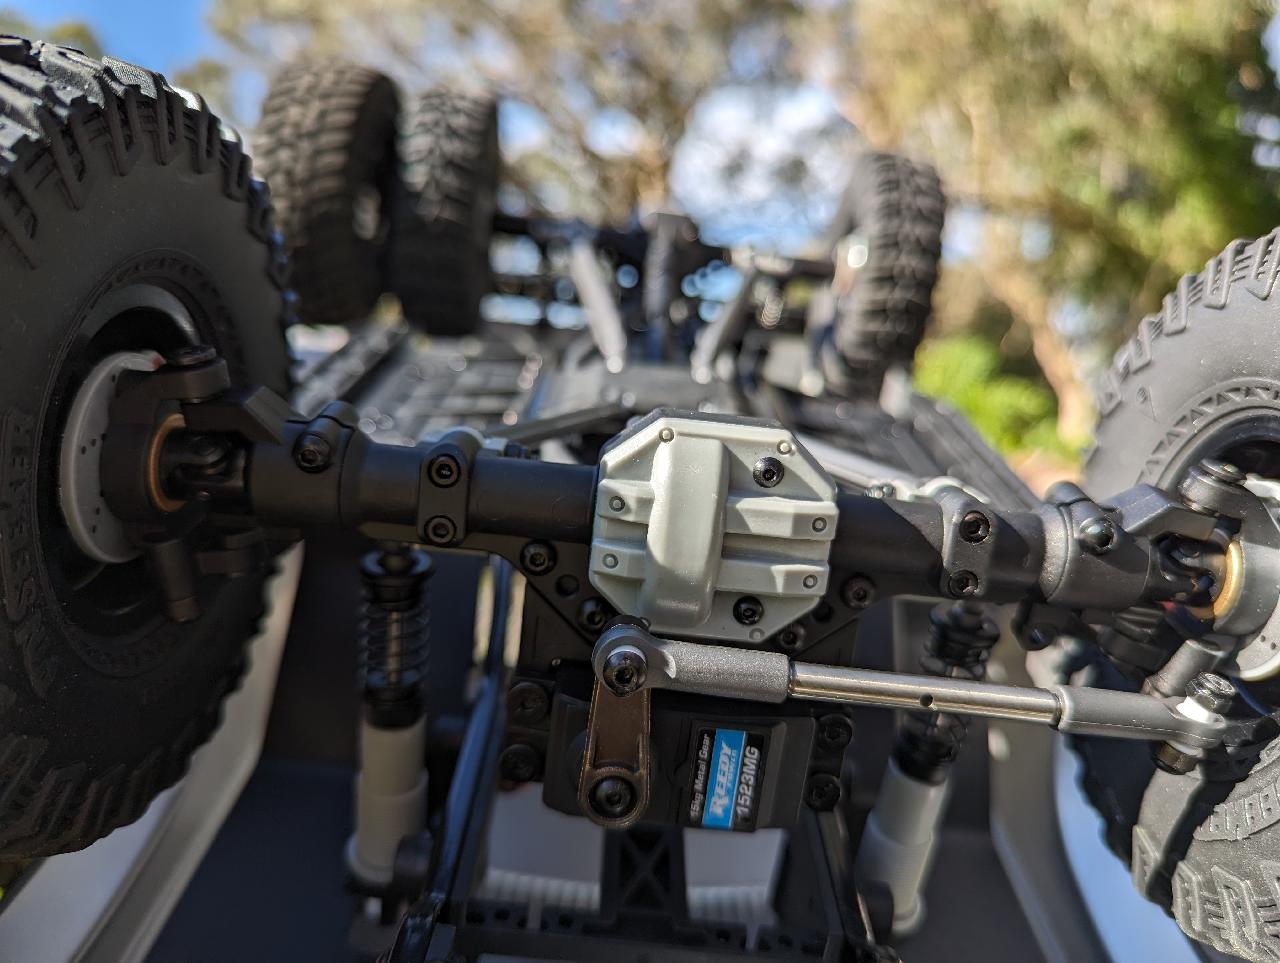
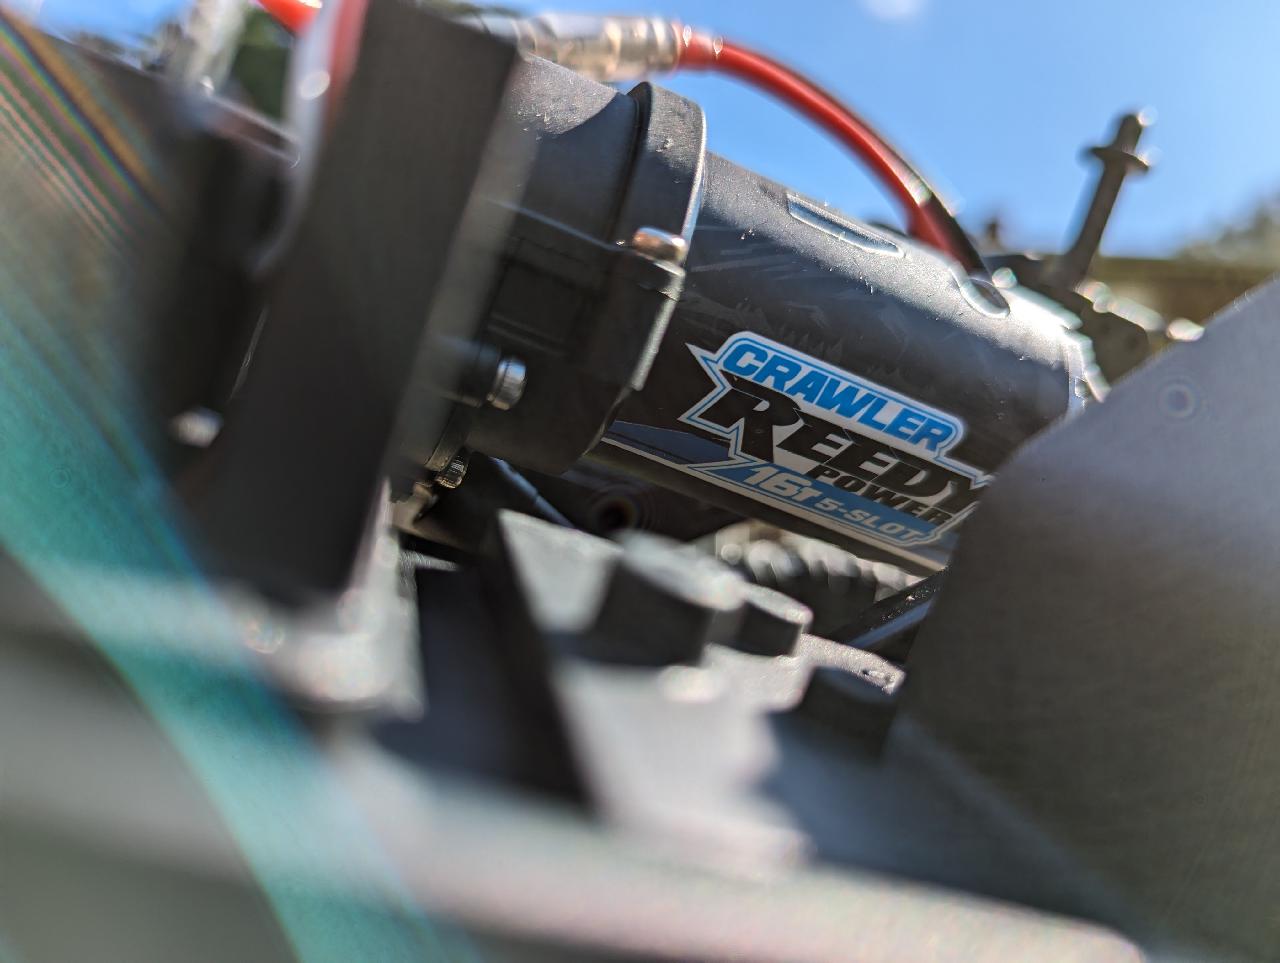
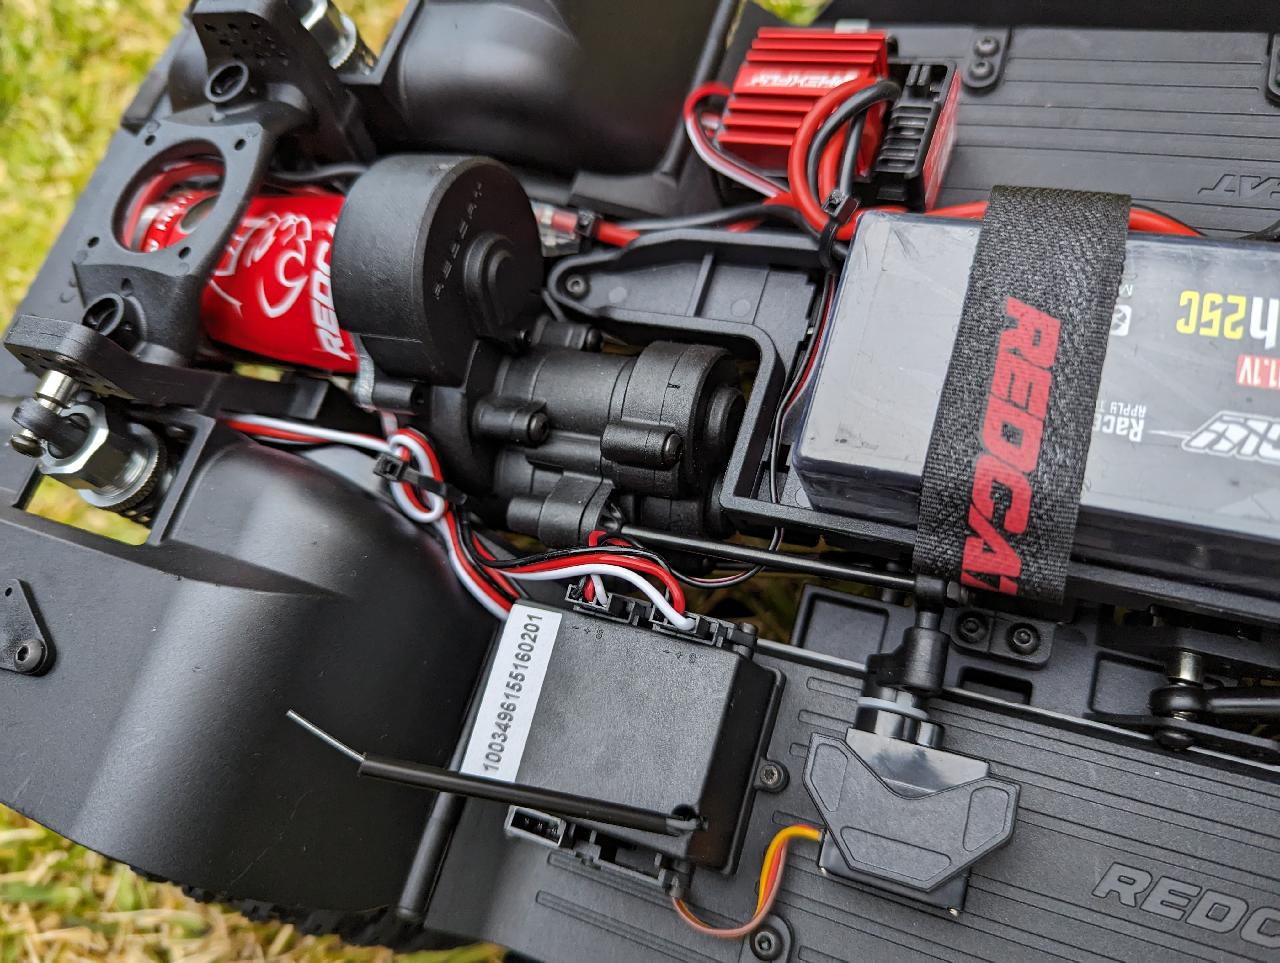
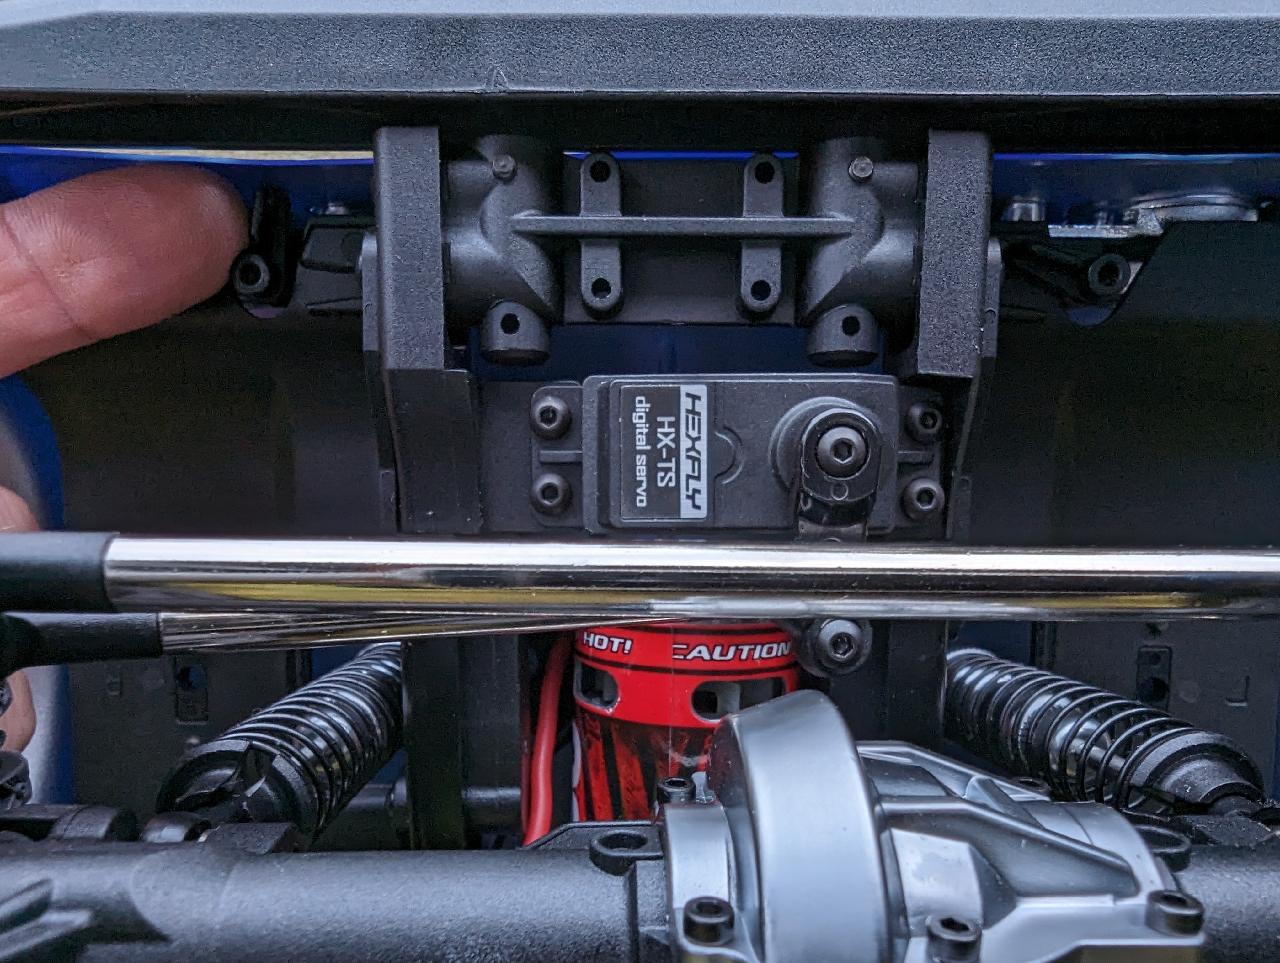
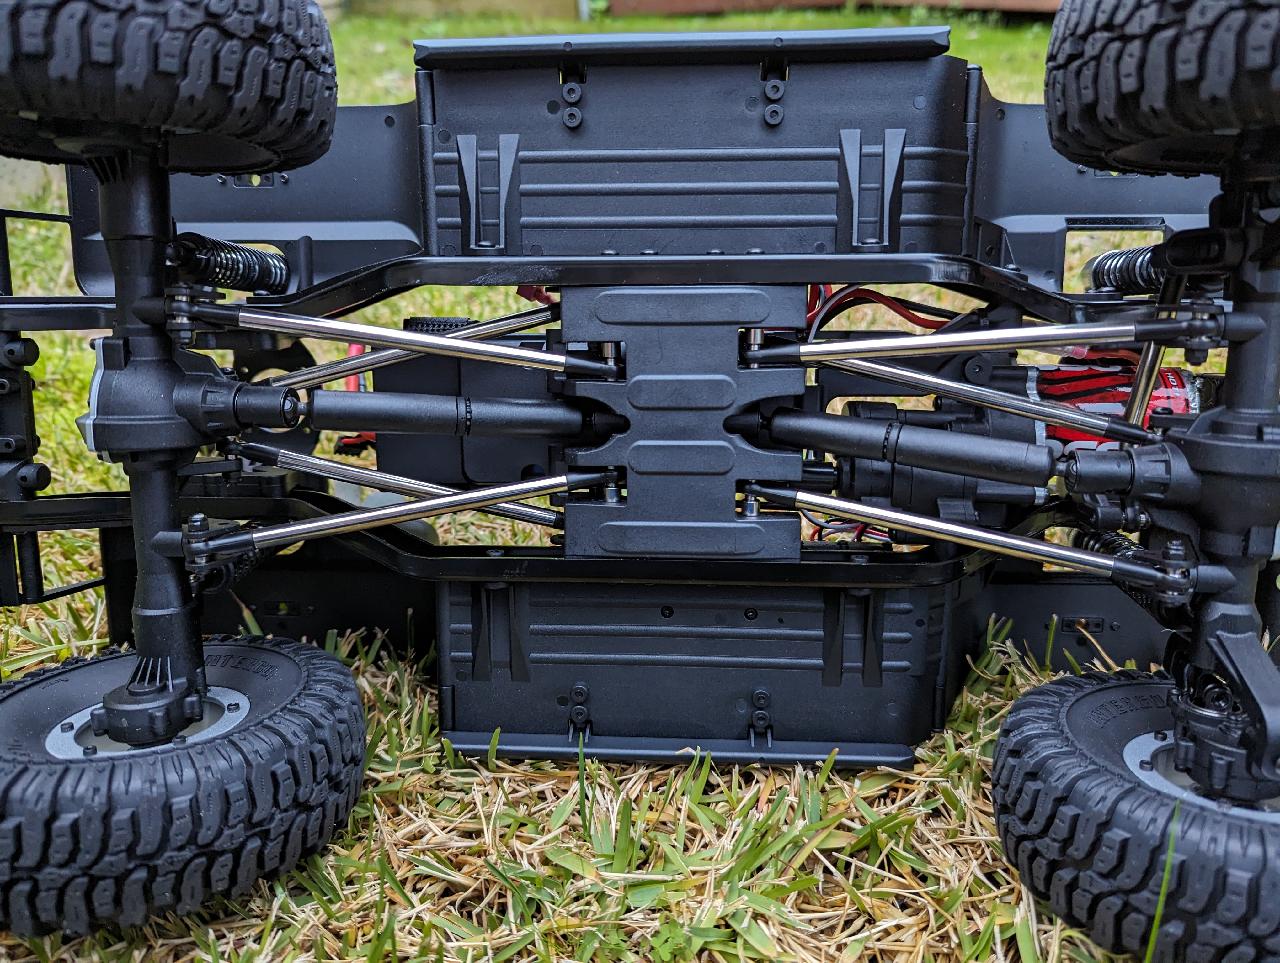
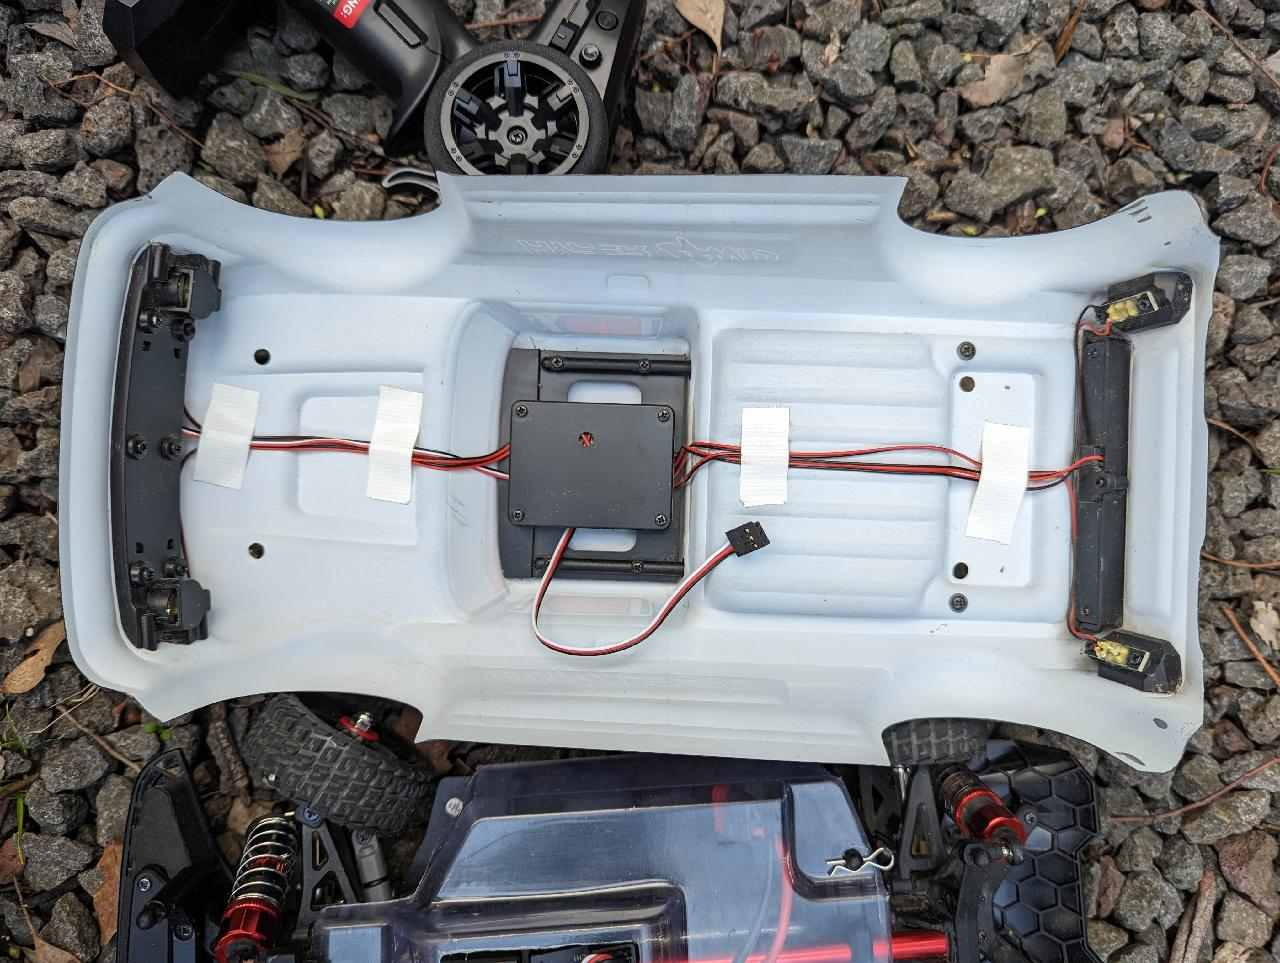
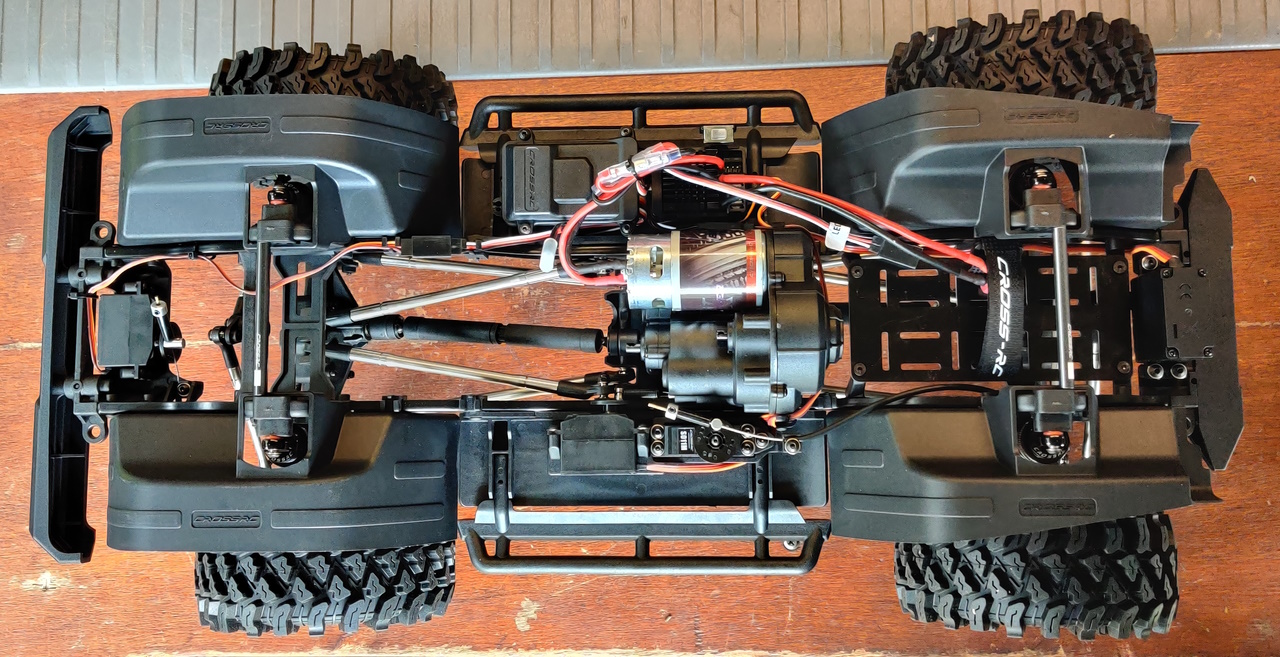
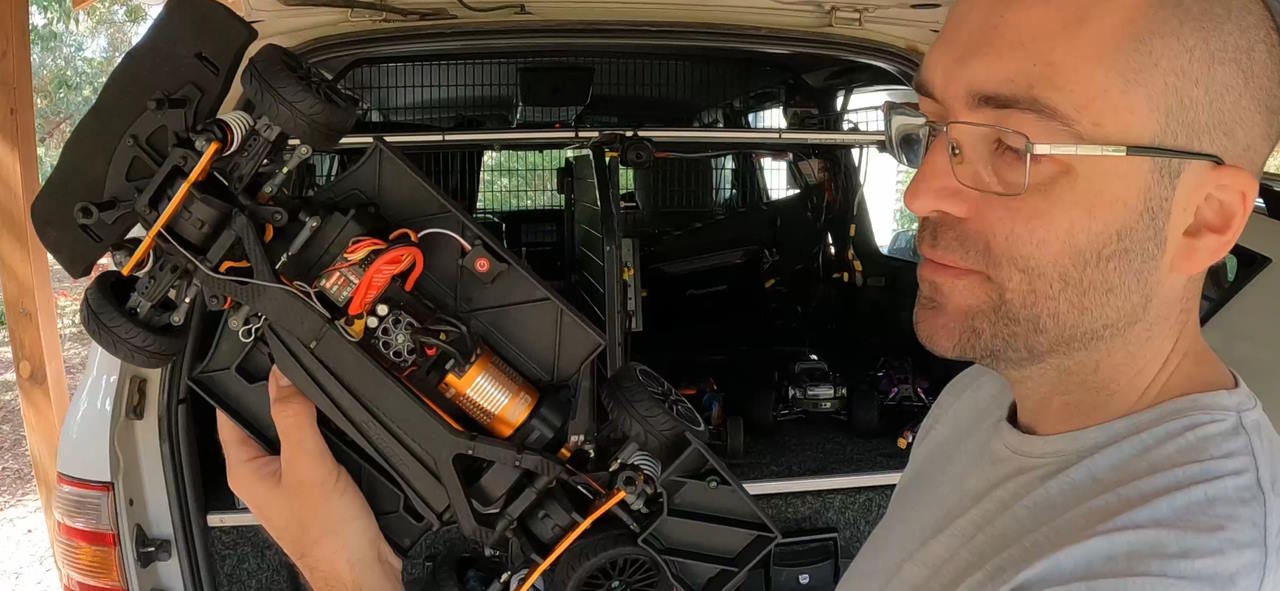
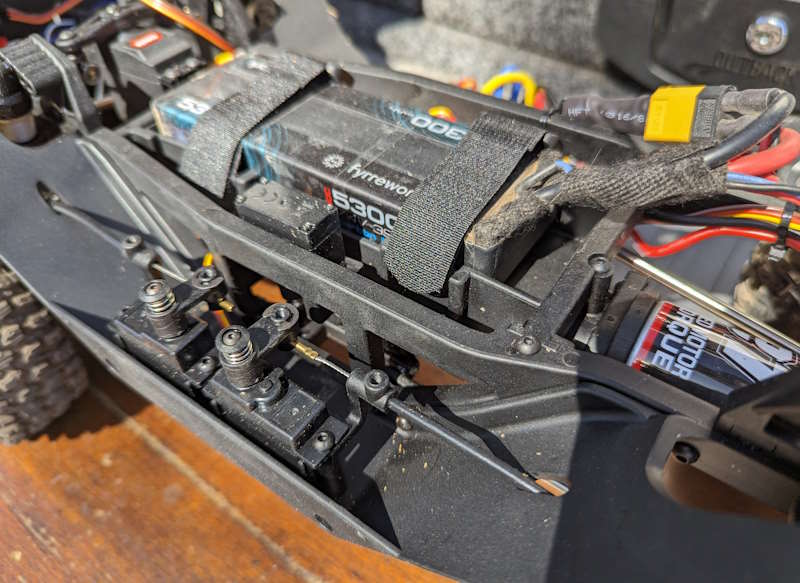
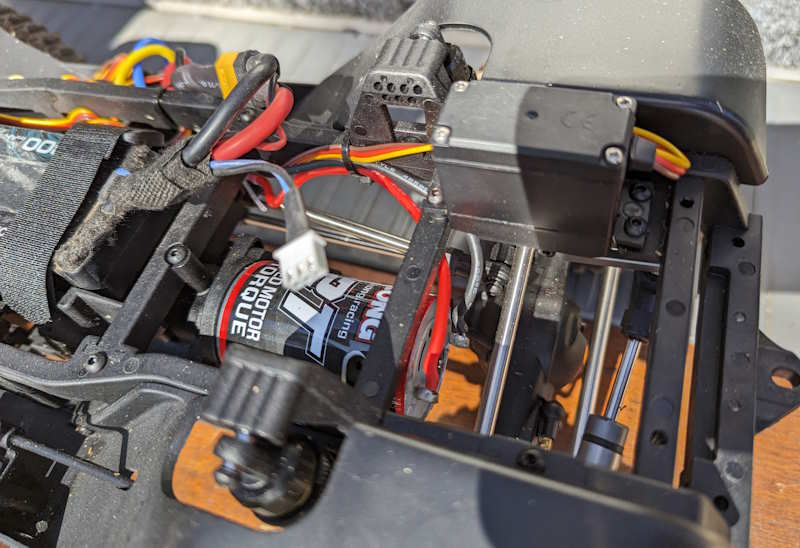
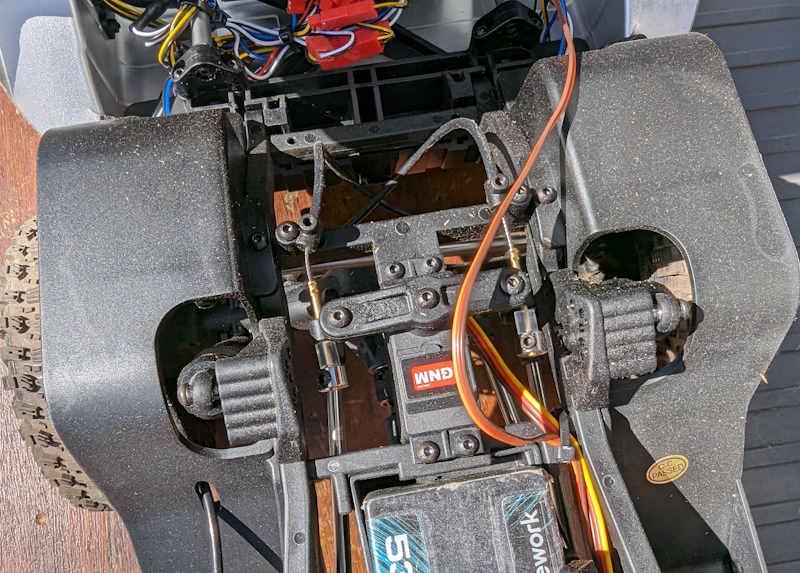
In the below photo, there are three servos closest to the camera. The first two are the diff lock servos, and then the one closer to the battery is the 2-speed servo. These are waterproofed servos with low power, I’m guessing maybe 2-3kg. Plastic gears, plastic spline, that kind of thing.

My front diff lock servo was broken, out of the box. I may replace it with another similarly cheap unit, or I may even just leave it be. I don’t mind the front being locked all the time. It’s the rear one that wants to be able to unlock, both for general driving and so that the ‘tank steer’ feature can work correctly.

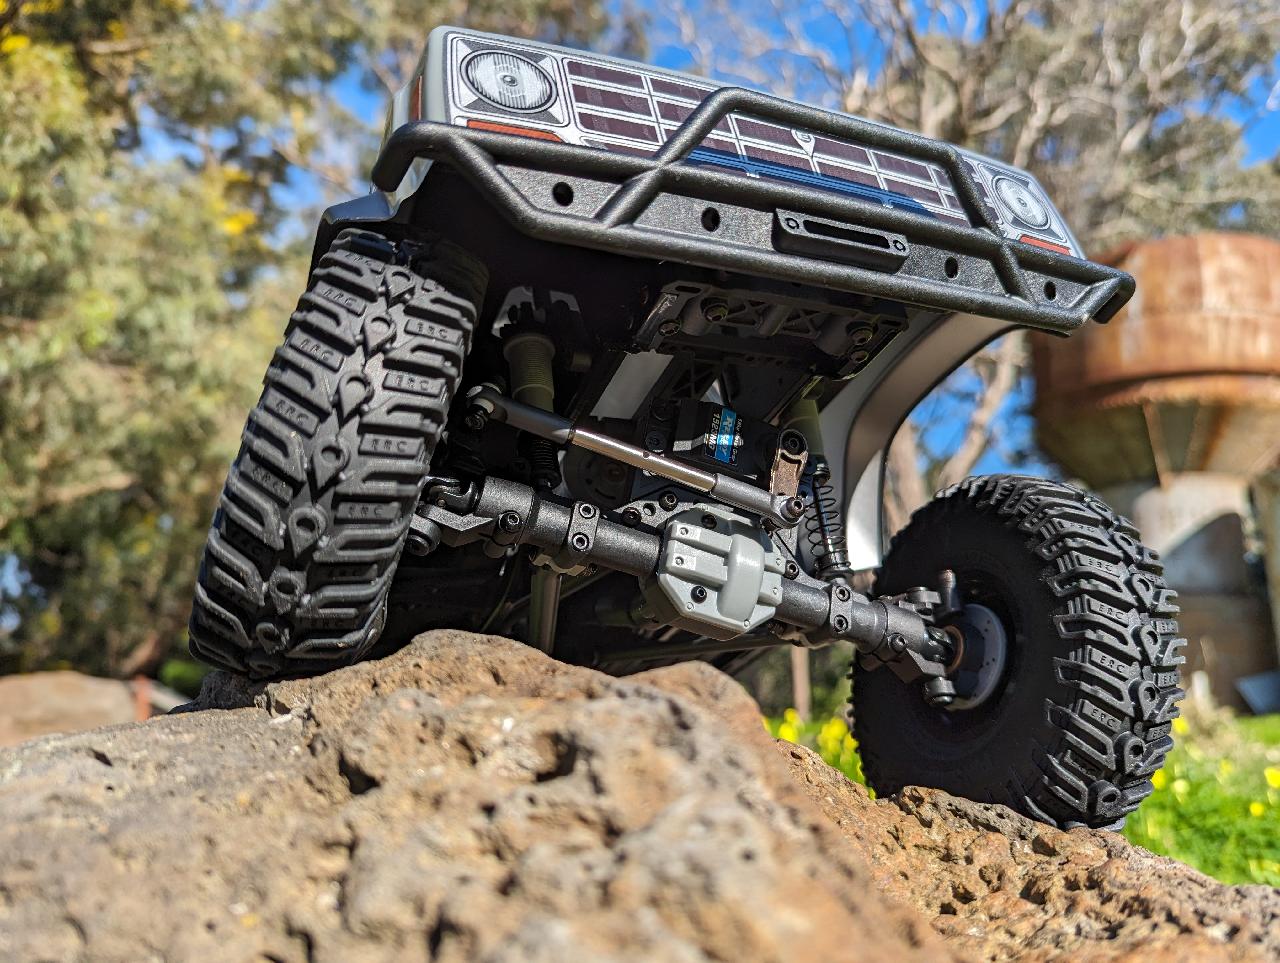
The steering servo is a metal geared unit and has plenty of punch. I’m guessing 15kg or so, which is fine for this car.
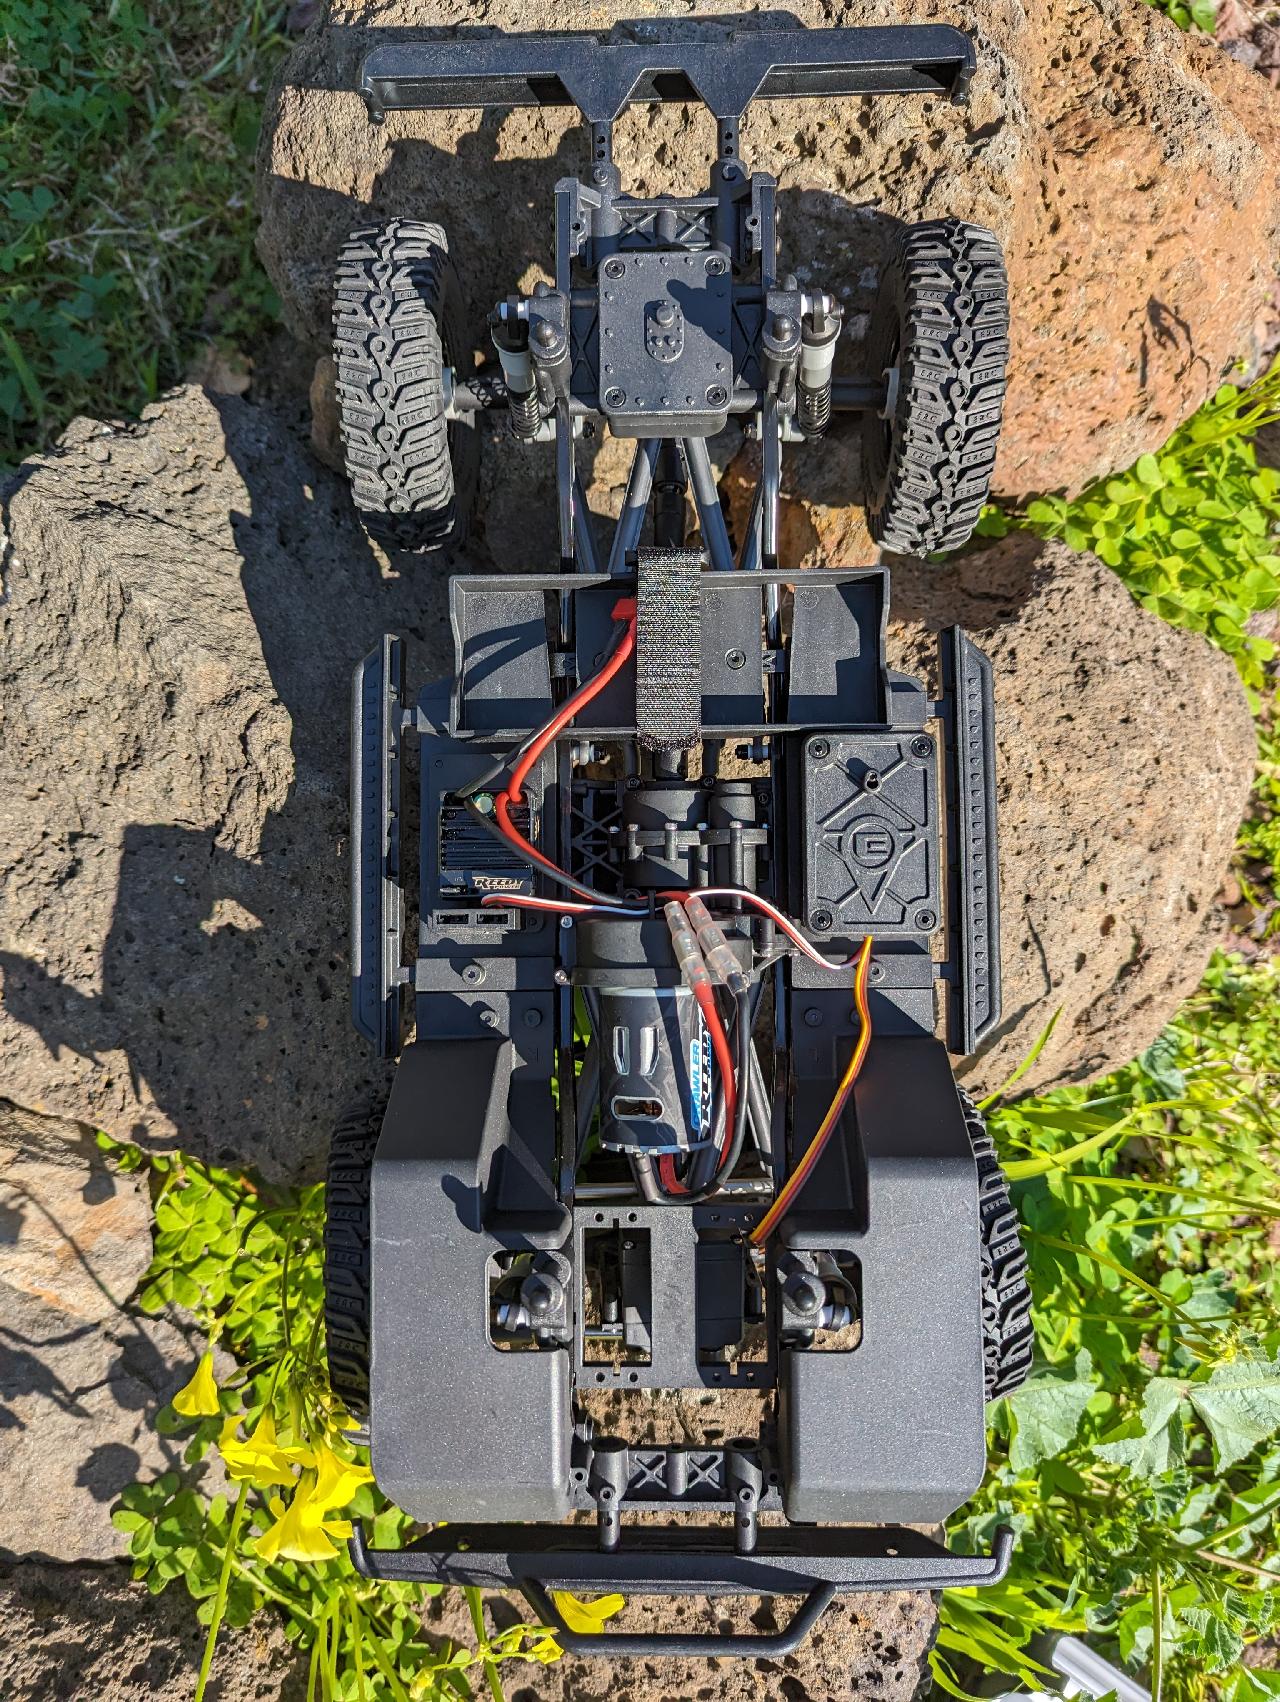
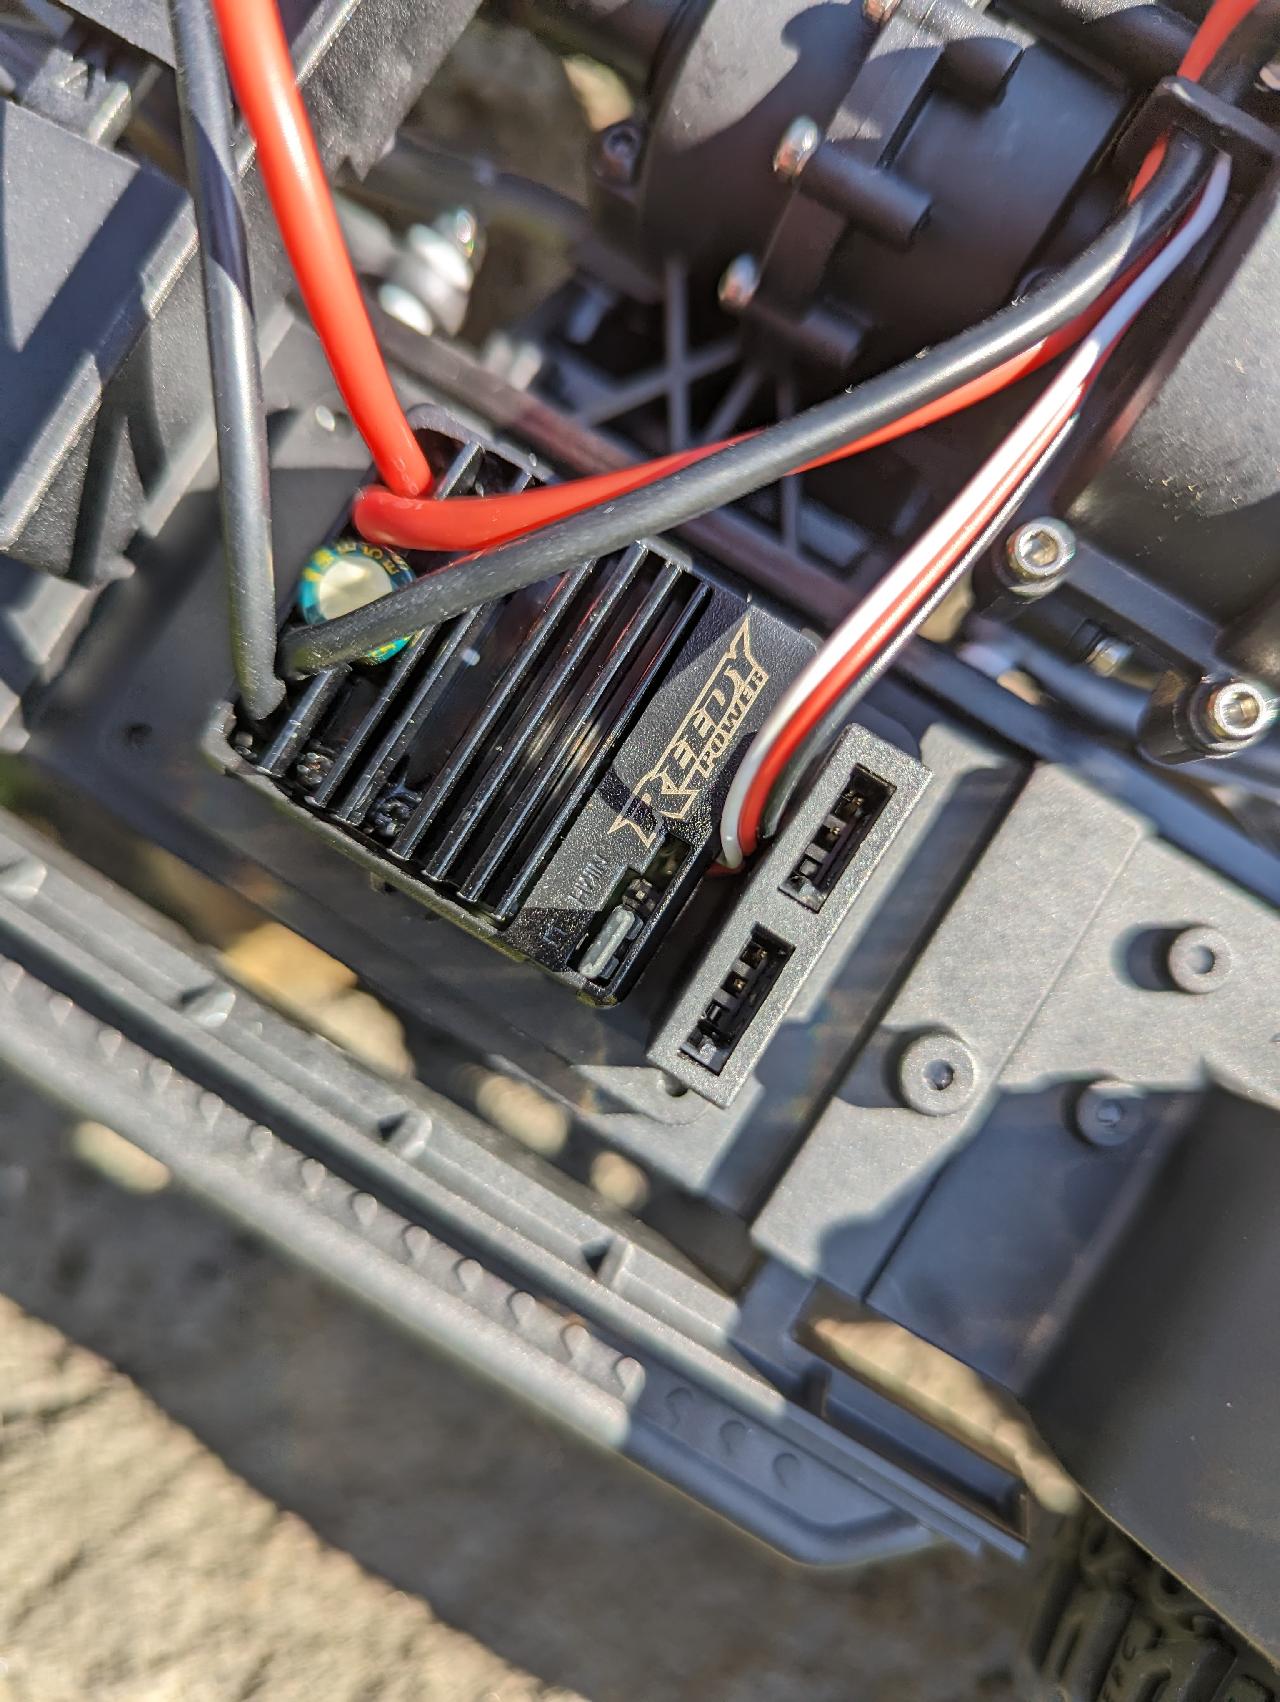
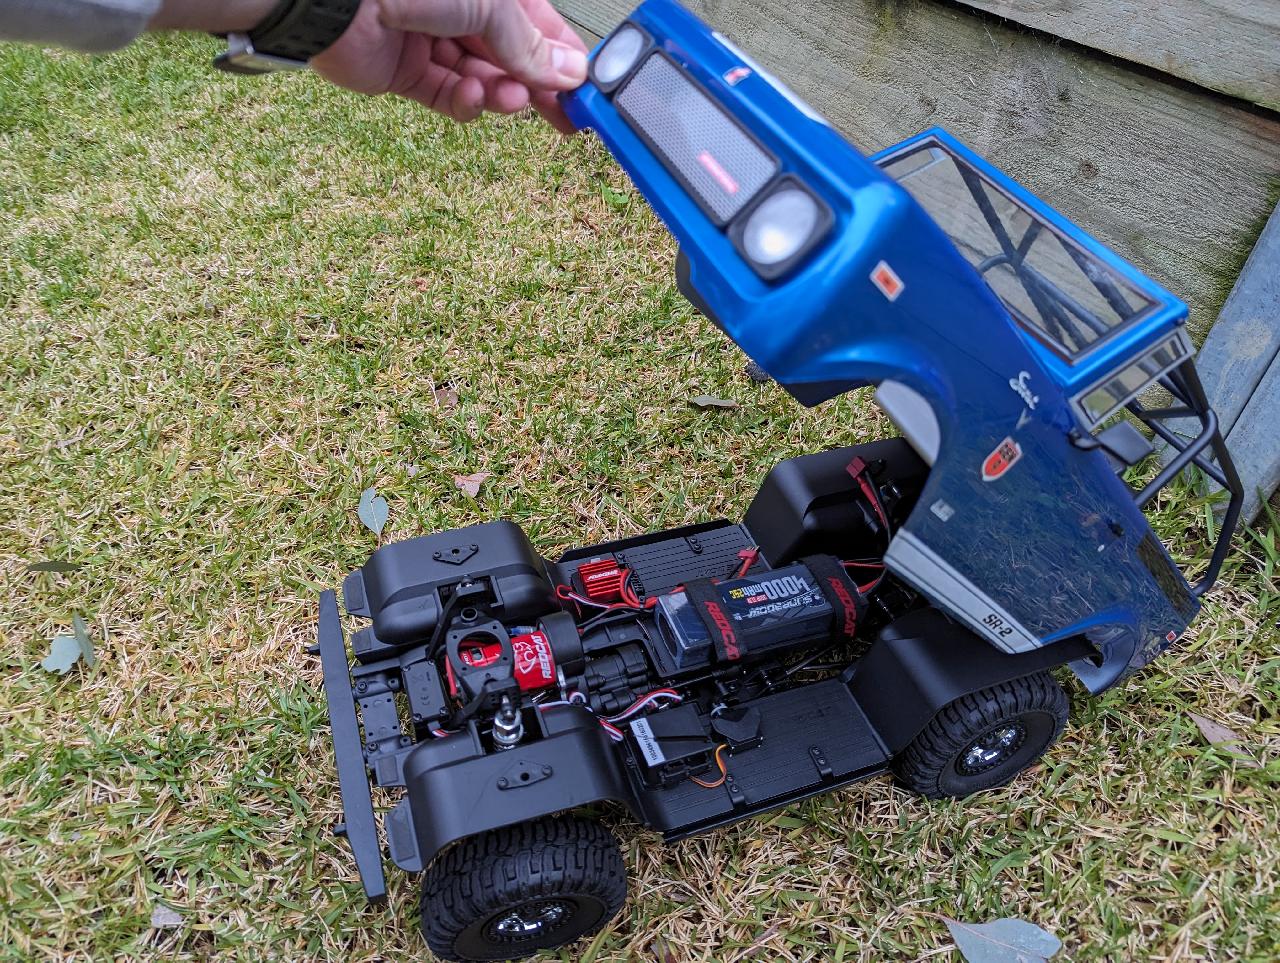
4106 Pro Servos

Electronics

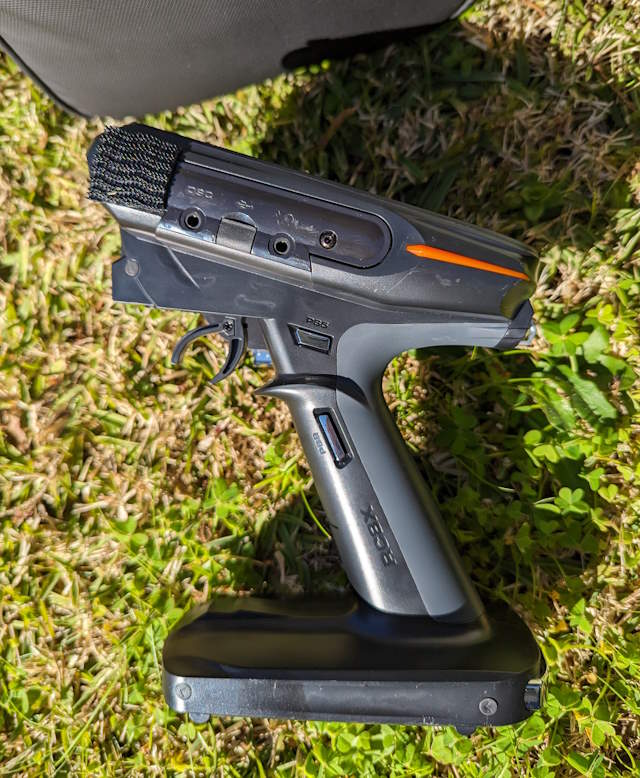
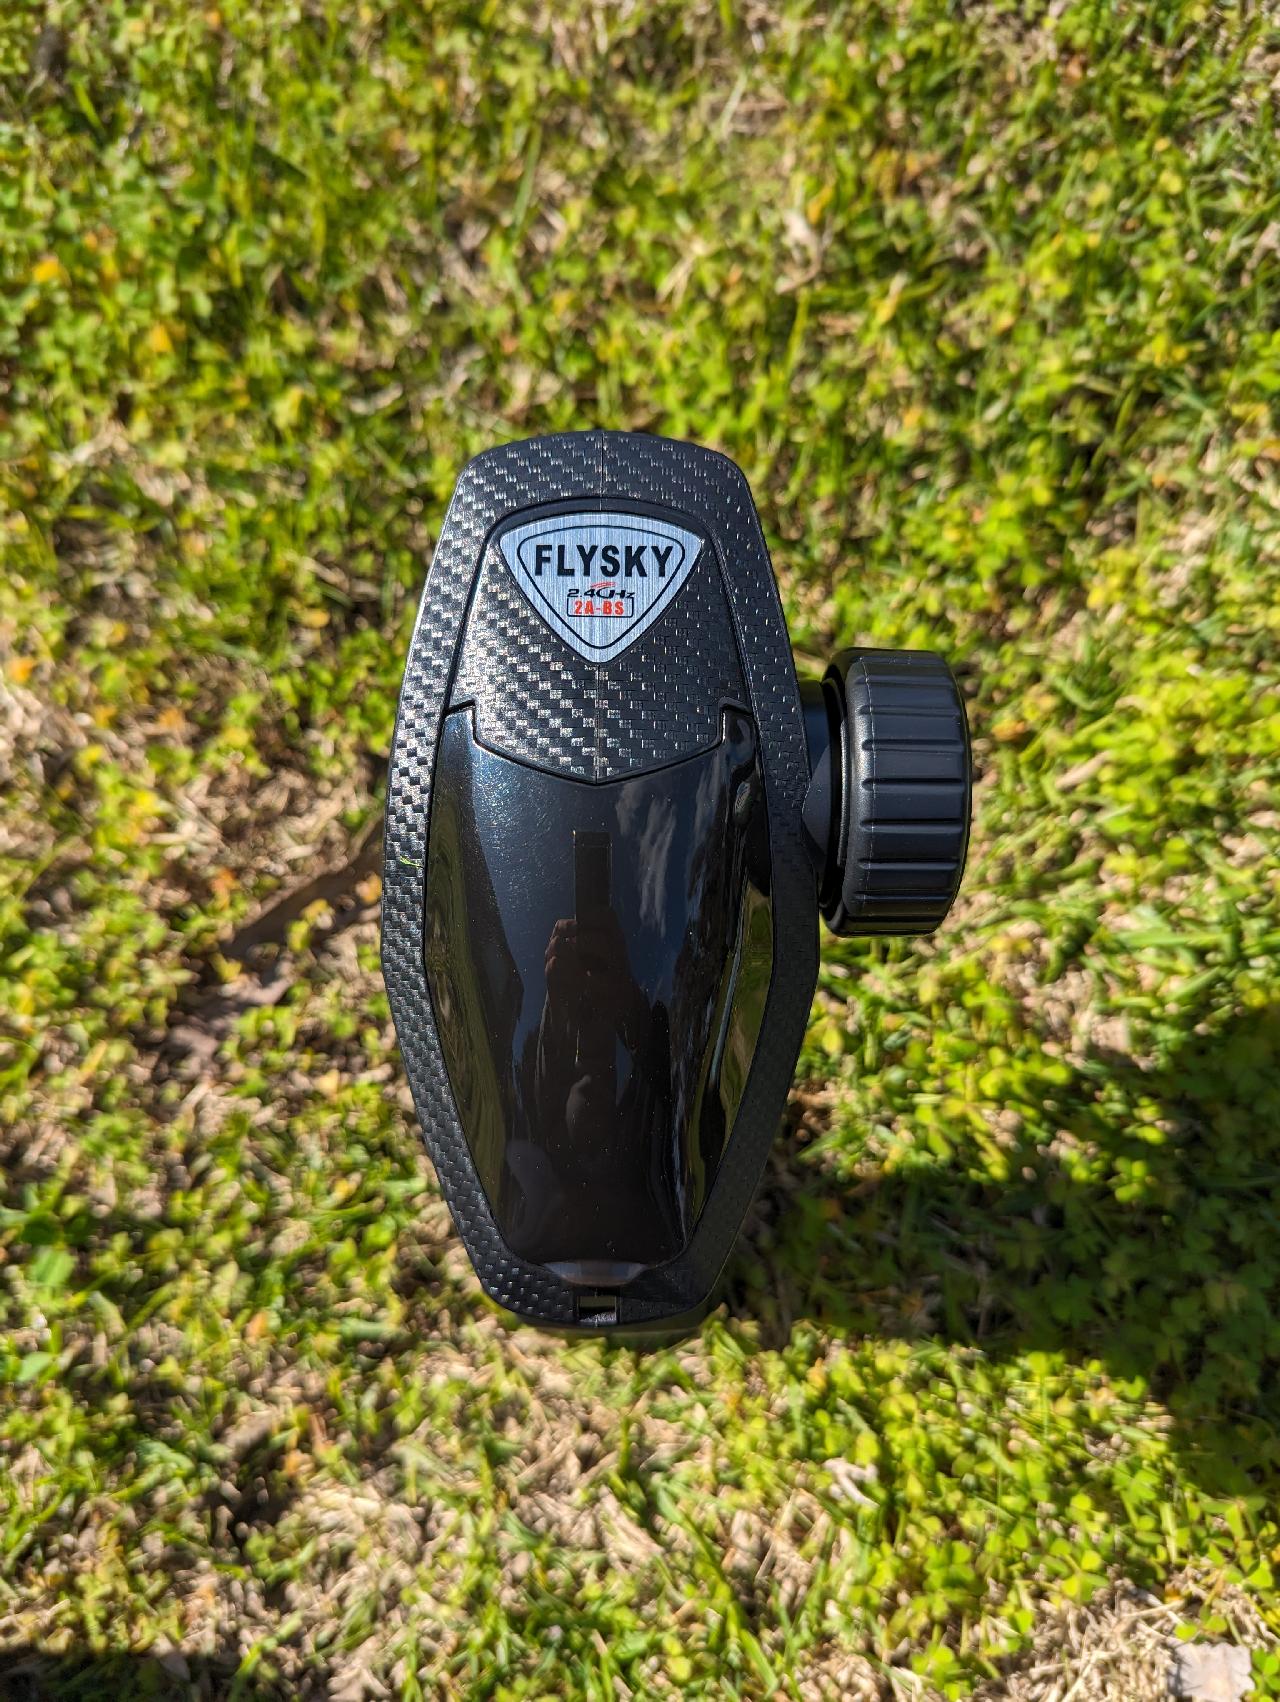
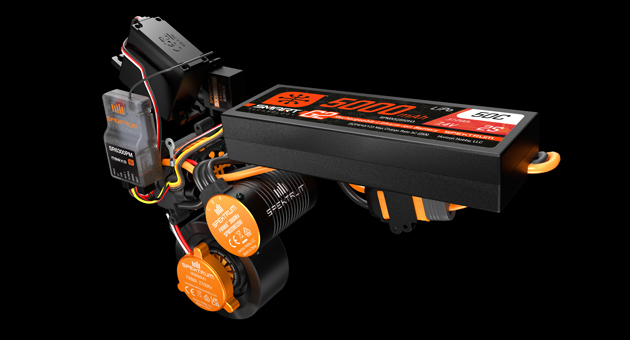
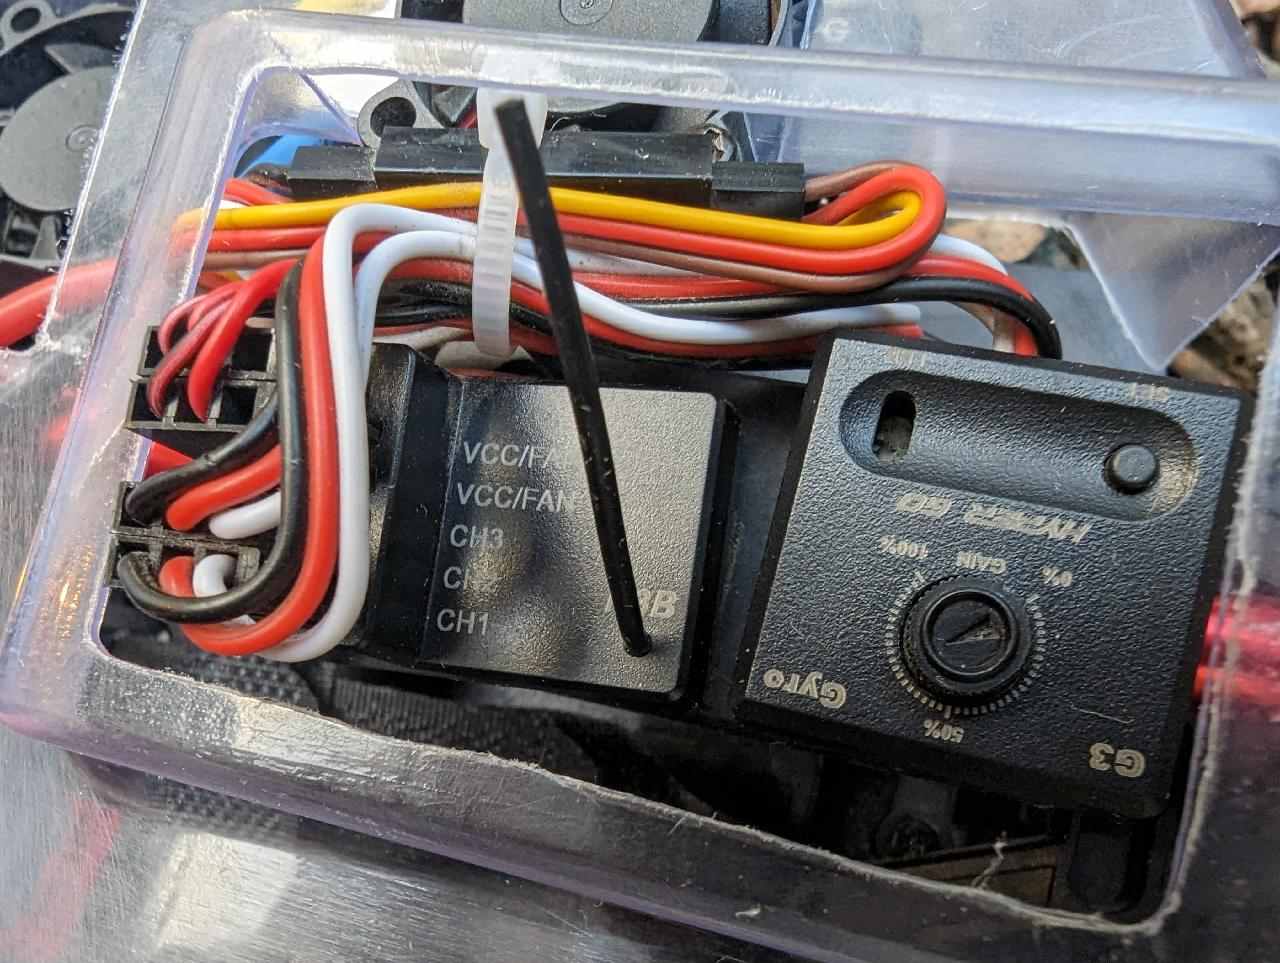
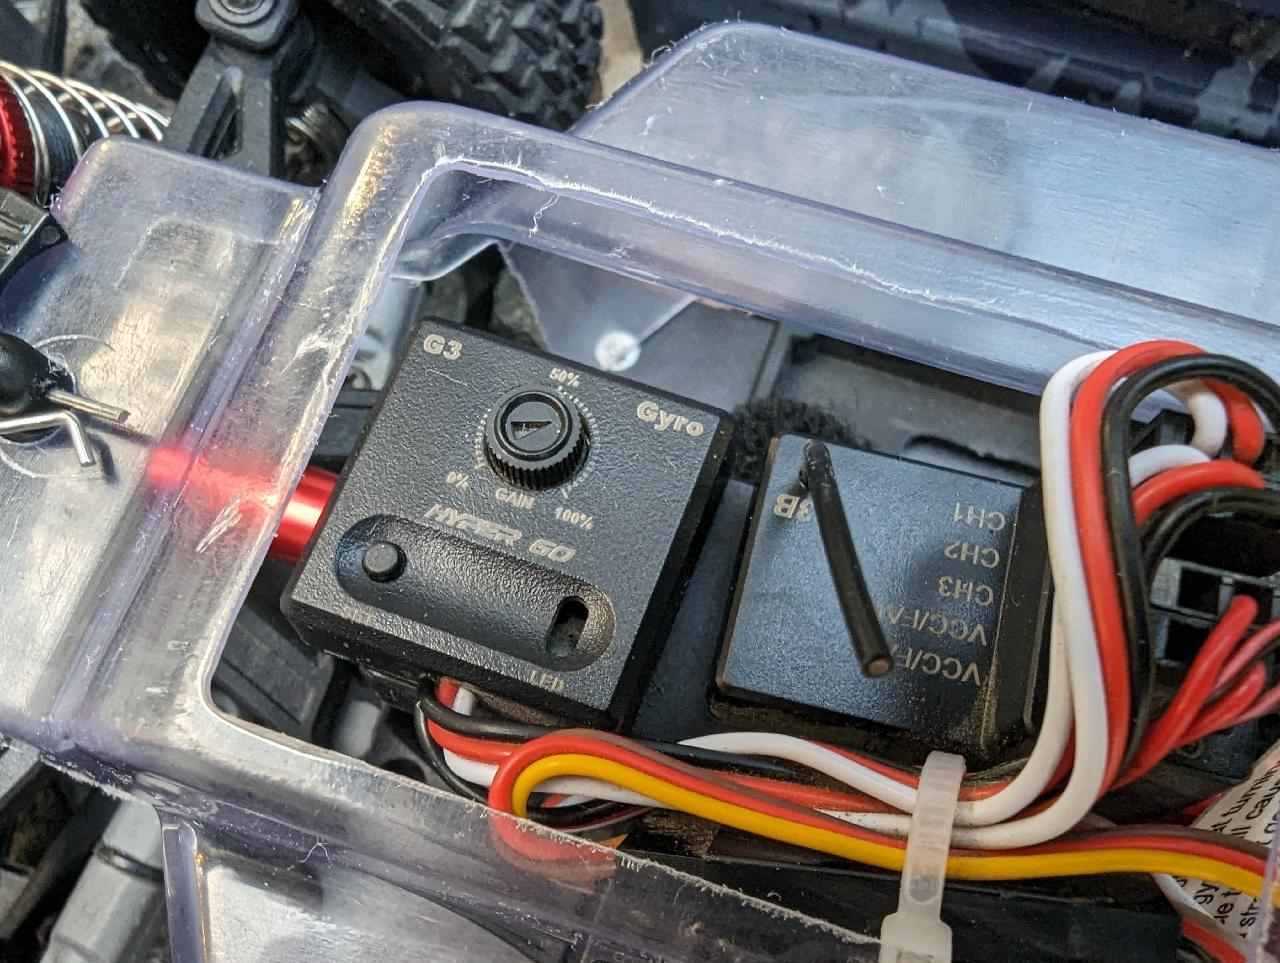
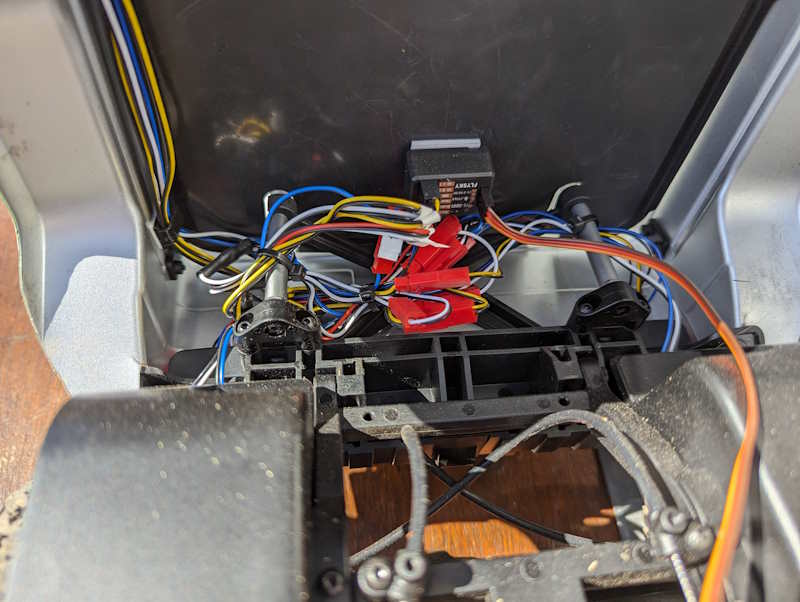
The ESC and receiver are an all-in-one unit from Flysky, which is OEM-only at time of writing. The Flysky FS-MG11-BS radio system incorporates a connected light kit that is designed to work with the radio system. It manages a lot of complexity in an elegant way. I like it. (It’s the same one you’ll find with the new FMS FCX10 1/10 model, and no doubt we’ll see it in other vehicles soon, too).

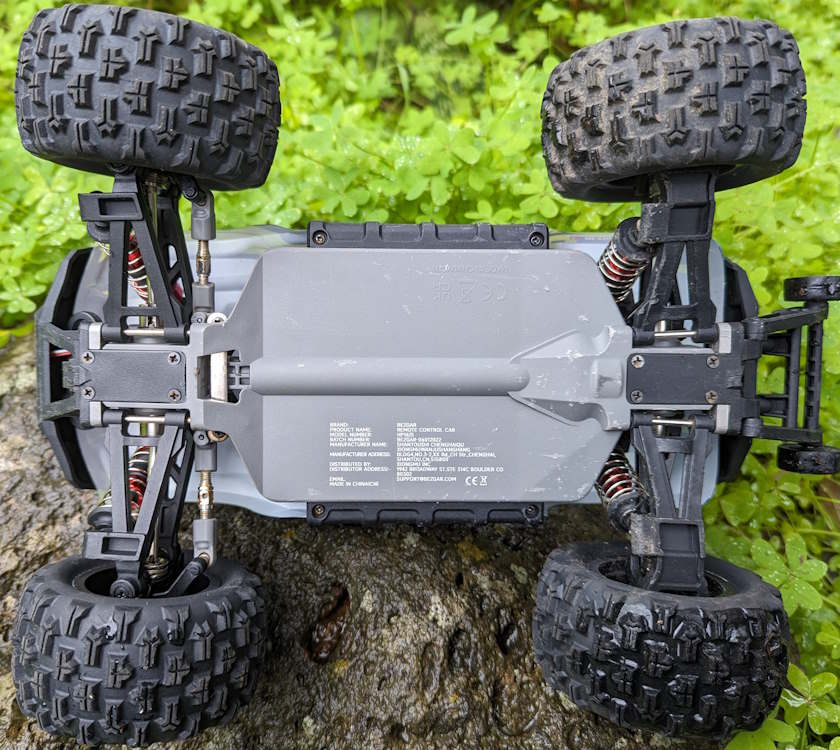
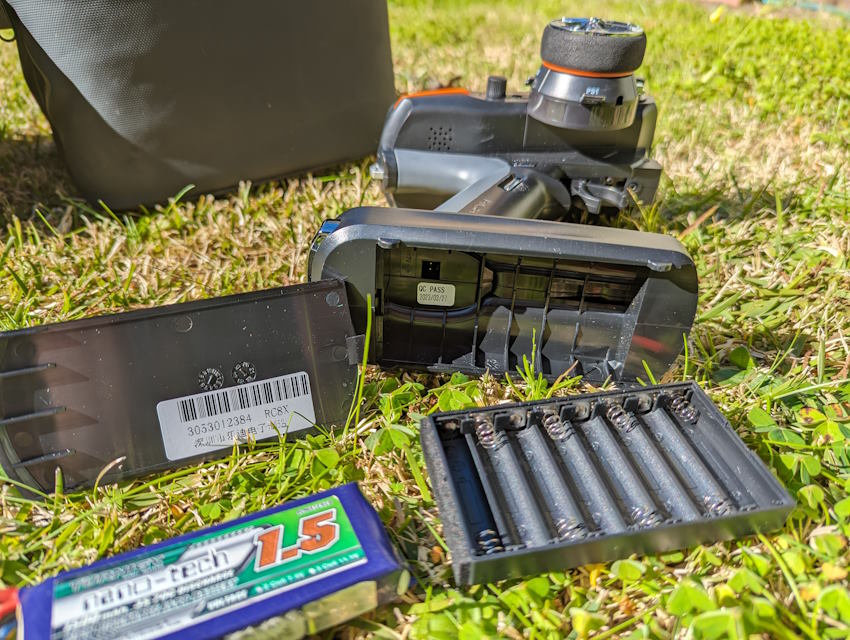
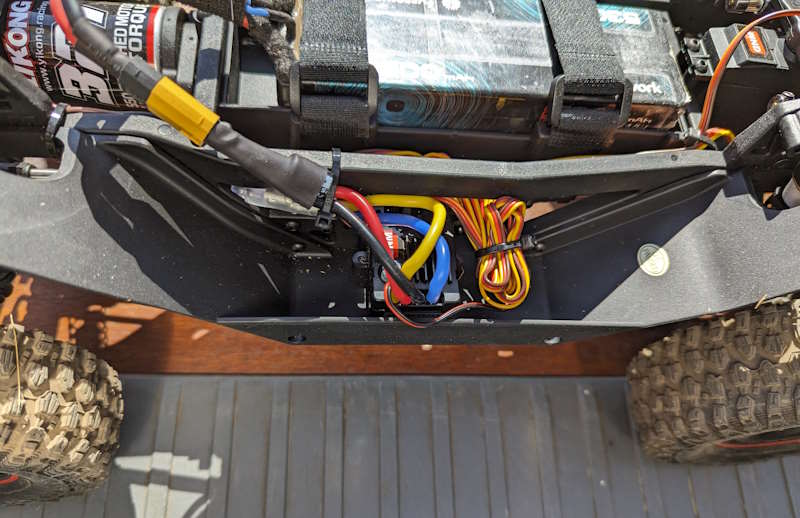
The car can take either a NiMH battery (6 or 7 cell), or 2S or 3S lipos. The ESC has a Deans (or T) connector. The power switch is located underneath, behind the skid, and is waterproofed.

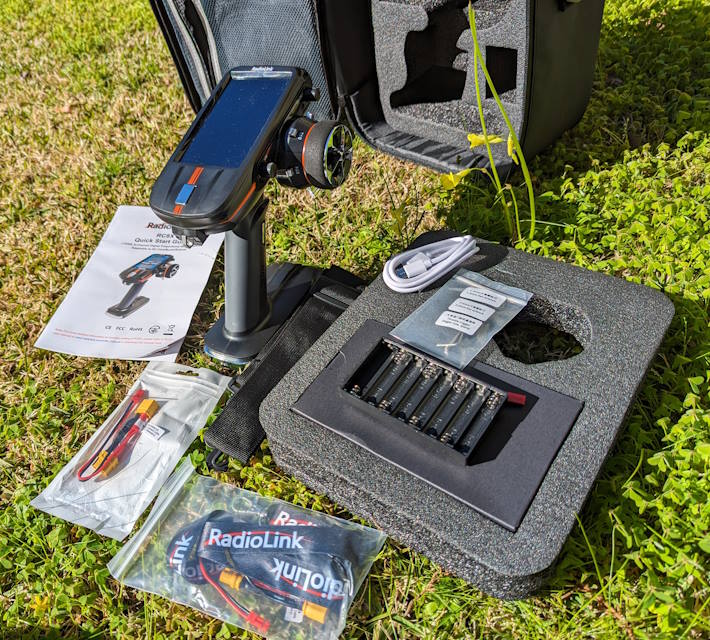
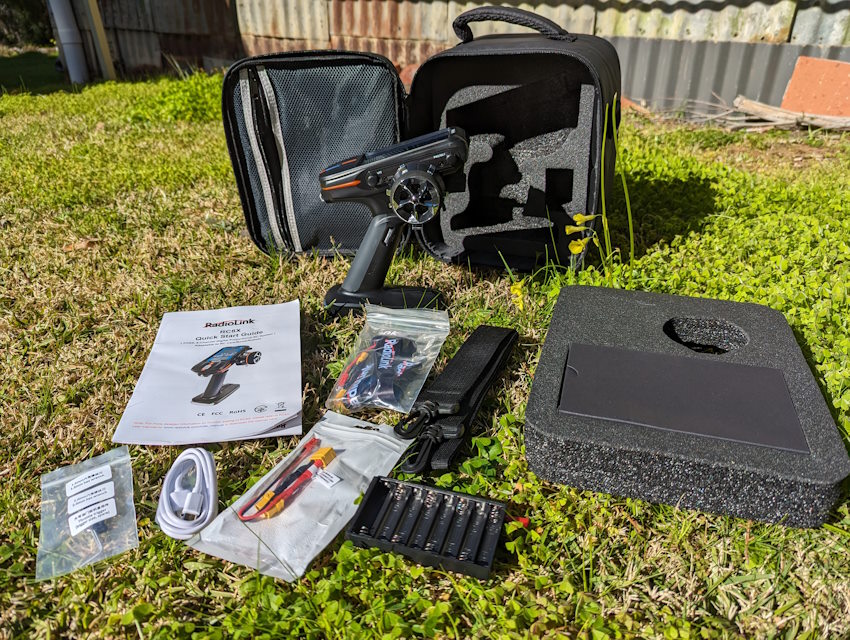
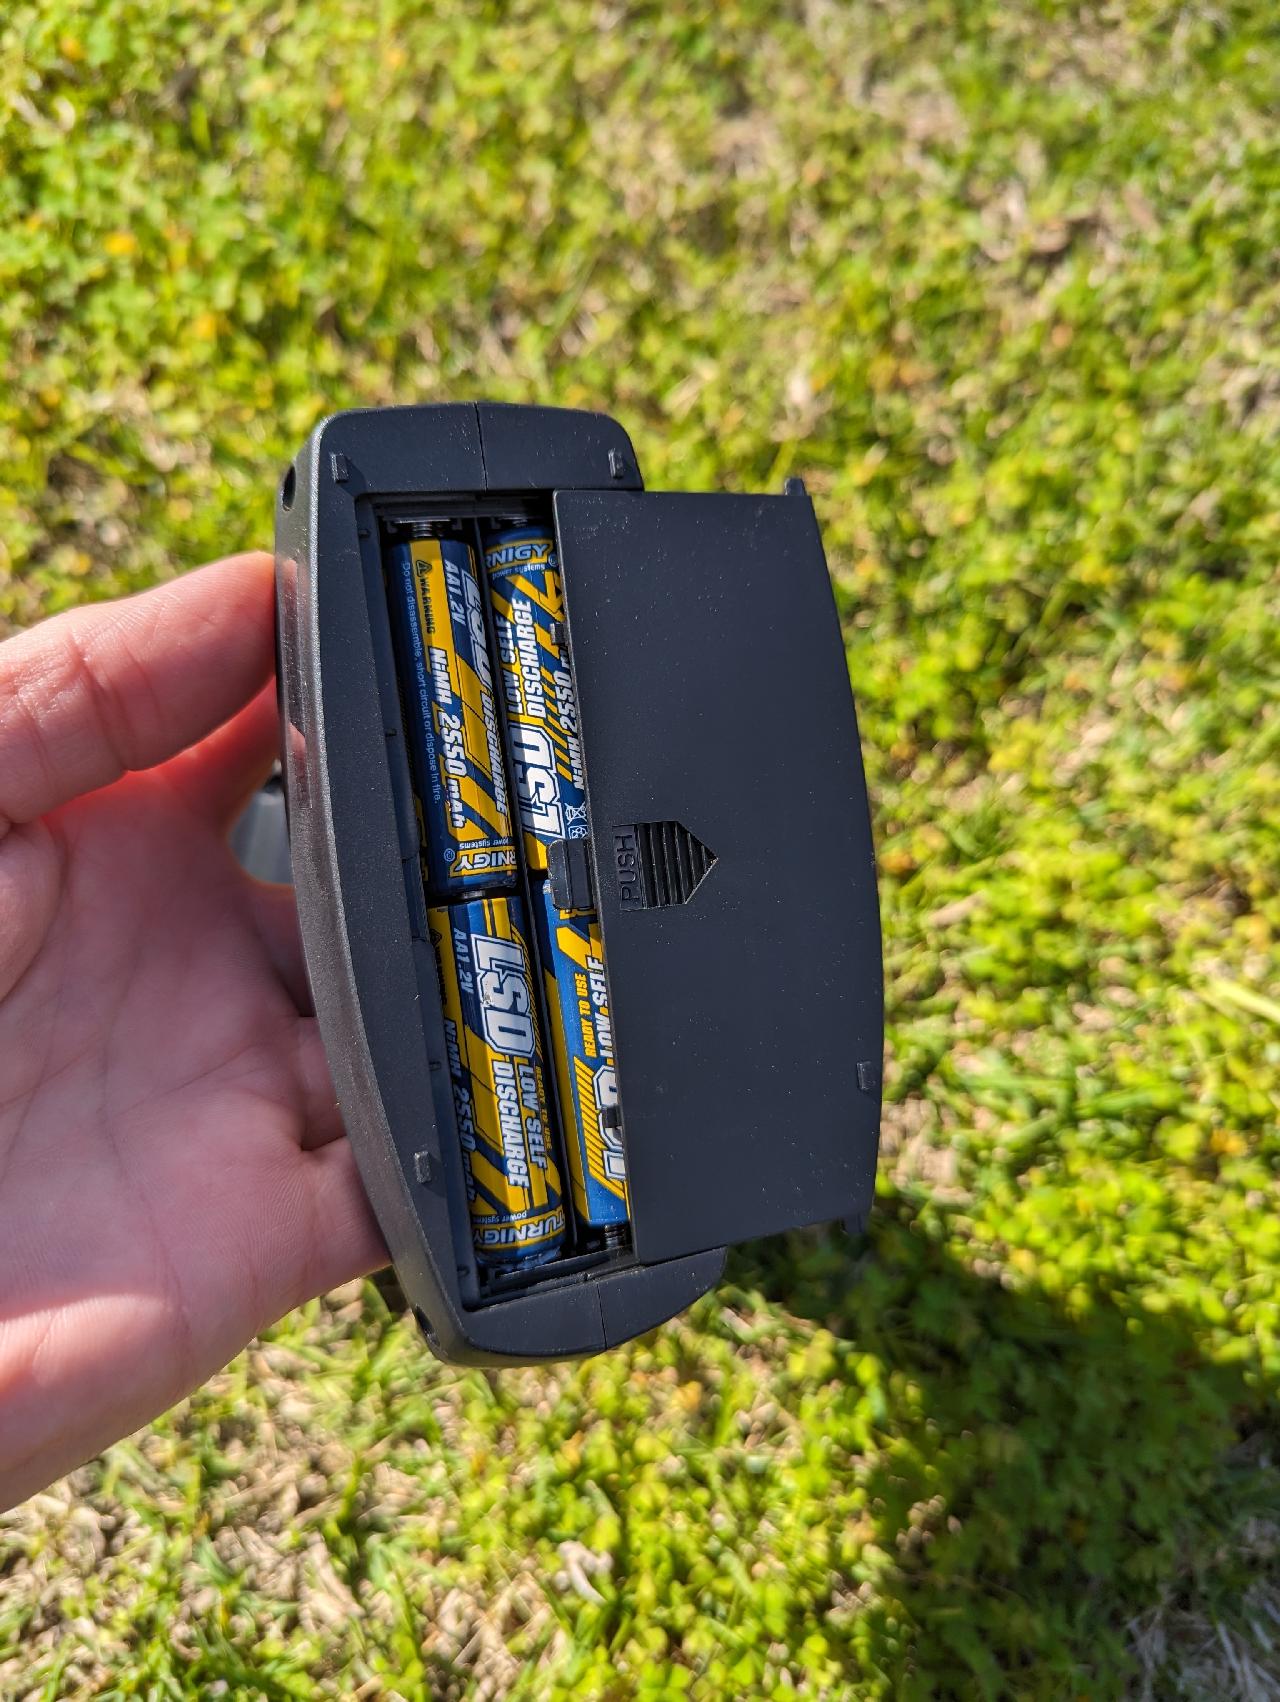
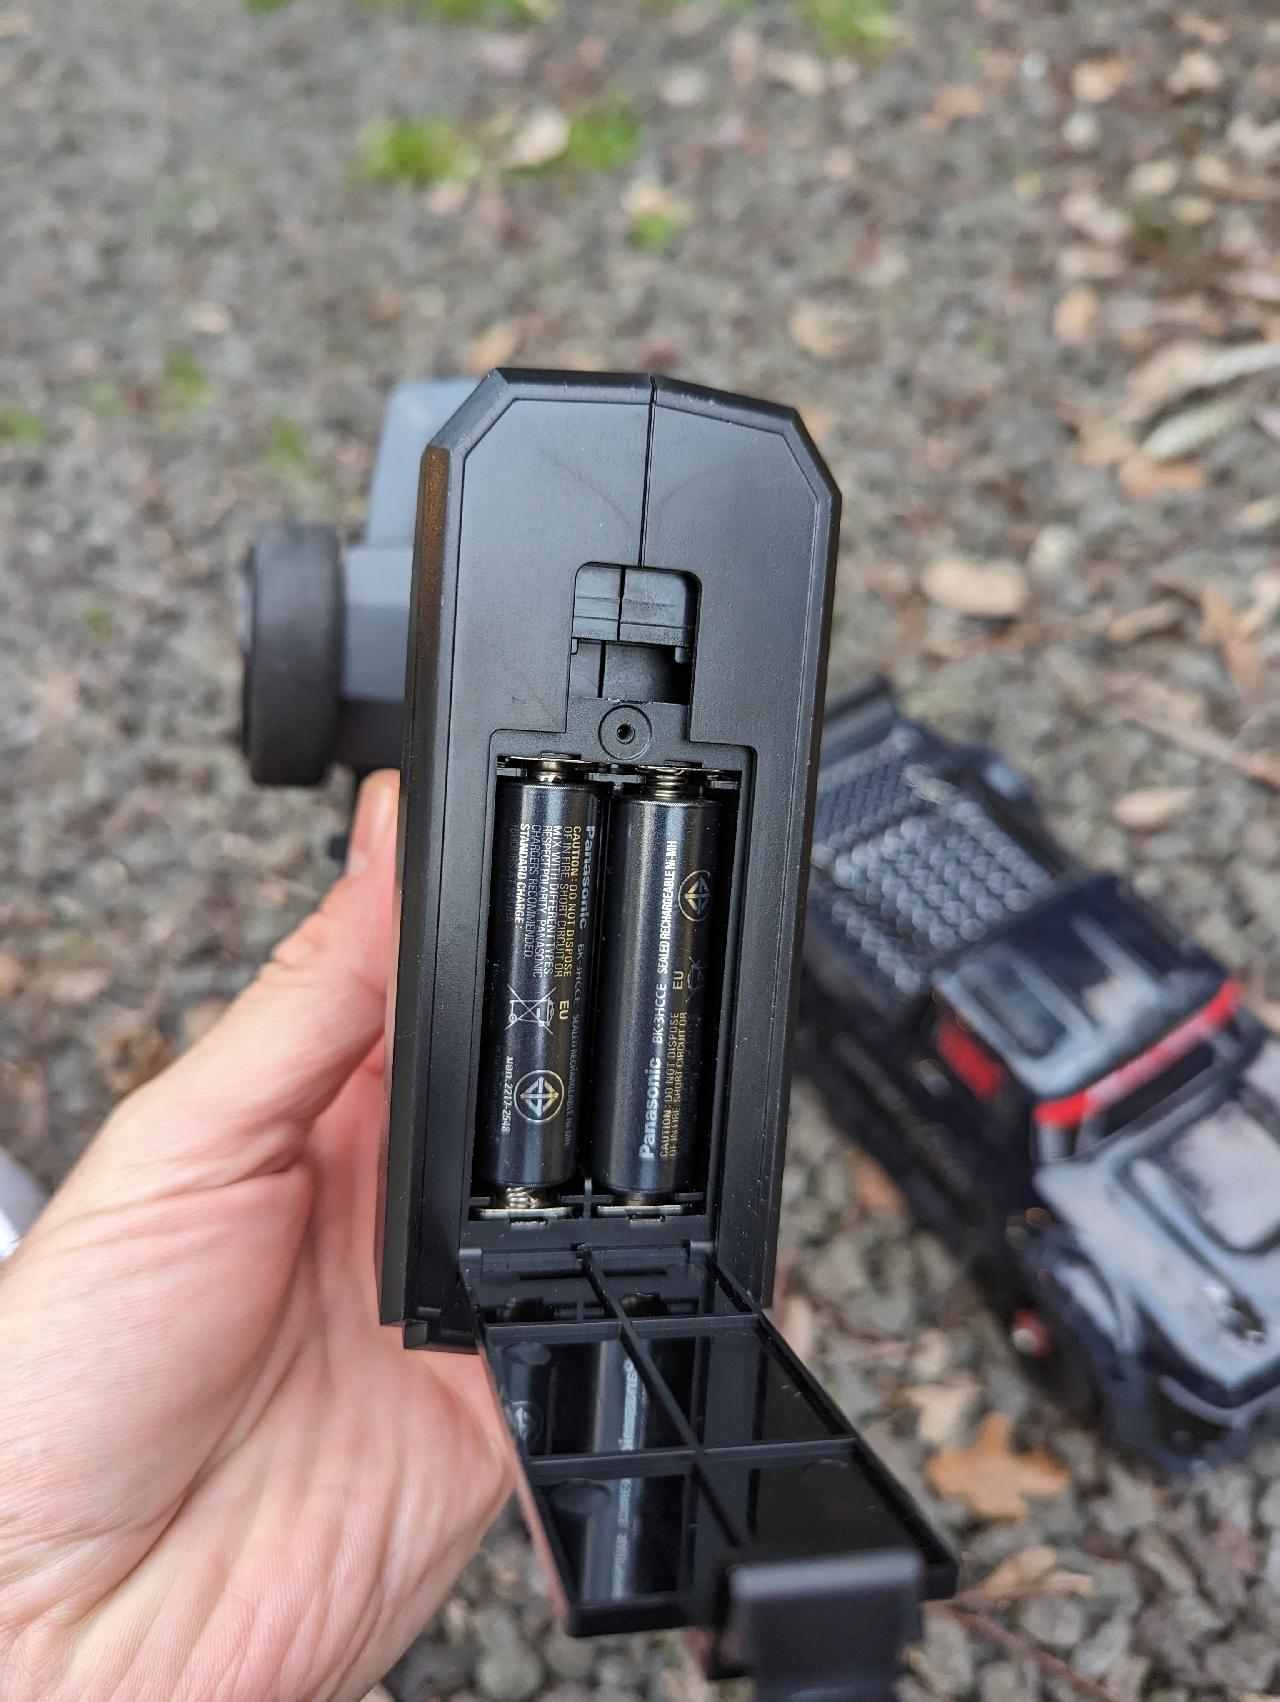
The radio transmitter takes 4x AA batteries and you’ll need to supply all the batteries for this vehicle.

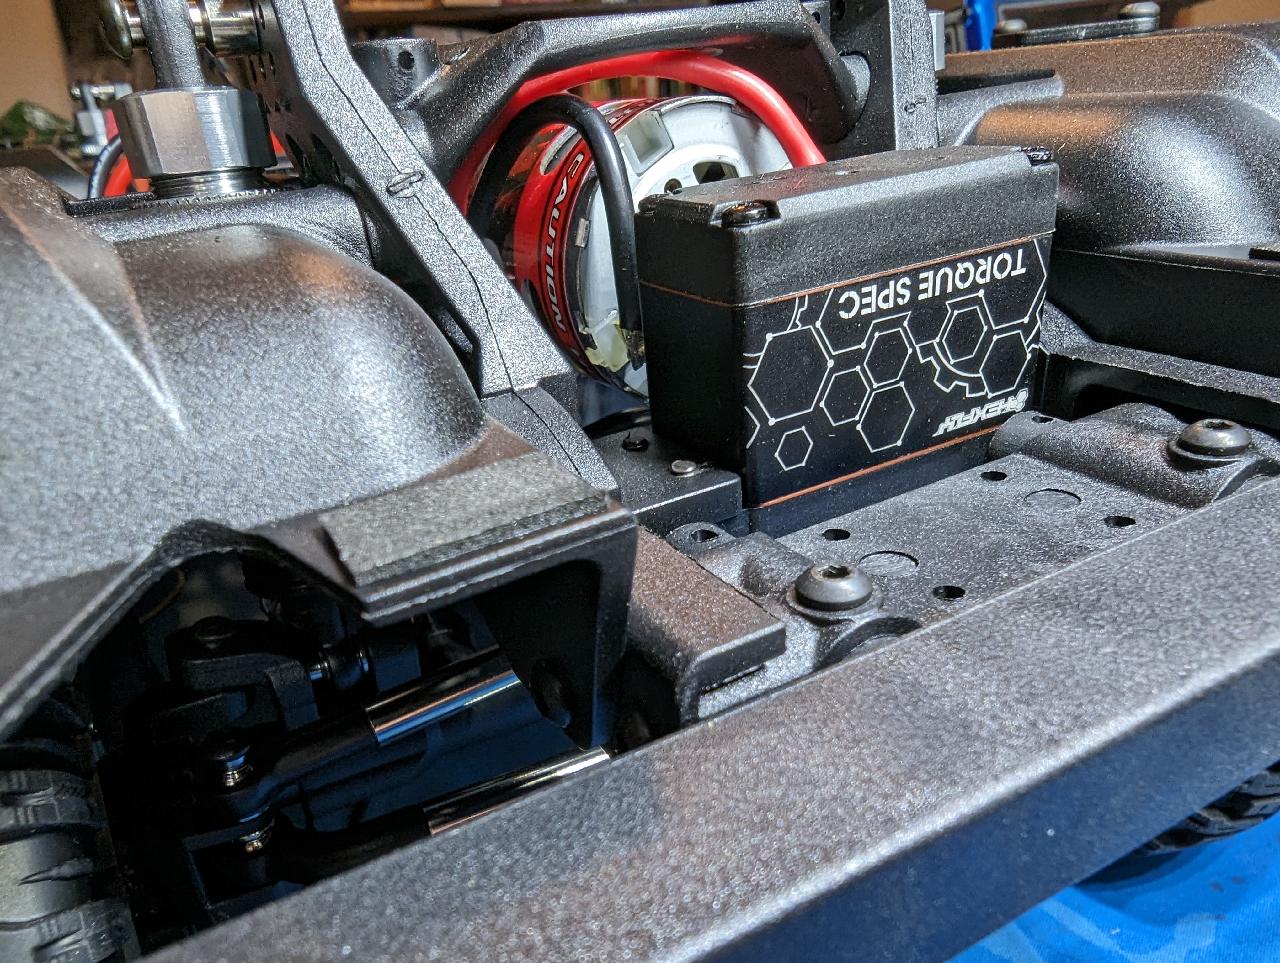
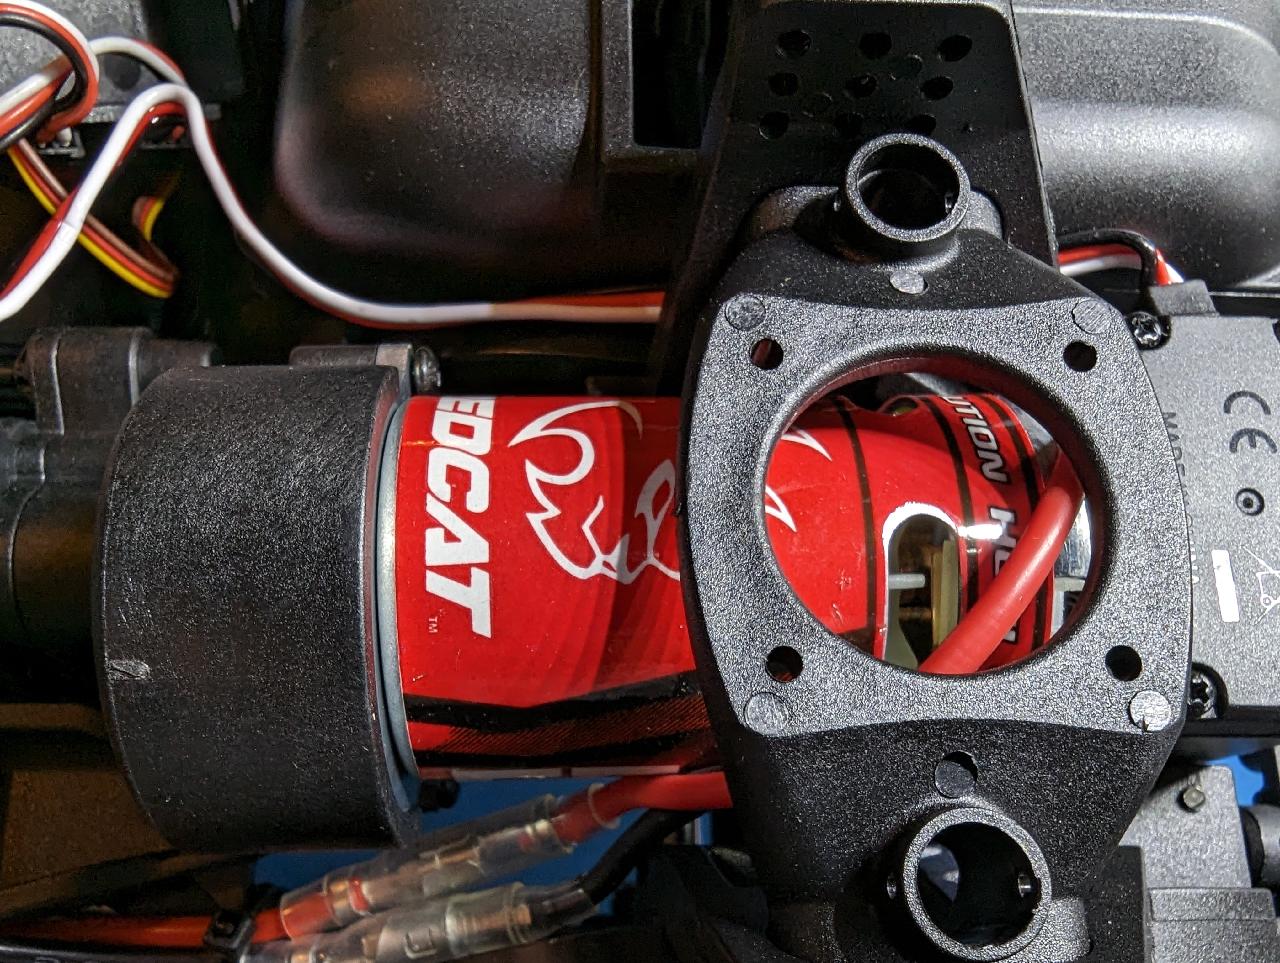
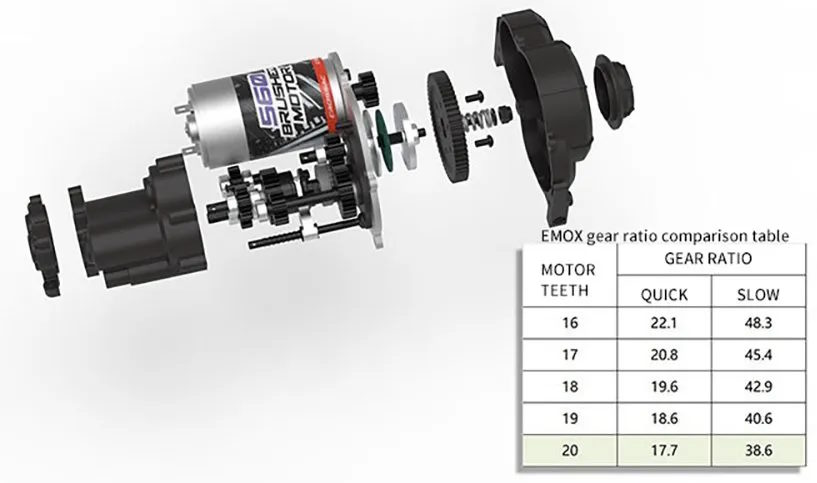
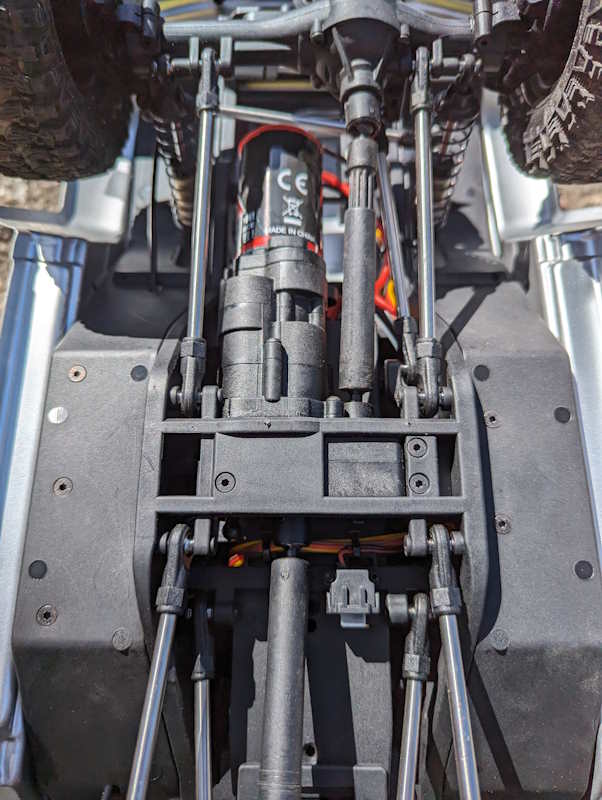
The motor is a large, 550-sized can with 32 turns. It’s well suited to the vehicle and I like it on both 2S and 3S.

4106 Pro Power Switch

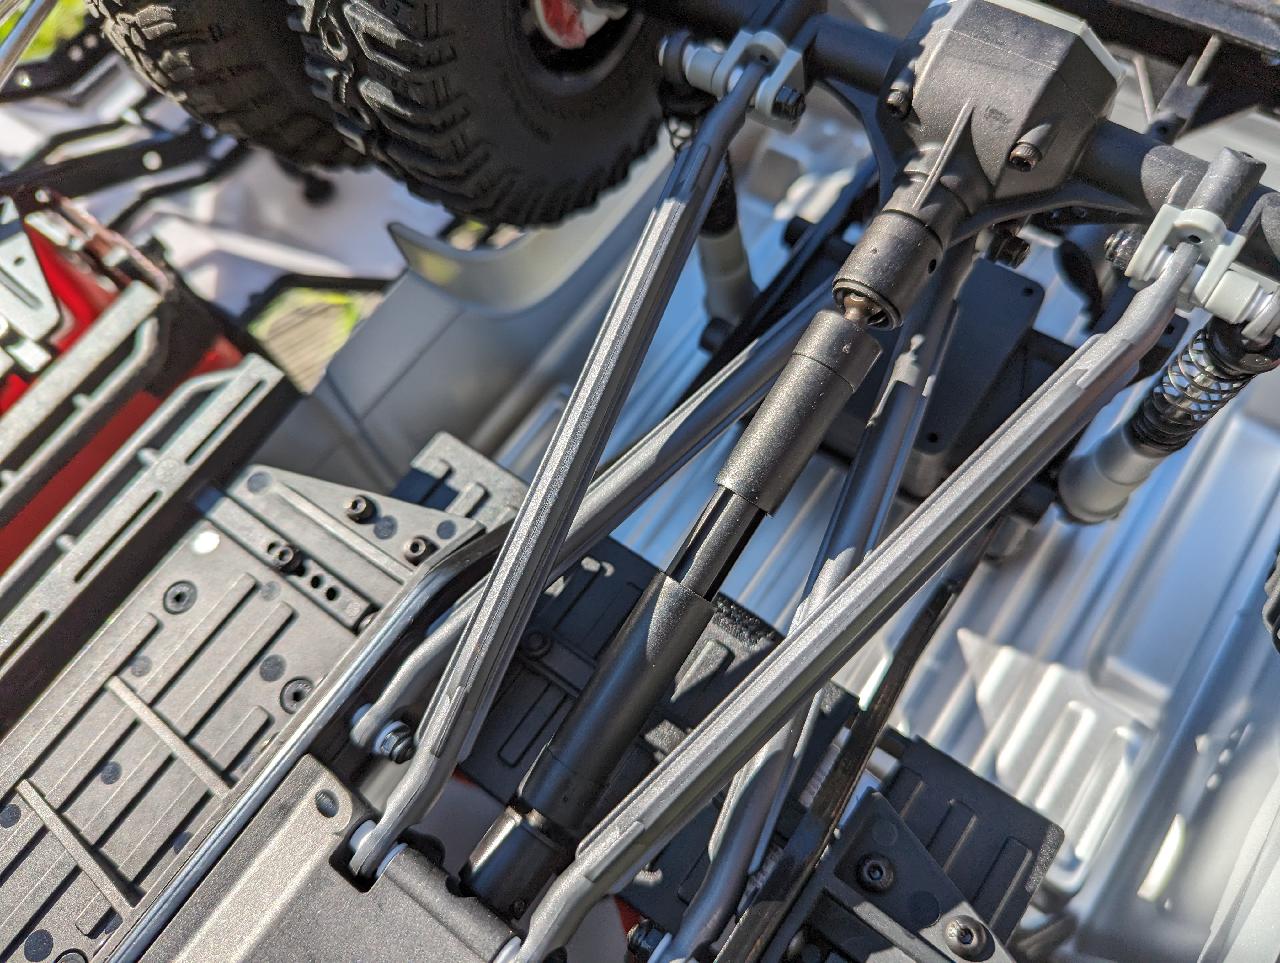
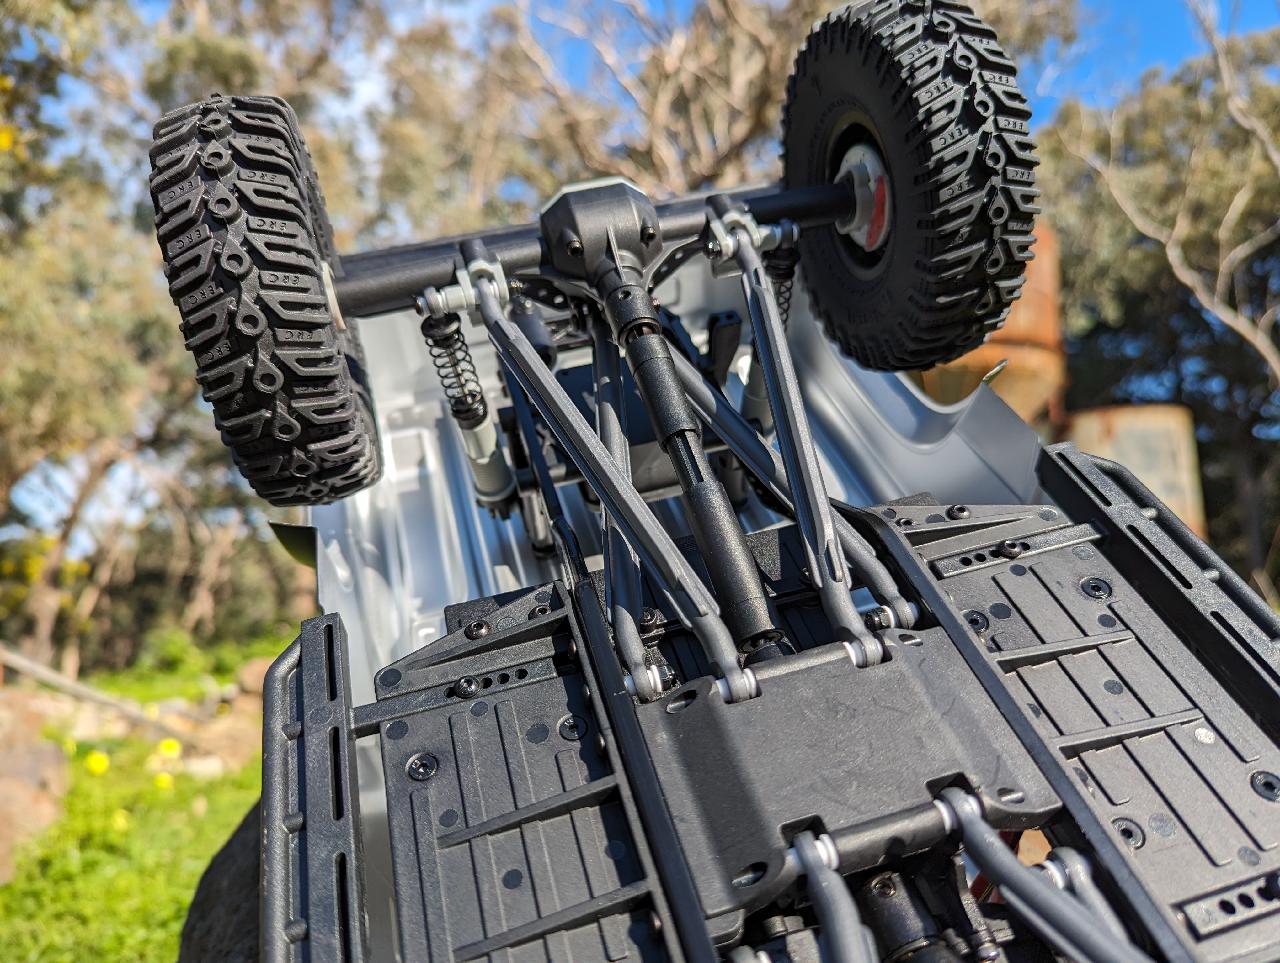
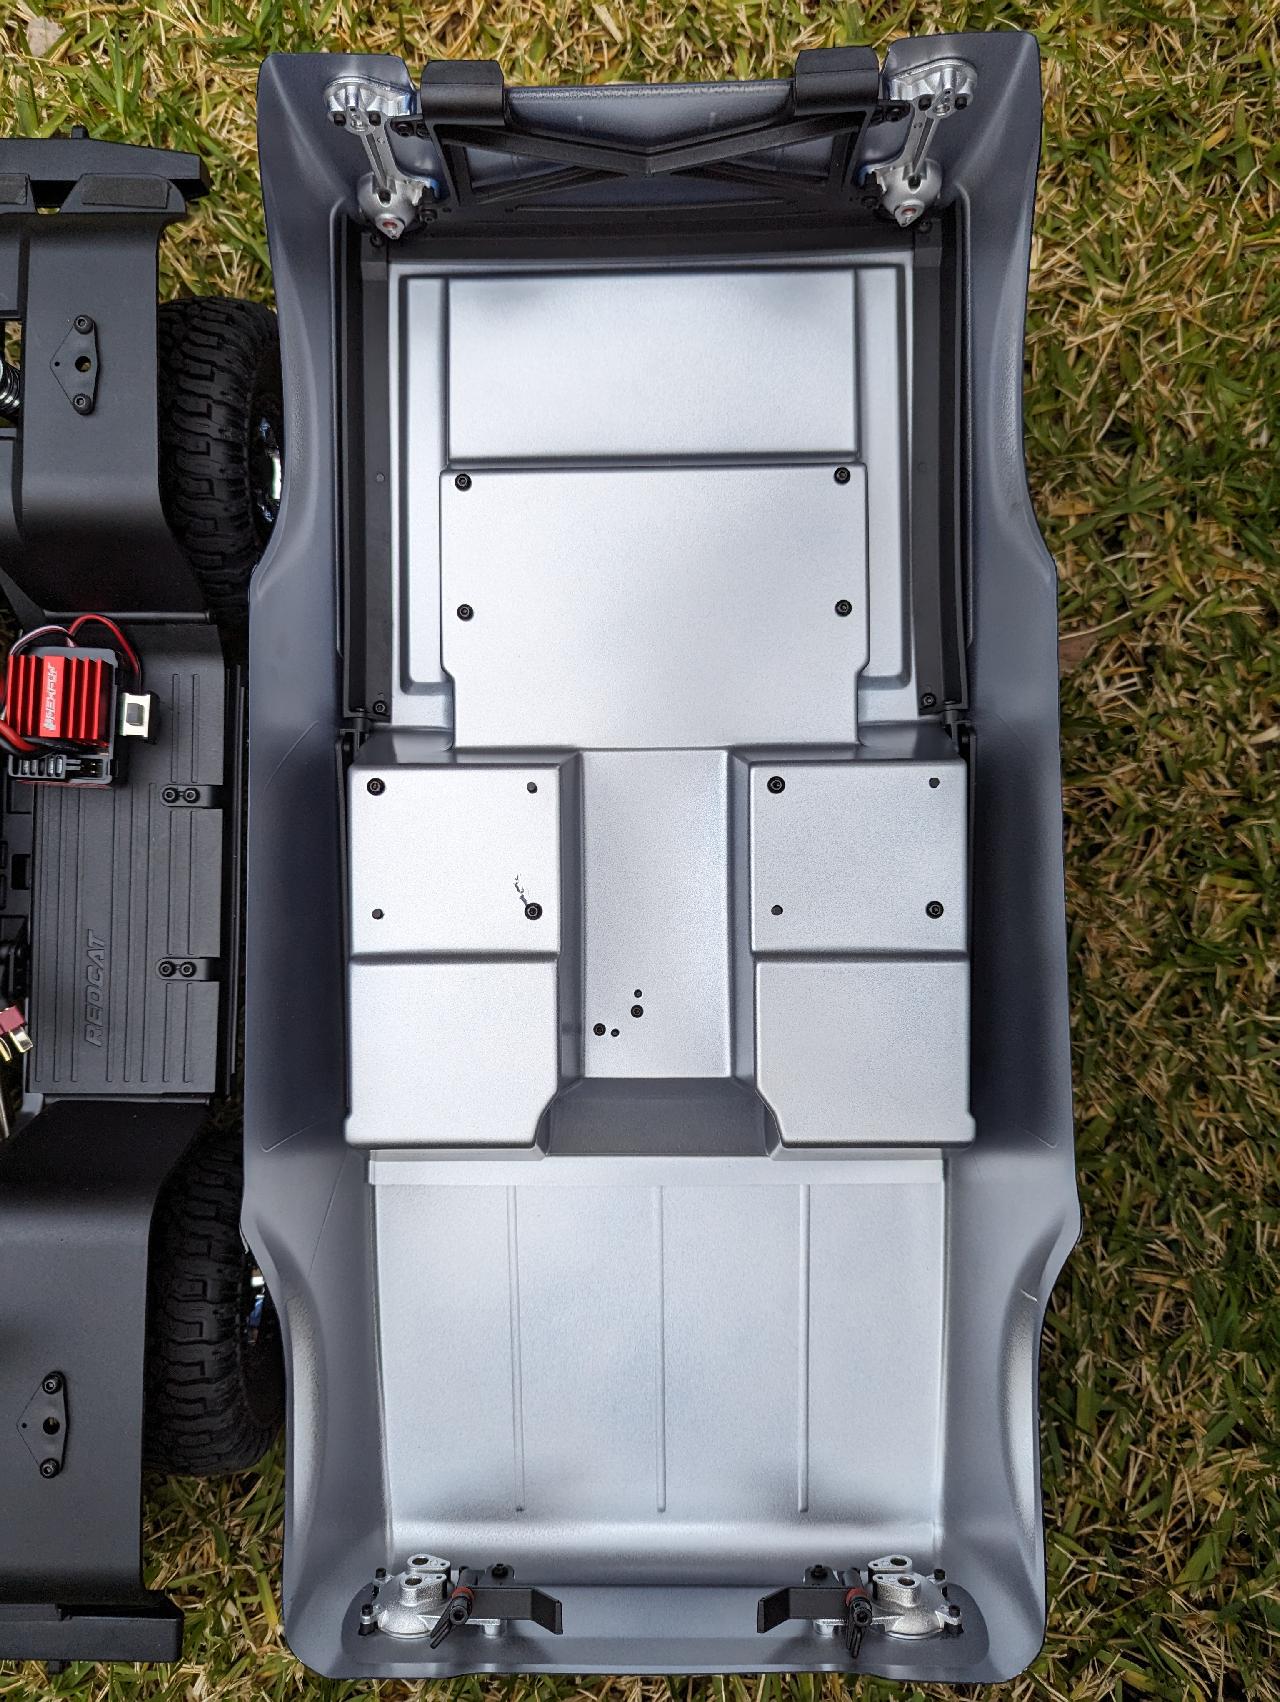
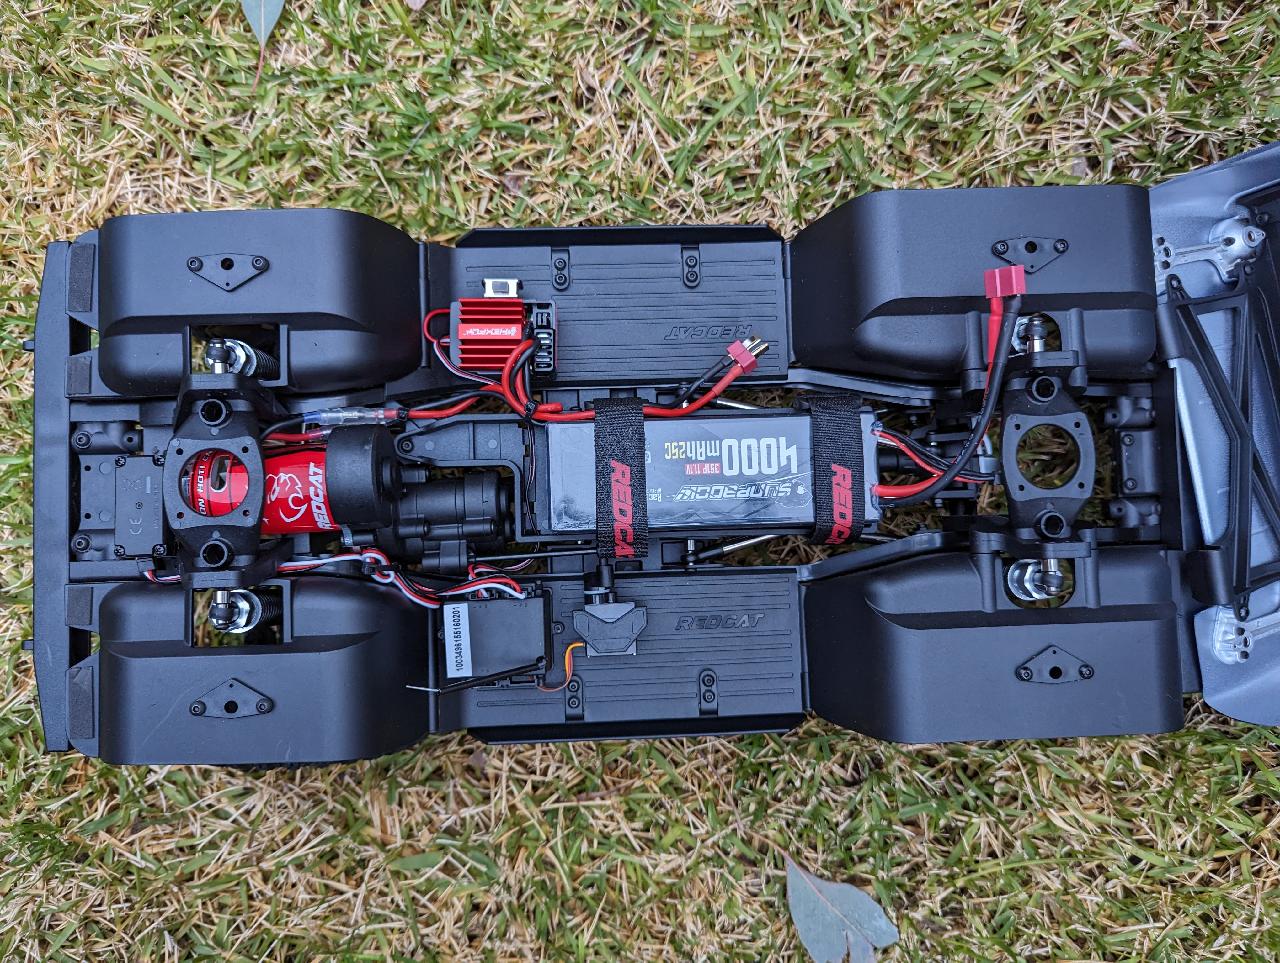
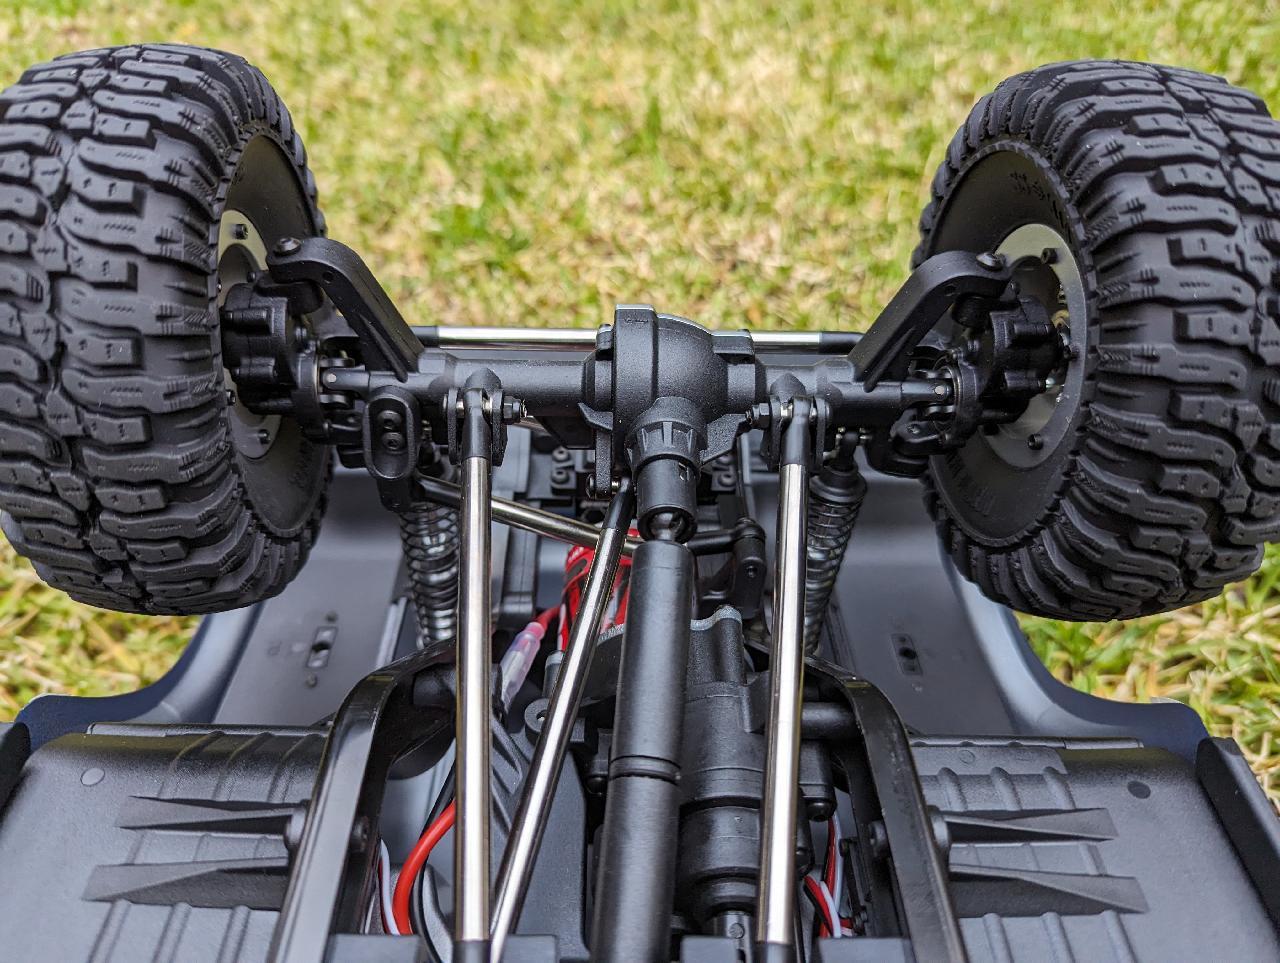
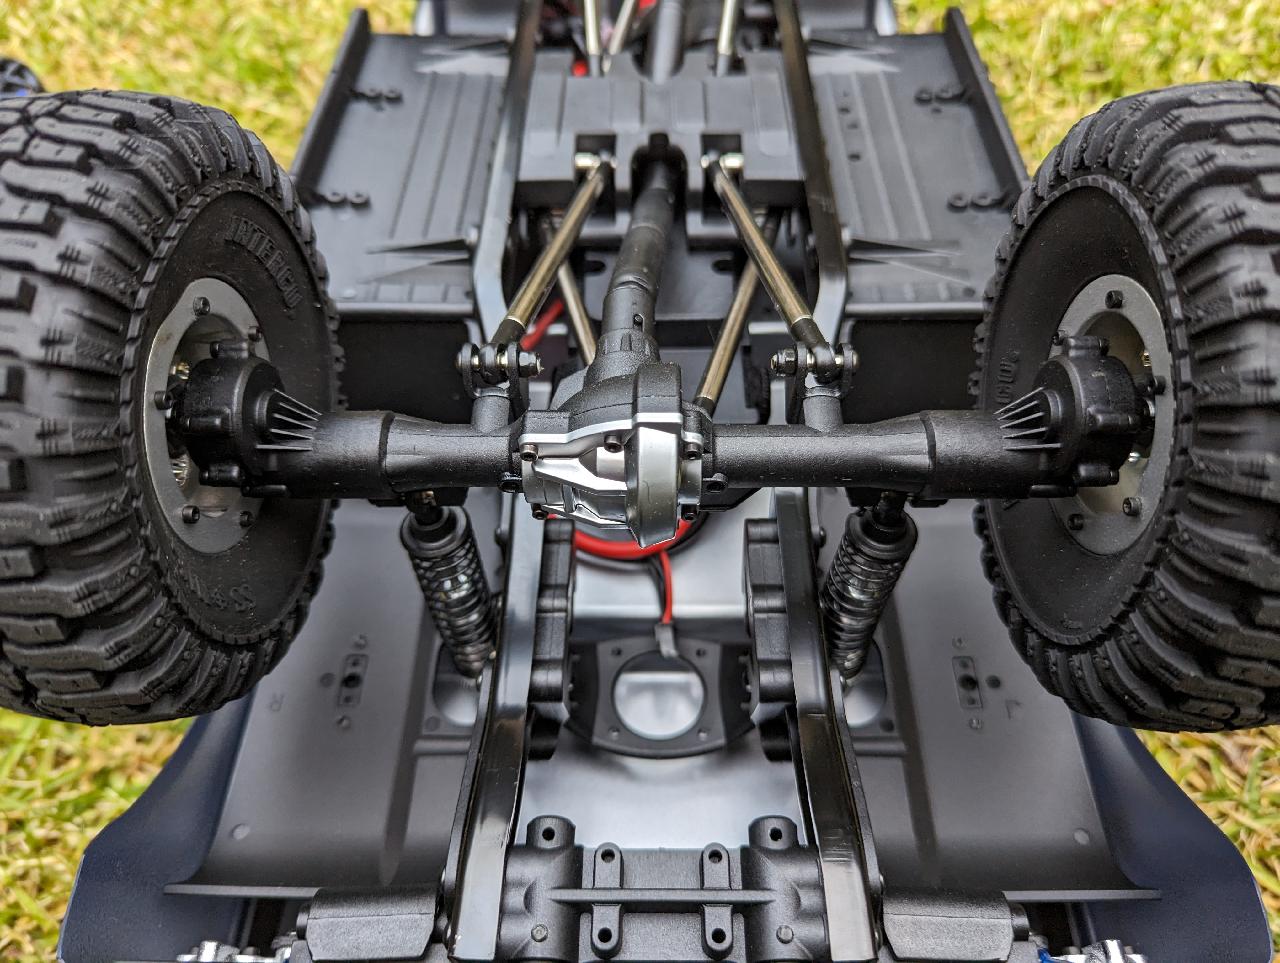
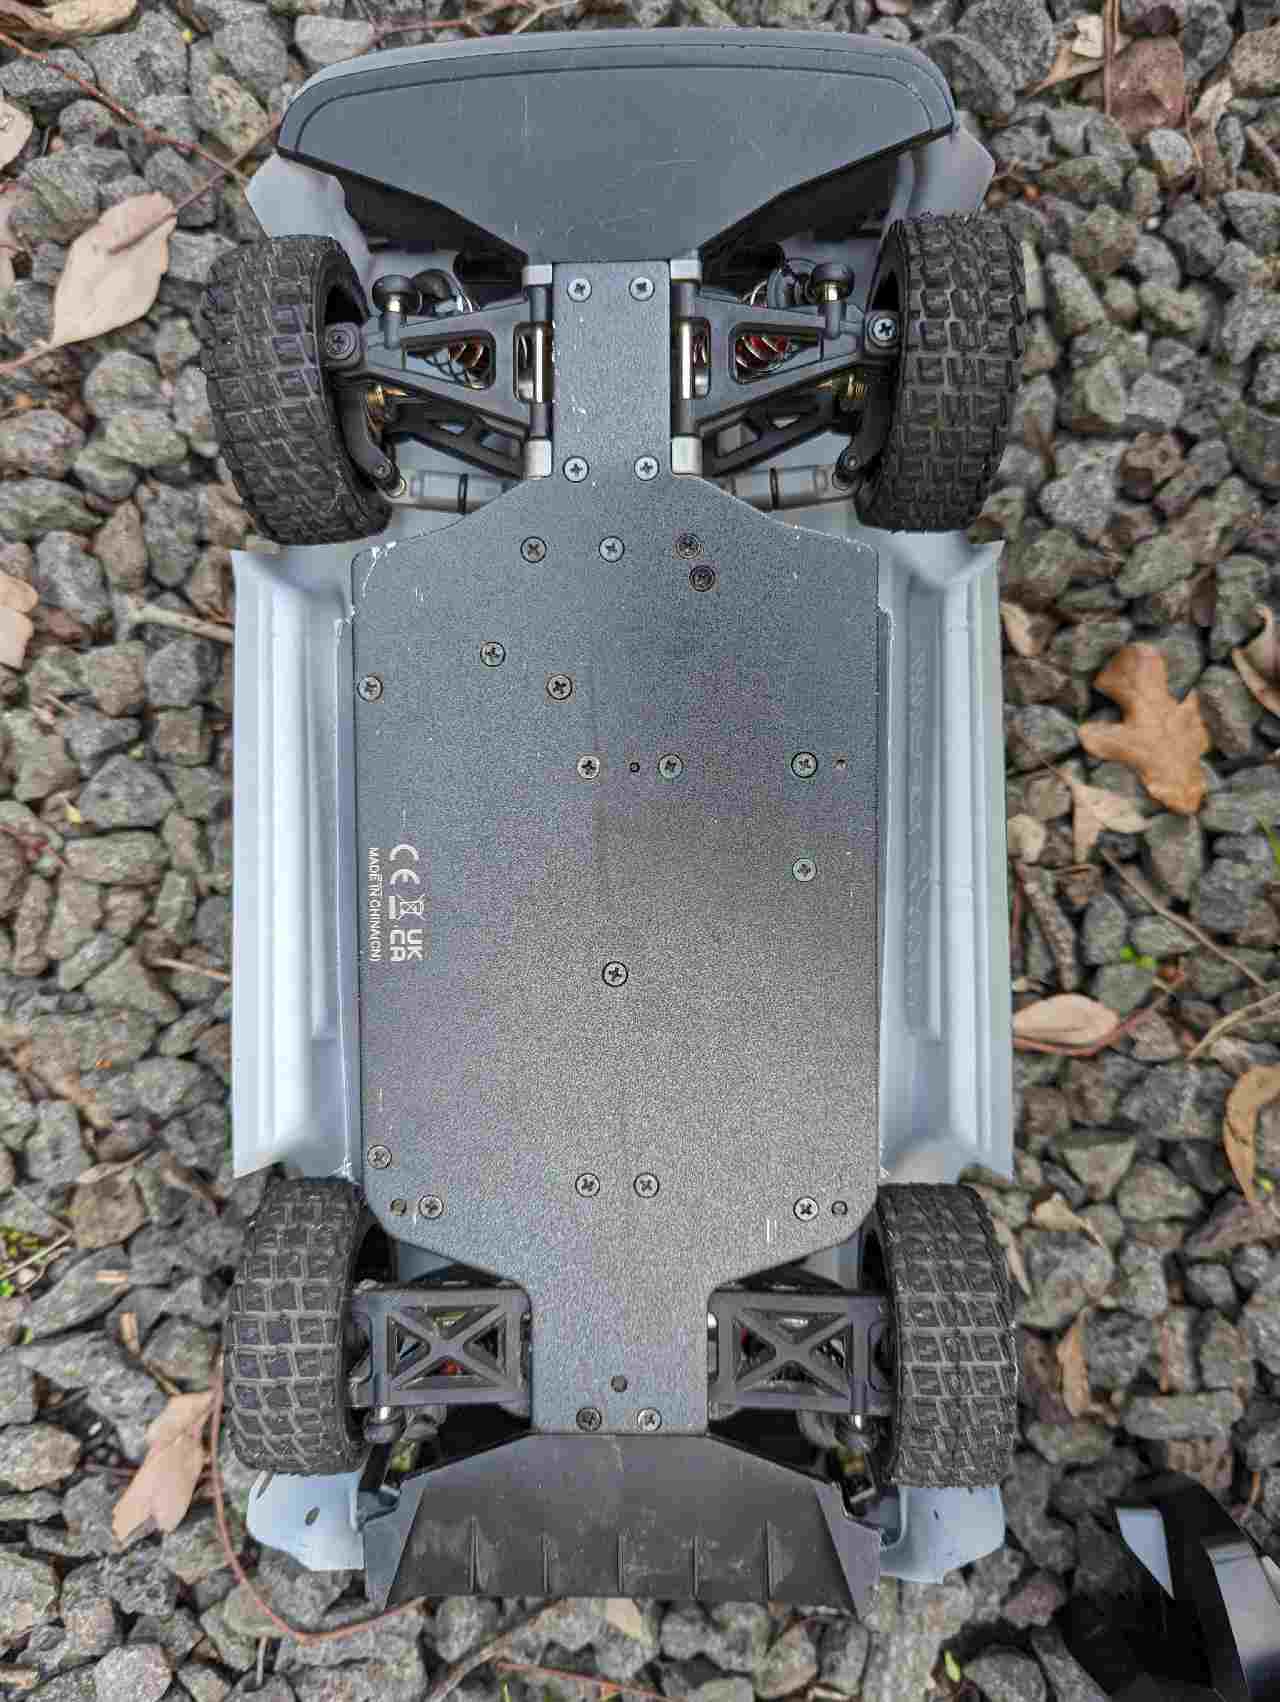
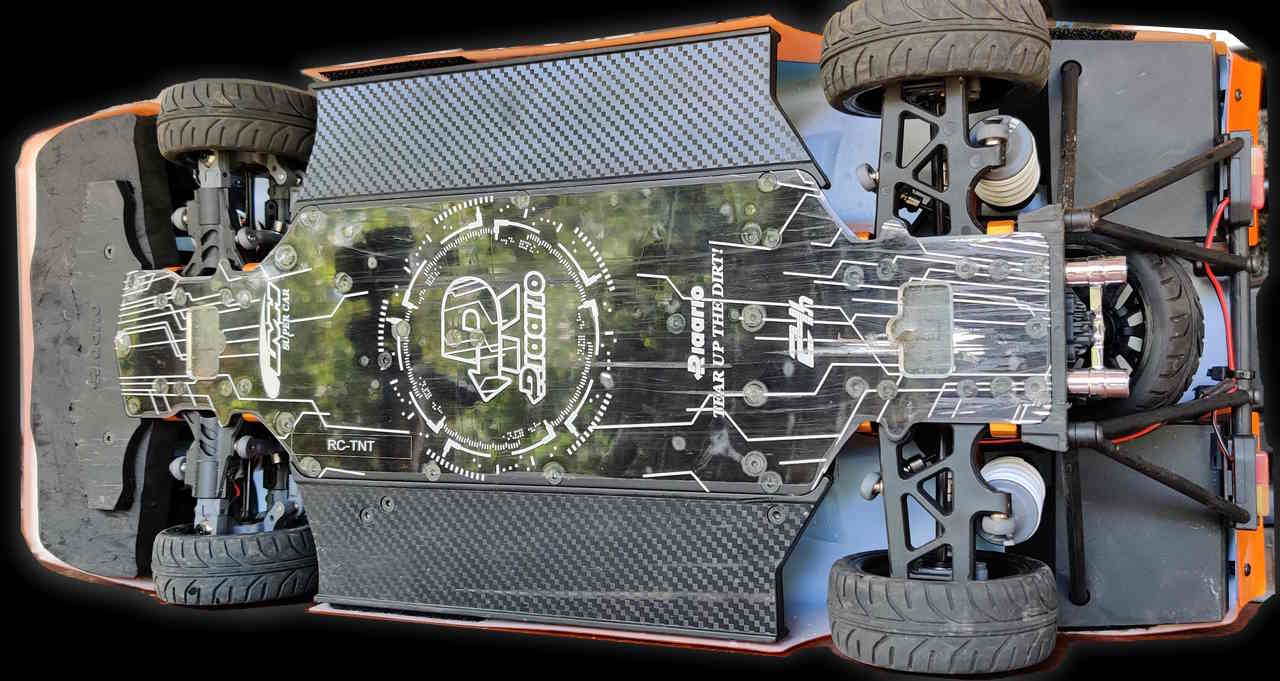
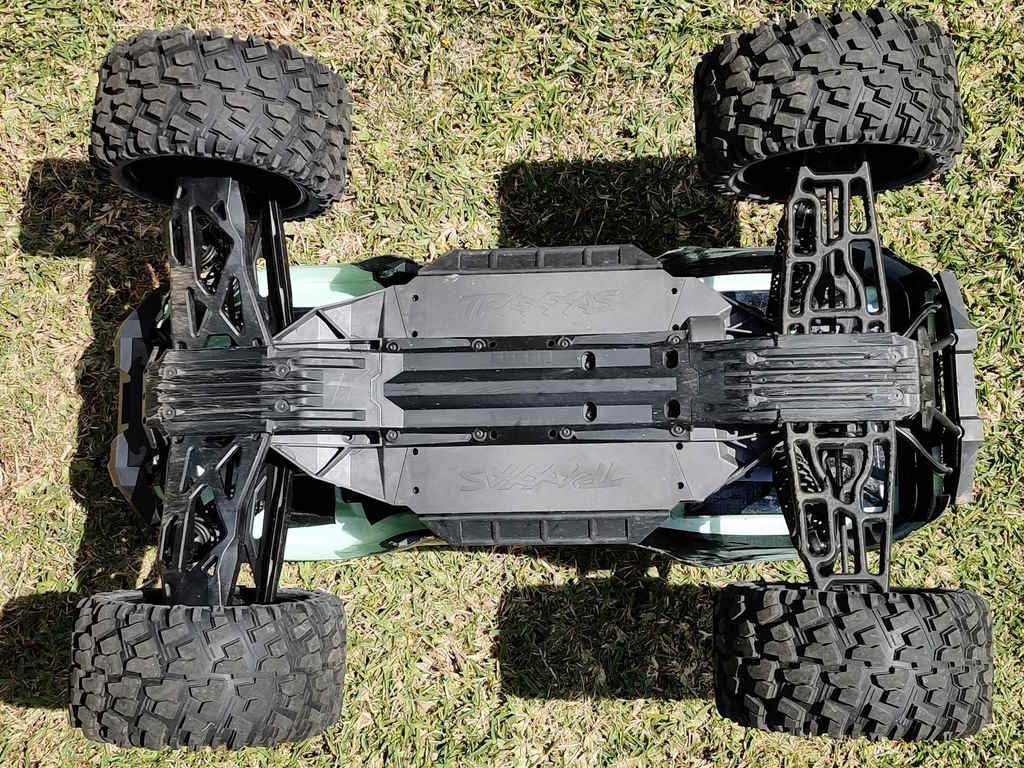
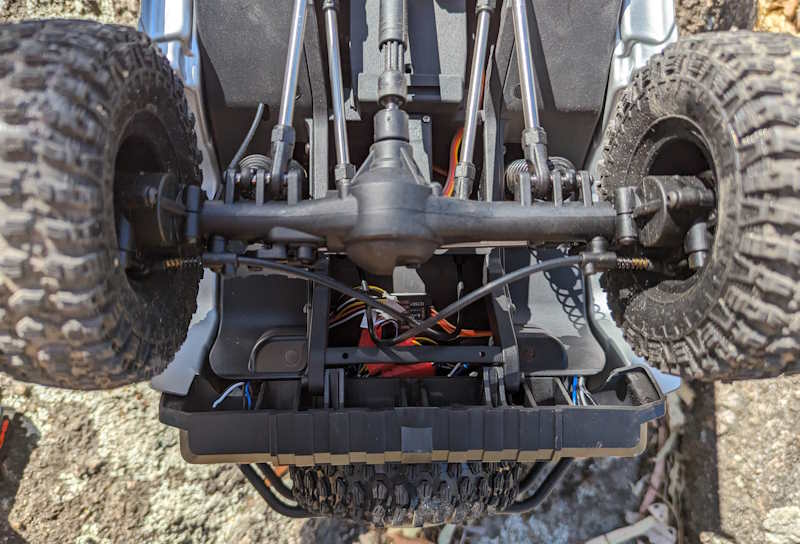
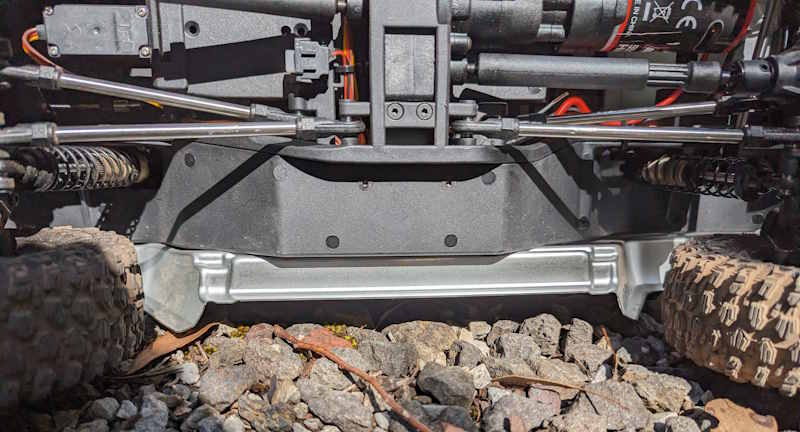
Axles & Undercarriage

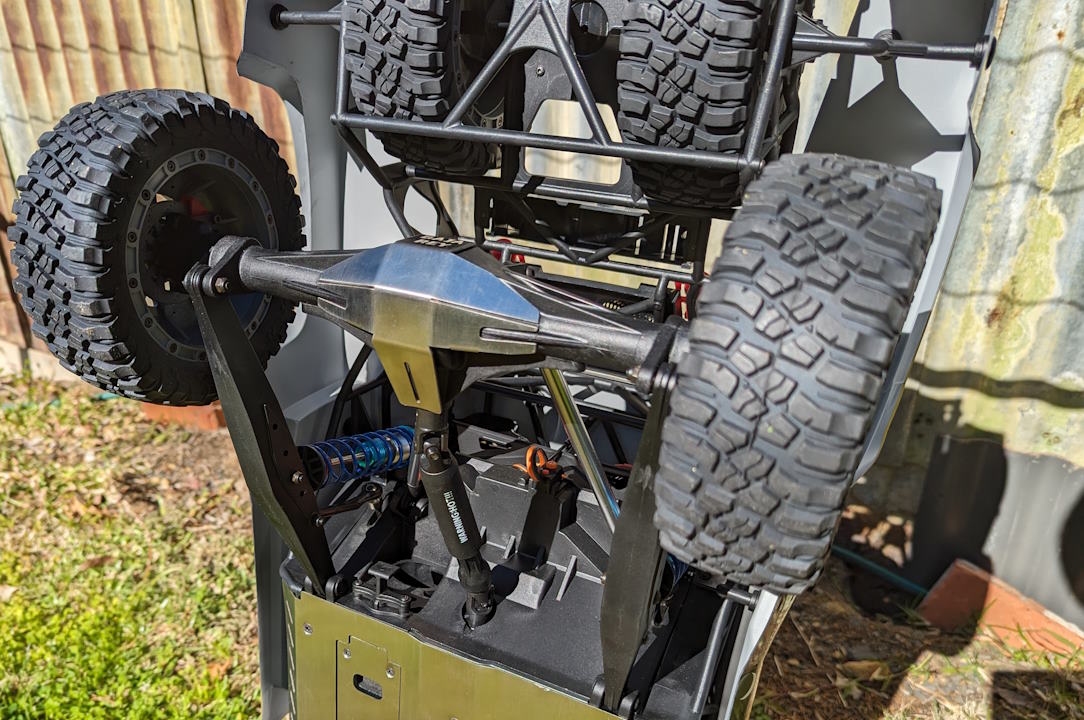
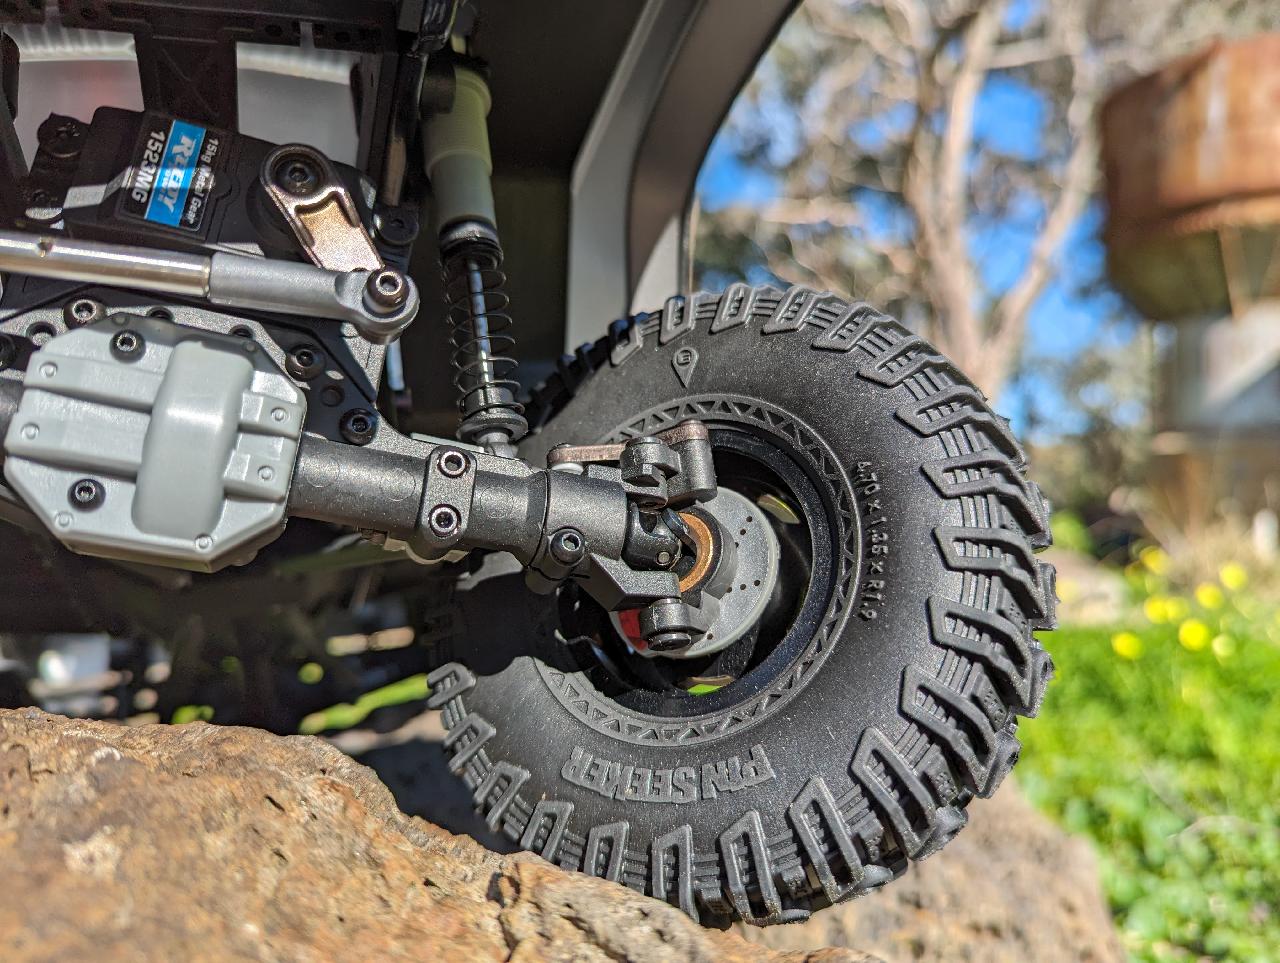
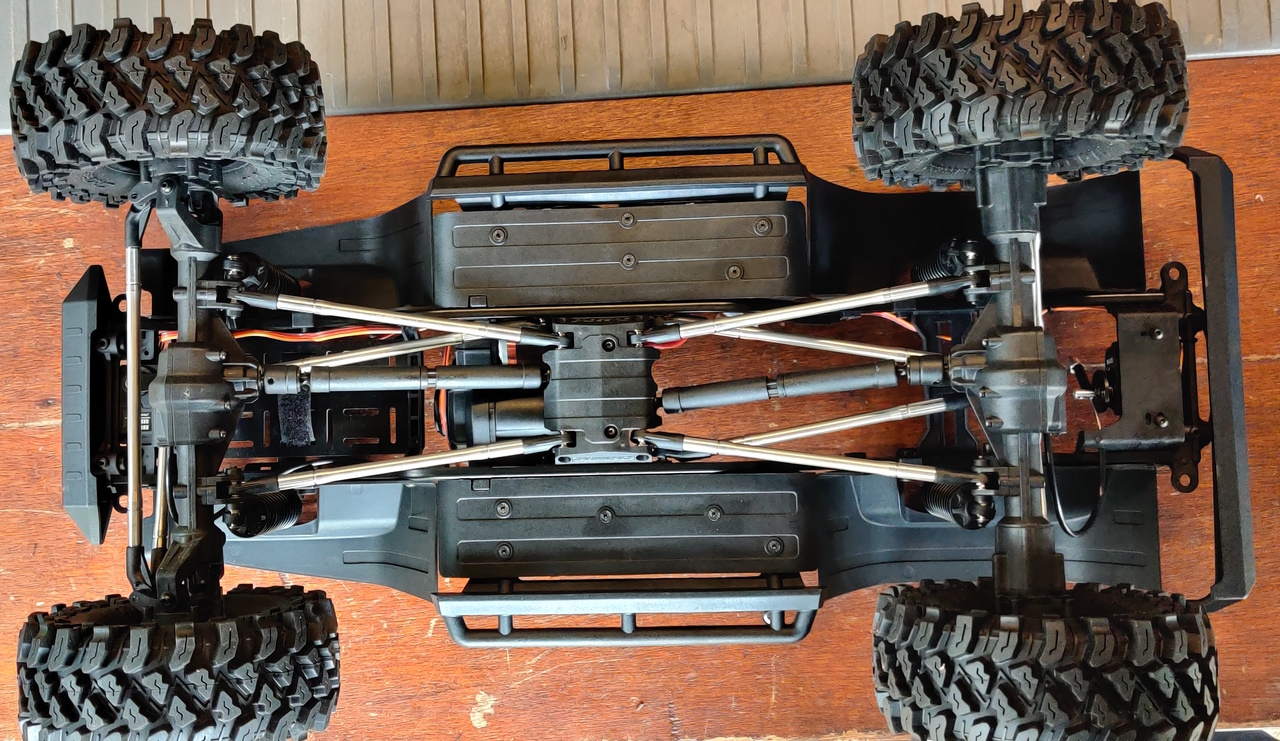
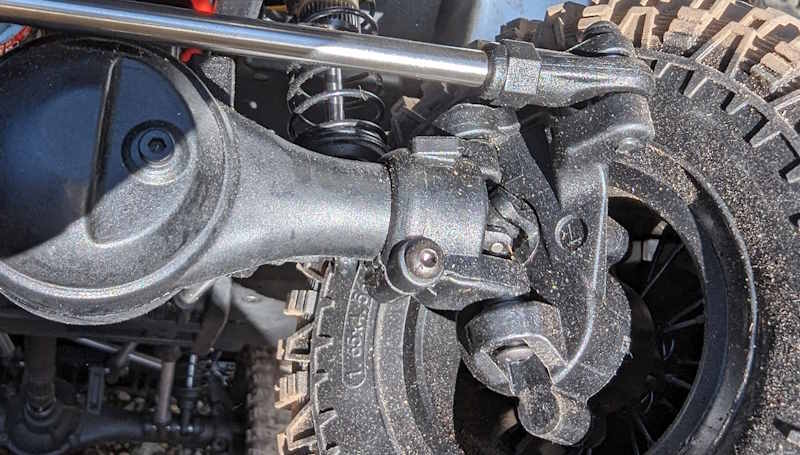
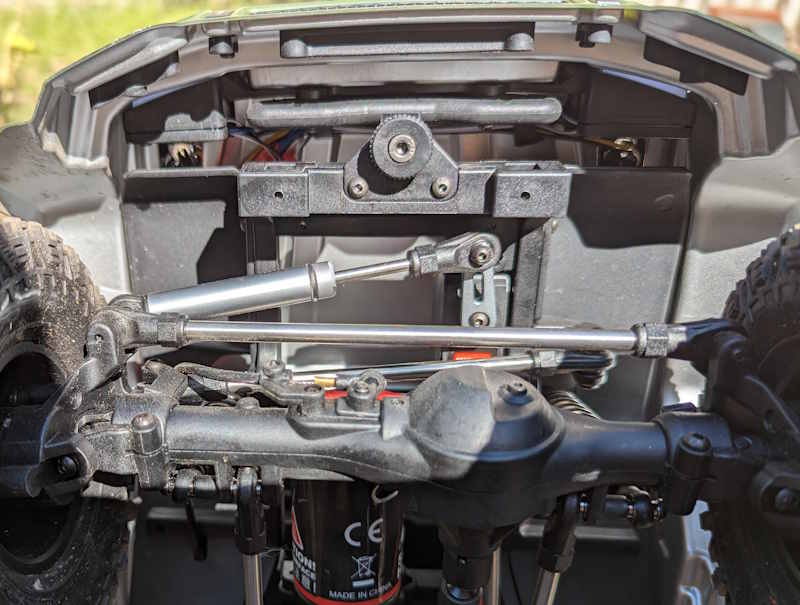
Axles are a pleasing scale design, with smooth lines and bolts in the right places. They engage well, seem like they’ll be durable, and the portals are tastefully implemented. No hulking, unnecessary chunks of plastic here. The front axles are steel universals, adding to their strength and something I always want to see in a crawler.

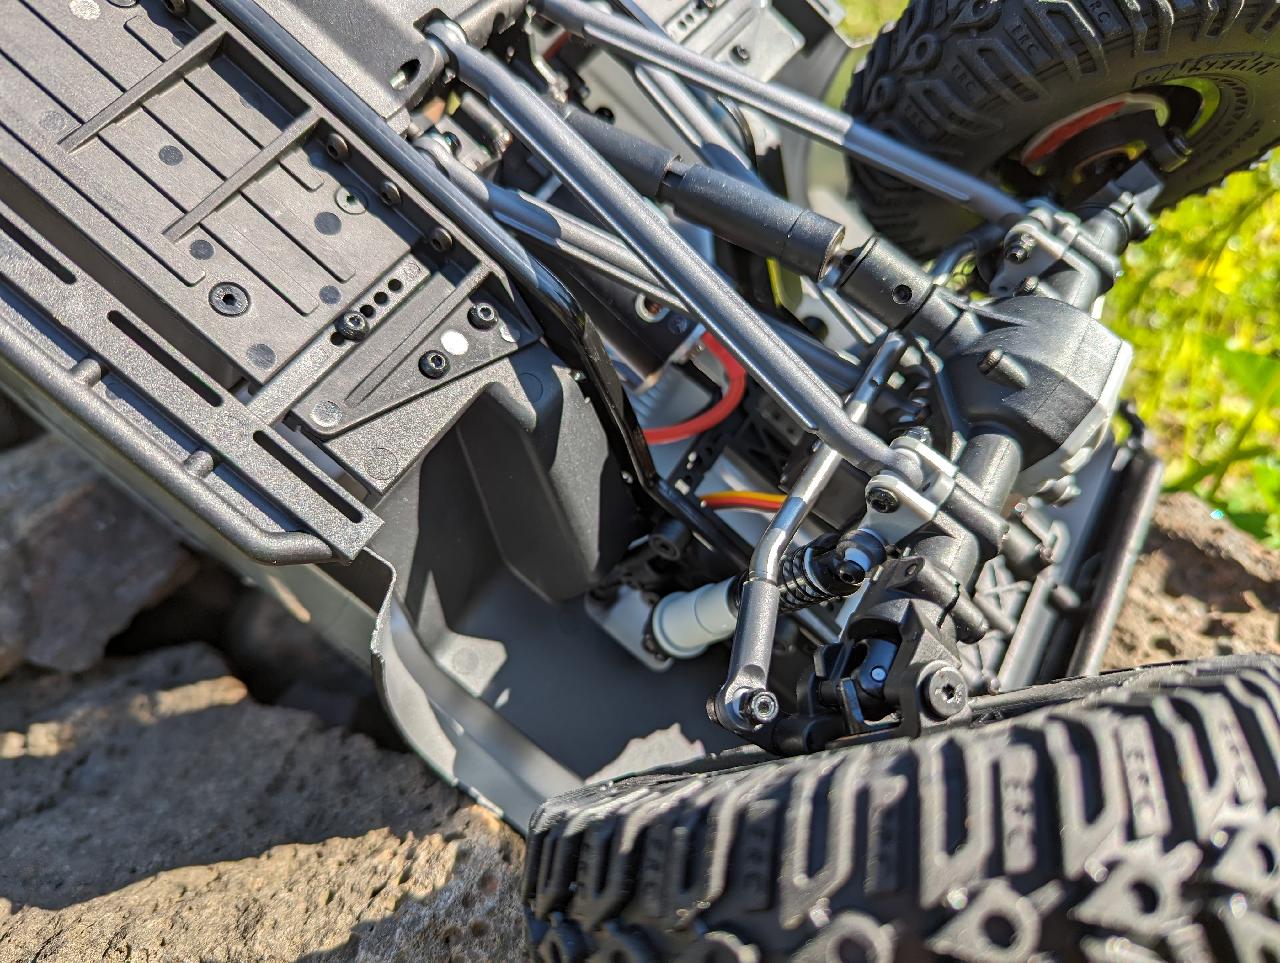
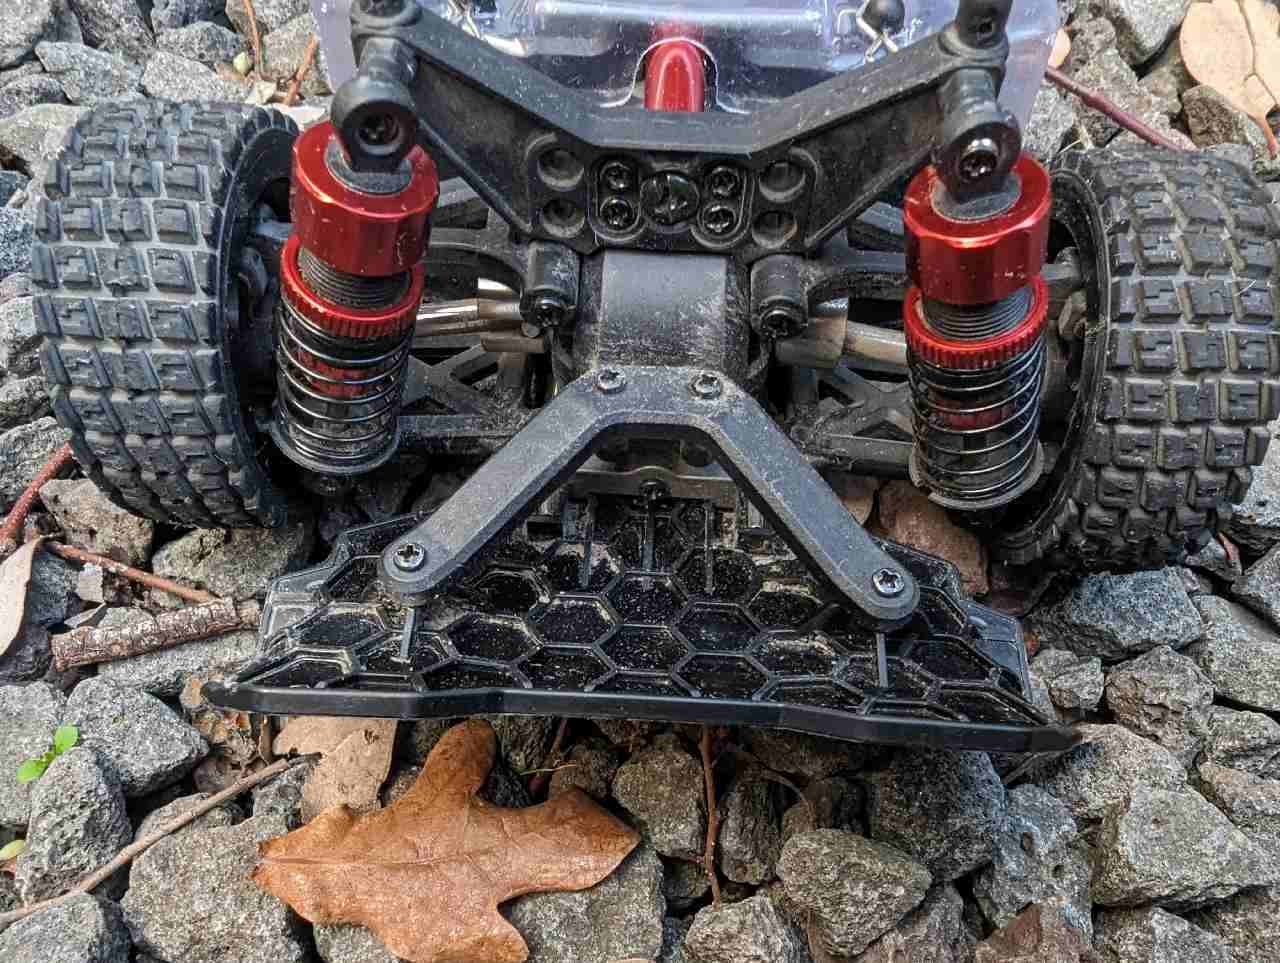
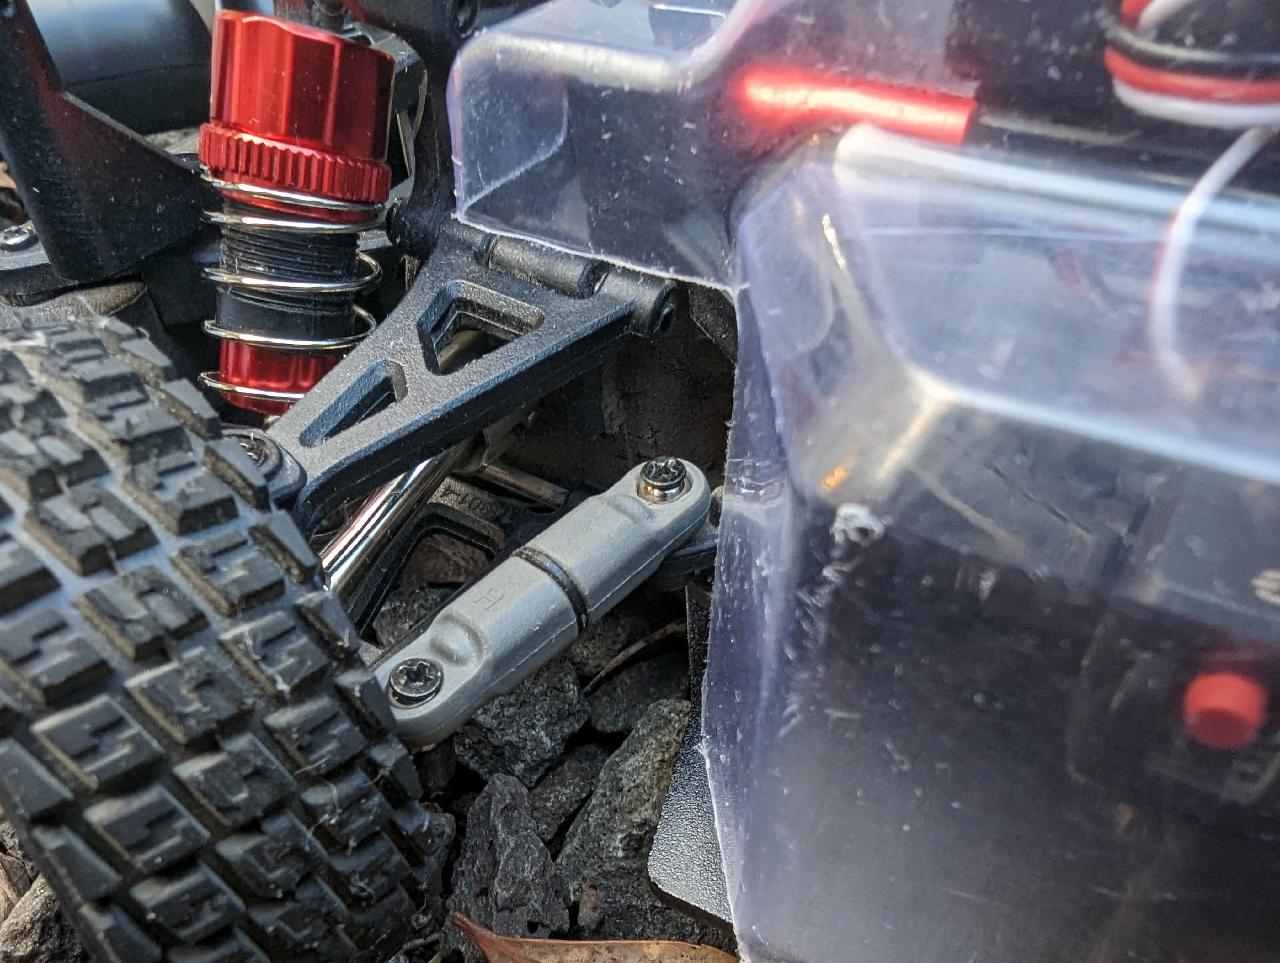
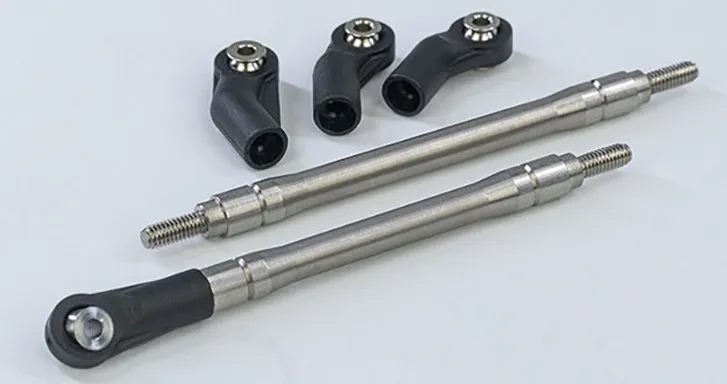
Thoughtful design is what you’ll find underneath the vehicle. Stainless steel links and inverse-rotation drive shafts are also like this. There’s a servo saver in the form of a passive steering damper on the steering link, too. It’s a solid undercarriage, overall. Nothing is hanging down to be grabbed by sticks or rocks and it just looks good.

Now, you may have read that it has a molded plastic chassis instead of the usual steel stamped C-channel rails. This is true. But, it works. The car is lighter for it, flex isn’t a huge issue and it keeps the cost down. I don’t see a down side in this model with that choice.

4106 Pro Steel Unis
4106 Pro Front Underneath
4106 Pro Body Screw

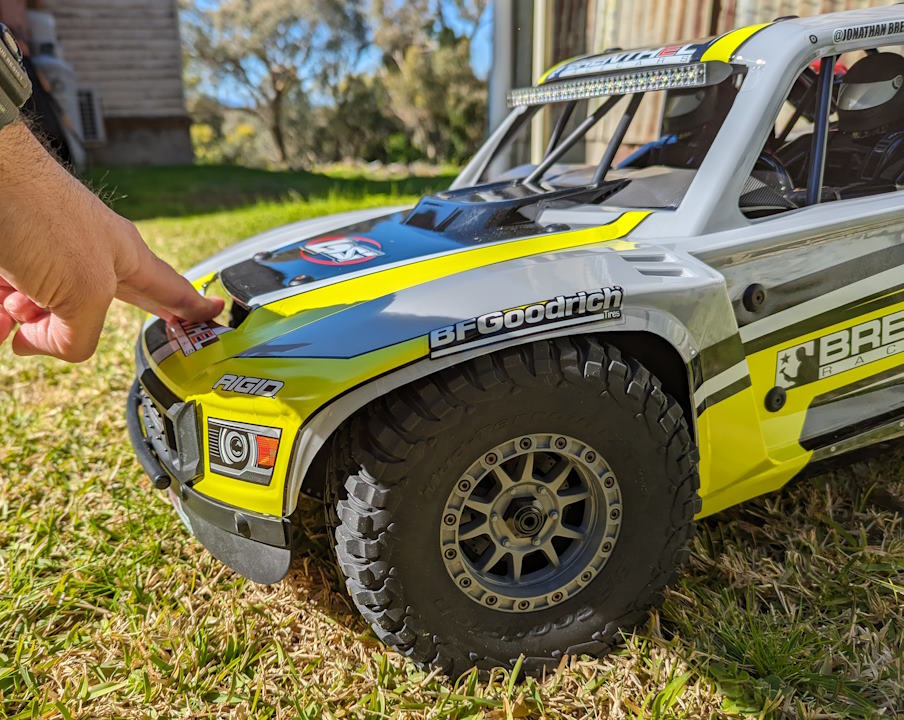
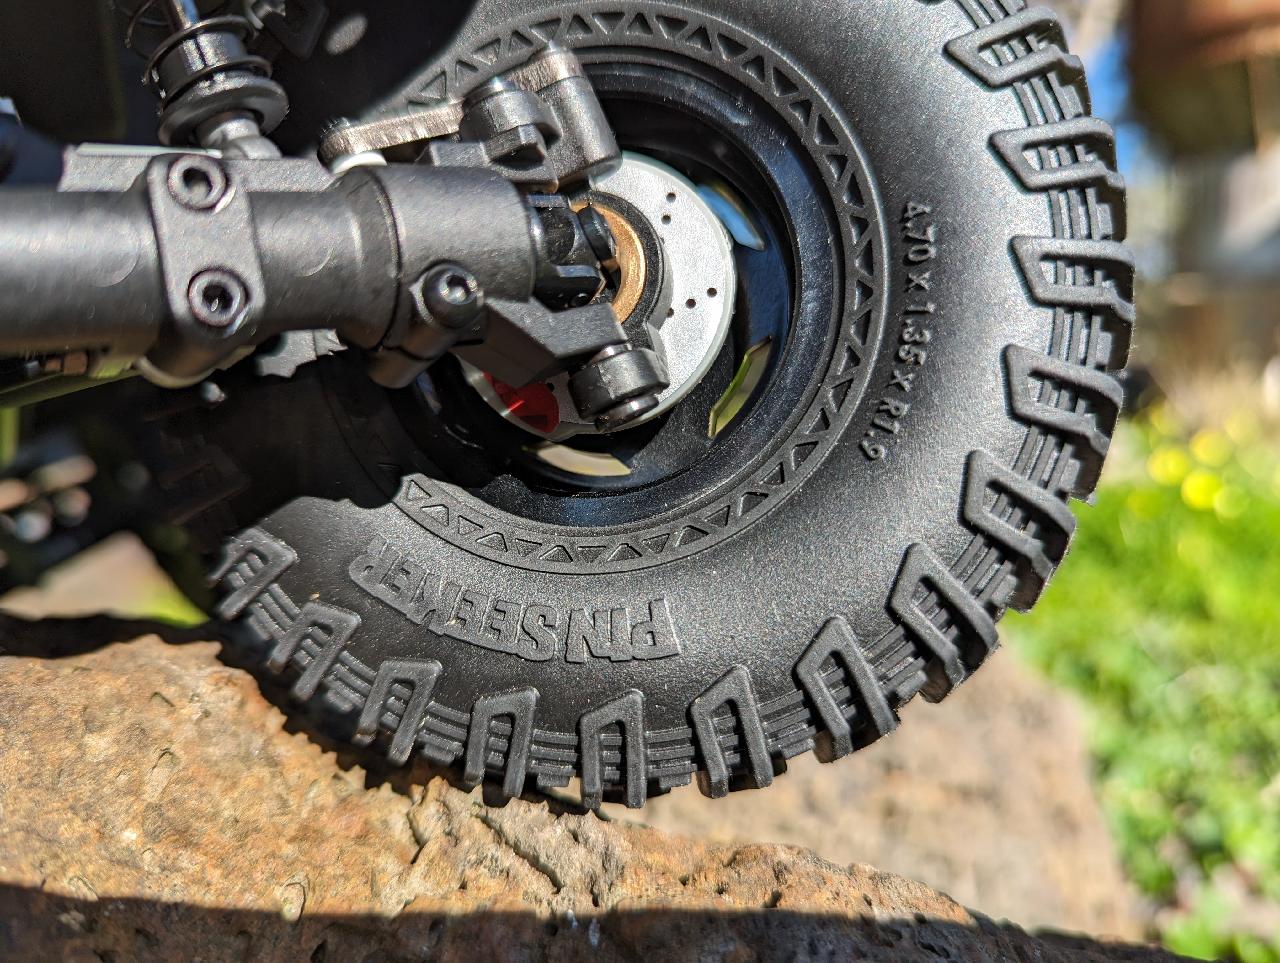
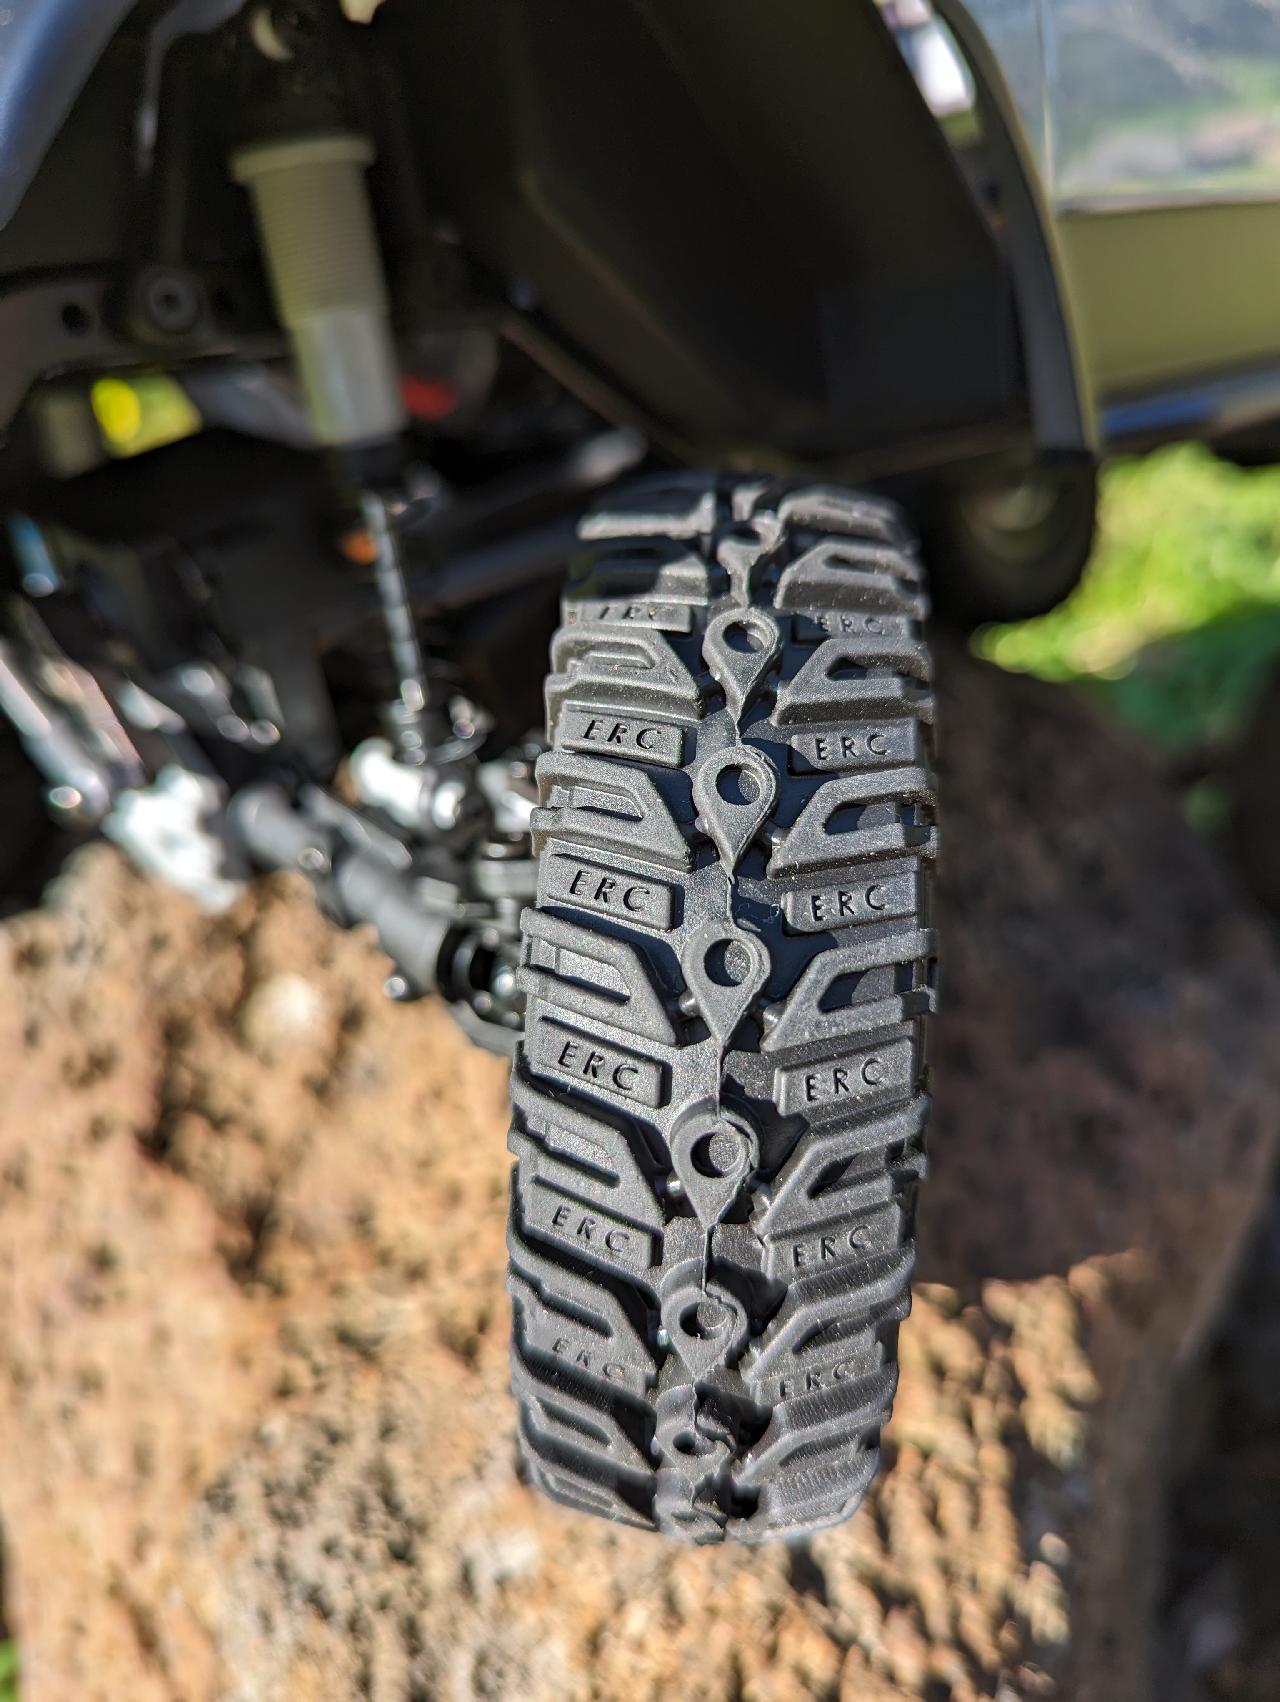
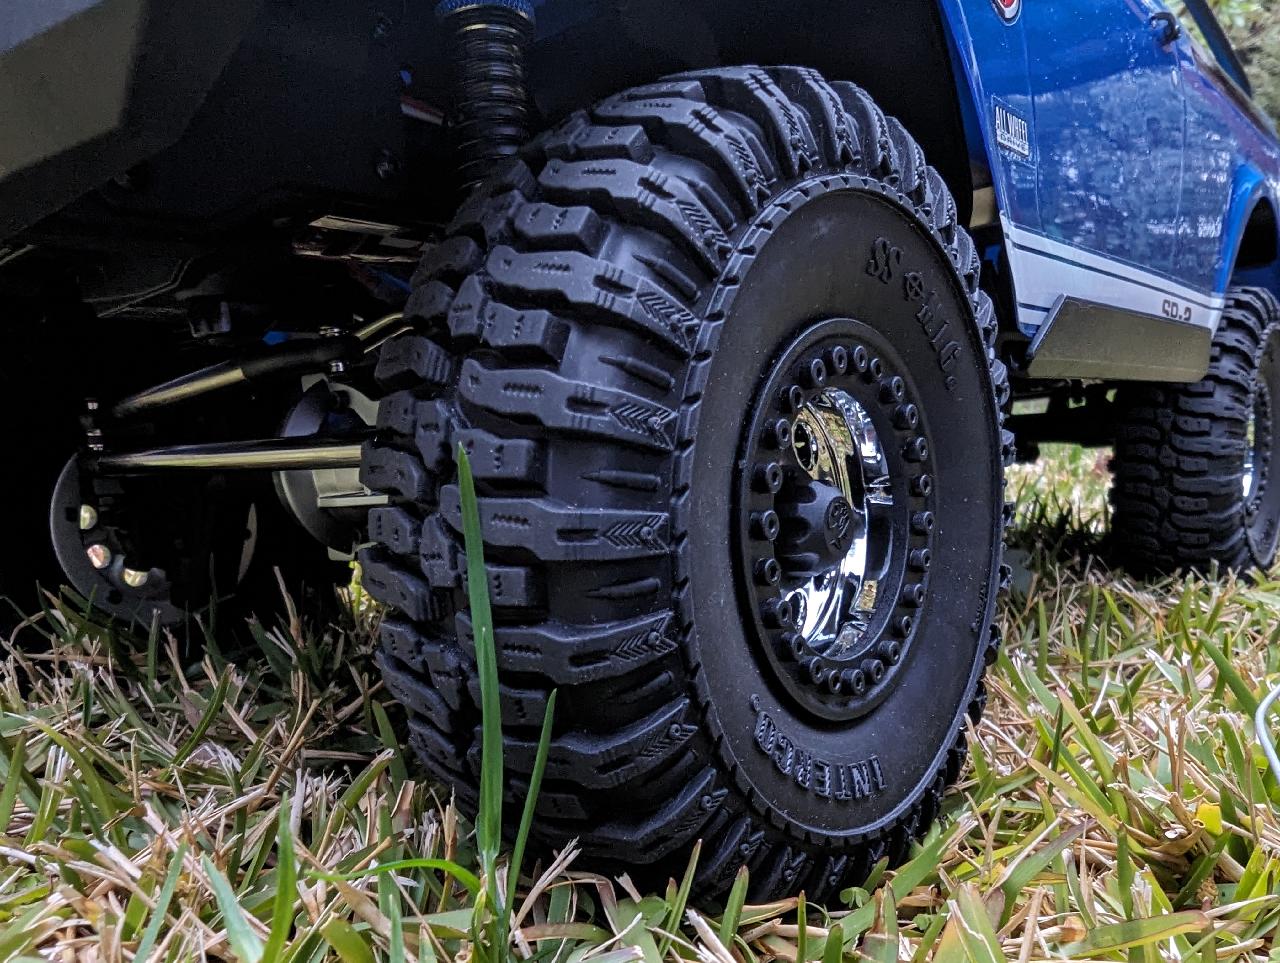
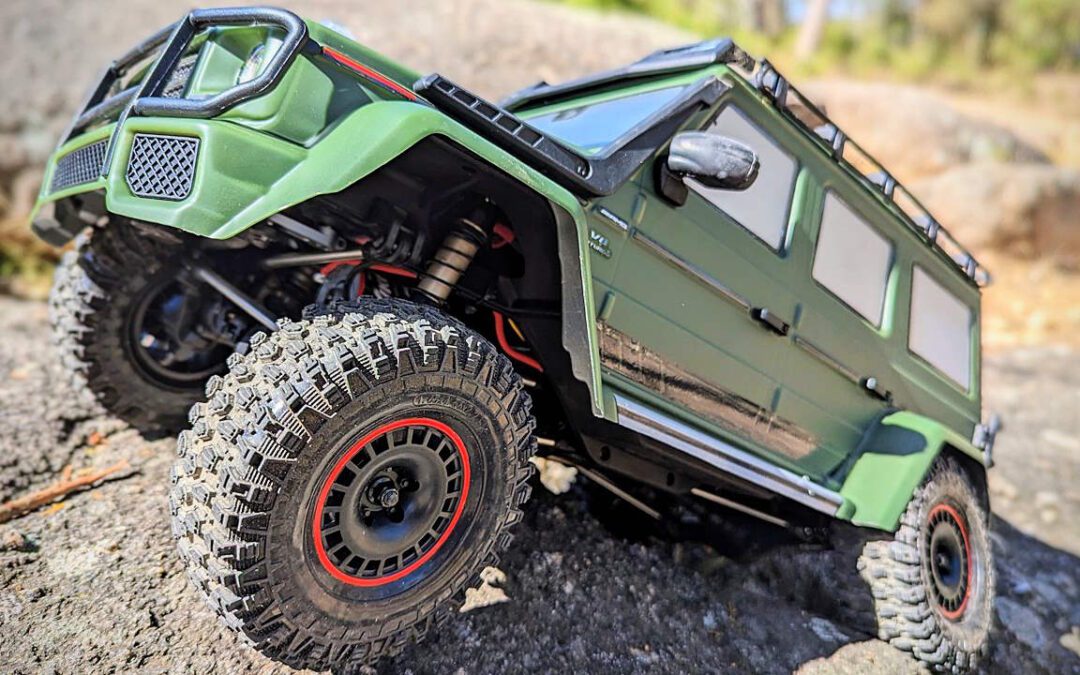
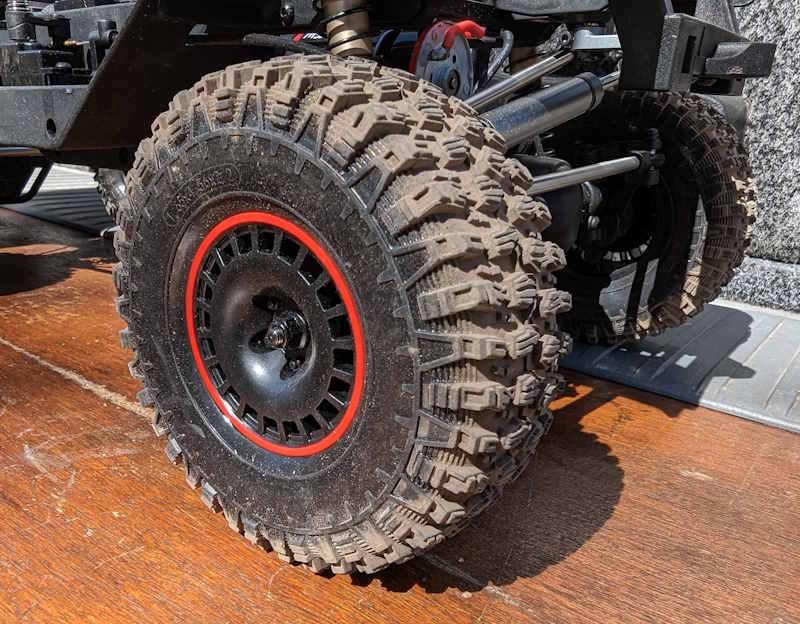
Mercedes & Hyrax: Clone Wars

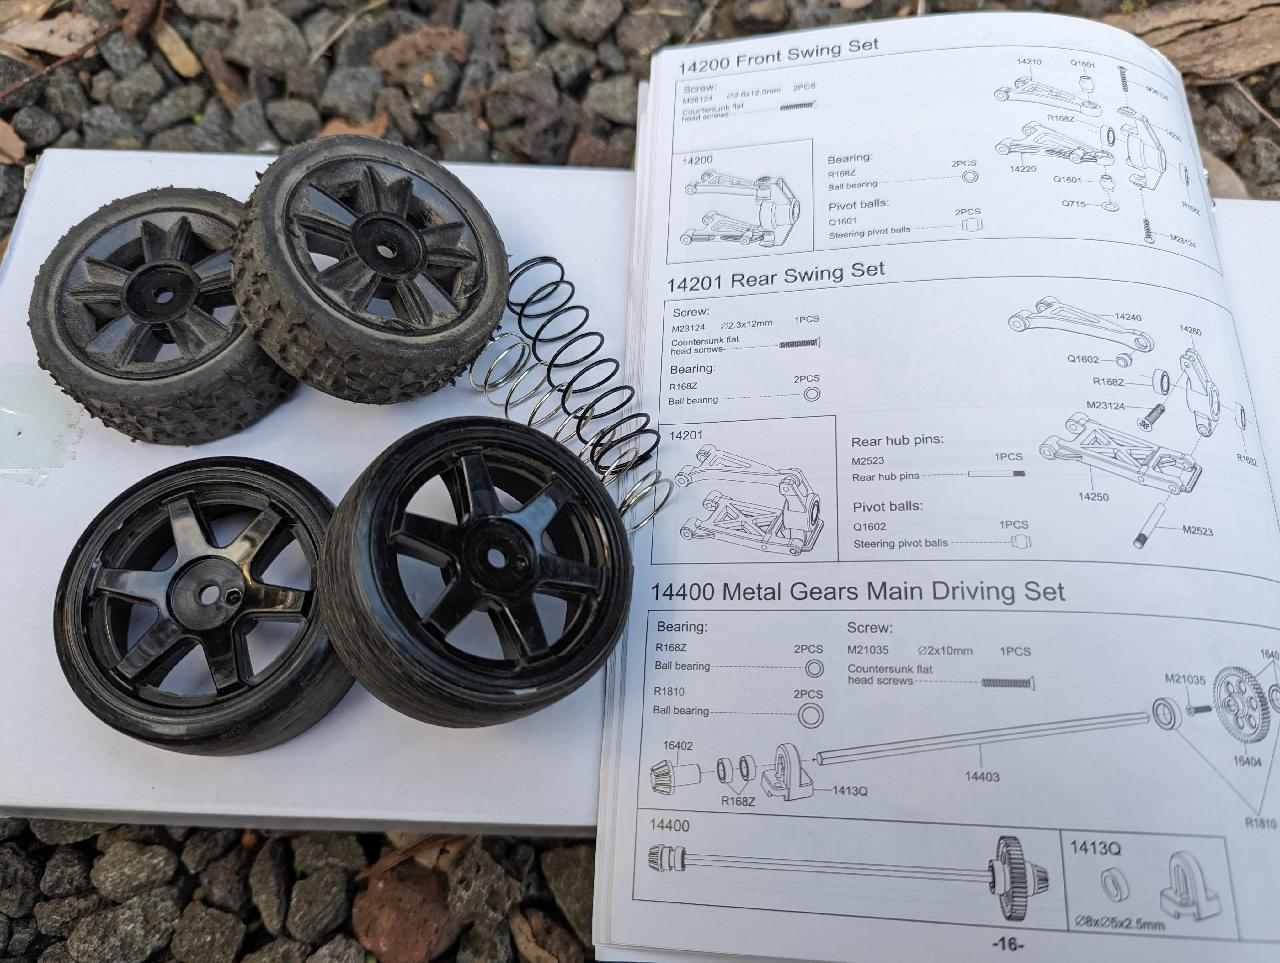
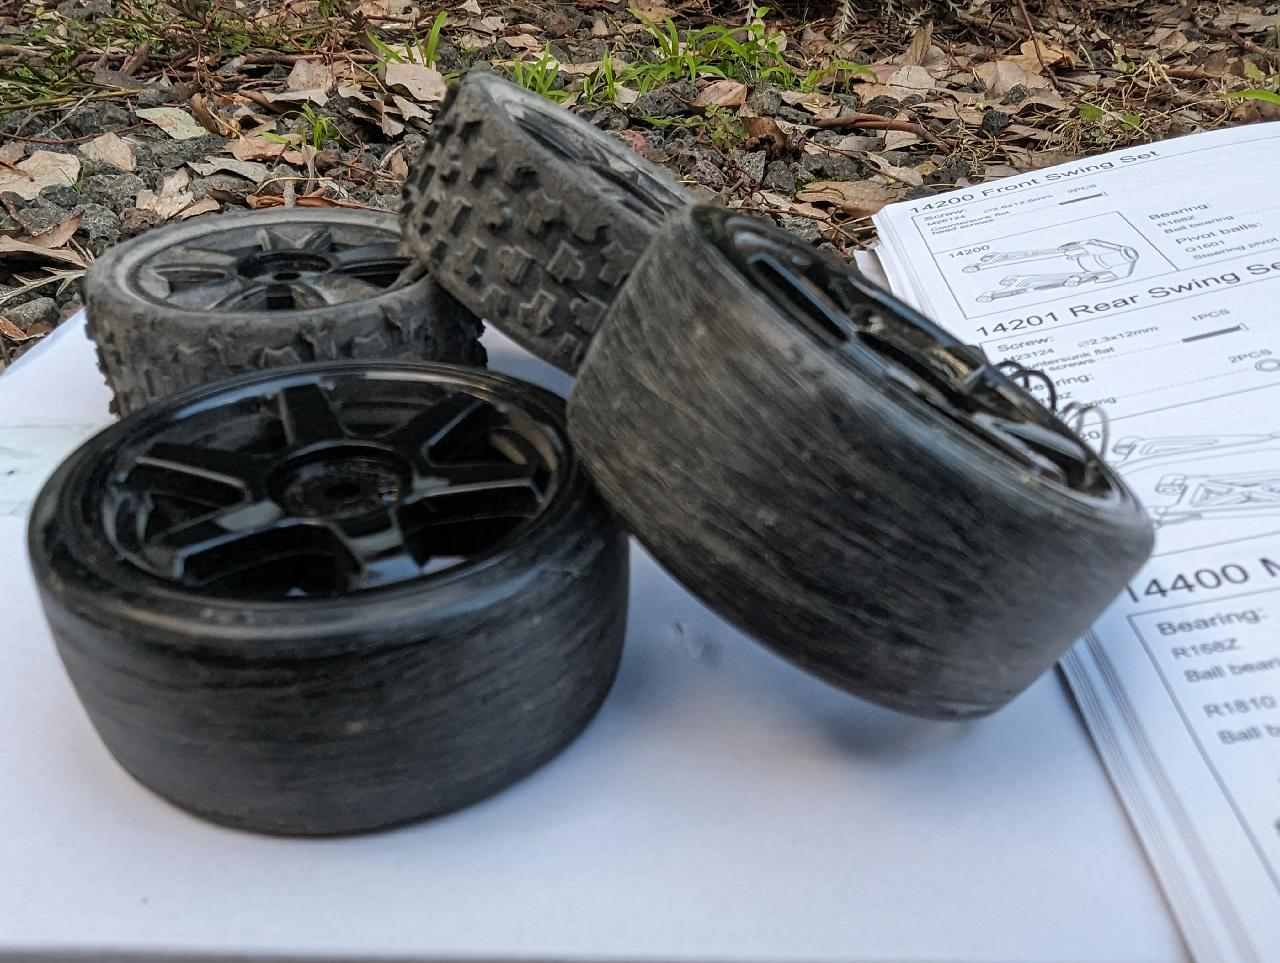
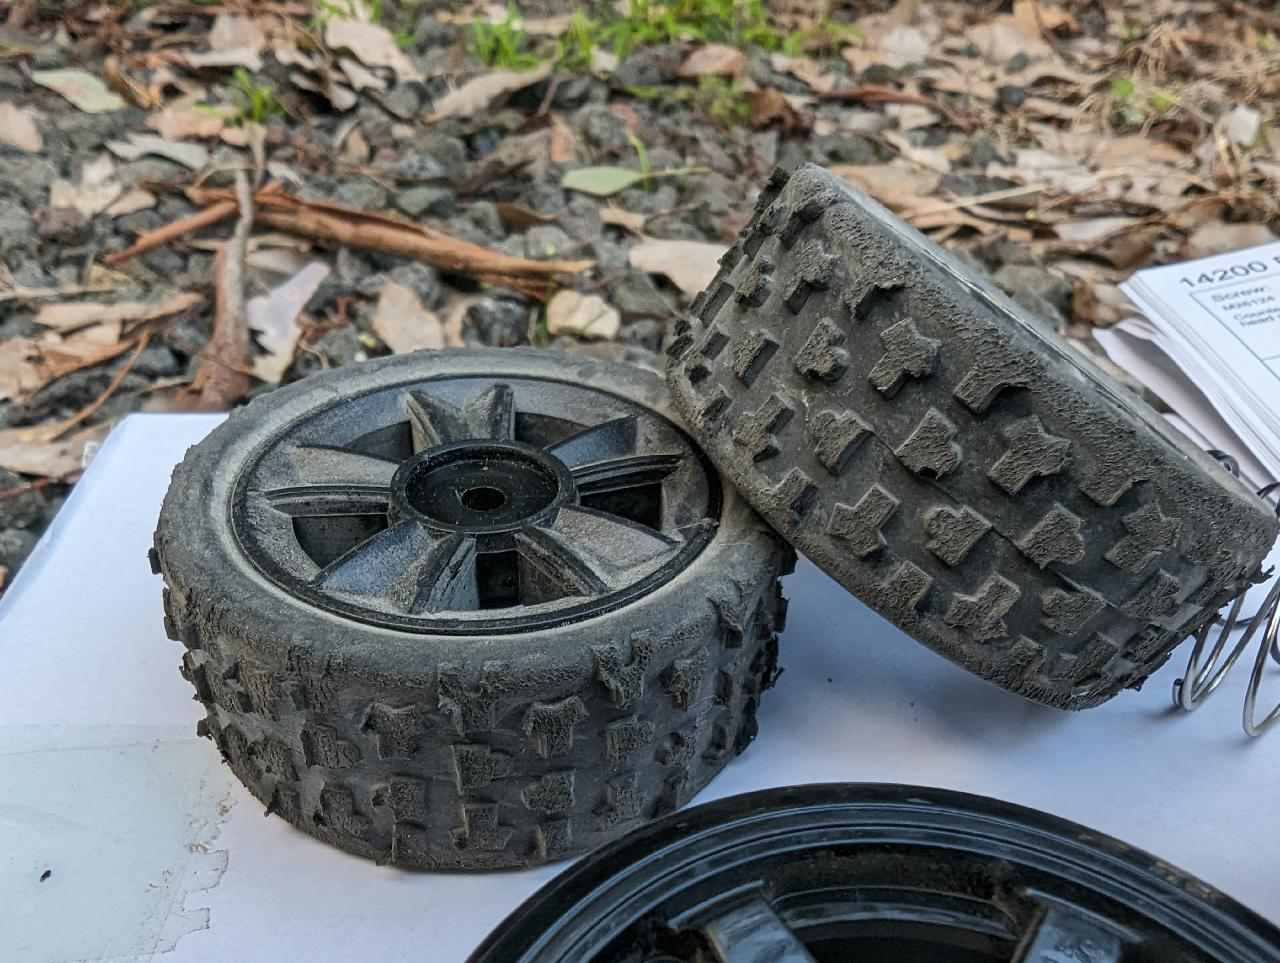
The wheels are 2.2″ and look like the real thing, with the tiny Mercedes G-Wagon spokes around a solid wheel hub. The tire treads are not so scale, being a Proline Hyrax clone, but run on a 4.56″ tire carcass, which Proline does not make. Not entirely a clone, then – though the treads themselves clearly are Hyrax. The foams are a little on the firm side but they work well.

4106 Pro Tires

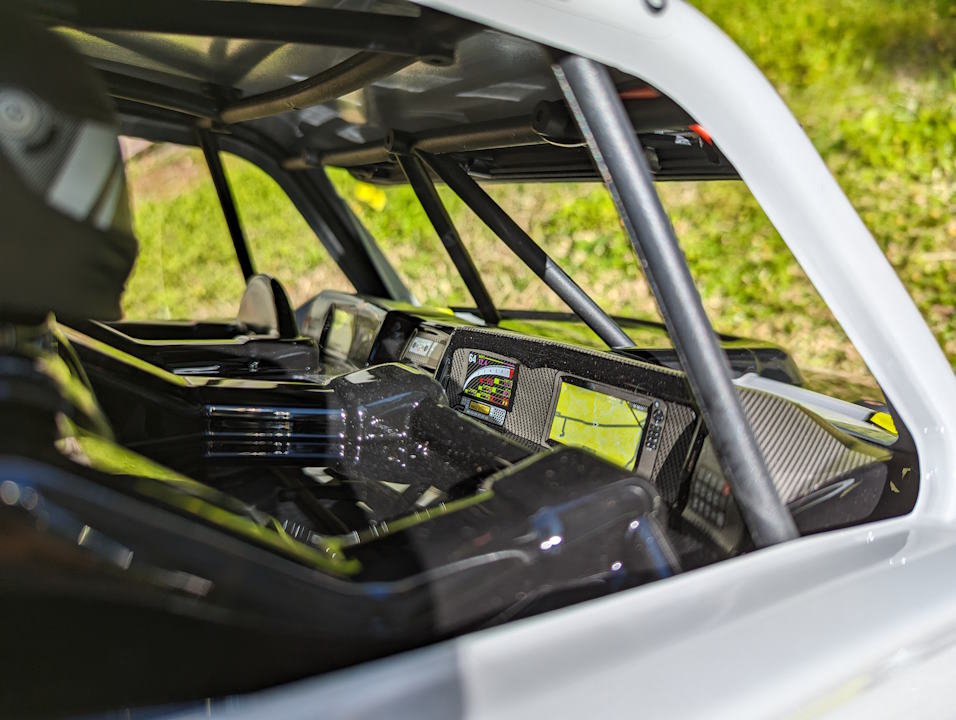
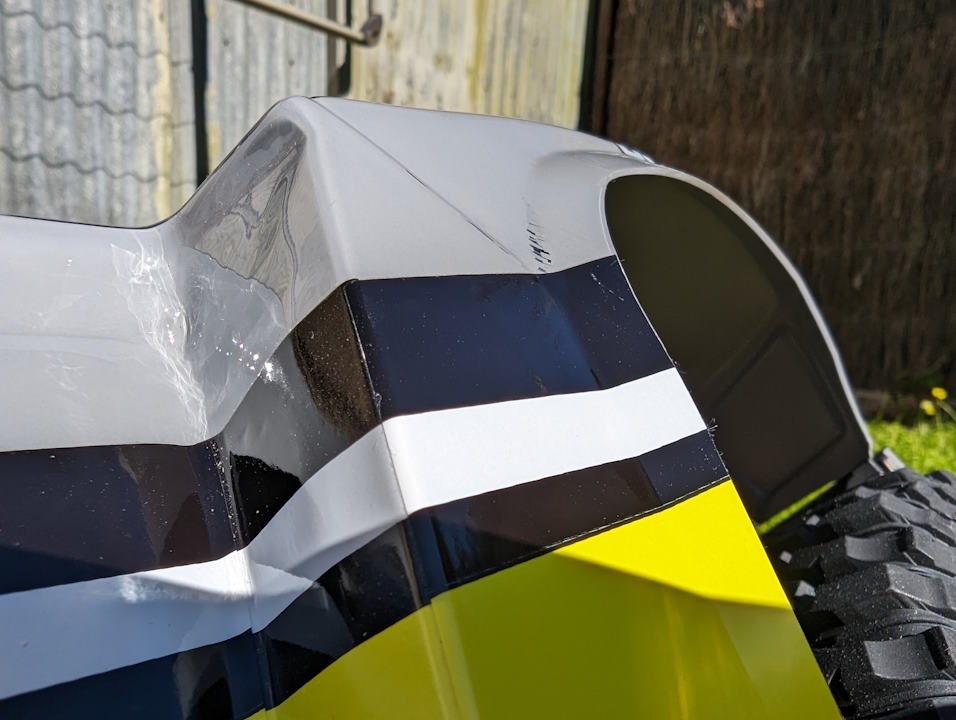
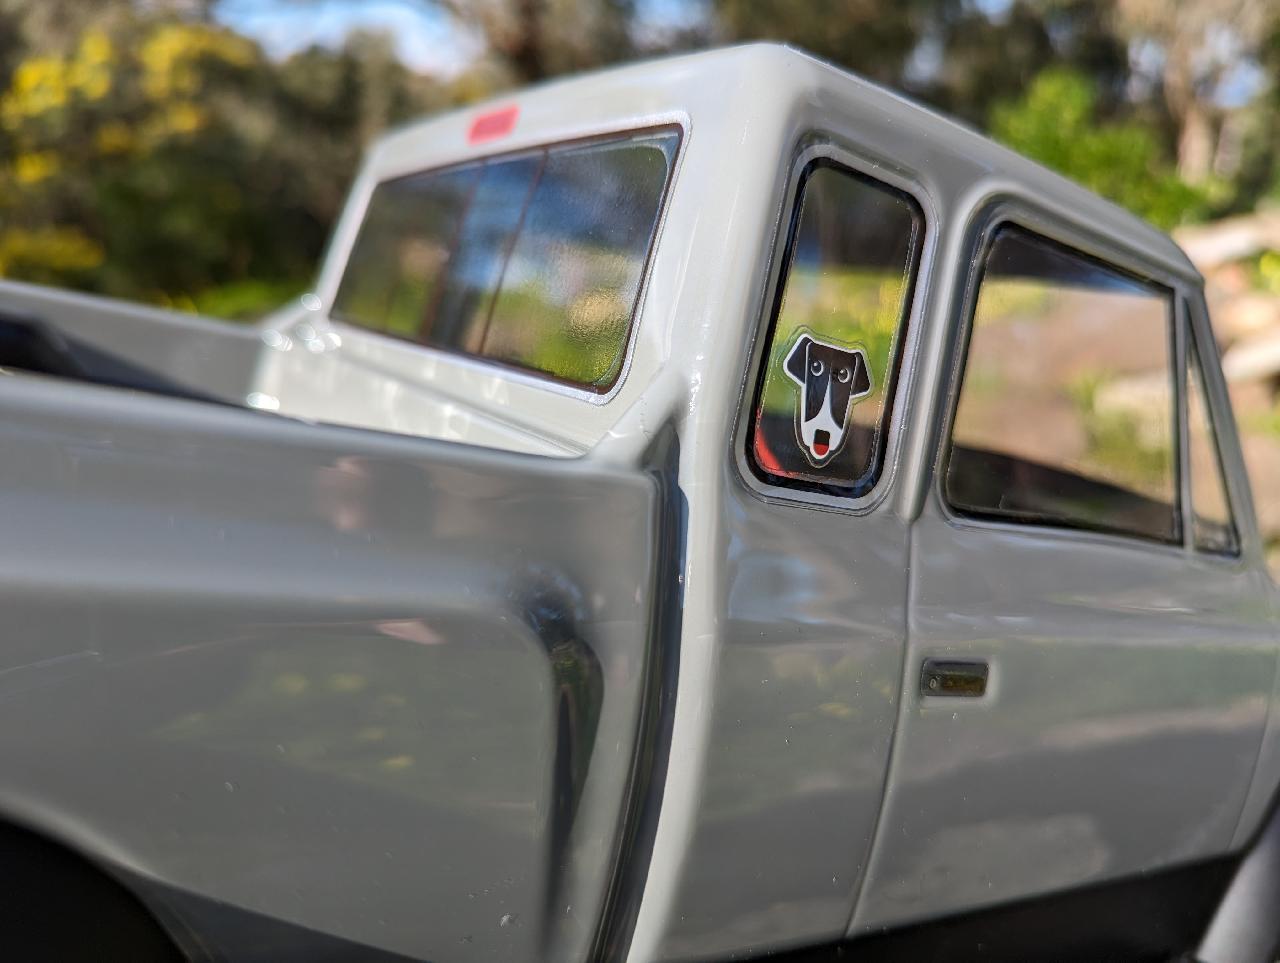
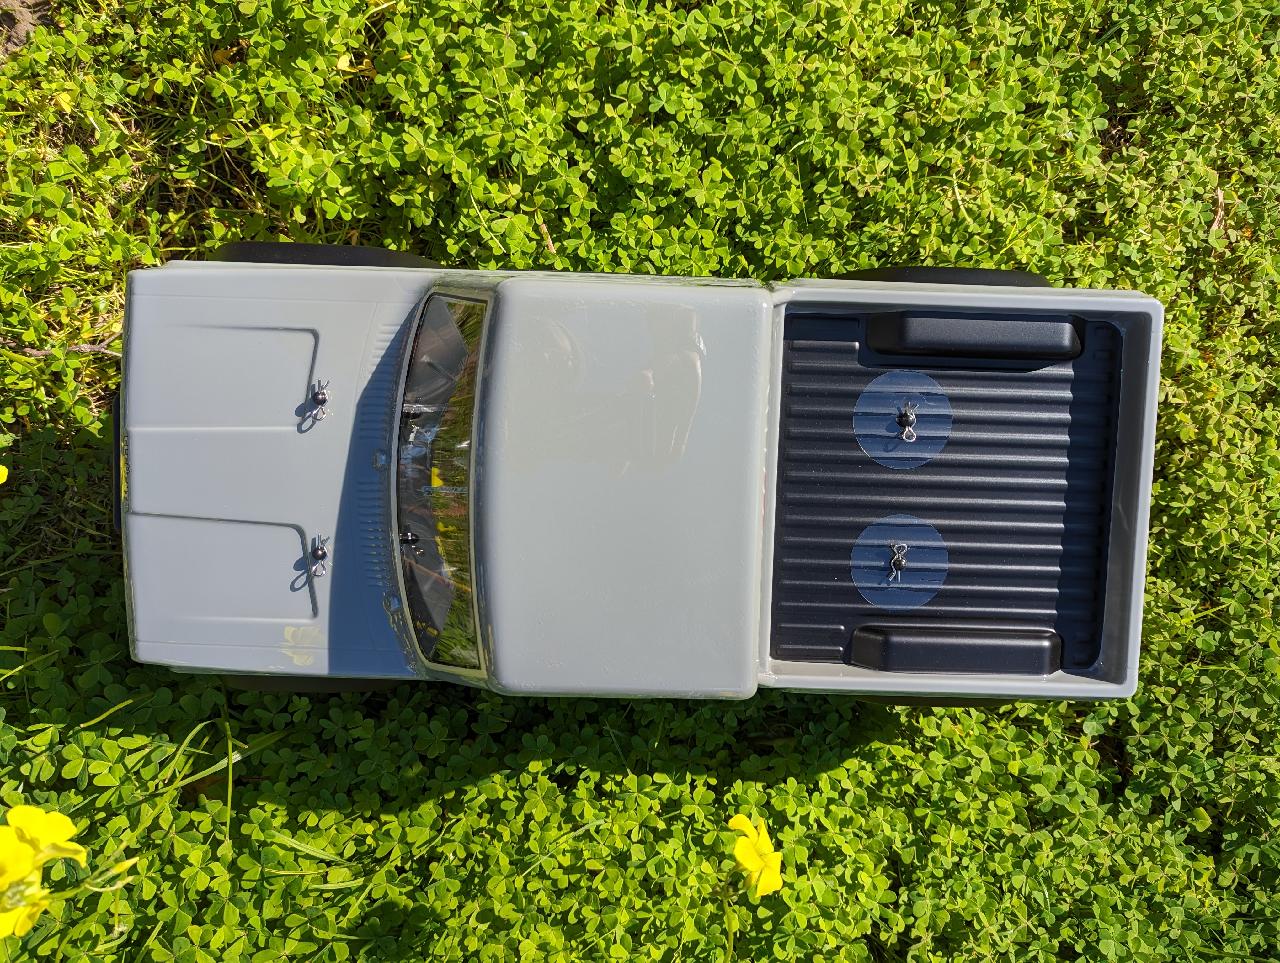
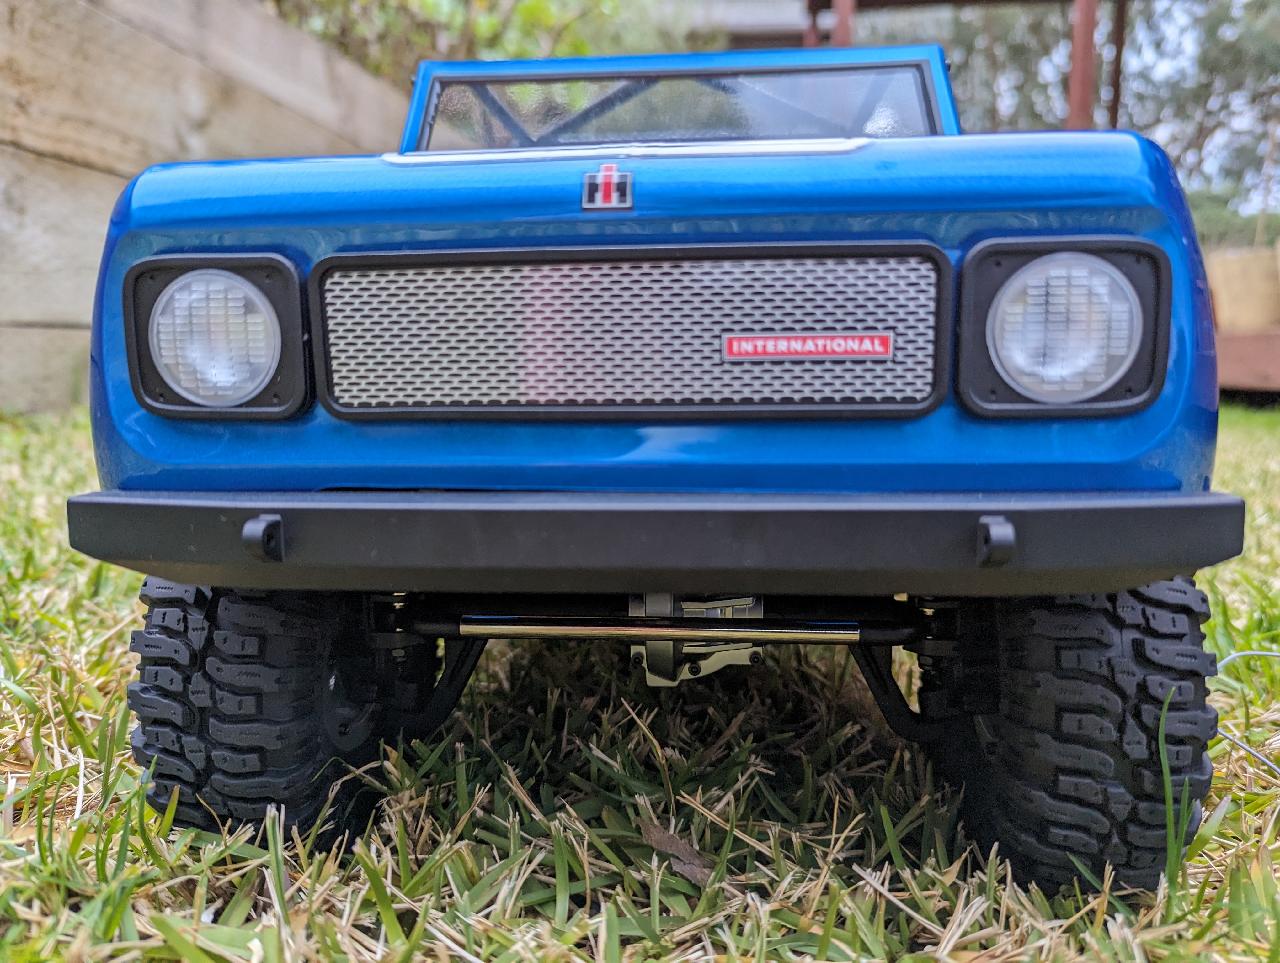
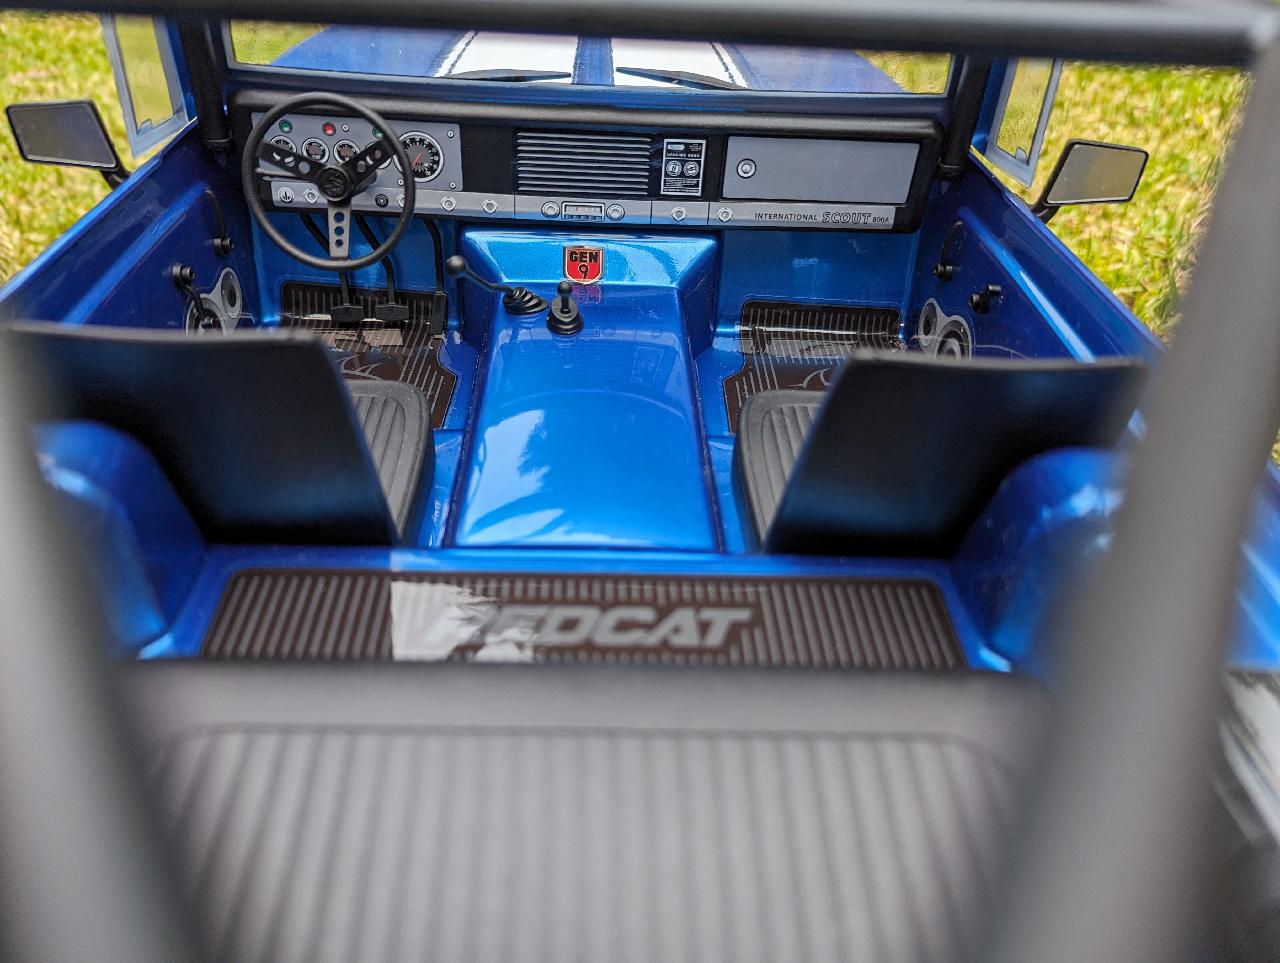
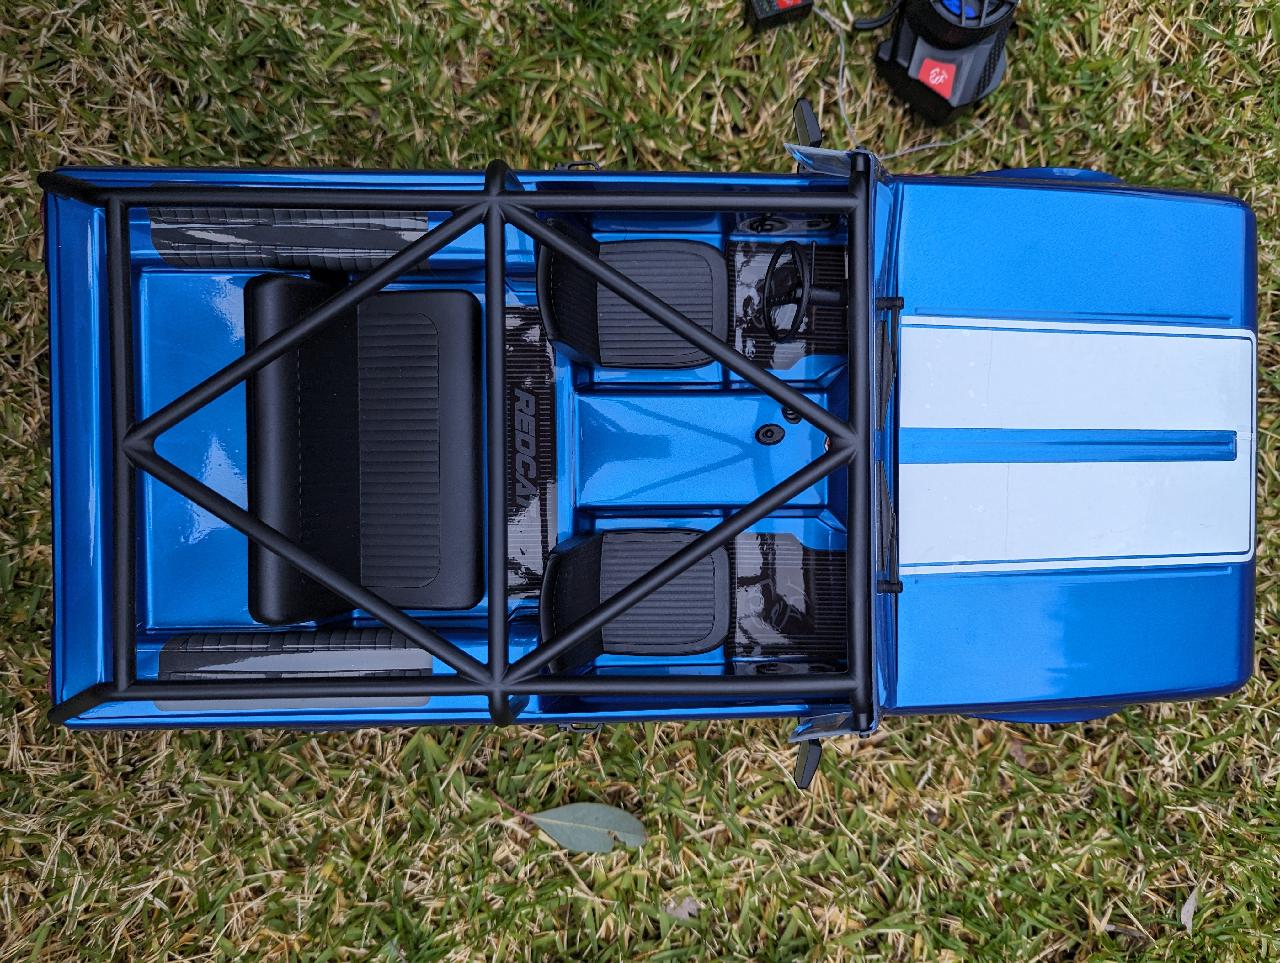
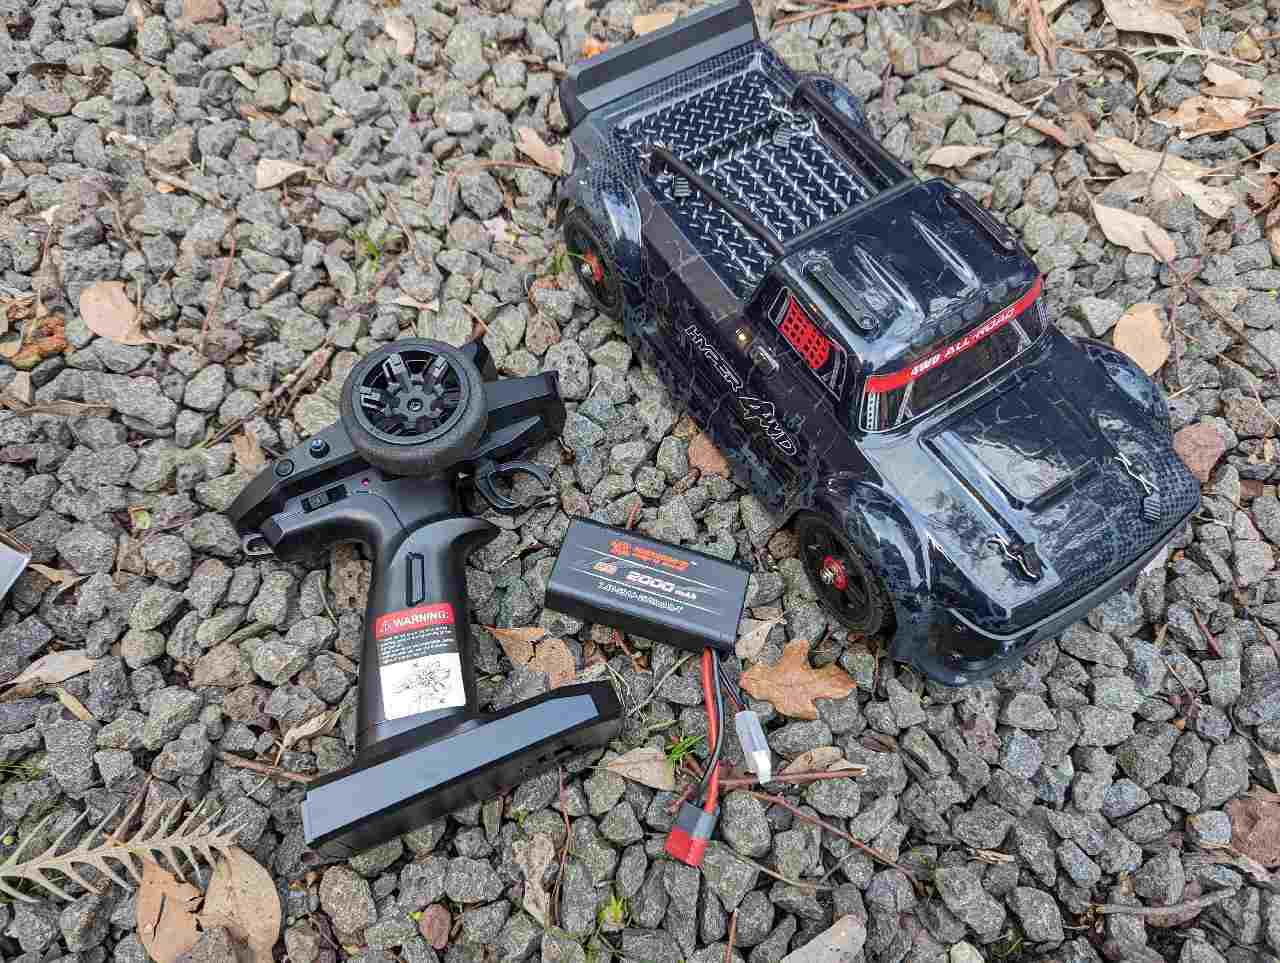
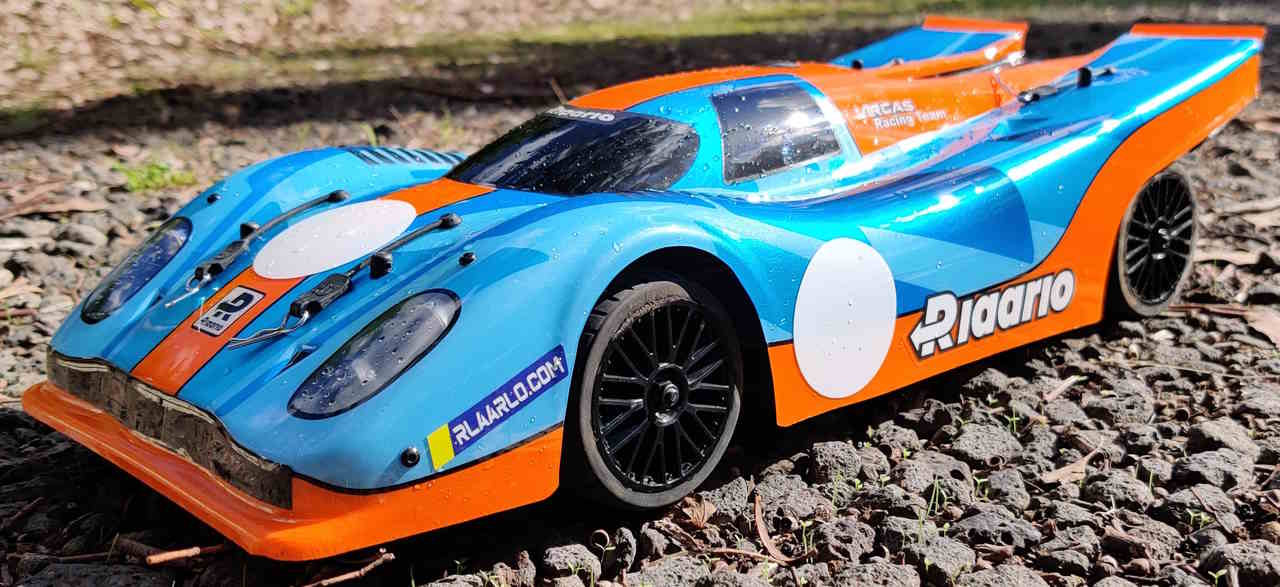
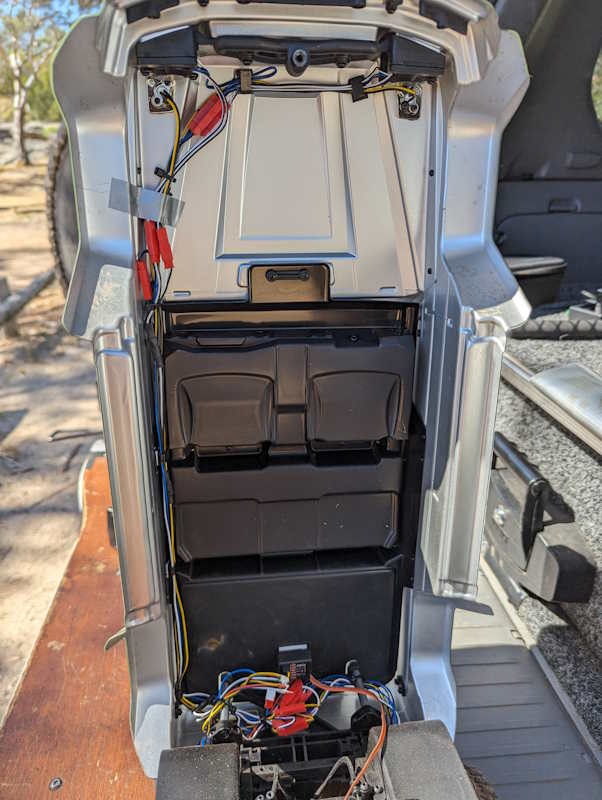
A Mysterious Interior

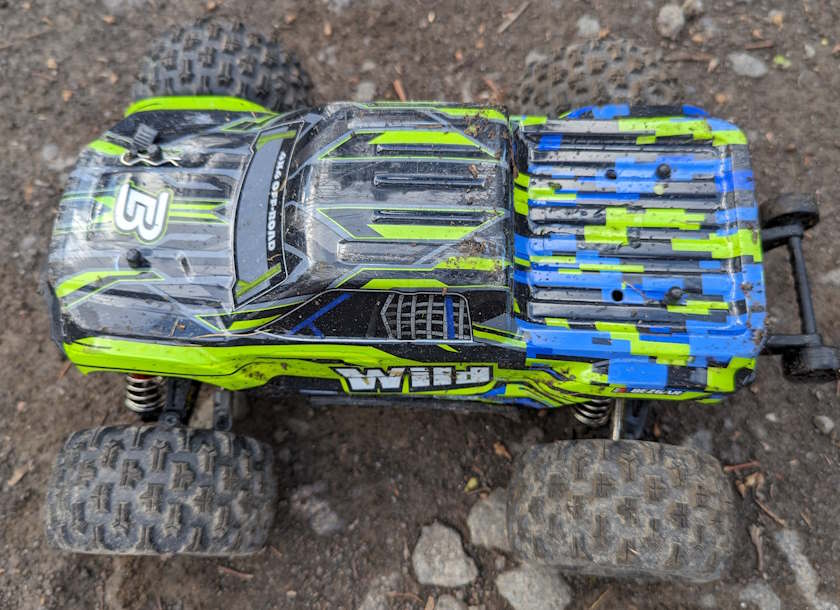
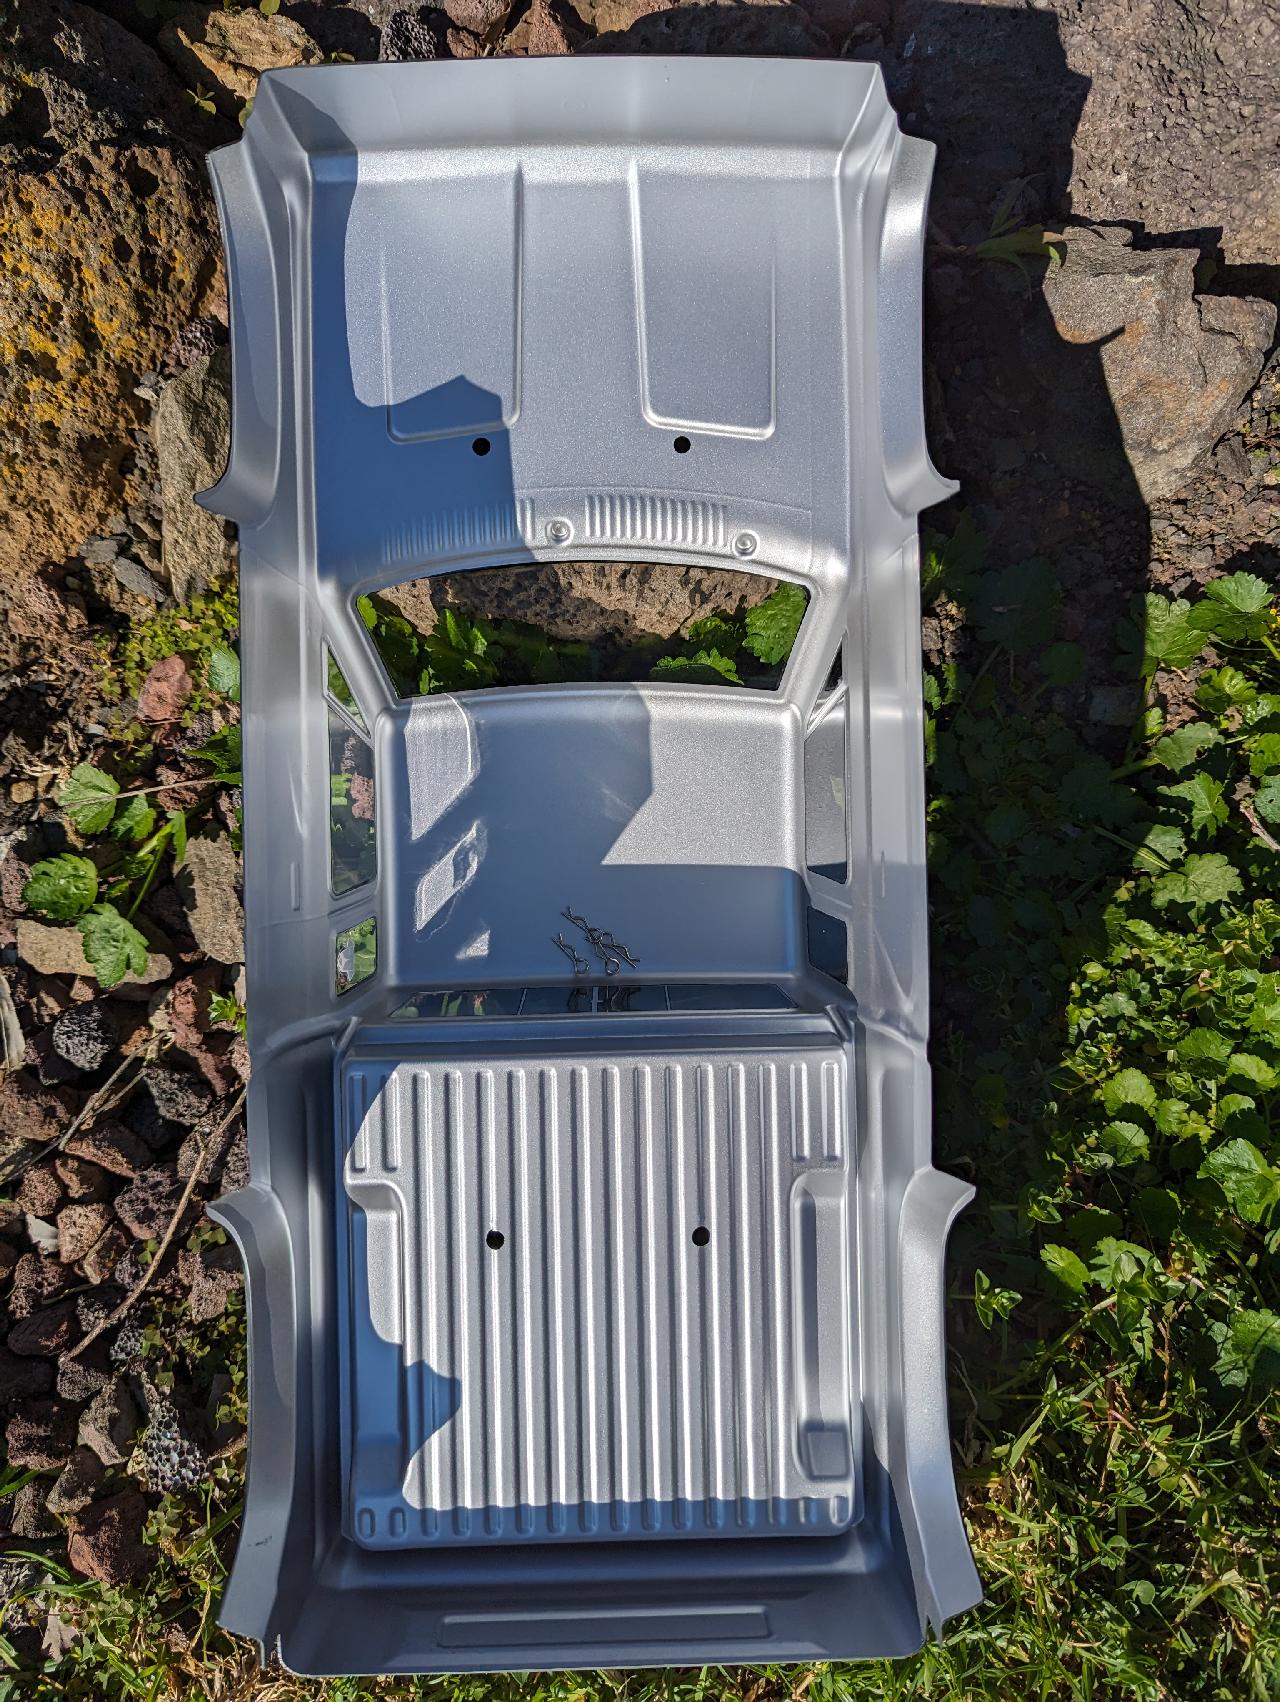
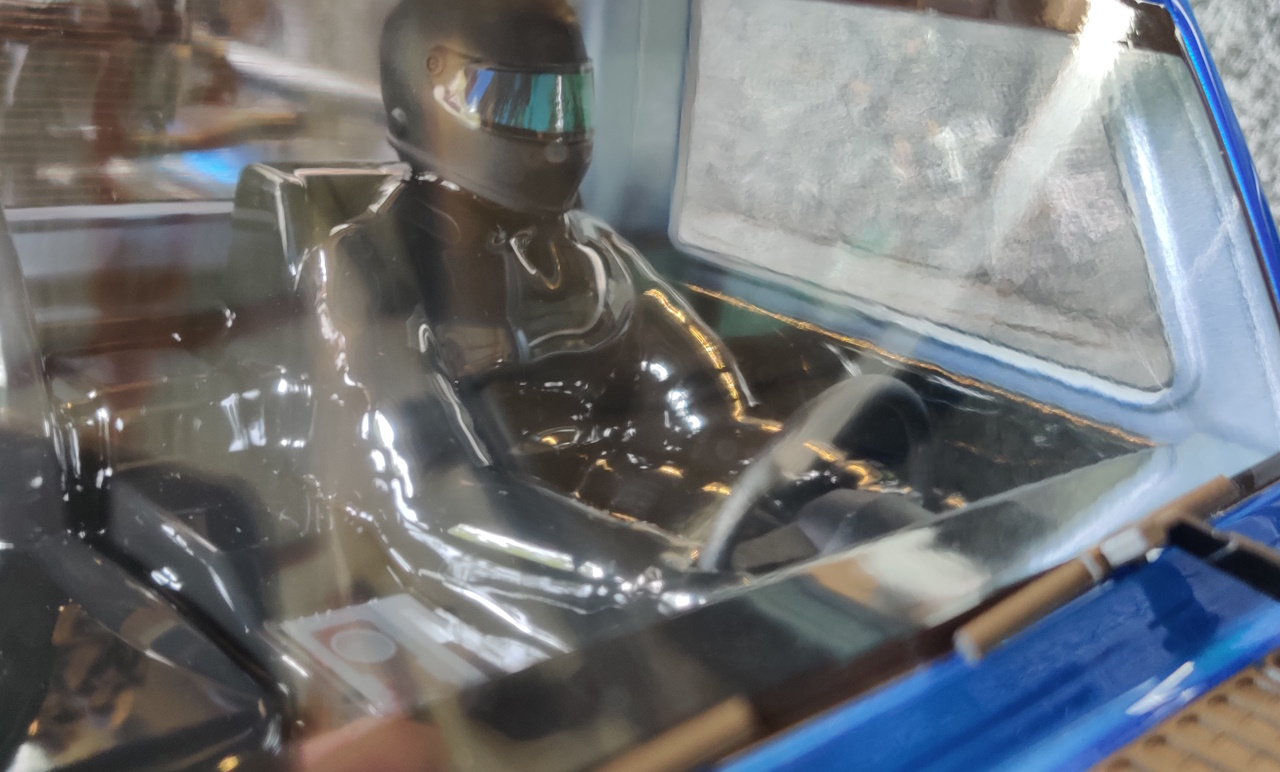
This G63 body has a complete interior, including dash, steering wheel, dash details and shifters, seats front and rear, and nicely finished. It’s in moulded polycarbonate, keeping the weight low.

However, there’s been a weird decision to apply a frosted, semi-opaque paint layer to the inside of the body on the windows, making it possible to only see the blurred outline of the seats, at best. Why go to the trouble and expense of including an interior, only to hide it? Perhaps subsequent manufacturing runs have removed the paint from the windows. I hope so.

Yikong 4106 Pro Body
4106 Pro Bendy Mirrors

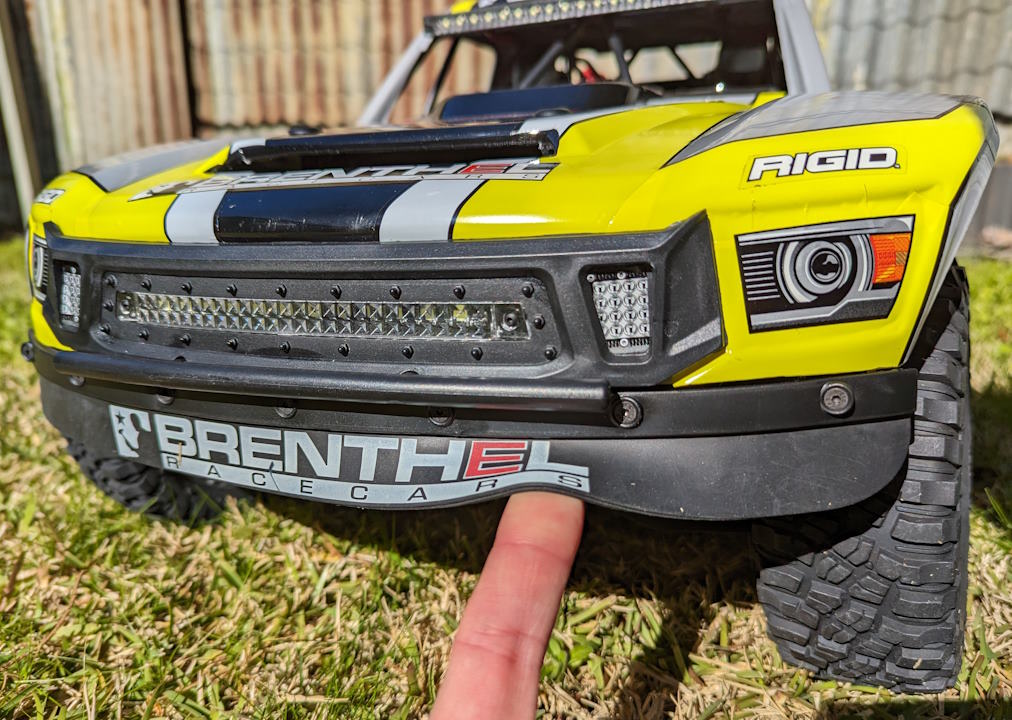
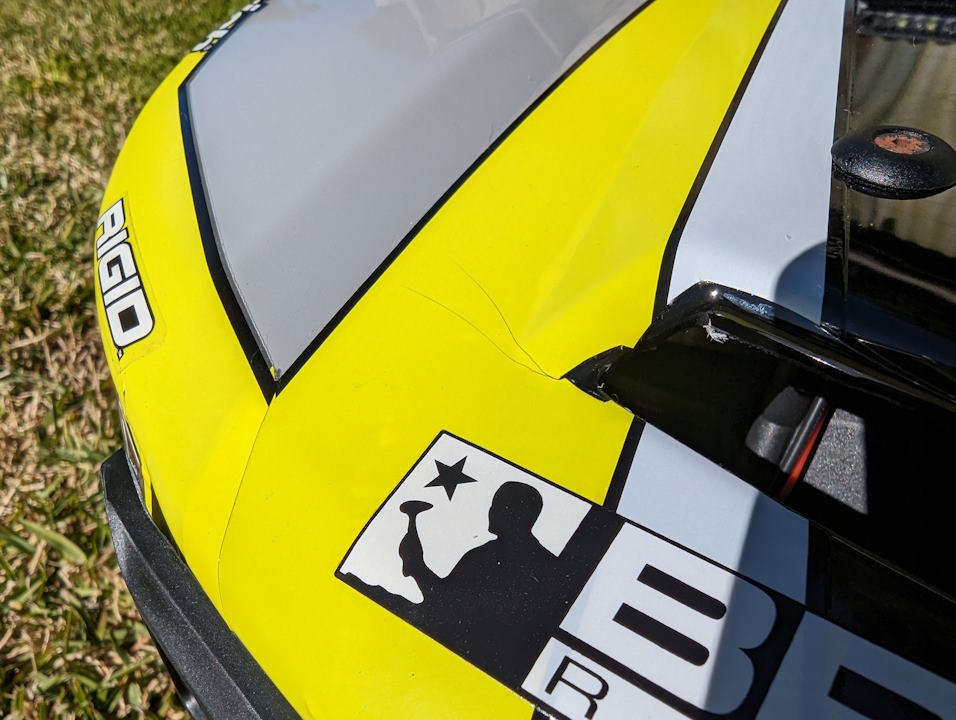
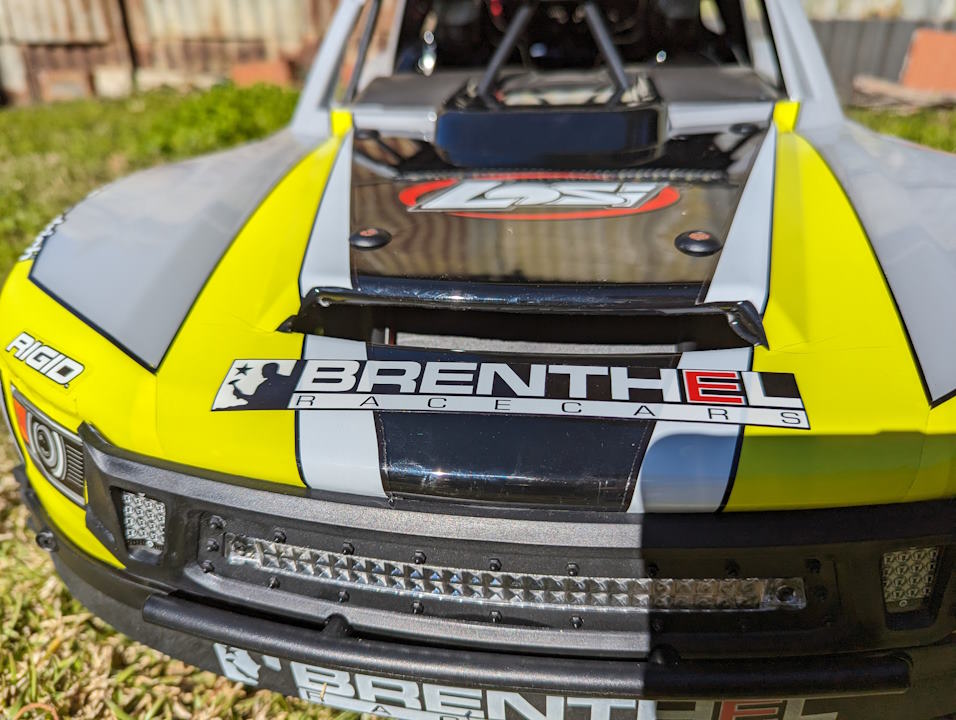
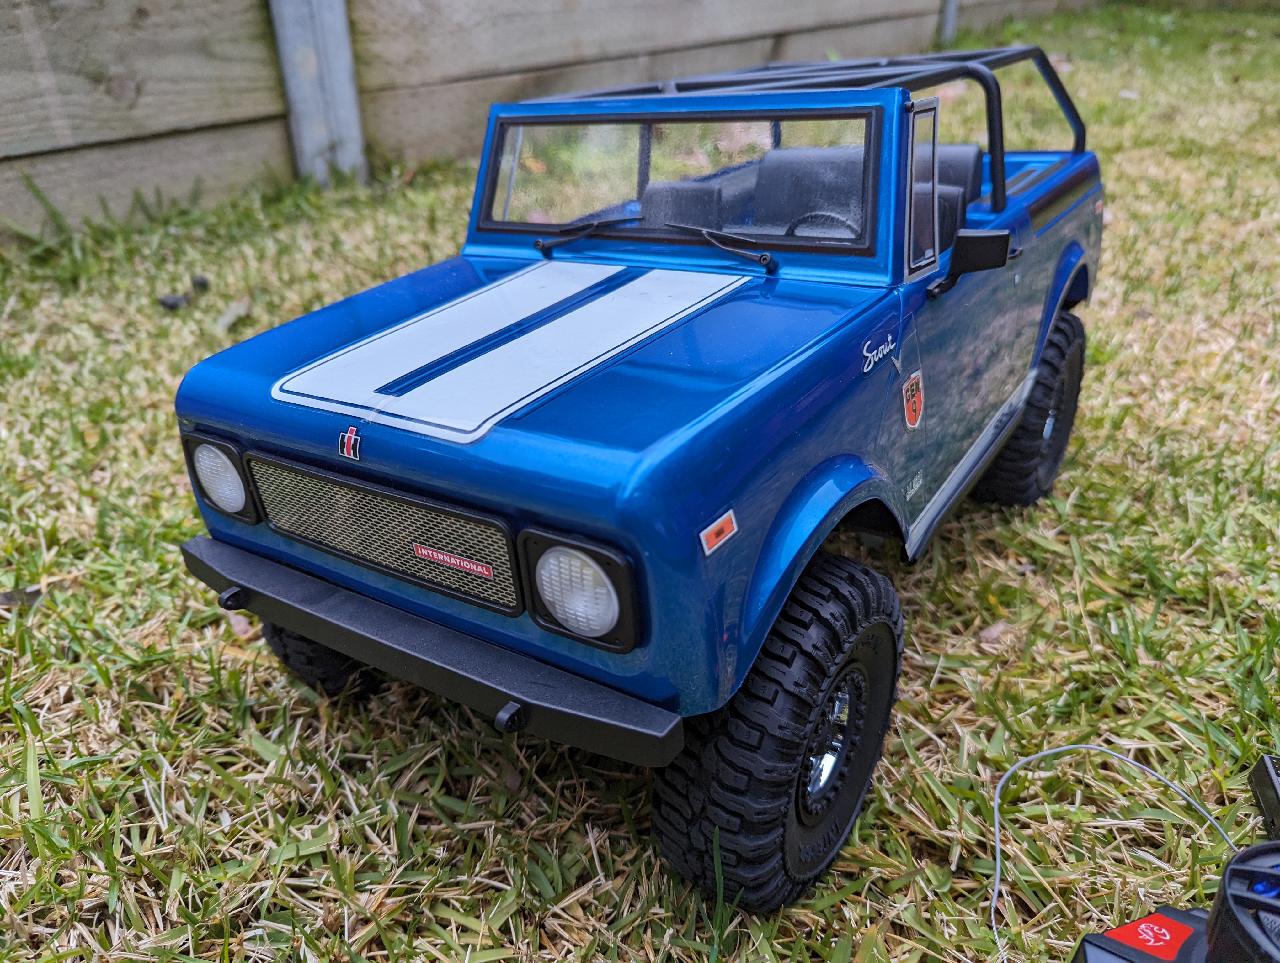
Front Bumper Dilemma

The car comes with a solid plastic front bumper that can be installed. By default, it is not installed, instead allowing the stock polycarbonate body to show off its pretty, moulded front lower grille. If you want to install that front bumper, some of the body needs to be cut away to fit it. I was going to do this on mine but realised it would look worse. Cutting it is a one-way decision, so I’ve decided to keep mine as it is.

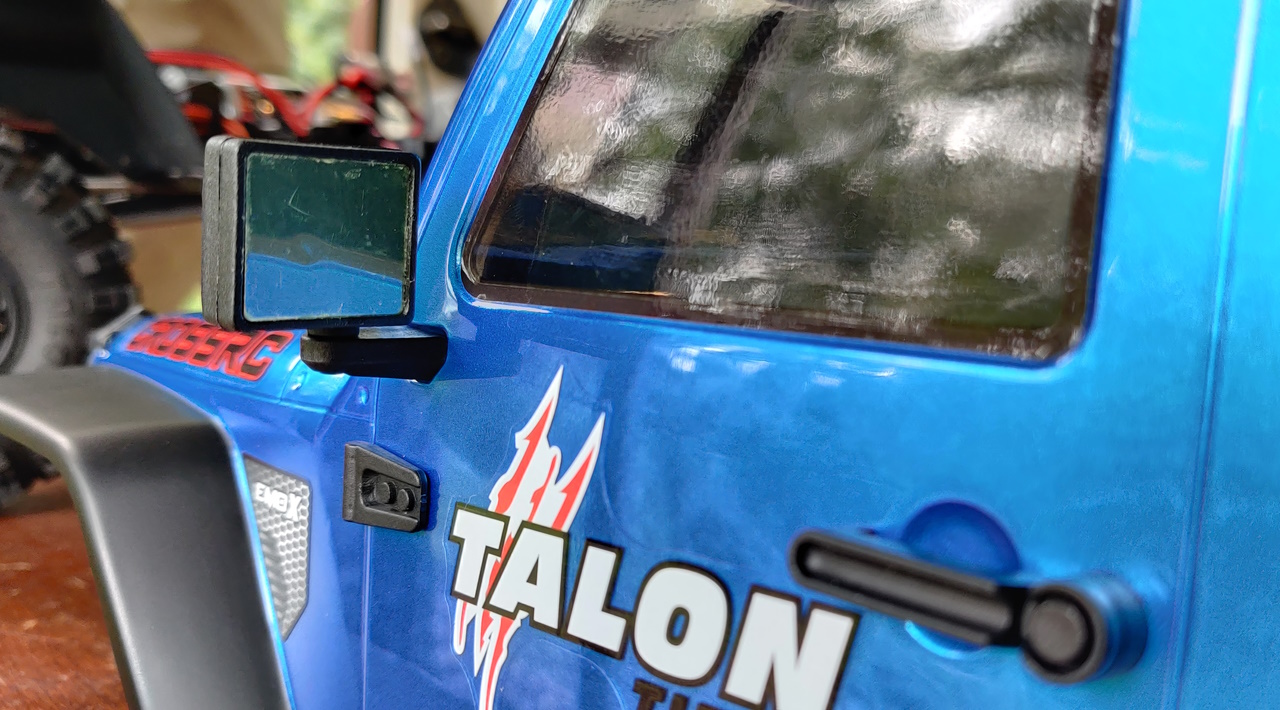
I should also add a note here about the sliders. They look like the aluminum of the real car -that is to say, they’re molded and painted on the polycarbonate body here. That means they look great, but it also means they’re weak. Just like the real thing, they’re really just for looks. You could beef it up with steel or plastic underneath, but it would be a custom job. As far as I know, there aren’t after-market rock sliders available for this model (yet).

4106 Pro Under Body
4106 Pro No Sliders

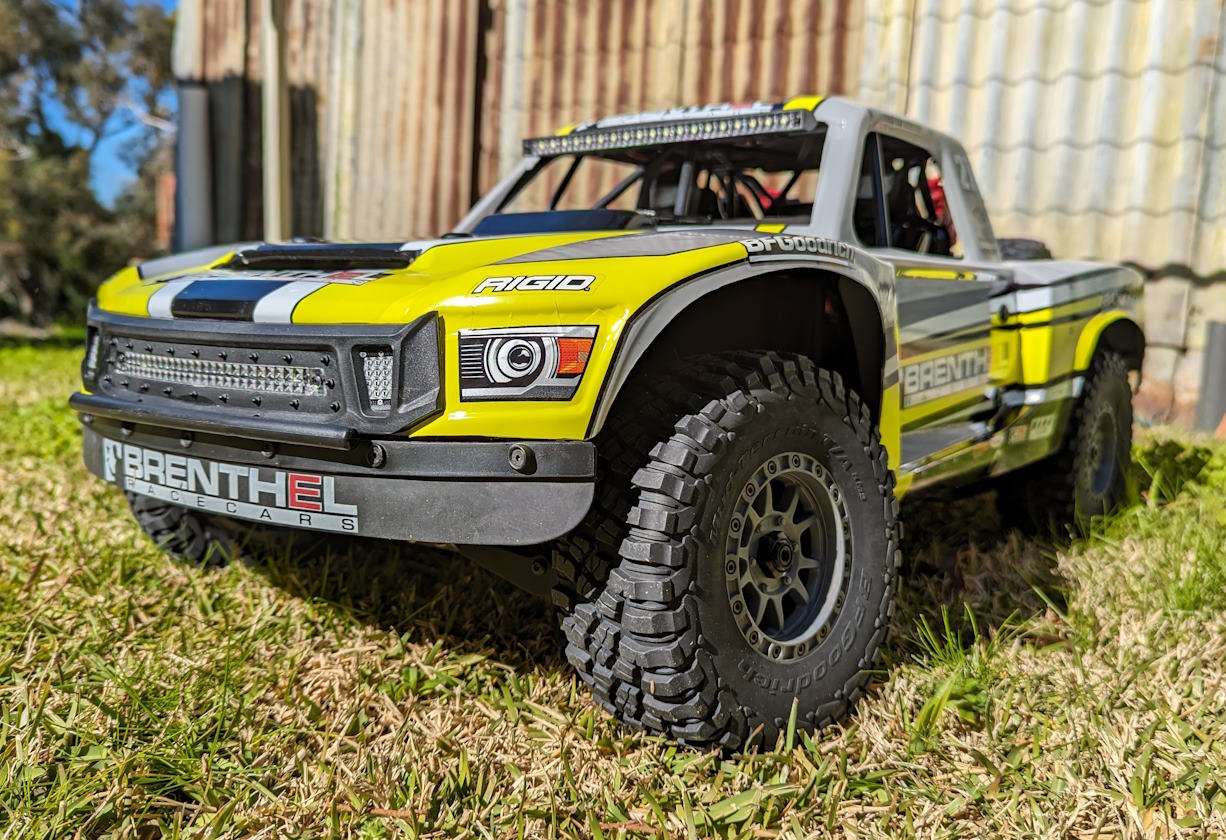
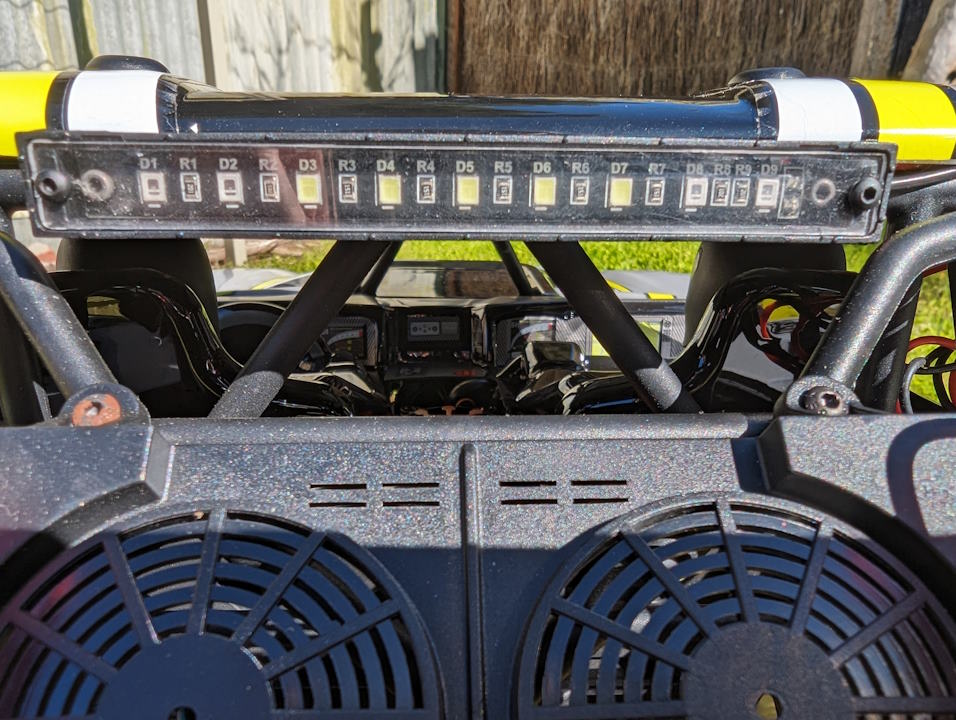
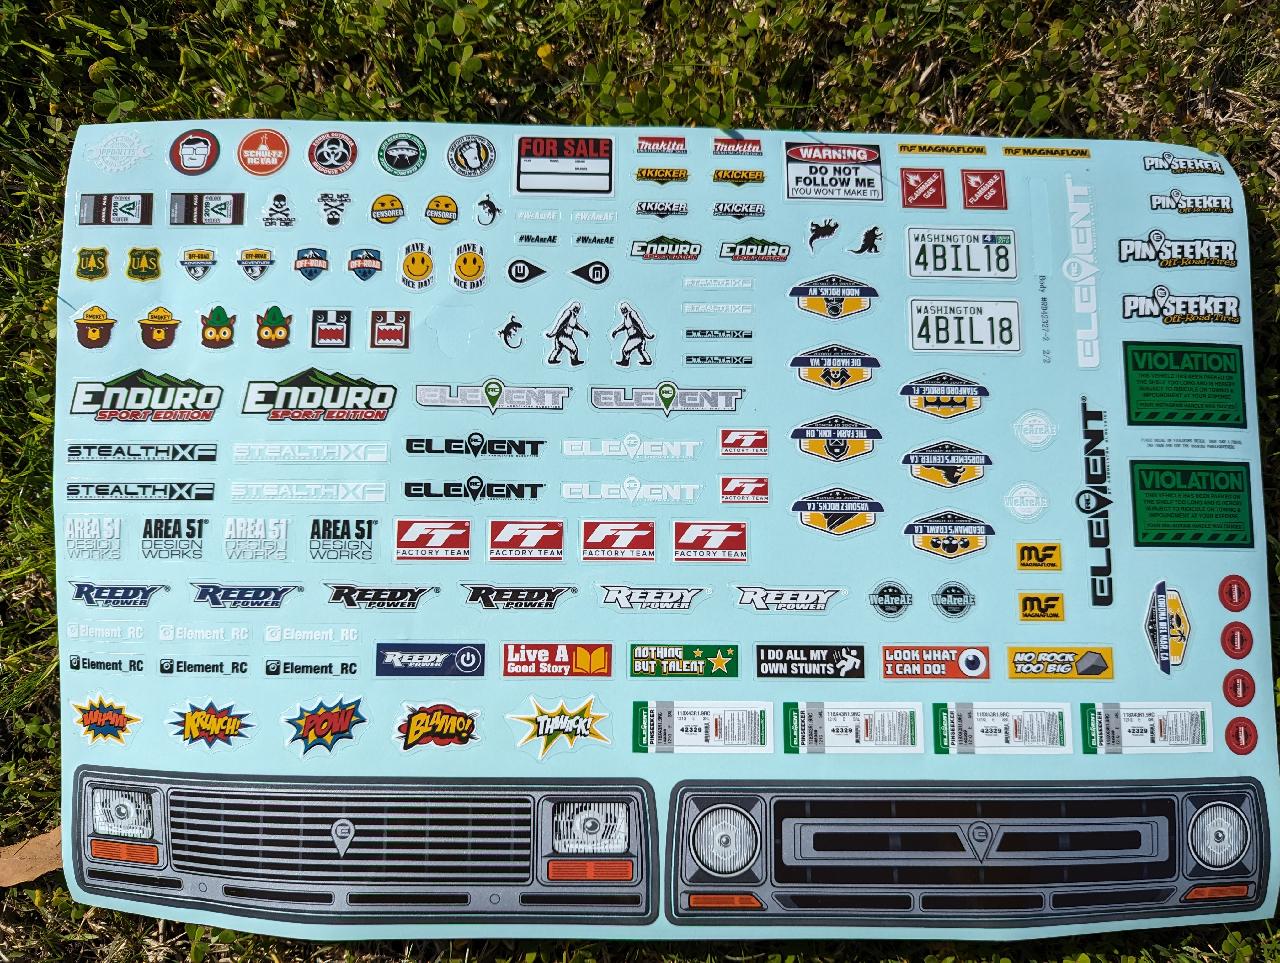
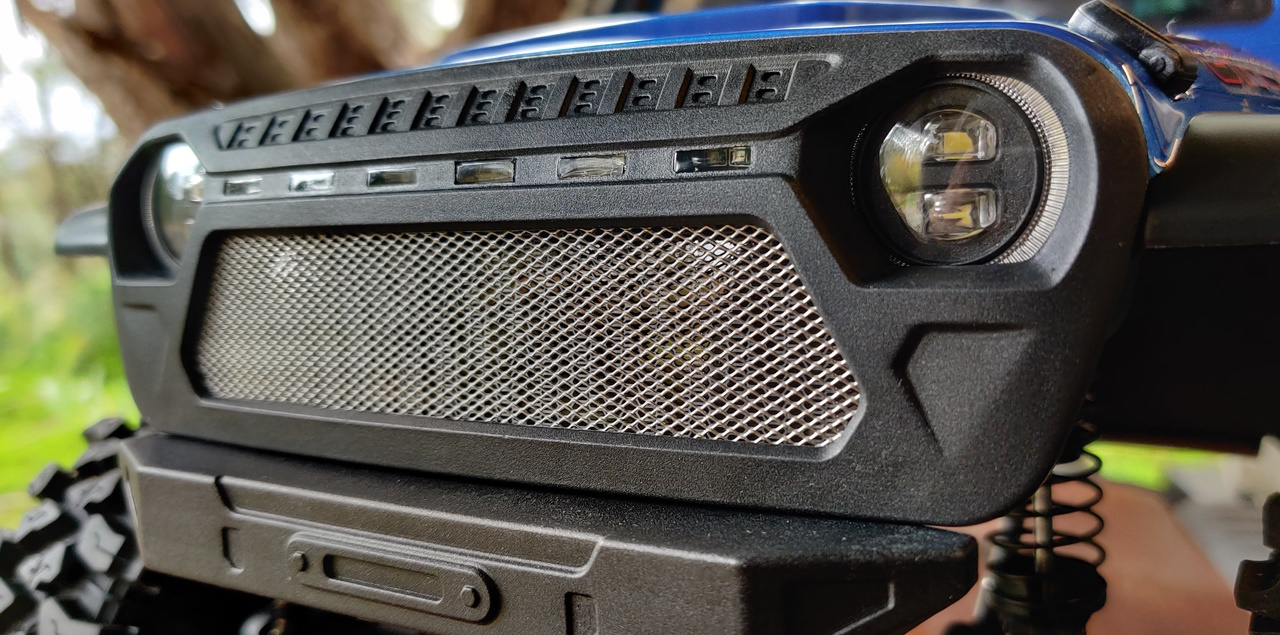
Lighting Up the Trail

The body also enjoys a complete light system. It functions as part of the integrated Flysky receiver/ESC/light unit and provides full-function lighting. Low beam, high beam, flashing, indicators, braking, reverse, and fog lights are all part of the vehicle’s abilities. Looks great and you can switch between off, low, high, and flashing configurations.
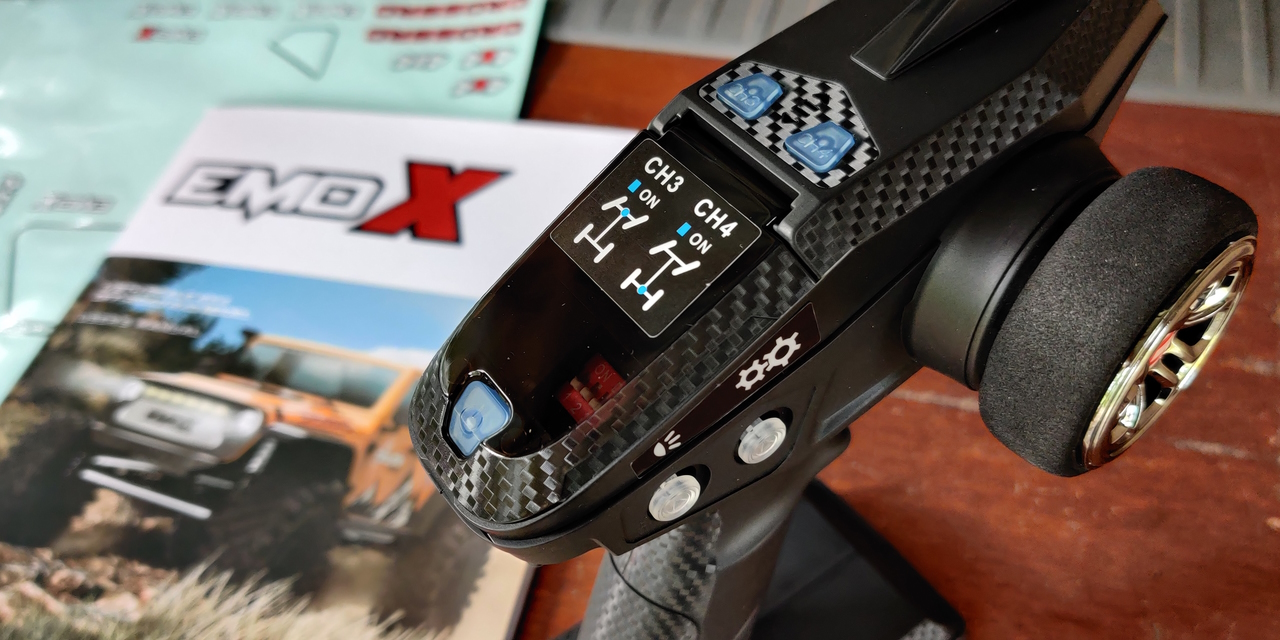
4106 Pro Light Kit

Drive Modes

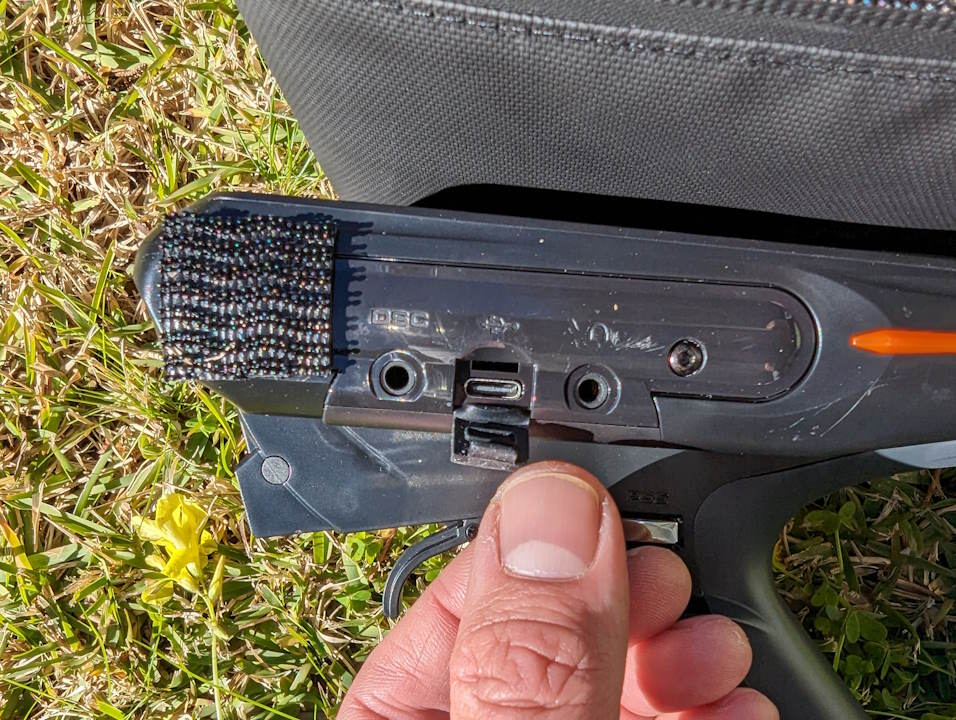
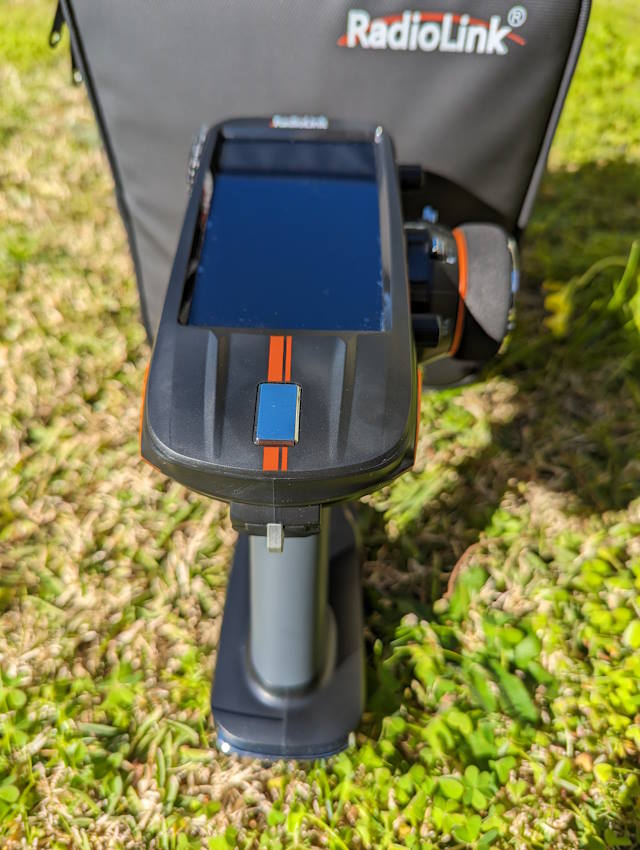
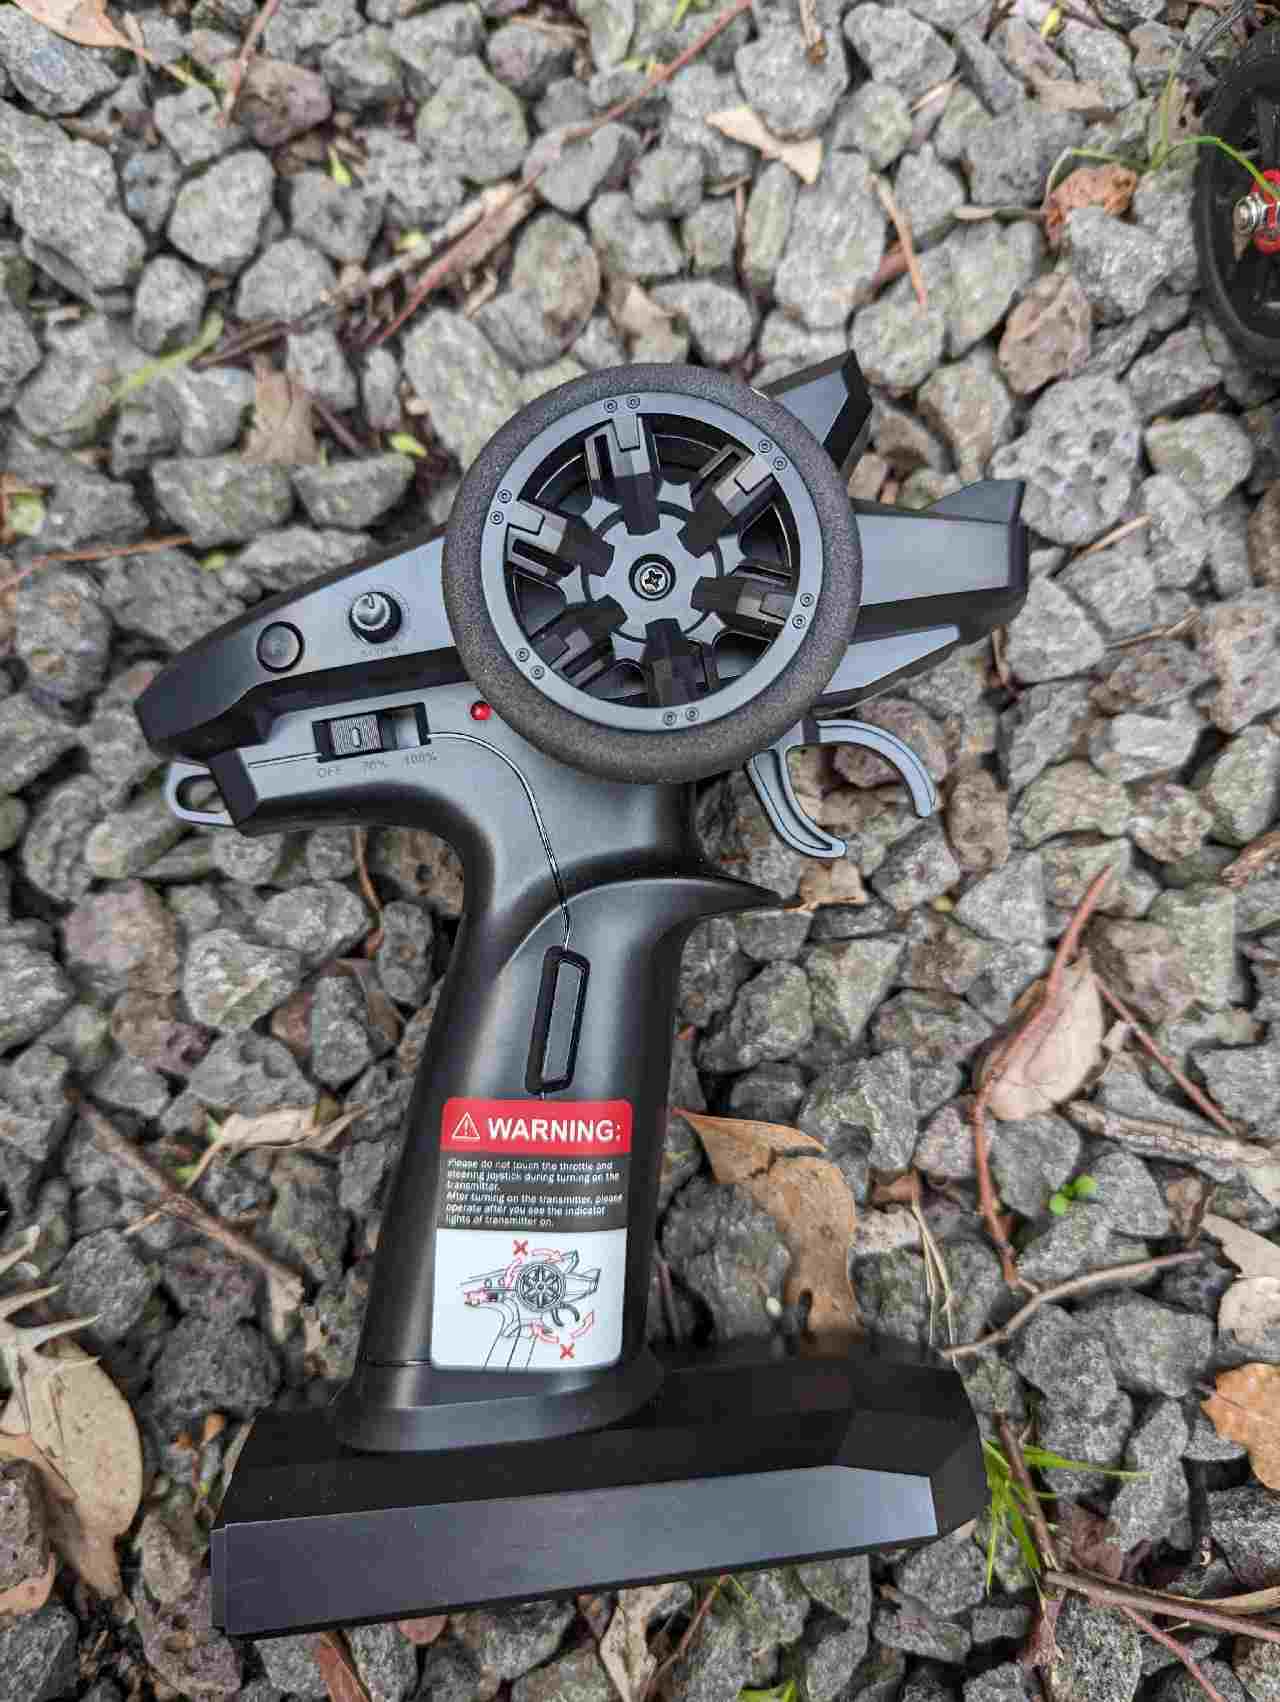
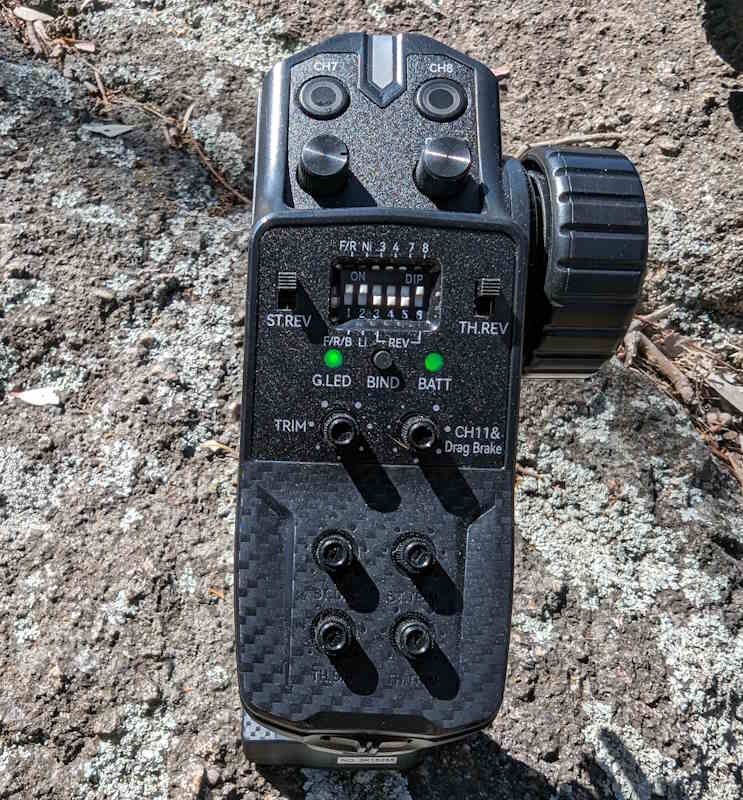
Also part of the Flysky system is a set of DIP switches on the radio transmitter. Switch 1 toggles driving mode from Fwd/Brk/Rev (trail driving) to Fwd/Rev (crawling). In the Trail mode, the taillights increase red luminosity when braking. In Crawl mode, there is no braking; you simply see the white Reverse lights when reversing, and the low-glow red taillights when otherwise stationary or driving.

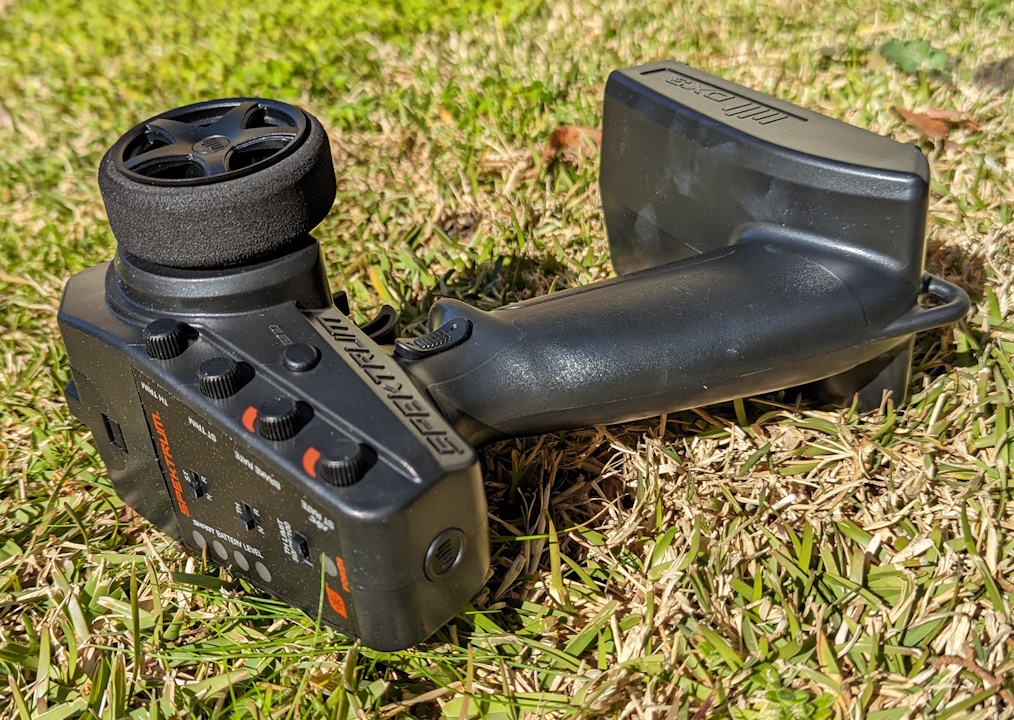
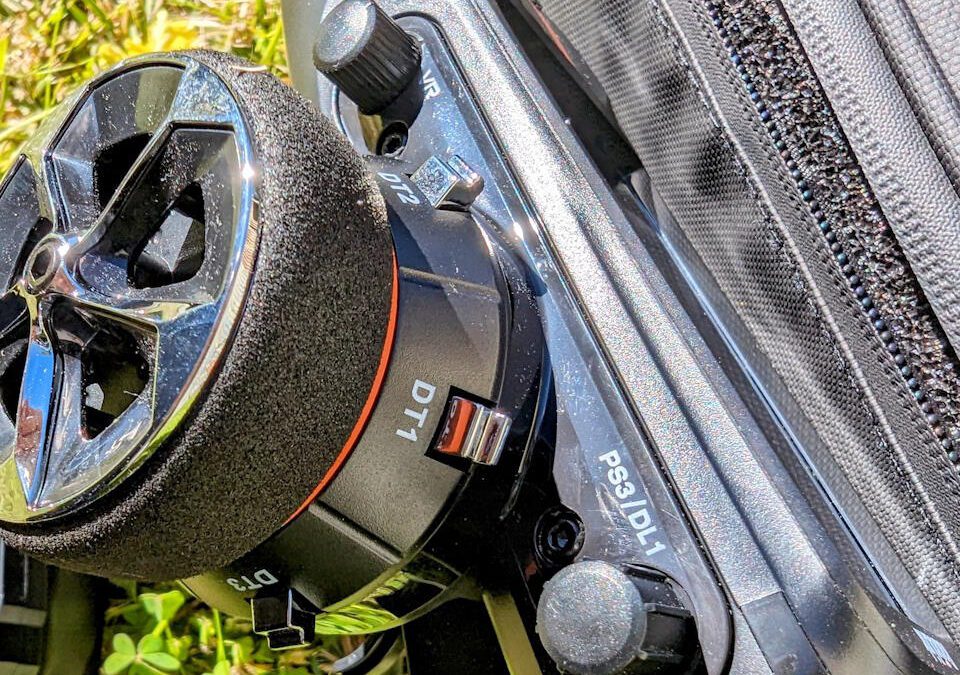
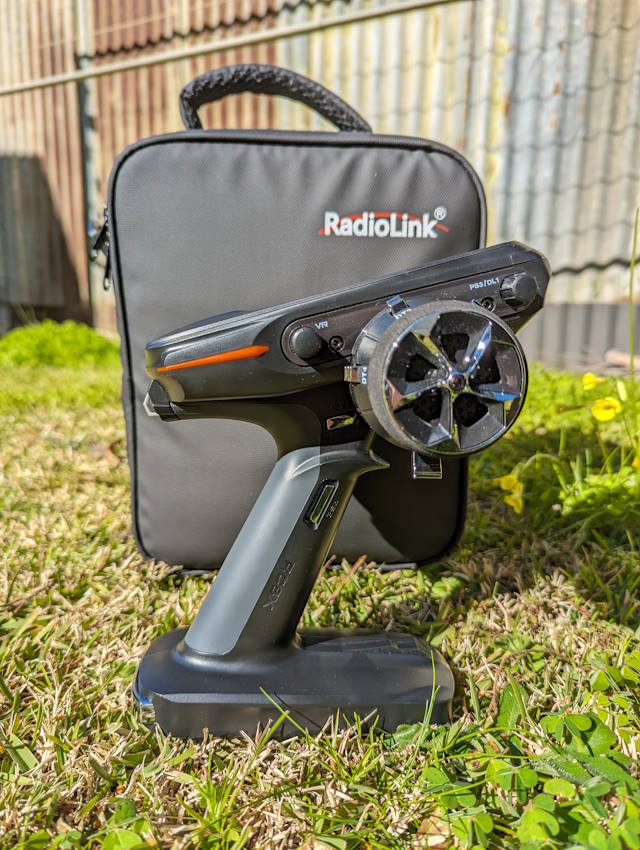
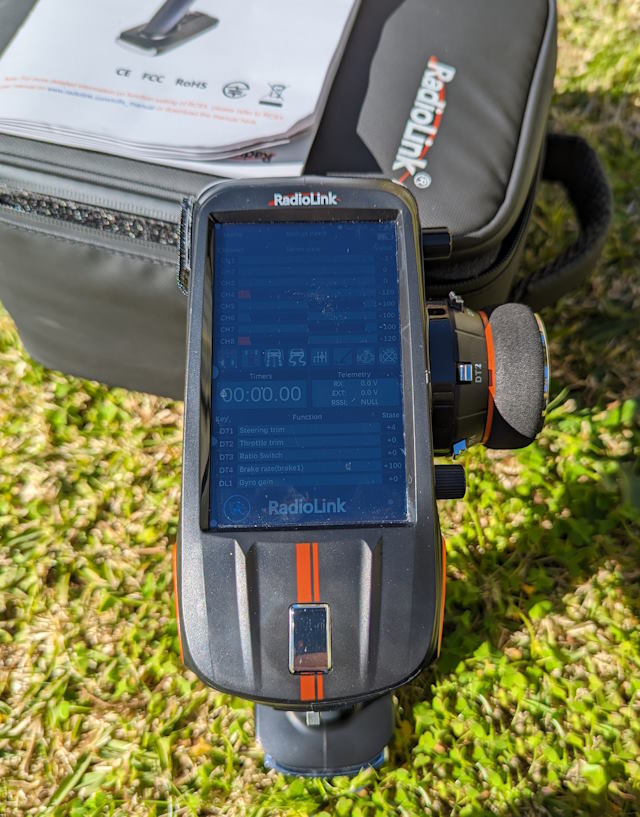
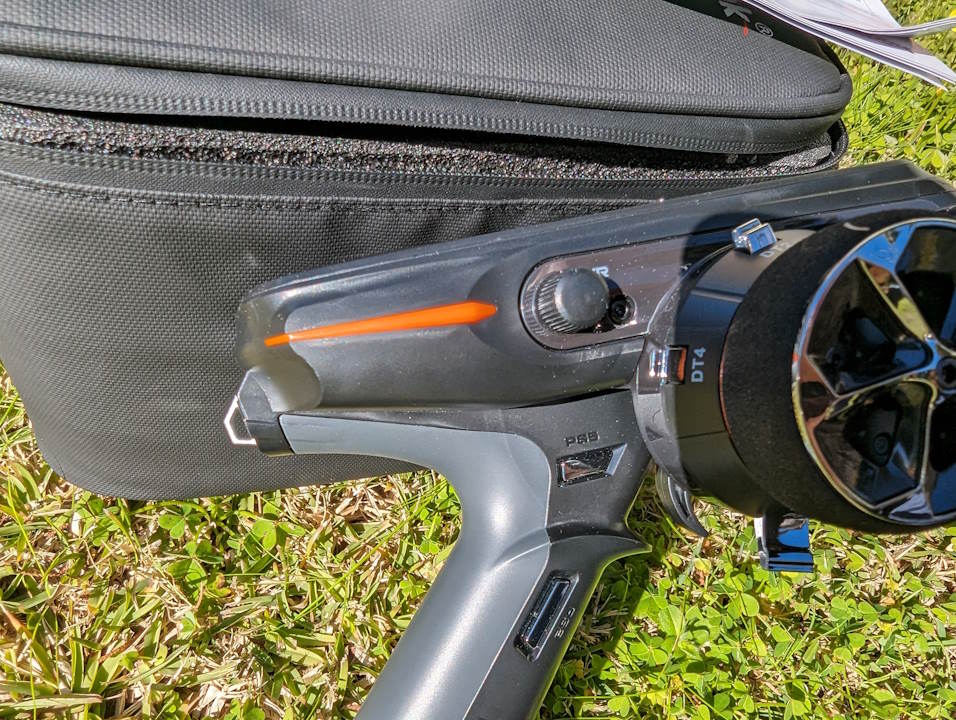
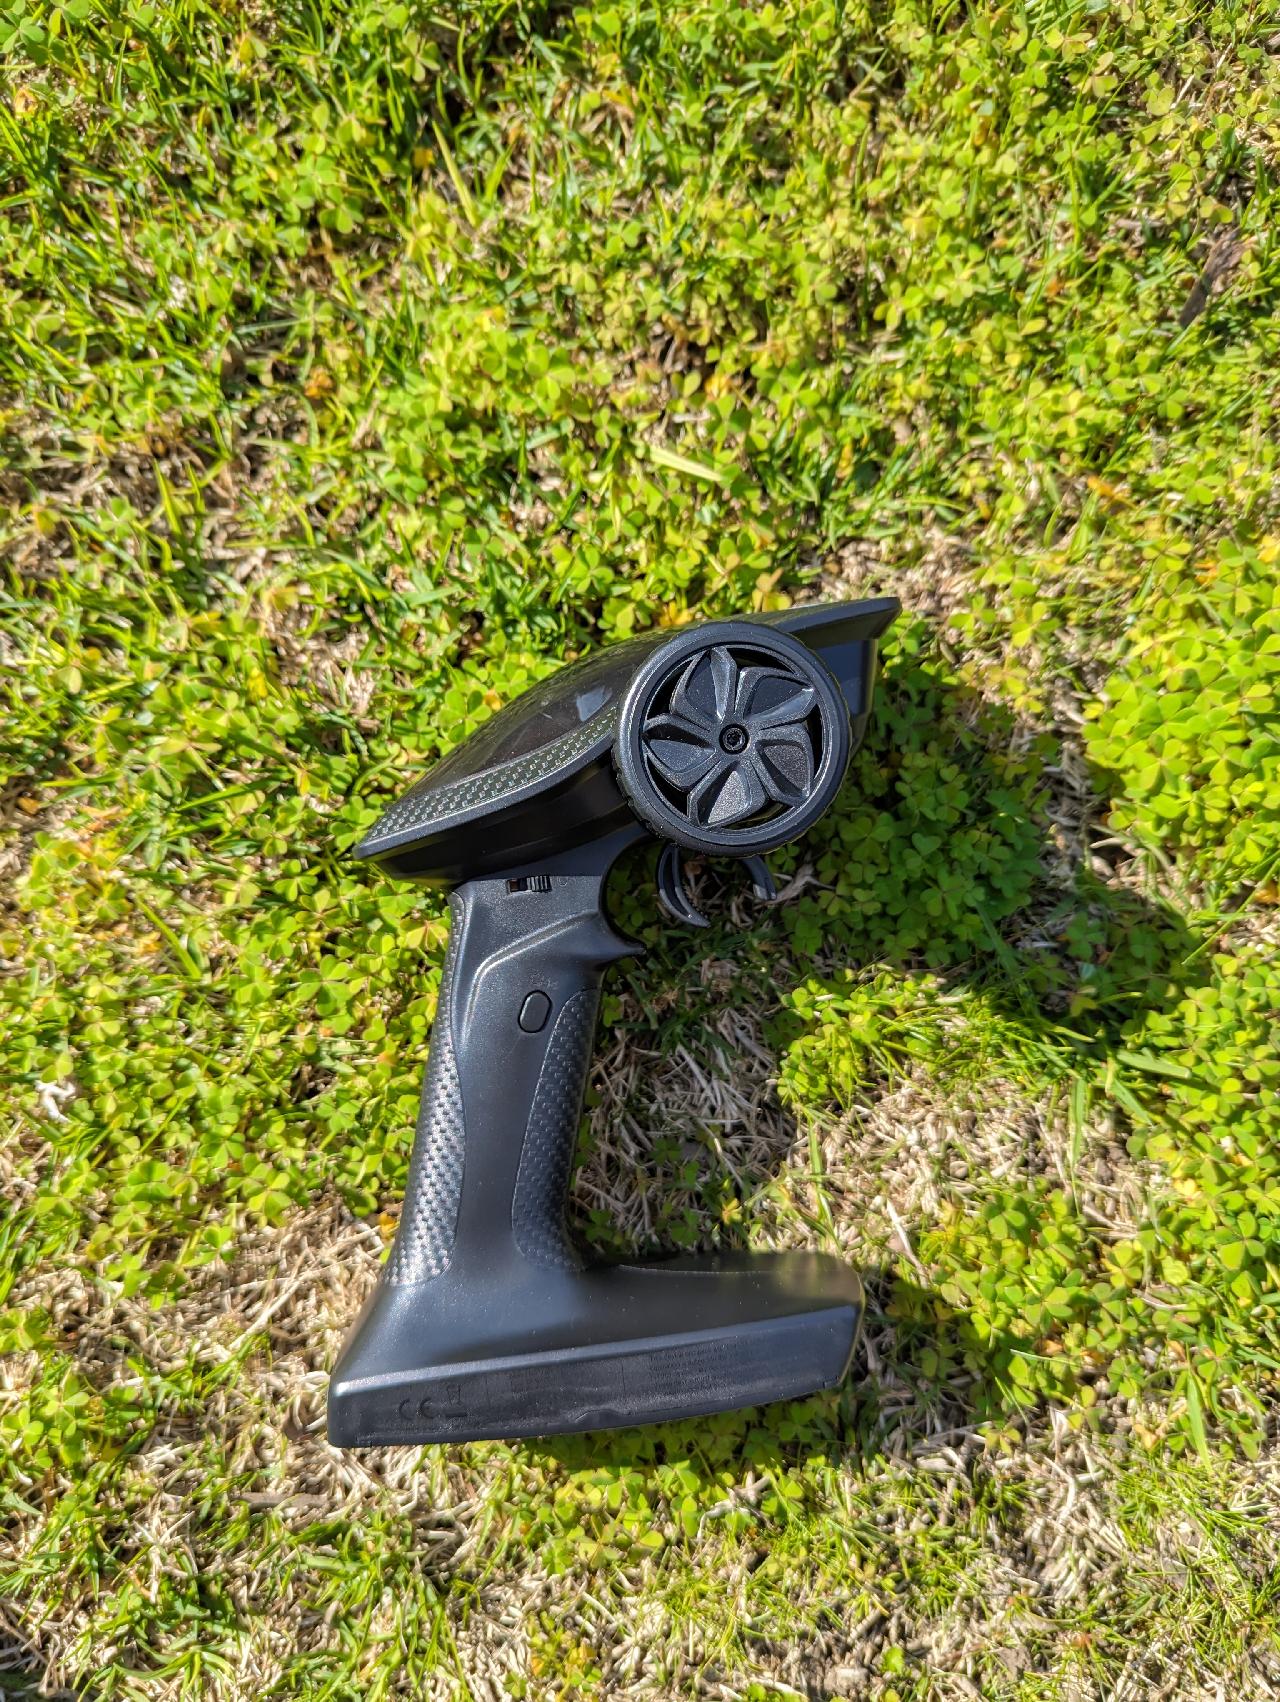
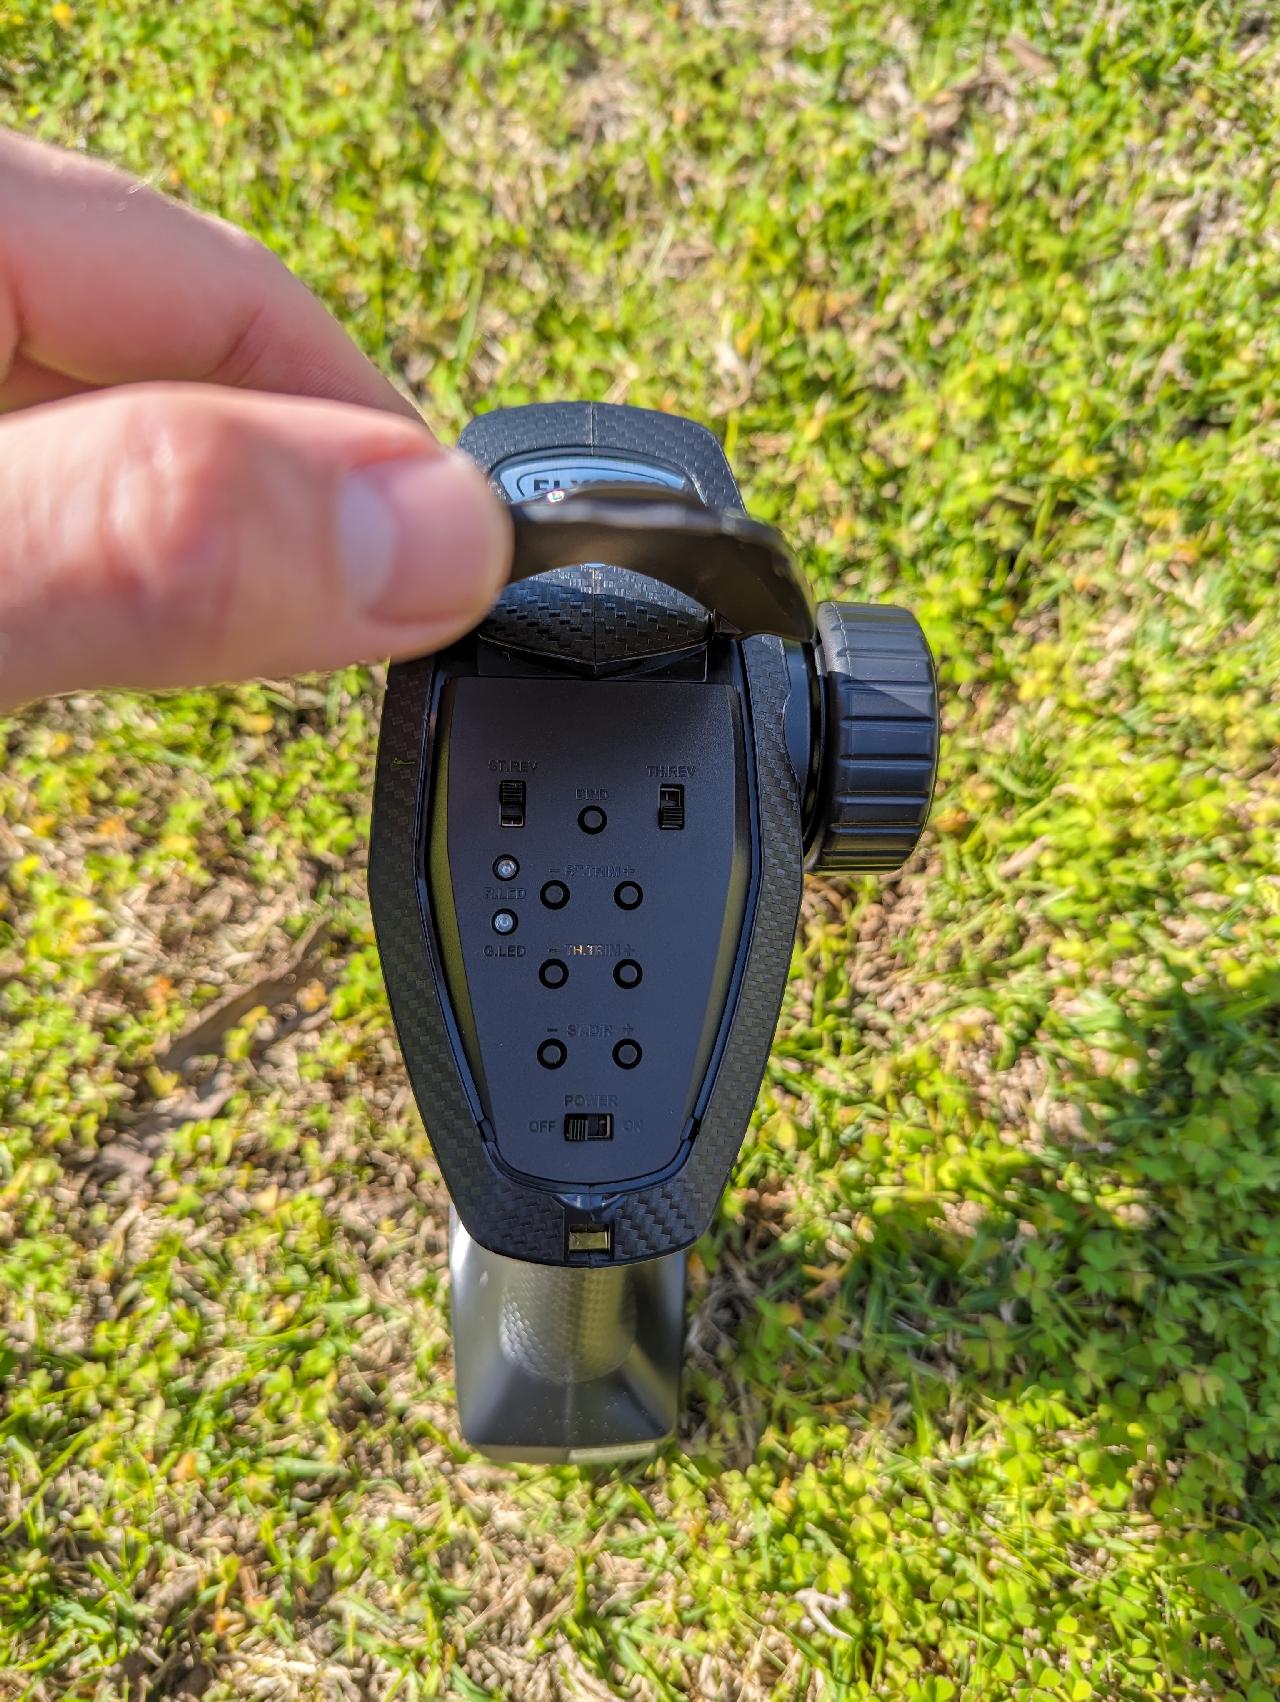
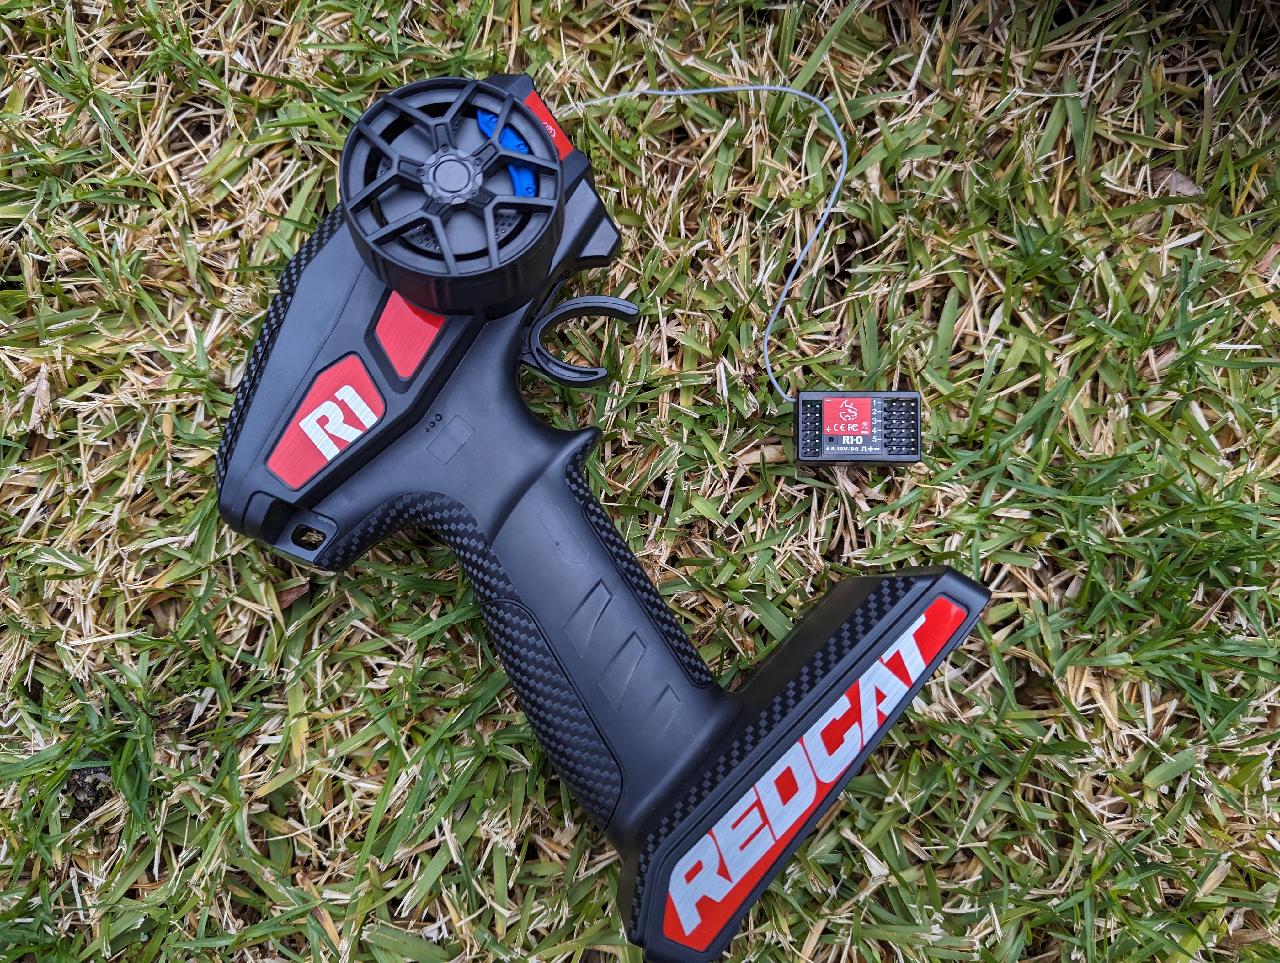
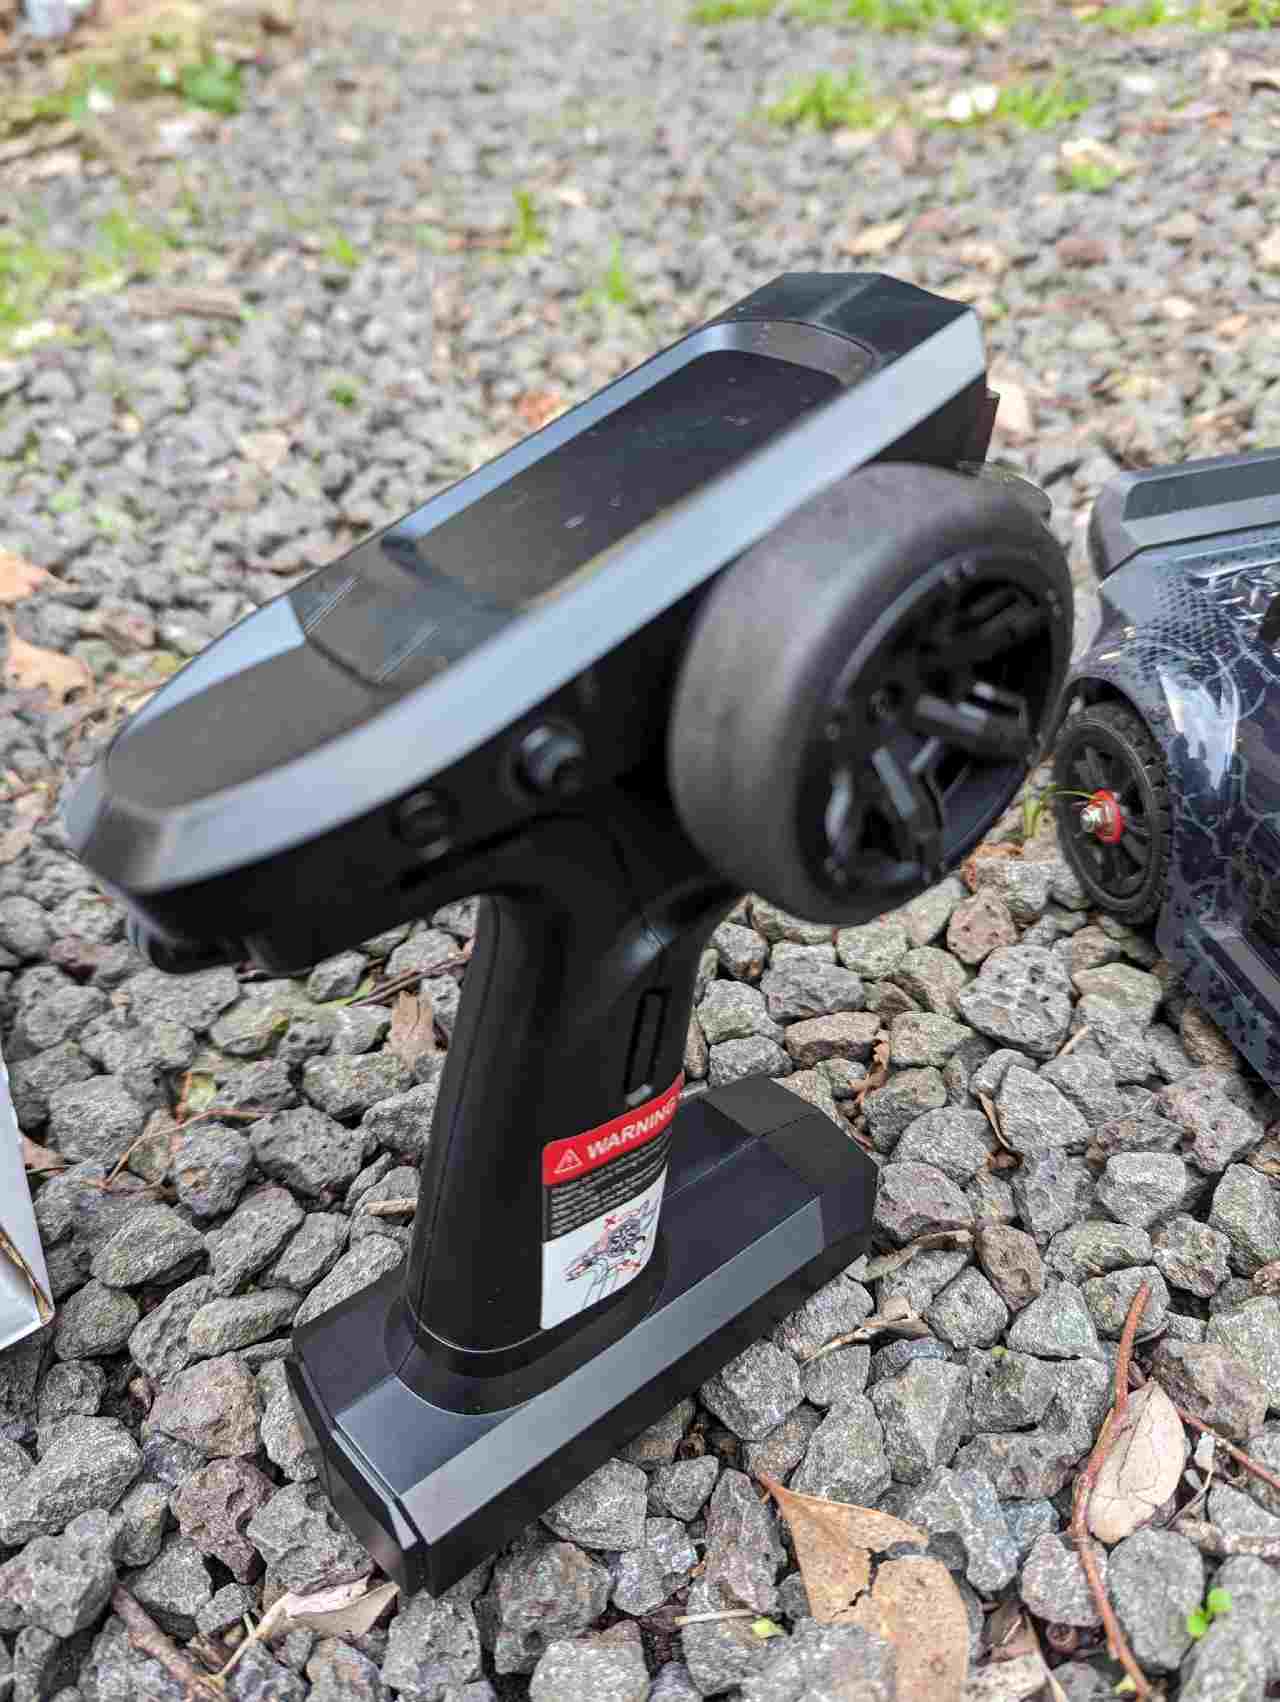
Speaking of the transmitter, the wheel feels very premium. There’s a weight to it, though plastic, that has the feel of a much more expensive radio. The spring is light, the balance neutral, and it just feels great to use. The throttle trigger also has a pleasingly light action.

4106 Pro ESC

Radio Freedom

There are many options on this radio and happily, many are not used. There’s a thumb dial that has maybe 5mm of movement from neutral in each direction – that isn’t populated on the receiver, so it’d make a great winch controller or rear steer option.

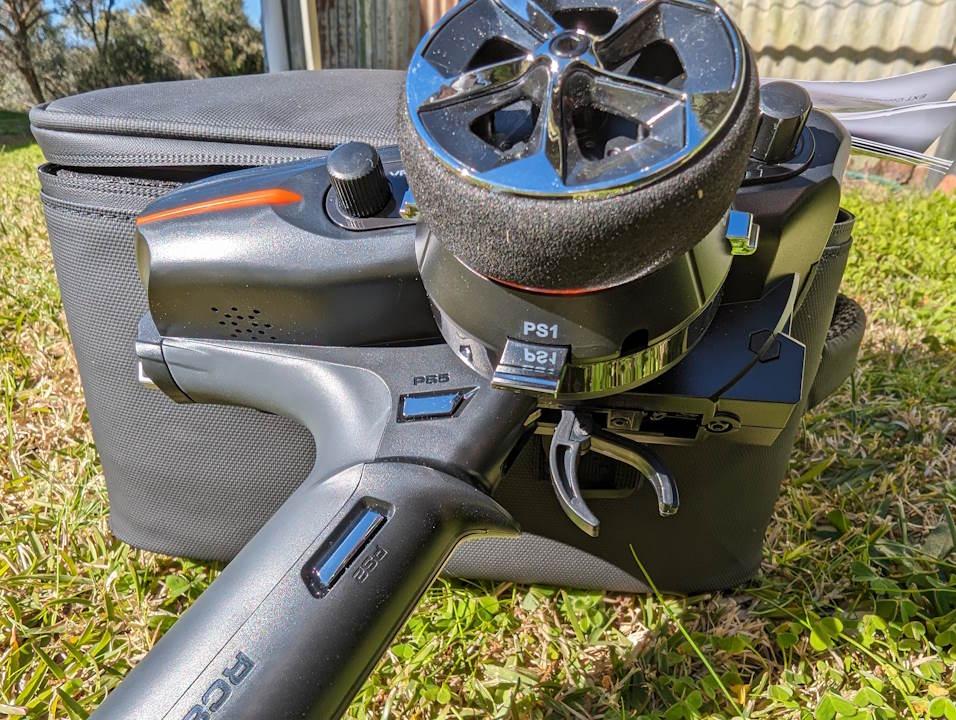
On top, there’s a button and a dial that also aren’t used on the receiver (unless mixing interferes with this; I haven’t tested them yet), but you end up with quite a few options. You could put a sound system in the car and have the spare top button as a horn, for example.

Yikong 4106 Pro Radio Side

Drag Brake on the Fly

Lastly, the radio also gives you a dial (Ch.11/Drag Brake) that allows the drag brake rate and intensity to be adjusted on the fly. The maximum setting feels like the equivalent of about 70% drag brake on a WP-1080 ESC (incidentally, see our programming guide here), in this vehicle. The minimum setting is basically zero drag brake. My video review shows the difference between these on the steep rock descent near the end. It’s a nifty feature.

Yikong 4106 Pro Radio Top

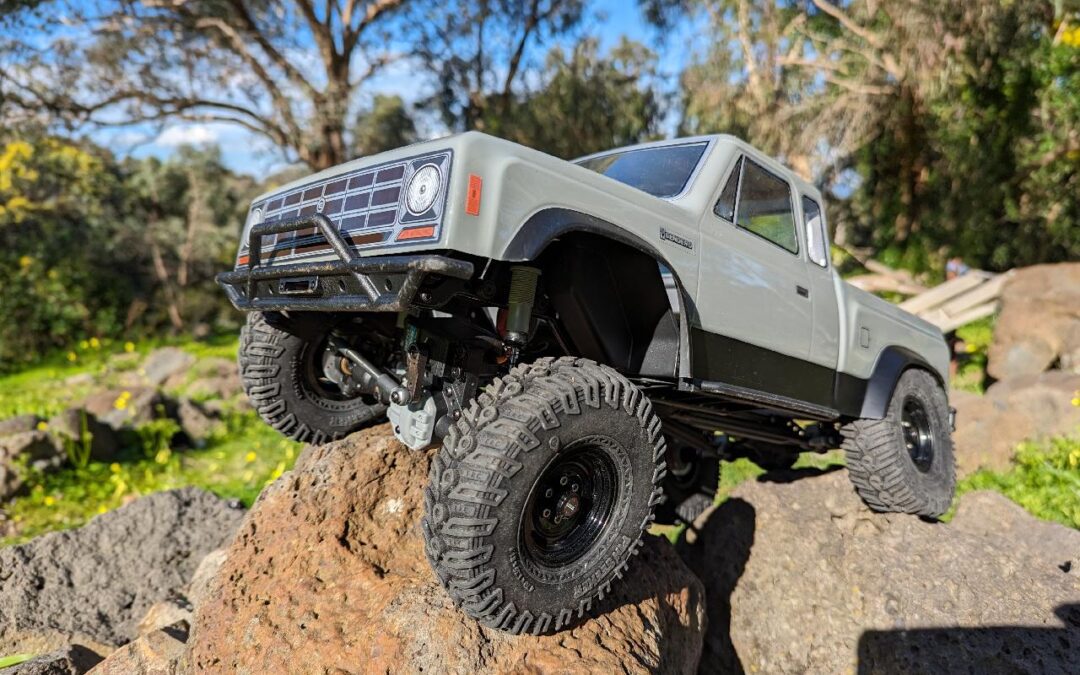
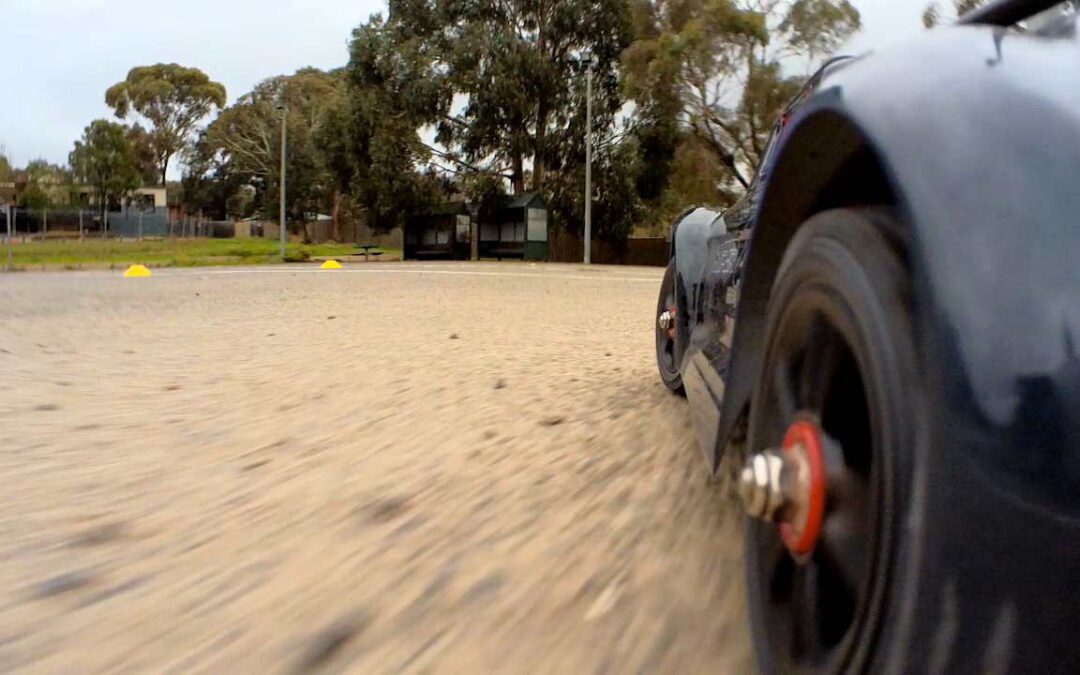
Yikong 4106 Pro Driving Dynamics

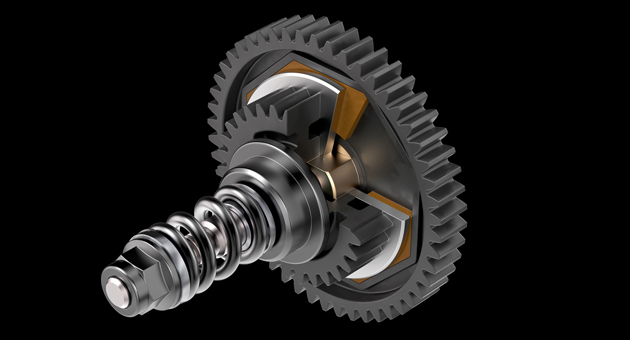
The car drives quite nicely. This is a scale vehicle more than a performance machine. With it’s many driving accessories, it’s very fun to play around with. The two-speed transmission has a pleasingly wide ratio between first and second. The lockers engage nicely – well, I should say, the rear one does.

The front one does too, when I do it manually, but my front locker servo arrived faulty, so I can’t tell you from experience. I’ll swap mine out for a replacement servo (just a mini size, they’re pretty universal, so no worries there) and it’ll be fine. The so-called ‘tank turn’ feature of those rear disc brakes is just fabulous, and the lighting kit in the pretty body makes night driving possible and day driving more scale.

4106 Pro 32T 550 motor

Back to the Big Thing

Now, onto those ramifications I mentioned in the intro: independent disc brakes. Yes, this model uses a single servo to modulate between left and right, for the sole purpose of tightening your steering radius when active. It works well. But as a proof of concept, now we know disc brakes work and that they can be rugged enough to be effective in an active, wet-n-dirty off-roader. On its own, that’s already impressive, right?

4106 Pro Disc Brake Servo

Now Think BIG

Okay, now think about faster cars. The Arrma Infraction has a disc brake on the rear outdrive from the transmission, for example. (Incidentally, buy an Infraction using this link for a discounted purchase; it’s my all-time favourite street car and so very worth it). Already a super fun, super powerful street machine, you now effectively have a hand brake feature on an 80mph-capable street basher. Nitros have also been using a disc brake on the drive shaft for years.

But to have disc brakes independently on each wheel? This means the traction control of full-size cars can be brought into road and track RC cars! Do you see the potential here? We already have the technology in the tiny ESC modules of current RC vehicles. Add a few extra servos and now you have something that can brake each wheel as traction is lost in a corner or under acceleration, and so on. What an exciting idea! I don’t know of any other manufacturer currently doing this, but I’m hopeful and excited to see more. Wow!

4106 Pro Brake Mechanism

Final Thoughts

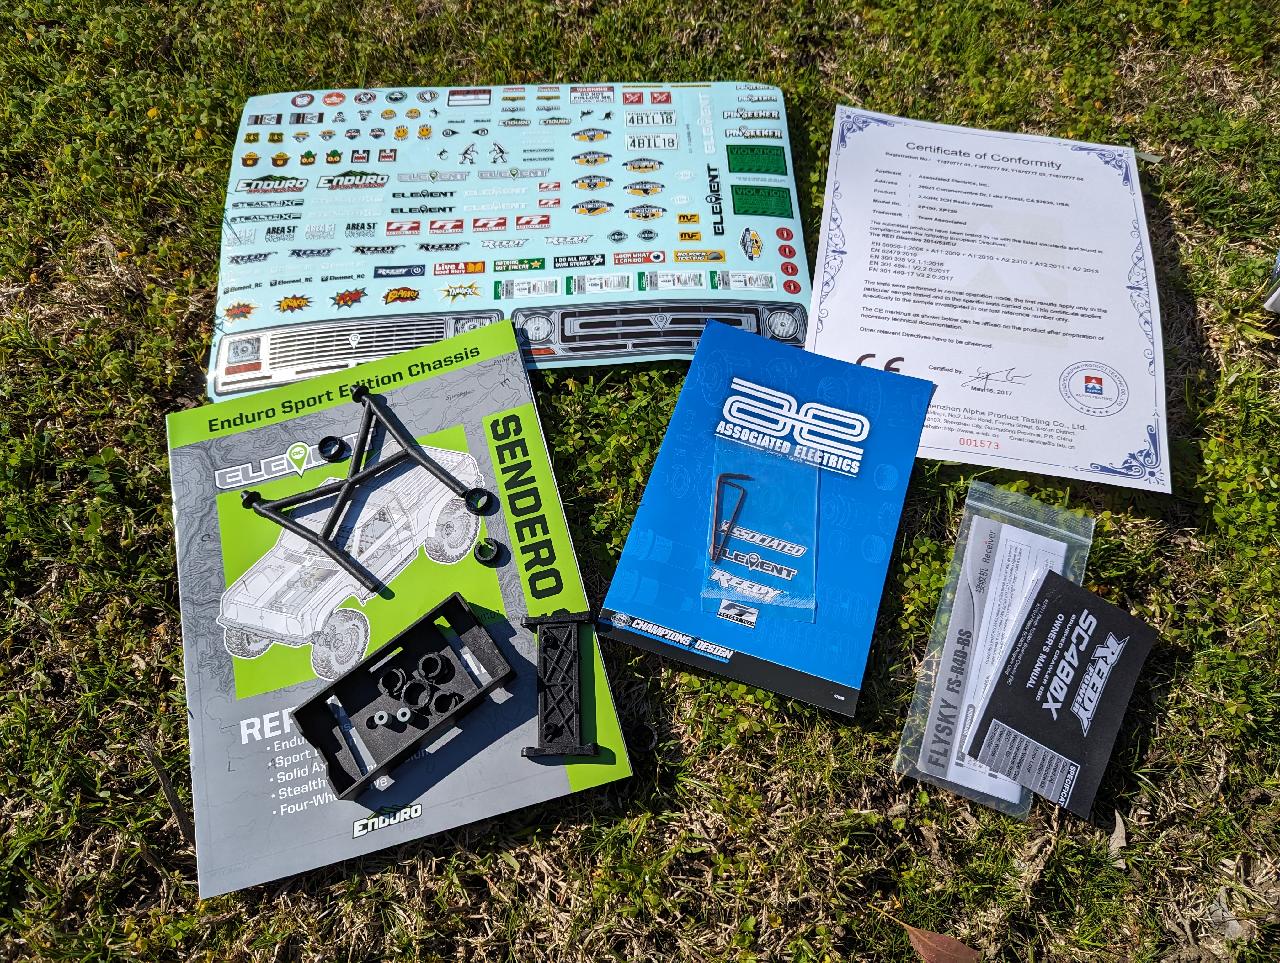
Frosted interior windows aside, the Yikong 4106 Pro is very well thought out. A manual would be appreciated, especially for hobby newcomers, as there’s a LOT going on with the radio. Thankfully, it’s well labelled.

I don’t support the blatant IP theft that Yikong have seemingly undertaken from Mercedes with the pretty G Wagon body, nor from the Hyrax tires. But, on the whole, they’ve created something special.

I’m loving the progress we’re seeing from these smaller brands and I’m so pleased the Yikong 4106Pro is not just another clone of an existing vehicle. It’s fun to drive, capable for what it is (think ‘Class 1 comp crawler’ and you’ll be pleasantly surprised) and it looks great. Recommended.

4106 Pro Steering Damper

Where to Buy

Here’s where I bought mine (not an affiliate link; it’s just the only place I could find it in stock in Feb 2024). There’s another Yikong model on my ‘to-buy’ list, but it’s a bit bigger than this one! Check out the Yikong 4083 1/8 RC crawler here.

Yikong 4106 Pro Rear
Craig Veness

Craig Veness

RC-TNT

Craig has been into radio control since the 90s and into RC crawling since about 2010, when a Losi MRC started the obsession! Now it's all rocks this and crawl that and upgrade all the things! ...You know how it is, right? Welcome home 🙂

A note on affiliate links: we purchased this vehicle ourselves for test & review purposes. Some of the links in the above article are affiliate links, which means we may be paid a small commission if you choose to click on them to make a purchase. As always, we make effort to ensure that no review is impacted by this – we still report on bugs and issues encountered during product testing, and our fixes or solutions if found. Thank you for reading and happy RC-ing!

Losi Super Baja Rey 2.0

Losi Super Baja Rey 2.0

It’s Huge

The Losi SBR 2.0 is one of the larger RC cars available today (currently on sale here). But it’s also quite different to most of the other 1/7, 1/6 and 1/5 scale fare you can choose. It might be the most unique offering in this scale, now I think about it. Consider: if you want to bash hard, you buy an X-Maxx, Outcast 8S or Kraton 8S. If you want to crawl or trail drive, the SCX6 has you covered. Large scale race track nearby? Get yourself a Losi 5IVE-T 2.0 or a DBXL and have at it. HPI’s Baja 5B has you sorted for big buggy action.

But what if you want scale desert truck driving? Humungous suspension travel, the kind of cornering that only a live rear axle can deliver? Something to match the Traxxas UDR favored by so many? But… bigger and more aggressive? Losi has you covered with the Super Baja Rey 2.0. Let me show you what makes this enormous monster so special.

Losi SBR 2.0

This is a 1/6 scale desert truck. I didn’t have the original one, so I can’t give you a side-by-side comparison, but Losi says this one is built on the Super Rock Rey chassis, but with an extra inch of wheelbase length. They’ve combined it with the front of the Super Baja Rey and there you go, SBR 2.0.

It’s a four-wheel drive vehicle that is engineered to be tough – but of course, with the live rear axle, it will take the right driving approach to keep the wheels on the ground. This style of vehicle is made to soak up big bumps at high speeds. While they can slide and corner reasonably well, this will never be a basher to replace the likes of the Arrma Senton 6S or similar, with its independent front and rear suspension. I guess you could say that RC desert trucks – the SBR here, the BR2.0, Traxxas UDR and so on – are all about the scale drive.

Losi SBR 2.0 Front LHS Corner

Body Issues

I’ll start with something that was a bit of a let-down. It’s only minor, but this isn’t a cheap model and so you expect the thing to be pristine out of the box. For this design, Losi elected to use something like vinyl wrap for the livery. Mine was a little worse for wear, with cracks in the decals around folds and edges. Some sheets were even misaligned. Screws were oxidized and there’s dust under the light bar lenses.

To be fair to Losi, this is surely a challenging model to assemble. Even in a production-line style setup, I expect it would take considerable effort to get something like this together without mistakes. But to find so many minor issues with my unit does make me wonder about quality control. Is it only the body I should be concerned about here, or will there be missing grease in diffs or a critical screw not secured completely?

Still Gorgeous Tho

The issues I had with this thing are only skin deep, as far as I can tell. At time of writing, I haven’t run the car yet, so if there are underlying mechanical oversights, I’ll edit this section later to let you know. But if you’re not looking closely, those misaligned panels and livery sheet cracks are not obvious. It’s all forgivable when you step back and take the thing in. This is a machine of beauty.

Radio System

Cars rarely came with radio systems in decades past. However, relative to RTR (Ready To Run) sales, kit builds are a lot less popular than they used to be. Many hobbyists may still prefer a kit (including me), but it isn’t what sells. Instead, manufacturers are typically now releasing models with everything assembled and included. The included radios with RTR systems have been hit and miss, maybe more on the ‘miss’ side for some time.

Horizon Hobbies has several big brands under its umbrella at this point. This includes the Losi vehicle here, but notably, also Spektrum. This is why you’ll get a Spektrum radio and power system with most Horizon-brand RTR models these days (Arrma, Losi, Axial, and so on). While the common and more basic Spektrum SLT3 system is fine, the better one is the Spektrum DX3 with 6100AT AVC receiver – and that’s what comes with the Losi Super Baja Rey 2.0.

I like this system in particular because of two dials that make it so much easier to use than so many others. The first is an adjustable braking dial – turn it up for more aggressive braking. The second is a stability control dial, or steering gyro – turn that up to have the car counter-steer more responsively to keep the nose pointed forward. In a car like this, I’d suggest the former is quite important and the latter is probably best left turned mostly down. Experiment and see; it’s so easy to adjust on this radio. I’m a fan! (The marks and dust are because Metro Hobbies sent me a floor model without telling me. Disappointing, but not a big deal).

Losi SBR 2.0 Spektrum DX3 Radio

The Main Thing

This is what we’re here for: that epic, desert truck suspension and live rear axle. Check these pictures out! Look at how much range there is, especially over the rear axle. It’s plush, heavy-duty and epic. Of course, the rear suspension is mounted on trailing arms, and everything about the arms at both ends is heavy duty and well designed. There are hefty sway bars at each end and it looks great. Even just typing this, I’m wondering how I’ve managed to not drive this car yet. I’m busy, but too busy to drive this car? I’m selling myself on this thing just writing this.

The front end has plenty of travel as well and the body has a pleasing amount of roll. There’s bolstering around the chassis mounts and both ends are adjustable with alu thumb screws. Looks great, too.

Drive Line

Steel universals are found throughout the vehicle’s drive line. The rear shaft is a fibre-infused telescoping unit that attaches to the steel unis at each end. Given the crazy power this car can make (and we should talk about that in a moment, see below), you’d reasonably question if plastic will be up to the job on the rear end, in particular.

Well, there are steel drive shafts available on the after-market for this car, but having discussed this car with other owners, the consensus seems to be that it’s tough enough for the job. Certainly, there’s not a lot of flex in the parts, but rigidity is probably the more important element here. The glass element should be sufficient. We’ll see!

Losi SBR 2.0 Rear Shaft and Links

Wheels and Tires

BF Goodrich Mud Terrain T/A KM3 tires are clamped securely in Method Racing beadlock wheels on 17mm hex adapters. Side walls are firm but have some flexibility and the foams are also medium-hard. Of course, there are the two full size, functional spares on the rear of the vehicle, which is part of the magic of this interesting car.

Power System

Bigger numbers don’t necessarily mean bigger speed. With RC power systems, getting the voltage, motor kv (revolutions per volt), and gearing correct can be a balancing act. Typically, larger scale vehicles will run lower kv motors, favouring higher volts to achieve the torque and power required to move a heavy vehicle rapidly.

The SBR 2.0 runs a Spektrum Firma 160A 8S-capable ESC, powering a hefty (no, really) 5687 750kv motor. This is both a huge diameter and lengthy can – this motor is 56mm across and 87mm long.Batteries are loaded from the bottom of the vehicle, also helping to keep the weight low. It has a claimed top speed of around 50mph. Doesn’t that sound kind of uncomfortable! Fun, though!

Losi Super Baja Rey 2.0

How does it drive? Well, I can’t give you that quite yet. I’m looking forward to it, but I’ve been waiting to drive with a Traxxas UDR so we can compare them a bit. I might try to throw in an Arrma Mojave 6S as well, and then we can see which might be the best to get for your purposes. I’ll put that video here, when I make it. I can’t wait!

Read more here and buy your own Losi Super Baja Rey 2.0 here.

Losi SBR 2.0 Front LHS

Don’t Miss

Meanwhile, you might be interested in reading about the 10-car roundup we’re doing at the end of 2023 and into early 2024. There are ten short course and desert trucks in 1/10 and 1/8 scale from all the big names and some of the smaller ones. The list includes the new Tekno SCT410 2.0, the Losi Baja Rey 2.0, Arrma Mojave 4S as well as the Senton 3S BLX, and more. Check out the channel for more.

Craig Veness

Craig Veness

RC-TNT

Craig has been into radio control since the 90s and into RC crawling since about 2010, when a Losi MRC started the obsession! Now it's all rocks this and crawl that and upgrade all the things! ...You know how it is, right? Welcome home 🙂

A note on affiliate links: the Amazon links in the above article are affiliate links, which means we may be paid a small commission if you choose to click on them to make a purchase. As always, we make effort to ensure that no review is impacted by this – we still report on bugs and issues encountered during product testing, and our fixes or solutions if found. Thank you for reading and happy RC-ing!

Bezgar HP161S – A Confession

Bezgar HP161S – A Confession

Trouble In Paradise

The Bezgar HP161S is a 1/16 RTR Monster Truck. It’s a tiny little package of durable and speedy fun! Sounds like a slam-dunk video and article combo, right?

You’d think so! And yet, things have not gone to plan. And on that note, here’s a letter I’m overdue on sending to Bezgar…

Bezgar HP161S Water Jump

We Need To Talk

Dear Bezgar,

I have a confession. You sent me the Bezgar HP161S 1/16 Brushless RTR Monster Truck earlier in 2023. I was excited about it, as I’d really enjoyed the similar Rlaarlo XDKJ-005 and figured this might be something like that experience – which was very good, all told.

It arrived! I unboxed it, filmed it, then put it back in its box. All the data was on my laptop waiting for me to make the video. All I had to do was edit it and get it onto YouTube.

But I just… didn’t.

Instead, the mighty little monster truck just sat there in its box, waiting.

And waiting.

Weeks passed.

Bezgar HP161S Weight

A Problem

You see, after I first played with it, I just didn’t ‘get’ it. I didn’t enjoy running it on my rocky driveway, not at first. The little truck was bouncy on the oversized gravel and it inevitably flipped over a bunch. I couldn’t speed-run it on my street, as it felt uncontrollable at higher speeds.

I really wanted to like it, but I simply didn’t enjoy those first few sessions with it.

And so, in my typical ADHD fashion, I moved on to something else. Then onto the next shiny thing. And the next.

More weeks passed.

Bezgar HP161S with Body

Broken Promises

In the back of my mind, I knew I had to come back to the Bezgar HP161S. I had agreed with you that I would do it, and so much time had passed that I was really starting to feel quite bad about it.

I wanted to make a video that covered how I felt about the truck; a truck that you sent me at no charge for review purposes in particular – but I just didn’t know how to both honor your investment and maintain integrity with my viewers at the same time.

And so, it just sat in storage.

I kept making other videos, and the HP161S just waited, sitting in its box.

Waiting.

And waiting.

Until…

The Catalyst

Just last week, we’d had a bunch of rain. There was mud everywhere. My son was home and bored. And this kid has two settings when he’s playing with RC cars: it’s either off, or the throttle is pinned and he’s got the car in FULL SEND, no matter if it’s a crawler, a trail rig, a basher, a road car – pretty much anything in my extensive RC collection that he’s driven, he’s broken it somehow. He’s the ultimate torture test technician. (There’s probably another RC channel idea in there somewhere).

I didn’t have time to fix up another car for him and I knew I’d finished filming the Bezgar HP161S weeks ago (it’d been months by then but as usual, I’d lost track of time). So, I charged up a 2S battery and put the controller in his hands.

Bezgar HP161S for Kids

Bezgar HP161S Tested

LAUNCH! He punted that thing around our muddy yard. Over the jumps, even off the big ones we save for the 1/8 and 1/5 trucks like the Arrma Kraton and Traxxas X-Maxx. There was lots of face-plant and flat-back landings, all the tumble-wumbles, big hits, full throttle collisions, you name it. He was giggling away and after a few minutes I stopped what I was doing to watch him.

The little Bezgar HP161S was not missing a beat. It was taking the punishment – and I don’t know about you, but the engineer in me can’t bear to abuse my cars. That special check in the mind – mechanical sympathy, you may have heard it called – it just stops me from bashing something to oblivion.

But not so with my boy. Oh, no. He was PUNTING that thing off everything. And the plucky little truck just kept coming back for more! Hard landings on corner wheels and the links and A-arms just hung in there like champs.

The little truck Just. Kept. Going.

Bezgar HP161S Dirty

Eureka!

And in those few magical minutes of watching him dish out Kevin Talbot levels of punishment, I knew I finally had my ‘hook’ for the video. This thing was a tiny terror; it was nothing less than a micro X-Maxx. And I could now put together the kind of video that did this little rig proud.

And then I played with it some more and it grew on me. I discovered some little ways to make it go better, and before I knew it, I was having FUN! What do you know!

So, Bezgar, I’m truly sorry it took me so long to get this little truck into the spotlight. It didn’t deserve the wait, and you have been incredibly patient. You’ve built something truly special here and it might just be one of the toughest little trucks in my very, very crowded RC garage. Well done.

Here’s the video:

BTW, Happy Birthday

Well, happy 5th birthday, Bezgar! Hope your next year in business outshines the last! I’ll be cheering you on!

PS. You’ve just emailed me to thank me for taking so long with the car, getting to know it and for taking the review so seriously. In that case, maybe ignore the above. Let’s go with how serious I am about the car. That makes me look like the hero of this story. I like that much more!

Grab Yours!

For 10% Discount, Use Code: RC-TNT

Craig Veness

Craig Veness

RC-TNT

Craig has been into radio control since the 90s and into RC crawling since about 2010, when a Losi MRC started the obsession! Now it's all rocks this and crawl that and upgrade all the things! ...You know how it is, right? Welcome home 🙂

A note on affiliate links: we were provided with this car by the manufacturer for review purposes. The Amazon links in the above article are affiliate links, which means we may be paid a small commission if you choose to click on them to make a purchase. As always, we make effort to ensure that no review is impacted by this – we still report on bugs and issues encountered during product testing, and our fixes or solutions if found. Thank you for reading and happy RC-ing!

RadioLink RC8X: Your Next Upgrade?

RadioLink RC8X: Your Next Upgrade?

Available on Amazon

RadioLink Direct sells this on Amazon

What Came Before

We’re looking at the RadioLink RC8X radio system today, but first, I want to take a short wander back in time with you. The year was 1987 and I had my first hobby-grade radio-controlled buggy in my hands. The radio transmitter was one of those old Futaba dual stick arrangements – still in use today in much of the hobby, but not with cars and their ilk. The transmitter took 8x AA batteries and the receiver took 4x AAs, as well as the NiCad stick pack. It was a tedious affair and though it worked, it was clunky.

In the decades since, I’ve encountered a multitude of transmitters, each with its own quirks and features. I have my budget favorites and there are models I like and ones I don’t. But here’s the thing: there are only so many ways you can make a radio transmitter. People have a variety of ways they want to use one and if you’re in the after-market (as opposed to OEM, being supplied with RTR models these days), you have your work cut out for you: your product needs to be familiar and intuitive enough to use, but different in some way so it stands out and to look good doing so.

RadioLink RC8X Radio & Bag

Enter the Radiolink RC8X!

This radio system is something a little different to previous RC radio upgrades I’ve had. RadioLink sent me their new RC8X handset along with a few receivers to review – you may have noticed it in some of my videos recently (the speed run series and the Redcat Gen9 to name a few). I’m pleased to report that this is not just a new iteration of the same old stuff. This tricky little handset has some features that may surprise you – let’s take a look.

RadioLink RC8X Carry Bag

First Impressions

Straight out of the box attractive carry case, the RadioLink RC8X feels special. It isn’t pro-level briefcase special (keep an eye out for our FlySky NB-4 system review soon!), but that’s a different beast. No, the RC8X feels more like a utilitarian do-it-all model that I’m hoping might be my new go-to for a bunch of my models (I have over 100 in my garage at this point and keeping track of everything is a task!).

The handset’s sleek design is complemented by the 4.3-inch full-color IPS touch screen, framed in burnt-orange LED strips on each side of the base. Radiolink seems to have hit the mark in blending form with function and I really like how this one looks.

One thing that stands out immediately is the hulking ‘PS4’ button at the rear of the radio’s base, or foot. In my testing, I’ve bumped this button repeatedly, so I’ve had to disable it. The good news is this is one of just two negative things I have to say about this radio. More on that in a bit.

RadioLink RC8X Package Contents

A Screen That Does More

The RC8X’s display is nothing short of impressive. Boasting an 800*480 resolution, it promises a smooth screen refresh experience akin to mobile phones. The absence of any lag during fast scrolling is a testament to its capabilities.

And as a neat surprise for FPV fans, the screen doubles up as an FPV display – we’ll touch on that in our video, at the end of this article. It might seem gimmicky, but there are a couple of situations where having this feature is really going to be quite handy. Personally, I’m a fan and I’m going to miss this on other radios from now on!

RadioLink RC8X Screen

Customization: A Personal Touch

The system’s designers have outdone themselves with the customization options on the RadioLink RC8X. I have many different systems in my collection and customization is common. However, it’s often a clunky experience and the “limitless options!” from the sales copy often translates to a small choice of colors or layout changes.

I have been surprised at both how easy and how broad the customization is with the RC8X. If you’re like me, you don’t mind how it looks and sounds in stock form, as long as it’s functional. However, given making changes is so easy, you’ll probably be tempted to try it. From system themes to voice broadcasts, the transmitter can be tailored to your preferences. You can tweak background colors, font colors, and function buttons, and it’s easy!

RadioLink RC8X Customization

Voice Broadcast: Keeping You Informed

The voice broadcast feature is a noteworthy addition. It allows for alarms based on various parameters, including low transmitter voltage and low RSSI. These features are fairly standard.

Where the RC8X gets special is with its ability to customize the voice broadcast content. And I don’t just mean a little. I’ve browsed the file system on the removable mSDHC card and found you can completely redo the sounds for this thing. It’s filename-based, so if you were so inclined, you could fully redo the sounds for the RadioLink RC8X and have a radio uniquely your own. It’s pretty cool. The inclusion of a headphone jack ensures you’re always in the loop, even in loud environments.

RadioLink RC8X Complete Package

Performance Metrics

The RC8X promises a ground control distance of up to 600 meters, a testament to its FHSS spread spectrum and 67 channels. More is better here, though the radio must operate within a given band. Having a powerful computer driving the frequency hopping means agile interference-avoidance for maximum SNR (Signal to Noise Radio). This should also be helpful in hilly or otherwise convoluted/crowded environments, as lower frequencies may do better and the radio will adjust on the fly, automatically. We’re talking small improvements, but it all helps. 2.4GHz is already pretty good, but you should notice a difference with a powerful radio system and its various tricks to maintain a good signal.

RadioLink RC8X PS1

Response Time: Precision in Control

A response time of 3ms is close to the best in what’s currently available. Futaba, FlySky and Sanwa have this handset beat with 2ms to 2.8ms best measurements across different models – but I challenge you to notice the difference at 5ms or less. I can speak personally to the feel between +10ms and the faster handsets like the Futaba 4PK or Sanwa MT12 on the track, with a previous comparison I’ve done, but modern premium radios have their own implementations of maxing out response speed and the Radiolink RC8X is one of them. Notably, the consistent low speed is what’s important to track racers and historically, the Sanwa easily beats the Futaba 4PX/K models with consistently low latency. The new Flysky NB-4 and this RadioLink RC8X also show promise in low average speeds, where others have tried and failed in the past.

The way they usually achieve it is with some form of duplexing, at the cost of additional channels. Instead of having 8 active channels, for example, the RC8X will only allow you to have throttle and steering active when you’re at the highest speed. The FlySky NB-4 is similar in this regard. It’s a limitation of physics and what can be achieved with a single transmitter and receiver module, but I’m glad of the choice. Even with all the channels enabled, you still have a snappy system, while when you’re in a race environment you’ll only need throttle and steering anyway. Good compromise!

RadioLink RC8X Top-RHS

Telemetry: Data at Your Fingertips

The telemetry feature is a game-changer, offering real-time insights into model battery voltage, RSSI, and receiver voltage. With support for up to an 8S (33.6V) battery, you’re always equipped with the data you need for a safe RC experience.

I’ll repeat that: the receivers can accept up to an 8S battery directly connected to the voltage telemetry port to give power level data to the handset. Even my previous favorite FlySky radios don’t do that. I’ve always needed an expansion module to achieve this. Many people might overlook this seemingly minor feature, but for those wanting the simplest way to stay on top of battery levels in their models without having to add additional sensor module/s, this is a standout feature!

RadioLink RC8X 32GB mSDHC

Receivers: R8FG and R4FGM

This brings us to the RadioLink RC8X receivers that ship in the package. Helpfully, it actually includes two distinct receivers:

R8FG: This receiver comes with an integrated gyro, ensuring precise control. The support for high voltage servos further enhances its appeal.

R4FGM: Compact yet powerful, this receiver is designed for smaller RC models without compromising on reliability.

As covered above, I really appreciate that both of these receivers can handle high voltage servos and even gives you feedback on your model’s voltage – the built-in battery telemetry port handles up to 8S direct! Bananas!

If you’re into SBUS, the R8FG’s got you covered. It can output an SBUS signal, making it a breeze to connect.

But here’s the cool part: the RC8X isn’t just limited to the R8FG. It plays nice with a bunch of other receivers. There are these compact 4-channel ones, the R4FGM and R4F, which are perfect for smaller RC cars. Then you’ve got the 6-channel ones like R6FG and R6F, the 7-channel R7FG (which we used in the Rlaarlo Speed Run video series), and even the long-distance champs, R8EF and R8F, which are great for RC boats and possibly speed runs (as yet unexplored).

RadioLink R8FG Rx

Adaptability and Power Options

One of the standout features of the RC8X is its adaptability. The transmitter can be powered using various sources, including 8 AAA batteries, 2S-4S LiPo batteries, 6S Ni-MH batteries, or even a computer or mobile power bank via a Type-C cable. The universal JST connector ensures protection against reverse polarity connections.

Sounds good in theory, right? In practice, you’ll want to be prepared, as this leads into my criticisms of this system. Read on…

RadioLink RC8X USB-C

Drawbacks

I mentioned the PS4 button is a bit of a problem earlier in this little chat. I bumped it frequently when filming my various videos for RC-TNT, so I ended up disabling the button entirely. This is a minor annoyance with the design and one you may overlook unless you’re clumsy like I can be!

My other nitpick with this otherwise brilliant system is the radio’s default power configuration. It needs no less than 8x AAA batteries to work out of the box! In 2023, this is ridiculous. AA batteries at least I could understand, as their capacity makes their number more palatable, but to need this many AAA batteries in a power-hungry computer system like the RadioLink RC8X seems like a design oversight.

RadioLink RC8X Battery Compartment

Lemons to Lemonade

UPDATE: it’s come to my attention that if you buy this radio system from Radiolink Direct on Amazon, they appear to ship the radio with a 2S LiPO battery, which neatly solves this issue! Woohoo!

Otherwise, if yours comes with the 8x AAA holder, you could do one of a few things:

  • Suck it up and use rechargable NiMH AAA batteries. They’ll give you a few hours of life at least and hey, you can keep a second set on standby.
  • Remove the AAA battery case entirely and replace with a LiFE or LiPO battery. As long as it has the red JST plug and is 2S to 4S, it’ll work. I’d reocmmend a 2S 1200mAh LiFE or LiPO, as this will fit easily. I’m using a Turnigy Nanotech 1500mAh 2S battery and it fits. Just. This pair will safely fit, and will help keep you powered up with a ready spare.
  • 3D print a larger battery lid for the base of the radio and 3D print or buy a 2x 18650 battery holder with red JST plug (mind the polarity matches the radio’s labels). There are also 2S 18650 LiIon premade battery packs that will fit, as long as you have an extended lid printed for it.

The battery compartment is roughly (L) 92mm x (W) 53mm x (D) 13mm – a bit deeper in places – but if your battery is smaller than that, you should be right.

RadioLink RC8X PS4

Ergonomics and Design

Radiolink has paid attention to the ergonomic design of the RC8X. Features like adjustable trigger spring tension, threaded design for better grip, and a lanyard for weight balance showcase their commitment to user comfort. A notable design feature is the ability to reverse the installation direction of the wheel section, making it friendly for both left and right-handed users.

I also like that the wheel can be easily removed and replaced with a 3D printed alternative that comes with a built in thumb steer for one-handed operation. I understand RadioLink sells something like this also, if you’d prefer to get the real deal from the company.

RadioLink RC8X Radio Back

Conclusion

The Radiolink RC8X is more than just another transmitter in the market. It’s a blend of innovation, user-centric design, and performance. If you’re on the hunt for a transmitter that ticks all the boxes, the RC8X might just be the one you’ve been waiting for. Grab one here or read more on RadioLink’s website here.

RadioLink RC8X Radio Top

Available on Amazon

RadioLink Direct sells their products on Amazon – buy yours directly from them!

Craig Veness

Craig Veness

RC-TNT

Craig has been into radio control since the 90s and into RC crawling since about 2010, when a Losi MRC started the obsession! Now it's all rocks this and crawl that and upgrade all the things! ...You know how it is, right? Welcome home 🙂

A note on affiliate links: we were provided with this radio system by the manufacturer for review purposes. The Amazon links in the above article are affiliate links, which means we may be paid a small commission if you choose to click on them to make a purchase. As always, we make effort to ensure that no review is impacted by this – we still report on bugs and issues encountered during product testing, and our fixes or solutions if found. Thank you for reading and happy RC-ing!

Element RC Enduro SE Sendero Trail Truck

Element RC Enduro SE Sendero Trail Truck

It’s Enduro SE!

I’ve been calling it the Sendero SE, but it wasn’t until I went to write this article that I realised the truck is called the Enduro SE Sendero. Well, that makes sense, as the Enduro platform is the common layout you’ll find under all of Element RC’s current line of epic rock crawlers and trail trucks, current and retired: the Sendro HD, Gatekeeper, Ecto, Knightrunner, Bushido and now, the Enduro SE. (We’ve looked at ALL of these on the channel).

Available from AsiaTees or Amazon, this rig has been an interesting combination of budget and performance oriented decisions by Team Associated. This more budget-oriented release first hit the shelves in November 2022. Being in Australia, I tend to get new releases up to 6 months after that, and in this case, it was even longer. But it’s finally here and we’ve already had it on the rocks, so I am in a good position now to show you through this one. Let’s dig into what makes the Enduro SE (Sport Edition) a little different from all the other Enduro rigs before it!

Enduro SE Unboxed

Same, But a Little Bit Different

The Element RC Enduro SE Sendero is a trail truck that draws inspiration from the truck styling of the 80s and 90s. This isn’t new to this class of RC vehicle, but there’s a trick to this model. You might expect the closest comparison to be to the Sendero HD, given the name is common to both. (You can find our review of the Sendro HD here, and our video series here).

However, the reality is something quite unexpected. As you’ll see in the video at the end of this article, I found the Enduro SE to be most closely similar to the Axial SCX10 II Deadbolt! We’ll have to do a video comparison on those two rigs as they’re similar in price, setup and performance. That’ll be interesting!

Enduro SE Complete Underside

Enduro SE Sendero Body

Unlike the Sendero HD before it, the Enduro SE Sendero boasts a one-piece polycarbonate body. The tube frame and tray are replaced with a drop bed and bumper, which is both durable and aesthetically pleasing. Additionally, underneath both ends of the body you’ll find adjustable bumper mounts with integrated winch line routing for the front.

Much firmer than the bumper on the Sendero HD, the Enduro SE features high-clearance front and rear bumpers that are still flexible, though clearly tough. The same, adjustable-width rock sliders finish out the sides, including slots for the polycarbone body sills to locate snugly. As with the Sendero HD, it looks like there’s room to lower the body a little, and to bring the bumpers in a bit. Both these things will marginally help the car on rock obstacles.

Transmission

New to this Enduro family member is the StealthXF gearbox. It’s a front-facing motor design but still centrally mounted on the skid plate. In a break from other Enduro rigs (all of which have run the StealthX transmission, to date), the Enduro SE gets no overdrive out of the box.

Further, whilst all other Enduro RTRs that I’ve looked at in recent years have come with 5.7% overdrive built-in AND an extra 11.83% overdrive gear set you can install yourself, the Enduro SE comes with no additional gears. If you want overdrive in this one, you’ll have to raid your parts box from other Enduro cars if you’re lucky enough to have another already, or else you’ll need to buy the gears separately.

Enduro SE Motor and Gearbox

Drive Train Upgrades

In my opinion: if you do decide to shell out for overdrive gears, go for the 11.83% set – the car is lightweight and not fast, so you won’t feel the shortcomings of having overdrive on the trails, and then when you’re crawling, you’ll really appreciate that more positive steering influence.

Pinion and spur are 48-pitch and the system works well. It’ll tolerate brushless power if you don’t go overboard. The HobbyWing Fusion SE 1800kv would be my pick for this rig, while the higher-power Hobbywing Fusion Pro 2300kv will also give the Enduro SE some hustle on the trails!

Enduro SE Chassis Top-Down

Links & Suspension

The Enduro SE Sendero is designed with heavy-duty 5mm diameter steel steering links and aluminum steering plates. It also features optimized ball cups and links that allow for more fluid axle articulation. The suspension system includes threaded shock bodies, mini springs, and a 90mm shock length. The adjustable rear shock mount positions provide flexibility for tuning both the wheelbase and shock angles.

The links are the same spaghetti-type, bendy plastic as found under the Axial Deadbolt. As you’ll see me demonstrate in the video below (it’ll post a few days after this article is published), the links allow considerable amount of lateral movement if you force the axles forward or back. This, combined with the bushings (see next section) really speaks to the more budget nature of this rig. Thankfully, I think these are the two most glaring ‘shortfalls’ of this rig – though not every situation will mean soft links and bushings are a bad thing. The truck is certainly light weight, which contributes greatly to its ability on the rocks! More on that in the video below.

Enduro SE Axles

The truck comes with updated axles, including universal front drive axles and a one-piece rear axle design. The front axle is splined and offers adjustable caster. The gearing system of the Enduro SE Sendero is robust, featuring metal ring and pinion gears, a machined steel top shaft, and a steel servo horn. I’m not too hot on the faux plastic disc brakes and calipers but it’s a tidy setup overall.

They’re straight axles, no portals here! The steering config is servo on axle, which is less scale but generally better performing than CMS (Chassis Mounted Servo) config. It’s a solid setup, I like it.

Bushings, Not Bearings

Be aware that the Enduro SE Sendero ships with 24 bushings rather than the ball bearings we’re used to seeing on the Enduro platform. Before you lose your mind on this point, remember this is a slow vehicle and one that’s likely to encounter mud and water.

The benefit of ball bearings over bushings is lowering resistance, giving you that sliver of extra speed on the racetrack or drag strip. In a crawler, your motor will draw marginally (and I mean marginally) more power to overcome the added resistance from bushings, but I double-dog-dare you to notice the difference. Bushings are low maintenance, too – they can get muddy and wet, even salty, and they won’t rust out and seize, so that’s your silver lining!

Enduro SE Pinseeker Sidewall

Wheels & Tires

The wheels of the Enduro SE Sendero have a 12.8″ wheelbase and are equipped with 12mm wheel hexes. The wheels are plastic and a beadlock design. Shiny black and attractive, these 1.9” units are well-suited to the rig.

The tires are new, and very, very Element. They’re narrow, just like those found on the Deadbolt, incidentally, and they have a repeating Element RC logo all around the center of the treads. They’re a 4.7” size, come with internal foams and the rubber compound is pleasingly soft. Under load on the rocks, the side walls are soft enough to deform, but firm enough to help the rig maintain traction and direction. They’re cheap, on a cheaper rig, but I like ‘em so far!

Enduro SE Pinseeker Tire Tread

Electronics

The Enduro SE Sendero is powered by a Reedy 16-turn, 5-slow motor, same as the rest of the Enduro family. The motor is mounted to an aluminum plate, as the backbone of the transmission. As with all the others, it is powered by the same Reedy ESC, too. The electronics are completely adequate for this machine, though they have their limits. Great low-speed control is to be expected from this combo, though it’s low on power, even if you gear it up. It should last a good long time though and it’s a great match to the StealthXF transmission, though there is obvious strain if you run on 3S (12V) power in a heavy crawling scenario – motor and ESC can get properly hot.

The receiver is housed in an enclosed box, while the ESC tray ensures clean wiring. The truck also comes with an additional (wider) battery box. The servo is the same Reedy 1523MG waterproof, metal gear unit found in all the other current Enduro vehicles too. As with the power system, this is quite adequate for this vehicle and should endure even heavy crawling sessions.

Enduro SE Radio

In a departure from the XP130 system that has shipped with all previous Enduro models, Element RC has chosen instead to go with FlySky. The truck comes with a 4-channel FlySky FS-G4P radio system, though it only uses two of the channels. The two unused channels are a three-position switch and a momentary-press button. Nice!

I like FlySky and have many of their radios. Maybe 20 – and that’s just the trasmitters. I’m well familiar with how their AFHDS protocols run (and there are 3 versions of this, plus ANT, in the FlySky range) and all their systems are solid. I have several of this particular radio, which uses the ANT protocol (hackers rejoice). It’s solid, fast enough and comes with numerous adjustments as you’d expect from any modern 2.4G radio. It’s a good pairing with the truck. It takes 4x AA batteries and is comfy in the hand, plastic wheel notwithstanding.

In The Box

There are two versions of the Enduro SE Sendero, but both have the same vehicle and radio. The standard version gives you the truck, radio, body mounts, shock pieces for full coil-overs if you change to that, a spare body cross member and a wider battery tray. There’s a manual, sticker sheet, SCX480X ESC manual and FlySky radio system manual. Lastly, some basic allen keys are included, to fit the rig. The other version is the LiPo Combo, which includes a compact balance charge and LiPo battery.

Both versions give you the now-standard Element RC box which doubles as a parking garage if you reverse the box – and its different for every model from the Enduro range. A bit of fun!

So, How’s It Drive?

The big question! This is best covered in our video review, which incorporates a rock test and copious opinions on the vehicle. It will be posted within a few days of this article being published. Catch you there!

Enduro SE in Late Winter
p

Our Test Course

If you’re not familiar with how we test RC rock crawlers, we have a course that challenges any 4x4 RC crawler in many ways:

  • Approach and departure angle: these  are challenged on Problems 2 and 3;
  • Side-hill ability: tested on Problems 1, 3 and 5;
  • Breakover (skid clearance): tested on Problems 4 and 6;
  •  Suspension articulation and centre of gravity: challenged on problems 2 and 5; and lastly,
  • A punishing ascent on problem 6 tests all of balance, break-over, articulation, tire traction and approach and departure angles.

Put together, we have a gnarly, challenging set of problems that challenge all crawlers. If a rig can conquer 3 or more of them, chances are you have a reasonably high-performance rock crawler. There are some machines that can claim all success on all six in stock form – but not many!

As you've seen in the video above, our Remo Hobby 10275 only managed to finish Problem 1. Still, one is better than none, right?

Get One!

Check the manufacturer page for specific details if you’re after more: https://www.associatedelectrics.com/element/cars_and_trucks/Enduro/SE_Sendero/

Buy an Element RC Enduro SE Sendero Trail Truck RTR from AsiaTees or Amazon. These are affiliate links that help support RC-TNT at no extra cost to you. Thank you for using them, if you do so!

Enduro SE Rock Crawl Stance
Craig Veness

Craig Veness

RC-TNT

Craig has been into radio control since the 90s and into RC crawling since about 2010, when a Losi MRC started the obsession! Now it's all rocks this and crawl that and upgrade all the things! ...You know how it is, right? Welcome home 🙂

A note on affiliate links: we were provided with this car by the manufacturer for review purposes. The Amazon and AsiaTees links in the above article are affiliate links, which means we may be paid a small commission if you choose to click on them to make a purchase. As always, we make effort to ensure that no review is impacted by this – we still report on bugs and issues encountered during product testing, and our fixes or solutions if found. Thank you for reading and happy RC-ing!

Losi Promoto-MX: the Ultimate RC Motocross Experience

Losi Promoto-MX: the Ultimate RC Motocross Experience

New on Two Wheels

The world of RC vehicles is vast and varied, with models designed to replicate every type of real-world vehicle, from cars and trucks to planes and boats. But there’s one type of vehicle that’s been largely overlooked in the RC world until now: the motocross bike. Enter the Losi Promoto-MX, a groundbreaking RC motocross model that’s set to create a new niche in off-road RC.

Horizon Hobby launched this bike under the Losi brand at the start of July 2023. It caused quite a stir, as while bikes have been around for some years now, durability or performance or realism or size have all been challenges to the existing models from other manufacturers. To see one that is apparently stable off-road, with a realistic and bendy rider, whilst looking great and pulling stunts – well, that’s something new! Then consider the size of the thing and you have a compelling new toy to seriously consider!

Losi Promoto-MX Green Stand

Unprecedented Realism

The Losi Promoto-MX isn’t just another RC motorcycle. There are some good models around already, though they’re mainly on-road. The Losi is something different. It’s a meticulously designed, ultra-realistic 1/4 scale motocross bike that captures the thrill of riding a full-size bike with unprecedented accuracy – even if the rider’s rear doesn’t ever leave the saddle!

It’s clear the Losi team has gone above and beyond to reproduce true dirt bike performance. The realism of the Promoto-MX runs deeper than its faithfully detailed looks, too. Consider the narrow frame, the rider with authentic riding gear, and the officially licensed graphics. More important is the accurate performance, accomplished through a unique hybrid of mechanical and electronic technology that appears to let you run an RC bike like never before. More on that below; it is really quite impressive and it’s exciting to share if you’re new to this model!

Losi Promoto-MX Options

Cutting-Edge Technology

Losi teamed up with the engineers at Spektrum RC to reinvent stabilization technologies for a surface vehicle that requires balance to work. The Spektrum MS6X continuously calculates the bike’s positioning relative to gravity, taking into account the inputs from the transmitter. There’s a 2700kv motor driving a 22,000rpm gyroscopic wheel as part of this system. The MS6X feeds outputs to gyro, throttle and steering that give realistic and predictable handling to the ‘driver’ at the radio. The more I think about what they’ve done here, the more impressed I am – this thing is a marvel of modern technology.

But then, it gets better: stopping distance was cut in half by complimenting the traditional rear-wheel braking (ESC+motor) with a cable-driven front disc & caliper system. Just as on a real bike, stopping with both wheels is far superior to just the rear wheel, and marginally better than just using the front. (Of course, you can get lost in the techincal side of motorcycle handling and which brake to use when, but in an RC model, we don’t have to get so sidetracked!) This new technology works behind the scenes to give the Promoto-MX performance superior to any previous RC motorcycle.

Durability and Protection

Knowing the Promoto-MX would exceed eight pounds, the Losi team over-engineered critical areas to give the bike the extra support needed to withstand hard-hitting dirt bike action. The innovative front crash structure is rigid during normal running, but absorbs front impacts by compressing until the front tire bottoms into the chassis frame. That protects the front fork tubes from bending, keeping them safe and true. Included skid plates guard critical components from rocks and debris, and a twin aluminum plate chassis shields all of the bike’s electronics.

Losi Promoto-MX Disc Brake

Suspension Like No Other

No other RC product on the market has a suspension package like the Promoto-MX. Losi studied the suspension geometry and technology of full-size motorcycles to give it the same handling characteristics. The front suspension takes a unique approach to RC shocks with a front fork and internal dampener and spring. It’s adjustable, rebuildable, and looks like the real deal. The Promoto-MX also has a rising rate rear suspension, just like a real motorcycle. It starts soft around ride height but stiffens as the shock goes deeper into its travel, keeping the bike from bottoming out on flat landings.

Losi Promoto-MX Red Air

Losi Promoto-MX Powertrain

The heart of the Promoto-MX powertrain is a robust Spektrum Smart Brushless System, featuring a 3800Kv 4-pole brushless motor and 85A Smart ESC. This is a sensored system that will get you moving out of the gate hot, with enough torque to clear large triples and hit 40+ mph top speeds on a 2S LiPo battery. The durable drivetrain is true to scale, with chain drive that lets your rear tire rip whenever you’re ready to send it!

Losi Promoto-MX Green Tank

Realism in a Motorcycle

The Losi Promoto-MX RC motorcycle sets itself apart from every other remote control motorcycle and dirt bike with its scale details, authentic control, and realistic powertrain with disc brakes and chain drive. The gyroscopic force of the flywheel partnered with the new MS6X stabilizing technology from Spektrum deliver the stability of anything on two wheels, all in a 1:4 scale RC dirt bike package.

Something that maybe wasn’t practical to produce at scale until recent years, the Promoto-MX features a firm but flexible model human rider. The head jiggles over the bumps, there’s a bum on the saddle and the protective gear matches the smart livery of the bike, in all three colorful designs. The only thing you’ll miss seeing is the rider standing on the pegs when the going gets rough or the air gets big. Perhaps that’s one area modders can work on as this niche becomes more established. Today more than ever before, the potential for such a mod is there. We have the technology! …Probably!

Losi Promoto-MX Red Bike Stand

Mastering RC Motocross

Maneuvering a motorcross bike around obstacles, carving precise turns on the dirt or popping wheelies over berms are challenging enough on a real bike. When you consider that many RC cars are basically just suspension, steering and motor in a chassis, and then what is involved when you cut the number of wheels in half, making a stable and drivable model seems like a tall order. We know that keeping balance is easy enough for a bike, as long as that rear wheel is spinning. But what about stability in turns and in the air? The Losi Promoto-MX RC motorcycle has the stability you need to perform those stunts and tackle the tight turns thanks to an onboard gyro – but it doesn’t do everything, and has been designed in a way to be complimentary to the drive whilst still leaving enough challenge on the table for it to stay interesting! Working to improve your control and adding new skills to your repertoire should keep you coming back to the bike for more!

Losi Promoto-MX Top-down

Losi Promoto MX Specs

Dimensions

  • Model Scale: 1/4
  • Ground Clearance: 2.9 in (73mm)
  • Product Length: 20.2″ (513 mm)
  • Product Width: 10.8″ (274 mm)
  • Product Height: 17.3″ (439 mm)
  • Product Weight: 123.5oz (3500g)


Power

  • Battery: Sold Separately (or in bundle)
  • Connector Type: IC5


Motor & Gears

  • Drivetrain: 1WD
  • Motor Size: 540
  • Motor Type: 3800kv ‘Smart Brushless’ System
  • Final Drive Ratio: 12.0:1
  • Internal Gear Ratio: 4.8:1
  • Spur Gear: 50T
  • Pinion: 20T
  • Ball Bearings: Full Ball Bearings
  • Gear Pitch: 32P


Wheels & Suspension

  • Suspension: Front Fork, Rising Rate Rear Suspension
  • Shock Type: 16mm Big Bore Aluminum Shock
  • Wheel Width: Front – 1.1 in (28mm), Rear – 1.4 in (36.3mm)
  • Tire Compound: 65S
  • Front Brakes: Cable-Driven Piston/Caliper/Rotor
  • Rear Brakes: Motor Braking
  • Tire Tread: Dunlop Geomax MX53


Chassis & Tech

  • Chassis: 3mm Aluminum Plate
  • Body: Color Molded Panels with Wrap Graphics
  • Speed Control: Included
  • Charger: Sold Separately
  • Receiver: Included
  • Radio: Included
  • Technology: AVC and SMART, MS6X
  • Power Type: Electric
  • Servos: Included
Losi Promoto-MX Red Rider

Coming Soon!

The Losi Promoto-MX will be a game-changer in the world of off-road RC. It seems like one of those products that creates its own niche of vehicle upon release, in the same way the Axial SCX6 did, or the Traxxas TRX6, for example. Its unique design, innovative features, and high-performance capabilities make it a must-have for any RC enthusiast. I understand this model will be broadly available for sale at the end of August 2023. Whether you’re a seasoned pro or a beginner, the Promoto-MX is sure to provide hours of thrilling off-road racing action. Snap one up when they’re out – I know I will!


Buy here: https://www.horizonhobby.com/losi-promoto-mx-rc-motorcycle/

Photo credit: HorizonHobby.com

Losi Promoto-MX Red & Helmet
Craig Veness

Craig Veness

RC-TNT

Craig has been into radio control since the 90s and into RC crawling since about 2010, when a Losi MRC started the obsession! Now it's all rocks this and crawl that and upgrade all the things! ...You know how it is, right? Welcome home 🙂

Redcat Gen9 Scale Trail Truck

Redcat Gen9 Scale Trail Truck

​A Detailed Look at Redcat’s Latest

The Redcat Gen9 is the long-anticipated successor to the Gen8 V2. We had to wait a while in Australia to get it, but now it’s finally here! This new model is more than just a Gen8 V2 with a different body. It’s a whole new beast, sporting a new Scout model body and a host of updated features underneath. Let’s dive in and see what makes the Gen9 a worthy addition to the Redcat Racing lineup.

My favourite global hobby store, AsiaTees, sells both the blue and gray variant of this lovely new rig. And on Amazon, TREAL already has a bunch of shiny new goodies for it.

Redcat Gen9

What’s New with the Gen9?

The first thing you’ll notice about the Gen9 is its new body, modelled after the International Scout 800A. This model is slightly smaller than the Scout II, which allowed Redcat to tweak the front and rear bumper setups and enhance the already impressive approach angle performance of the Gen8. But the new body is just the tip of the iceberg.

The Gen9 also boasts a two-speed transmission, V3 portal axles, new tires (that look suspiciously close to the tread on the Marksman we reviewed last year), beadlock wheels, and an entirely new body mounting system, not seen on any other rigs to date. There’s an interior now, too – a big jump over the previous models in the series. If you’re a fan of the Gen8, you’ll find many familiar parts in the Gen9. Even as a Gen8 V2 owner myself, there are plenty of new features or updates to make the Gen9 a worthwhile investment.

New Gen9 Transmission

A Closer Look at the Gen9 Body

Redcat has upped the ante with the design and construction of the Gen9 body, thanks to their experience with their R/C lowrider lineup. The Gen9 International Scout 800A body is a multi-part piece that offers a detailed interior and exterior with ample room for customization. The open-cage design provides an excellent view of the interior, which includes a steering wheel, shift levers, door handles, and pedals. The only other trail rig that offers this level of scale detail is the SCX10 III Early Ford Bronco and some of the Cross RC models, such as the EMO XT4 (which we have here but it’s unbuilt – must get around to that one!).

The exterior of the Gen9 also features scale details, but they may not be as durable as you’d like. Side mirrors and door handles add visual interest to the body, but they may not withstand rough handling. Our unit has arrived intact, but I’ve read of numerous others who’ve received broken mirrors or door handles out of the box. Thankfully, Redcat includes a few extra parts in case you need them. I’d suggest keeping the mirrors aside until you get your rougher trail driving done! (Or look at hinged or rubber alternatives, like this handy 5-pack).

Redcat Gen9 Hinged Body

Lights and Colors

There are light buckets for 2x white LEDs on each side up front, and 1x red and 1x white reverse LED on each side of the rear. The side signals at front and rear of the body are stickers only. But, there are also two light buckets behind the dash! I’ve just gotta work out how to open it all up – it isn’t obvious and the manual gives no clues. I’ll cover this in a future video and/or article here on rc-tnt.com.

The Gen9 body comes in two color options: Metallic Blue and Graphite. Both are eye-catching, and Redcat includes two decal sheets so you can personalize your rig right out of the box. There aren’t instructions included but the box art gives you some idea of how you might go about it. You could also image-search the web for ‘IH Scout II’ for some inspiration. The body mounting system has also been redesigned, making it easier to access the internals of the rig. Two swivel latches secure the front of the body, and releasing them allows the body to be tipped toward the rear and removed from the chassis. Some have noted the front swivel pins can get loose with driving, but ours have been firm so far!

Redcat Gen9 Installing Lights

Under the Hood: The Gen9 Chassis

At first glance, the Gen9 and Gen8 chasses may look similar. Both feature a traditional H-ladder setup with full fenders and sideboards. The motor and transmission are in about the same spot. But a closer look reveals a small shift servo for the two-speed transmission and rock light ports on top of every inner fender. The portal axles have also been adjusted to improve durability, tracking, and steering performance. There’s a new servo, too! More on that in a moment.

These updates may not be visually striking, but they significantly impact the Gen9’s driving experience. The truck’s weight is certainly hefty for a ready-to-run (RTR) model. It’s heavy, at about 4kg, but the weight distribution is reasonably low and centered. The car is a little roll-over happy, but it’s not a chronic issue. That is, until you start making turns in 2nd gear! That’s another story.

The most significant performance change between the Gen9 and its predecessor is the two-speed transmission. The first gear is similar to the standard gearing of the Gen8, which is great for crawling but leaves something to be desired for trail use. This is a big point for the Gen9 over the Gen8, as second gear offers a fun, faster than walking speed experience. This feature is great for trail enthusiasts or those who want to let loose occasionally. Just don’t get carried away or you’ll be buying new side mirrors!

Redcat Gen9 Chassis

Redcat Gen9 Wheels and Tires

The Gen9’s tire choice is another departure from the Gen8. The Redcat team chose a 1.9″ version of the Interco Super Swamper SS M16, and I’ve just gone and looked – yep, it is the same tire found on their 1/8-scale TC8 Marksman, but in 1.9 instead of 2.2. This tire offers reasonable traction for both crawling and normal trail use. The wheels have also been updated with a faux outer beadlock ring for added scale. The actual bead locking is achieved from the rear of the wheels.

The tires of the Gen8 were fairly poor. We did a big tire test in 2021 that covered the Swampers from the Gen8 and they came up poorly overall. We do have an upcoming ‘biggest on YouTube’ tire test this year that’ll test more tires than ever before in one series and we’ll include this set in that test for reference. I’ll update this article with a link when it’s done.

Redcat Gen9 Tires

The Gen9’s Radio System

DumboRC has been making its way into many RTR configurations over 2022 and 2023. It’s good to see Redcat jump onto this as well. The Gen8 V2 came with the AFHDS protocol of the older FlySky system, which made it inconvenient for binding to newer radios. Now that DumboRC is commonplace, there’s a heap of flexibility out of box with this system.

You not only get the 5-ch receiver with the Gen9, but it’s the light-control variant as well, with an entirely separate, dedicated row of pins just for LEDs in the car. On the transmitter, only three channels are active in the default configuration. You can easily add a fourth and there’s even a Channel 5 dial under the cover of the radio. I’m unsure if this works yet, but when I get to testing it, I’ll update the article (yep, Ch5 is a dial-controlled channel with full functionality). The third channel controls the two-speed transmission servo via the left blue button on top of the unit. The two auxiliary channel buttons are easy to find and use, and they light up when activated, so you can easily tell what gear you’re in. Good!

Redcat Gen9 DumboRC

Redcat Gen9 Moving Parts

Portal axles grant clearance without hurting center of gravity too much and the metal diff plates are a nice touch. If construction and materials are at least as good as the Gen8 V2, then this drive train will be a solid and reliable performer.

There’s finally a better servo for steering than Redcat has done before – see the woeful unit on the Marksman, for example. They’ve been underwhelming for a few years now. To finally see a metal geared, metal cased, waterproof and 8.4v capable unit is awesome. It even gets to 42kg/cm of torque at 8.4v – what a turnaround from Redcat’s previous fare!

Drive shafts are plastic but tough. Axle components are also solid and the stainless steel links and ball ends are stainless steel. It’s a decent package all round, especially given the price. Even if this rig was $449, this would be a positive review of this vehicle. But the model is surprisingly good for its RRP of just $399 (and selling for less from some dealers).

Redcat Gen9 Undercarriage

Crawling and Trail Performance

The Gen9 shines when it hits the trail. The two-speed transmission is a standout feature, as the Gen8 was either fast and bad at crawling or slow but frustrating on the trail. The simple addition of the 2-speed is a winner. The first gear is perfect for smooth, low-speed crawling, while the second gear lets the rig move at impressive speeds. Despite its weight, this rig can really move.

When it comes to crawling performance, the Gen9 is excellent. After the Gen8 V2 was capable but not exceptional out of the box, the Gen9 has been a real surprise. I’d put it nearly on the level of the TRX4 Sport. The 1.9″ Interco SS M16 tires have an aggressive tread pattern and a high grip compound, allowing the rig to navigate obstacles with ease, even in challenging conditions. They’re not the all-rounders of the Traxxas Canyon Trails, but they’re a real improvement over the Gen8 V2’s tires. (See our Gen8 V2 review here). For more on performance testing, see our video (posted at the end of the article once it releases).

Redcat Gen9 Interior

Final Thoughts on the Gen9

The Redcat Gen9 is an impressive machine at an impressive price. For USD$399.99, you get a capable crawler and trail truck with features typically found in higher-priced models. It’s a great 1/10-scale rig for outdoor driving, whether in your yard or on the trail. With plenty of room for customization, the Gen9 offers solid performance and stunning visuals. That’s a win-win in our book.

For more information about the Redcat Gen9 International Scout 800A, see https://www.redcatracing.com/products/gen9. Get yours here.

Redcat Gen9 Top-Down
Craig Veness

Craig Veness

RC-TNT

Craig has been into radio control since the 90s and into RC crawling since about 2010, when a Losi MRC started the obsession! Now it's all rocks this and crawl that and upgrade all the things! ...You know how it is, right? Welcome home 🙂

A note on affiliate links: the Amazon and AsiaTees links in the above article are affiliate links, which means we may be paid a small commission if you choose to click on them to make a purchase. As always, we make effort to ensure that no review is impacted by this – we still report on bugs and issues encountered during product testing, and our fixes or solutions if found. Thank you for reading and happy RC-ing!

MJX RC Hyper Go: Pocket Rocket!

MJX RC Hyper Go: Pocket Rocket!

Big Speed, Tiny Package

Meet the MJX RC Hyper Go 1/14 Brushless RC Car, a compact yet hefty RC car that packs a surprising amount of discrete tech into a small package. No all-in-one modules here, this is a true hobby-grade vehicle. I’ll try to give you an understanding of the car’s features, performance, and value for money. On paper, it’s impressive. Let’s see if that apparent value is all it appears!

MJX Hyper Go Dimensions

MJX Hyper Go Unboxing

The MJX RC Hyper Go comes in a well-packed box that includes the car itself, a set of off-road tires, a set of drift tires, a 1.5A USB charger, some spare body pins, and a set of stiffer springs. There’s a manual with exploded-parts diagrams, too.

Depending on the configuration you buy, there may also be one or two LiIon 2S 2000mAh batteries included, too. (More on batteries below, but it takes 2S and 3S and there’s a standard Dean’s / T-connector on the ESC). It’s a solid package of goodies!

MJX Hyper Go Box Contents

Radio Transmitter

The radio that comes with the MJX Hyper Go is identical to the one provided with the Bezgar HP 161 (review coming soon). It features a Function button that controls the car’s lights, cycling through three different modes including off. The functions are all on with flashing red and blues in the grill and red brake/reverse lights; and all flashing up front and solid plus braking in rear. I didn’t like the red and blue flashing lights in the grill at first, but after driving it around a bit, I found it growing on me – and that’s saying something, if you know my usual reserved tastes on ‘loud’ things!

Note, the transmitter has a slight delay on the throttle inputs, which might take some getting used to. Once you’re driving, you don’t feel it, but from stopped, there’s a few hundred millisecond delay before you get a response. Thankfully, the components are all discrete (or standalone), and are thus replaceable. Even a cheap upgrade like a DumboRC 4-channel system (such as this X4 system here) will solve this delay issue and also give you better radio range, both without losing the light control. A FlySky GT5 would also be worth considering – probably my favourite premium-budget radio system.

Chassis

The 6061 aluminum alloy chassis of the Hyper Go is robust and well-designed. I observed a lot of triangles in the frame supports for added strength. It’s attractive and quite rigid, but doesn’t feel fragile. There’s some weight to it!

There’s space for the separate receiver, a 2845 3700kv brushless motor, servo, and a 45 amp brushless ESC. The car also comes with a clear, polycarbonate cover that allows the car to breathe while keeping (most) debris out. It’s a good layout that leaves room for upgrades and still fits the shorter-style 2S and 3S batteries that are readily available. You might consider these.

Battery & Motor

The Hyper Go comes with a lithium-ion battery. It’s a 2x 18650 2000mAh 3.7v pack that delivers 7.4v and is probably 10-15C. This will serve, but LiPO batteries will be better. We tested with both a 2S and a 3S Angry Snail pack, which were supplied by the company for review, and while cheaper cells they were ample for this car. You can find both of those variants here, if you need a few.  

The brushless motor is a peppy unit and is beautifully paired with this car’s size and weight. While the box says 3900kv, ours came with a 3700kv unit. This lower KV means better acceleration and is easier on the battery, at the cost of top speed. For a car this size, it’s a good trade-off and I’d think 3500kv to 3800kv would be about perfect. They’ve got it right for this one.

The car is 2s and 3s compatible, and it’s great to see fans on both the motor and the 45A ESC for ample cooling.

MJX Hyper Go ESC & Receiver

Drivetrain & Suspension

The drivetrain of the Hyper Go is simple but effective, with a motor, pinion and spur gear supported securely in bearings and mounts. There’s no slipper, no central diff, just an open diff at each end. It’s well suited to drift and bashing, though you might consider adding some stiff silicone oil or putty to the front diff for less understeer.

On asphalt, the car had a tendency to squat in the rear, lifting the inside front wheel on many corners and subsequently spinning out, despite the gyro being set to the recommended 75%. Out of the box, the suspension felt stiffer in the front than the rear, so I added gradual preload to the rear all the way up to 80% before giving up and fitting stiffer rear springs. Thankfully, those springs were included in the box with the car, so this helped – but did not completely fix – the squat and spin-out issue.

Sway bars would help here too, but I can’t see that they’re available for this model. You might have more luck – I searched MJX’s upgrades and spares page, but possibly sway bars have since been added. If you’re considering this car, assume you can’t get sway bars for now and set expectations accordingly.

MJX Hyper Go Drivetrain

Suspension Tuning

The suspension of the Hyper Go can be tuned to your liking, within limits. Here’s what you can change:

  • Springs, either soft or medium. Soft come mounted on the car, while medium firmness can be replaced on all corners in a few minutes with just a few screw turns.
  • Preload adjustment for ride height, which I’d suggest loading in the rear and keeping unloaded up front. Test on your terrain and see how you go with it.
  • Shock oil – less, more, thicker, thinner. It’s good out of the box, but you can slow them down or speed them up (slow in rear, faster in front, for example) if you wanted to fiddle some more with tuning.
  • And lastly, toe on the front wheels – there’s minimal tuning with an internal grub screw in the turnbuckles. There’s 1.5 to 2mm toe you can vary, and they come fairly aggressively wide out of the box, which is good for rough terrain and drifting. Speed runners will want to true the toe to a parallel setting.

Body & Lighting

The body of the Hyper Go is attractive and well-constructed, with a lead strip on the back and focused headlights at the front. The car also features flashing police-style lights, which can be controlled via the Function button on the transmitter.

Light control module and wiring is tucked up inside the body with attractive covers and white tape. Our tape was peeling off a little, but pressing back down was enough to keep things in place. The lights are bright, attractive and add to the fun. I’m a fan.

MJX Hyper Go Under Shell

Speed & Range Test

The Hyper Go is a speedy little goer, reaching a top speed of 61 km/h on 3s. This gives a likely top speed on 2s of 40 to 45 km/h. The car’s gyro helps with stability, especially at higher speeds.

Be aware that the radio range topped out at about 50m, or about 164ft. Not huge, though thankfully the car is small too, so this won’t be a problem unless you’re trying to do a speed run. (You can see how this went in our testing in the video review, at the end of this article).

MJX Hyper Go Car & Radio

Vehicle Detail

The Hyper Go is a solid car, made to a price but without compromising on quality. It’s robust where it needs to be, and the tight body post holes ensure the body doesn’t rattle around during high-speed runs.

There’s an attractive frame stiffener that runs from shock tower to shock tower. The servo is a full-sized 17g unit. There’s minimal adjustment of the geometry but the turnbuckles to allow minimal toe adjustment up front. Spare parts are available here.

MJX Hyper Go Top-Down

Drift Tires

The Hyper Go comes with a set of hard plastic drift tires. While they might not appeal to everyone, they do offer a unique driving experience, especially on a small, tight track. I wasn’t sure what I’d think of them but after running them on a 3S battery, oh boy – they are fun! I felt a bit silly at first, just spinning this thing and trying to drive as if on ice, but it grew on me and I keep wanting to drive it more now!

You’ll get bored of them eventually, but then you’ll be ready to try the Off-Road Tires for the next level up in drifting. Yeah, you heard me right – read on!

MJX Hyper Go Drift Wheels

Off-Road Tires

The off-road tires that come with the Hyper Go are fairly stiff. The rubber is firm and the lugs are widely spaced. While you can run this car on small gravel and short grass, it really isn’t meant for such treatment.

Where the off-road tires shine for the MJX Hyper Go is on asphalt. Yes! They’re surprisingly good at drifting! They wear fast on asphalt, but their large lugs provide just the right balance of reduced grip and forward traction for an exhilarating drift drive. Who knew!?

MJX Hyper Go Off-Road Tires

Road Tires

For me, these are the important ones to get right. Drifting is fun and you should be able to do it to a limited amount even with the normal road tires, but I want to see grip, good braking and acceleration and overall good handling characteristics. The lugs on these tires are still quite large, for road tires, so they’ll have their work cut out for them. How did they go?

Well, the road tires that come with the MJX Hyper Go are fairly aggressive, providing good grip on the road. Better than I expected. When combined with the stiffer rear springs and a little pre-load to help keep the front from lifting so much, they make for a fun driving experience. Acceleration is tight and if you’re careful with your turns, they’ll deliver a rewarding drive.

MJX Hyper Go On-Road Tires

Problems & Fixes

One issue with the Hyper Go is the slight delay on the throttle from the radio transmitter. You can live with it and after a little while it isn’t noticeable, especially for just bashing. However, it may irk some drivers. You can address this by replacing the radio system with a better one – not ideal, but at least it’s doable. The separate components of the car (receiver, ESC, gyro) allows for such an upgrade without needing to change any other parts of the car, so it’s good to at least have that option.

The other issue I had with the car was the inside front wheel lifting on turns, even with the above mentioned tuning already done. Sway bars could be helpful here, but otherwise the only thing I have yet to try is thicker oil in the rear shocks and perhaps a travel-limiting damper in the rears to limit compression by half or so. I want to keep that front pushed down as much as possible. The car is already fairly hefty and nicely balanced, so achieving that limited rear squat might be a viable way forward. I’ll keep testing and will update this section if I find a better answer.

MJX Hyper Go Gyro & Receiver

Final Thoughts

Should you buy this thing? My affiliate link says yes, but my cautionary advice says to first consider what kind of driving you like. If accurate cornering and track-like handling is more your thing, consider the Rlaarlo AK-917 (article here). However, if hooning and big skids and silly fast speed in a tiny package are appealing to you, then yes, the MJX Hyper Go will certainly deliver all of that!

The MJX RC Hyper Go 1/14 Brushless RC Car is a solid, fun-to-drive RC car that offers good value for money. Its robust construction, versatile features, and thrilling performance make it a great choice for both beginners and experienced RC car enthusiasts. While it does have a few minor issues, they are (mostly) easily fixable and do not detract from the overall driving experience.

If you’re interested in purchasing the MJX RC Hyper Go, you can find it here. Please note that this is an affiliate link, and I appreciate your support of RC-TNT if you choose to use this link to buy. Happy hooning!

MJX Hyper Go Chassis
Craig Veness

Craig Veness

RC-TNT

Craig has been into radio control since the 90s and into RC crawling since about 2010, when a Losi MRC started the obsession! Now it's all rocks this and crawl that and upgrade all the things! ...You know how it is, right? Welcome home 🙂

A note on affiliate links: we were provided with this car by the manufacturer for review purposes. The Amazon and AsiaTees links in the above article are affiliate links, which means we may be paid a small commission if you choose to click on them to make a purchase. As always, we make effort to ensure that no review is impacted by this – we still report on bugs and issues encountered during product testing, and our fixes or solutions if found. Thank you for reading and happy RC-ing!

Cross RC EMO X: Epic 8th Scale!

Cross RC EMO X: Epic 8th Scale!

Introduction

Cross RC EMO X is not the first model to have EMO in the name. In the past, we’ve examined the EMO AT4. (You can find the review here, along with a video). Until now, the EMO range has been a 1/10 scale family of crawlers. They’re known for their rugged capability and impressive features like remote locking differentials and two-speed transmissions above portal axles. However, the Cross RC EMO X breaks from this, hulking up to 1/8 scale. This is not your average RC crawler— it’s so much bigger!

EMO X Size Comparo

Overview

With a weight of 17lb (7.7kg) and dimensions 575 x 300 x 271mm, the EMO X commands attention wherever it goes. She’s a hefty beastie!

It comes in three striking colors: Bright Yellow, Metallic Blue, and Silver. Its design blends aggressive lines with the classic appearance of a rugged off-road truck. Note, there’s no licensed branding on this vehicle.

Equipped with features like a simulated driver, hidden body mounts and a full-size spare tire, the EMO X is thoughtfully designed. The shell is a mix of high-quality polycarbonate (or ‘Lexan’) and durable plastic pieces, ensuring exceptional ruggedness and longevity.

Cross RC EMO X Dimensions

Cross RC Swag!

Inside the Cross RC EMO X box, you’ll find an assortment of items. Alongside the impressive RC crawler itself, you’ll receive a set of quality Cross RC tools, a Cross RC baseball cap and Cross RC lanyard. None of this is necessary but it’s all awesome! There’s also a styrene ‘EMO-X’ piece still on its parts tree off-cut. Then, there’s all the usual inclusions you would expect. Notably, the manual provided is comprehensive and detailed, enabling you to disassemble and rebuild the vehicle with confidence. The sticker sheets are nice, too.

EMO X Swag

Radio

The EMO X is equipped with a 6-channel 2.4g transmitter and receiver, made by DumboRC. This one is special in that it delivers something I wish more manufacturers would do: every switch or button is clearly labelled! That’s super helpful. The other feature I love that DumboRC does is the buttons will light up when they’re engaged. No more guesswork on whether a diff is locked or what gear you’re in. I love it!

This handset series is known for providing reliable and responsive control. With its independent lock control, you have the ability to control the front and rear differentials separately or engage both simultaneously. You also have high and low gear and a light mode control button – more on that below. The trigger and wheel feel good in the hand and the handset takes 4x AA batteries. For an RTR radio, wow, this one sure is nice!

EMO X Radio

Body Details

The EMO X stands out with its impressive design and durable construction. It features a simulated racing driver, adding a touch of realism. The hidden mounts keep the body securely fastened during intense off-road driving. The full-size spare tire enhances its rugged appearance – the tire lugs are properly chunky!

A light control module is mounted underneath the shell and all wiring is routed neatly, helping keep things from catching where they shouldn’t. The body connects via a single Futaba-style radio plug that detaches easily when you remove the body, but otherwise stays connected.

There are detailed plastic trim pieces all around and even a metal front grille, next to trick, multi-feature headlights. Typical for Cross RC, this body is a smart and durable unit and it looks great.

Chassis

The EMO X incorporates a low center of gravity layout, enhancing stability and control. The strategic placement of the battery at the front between the shock towers allows for easy adjustment of the vehicle’s climbing characteristics. Use a smaller battery to improve CoG or slap a bigger brick in for longer running. Being over the front axles, the extra weight isn’t as bad as if it was over the rear.

The rig has a 375mm wheelbase, solid axle suspension system, stainless steel link rods, front panhard bar, rear 4 link and rear balance bar. It’s a rigid chassis with metal where its needed and flexible but strong plastic where weight-saving is more important. The bumpers blend well with the body and overall the rig has a durable feel. I hadn’t driven it at this part of the inspection and it was already looking like being one of my favorite crawlers.

Cross RC EMO X Chassis

Transmission & Drive Train

The EMO X boasts a robust transmission and drive train. Cross RC has a lot of history delivering reliable power delivery the EMO X will be no different:

Big Motor & Tough Parts

The 4X4 drive system of the EMO X is equipped with a 25-Turn 560-size brushed motor. It’s mated to a 2-speed transmission, featuring metal gears throughout. This combination offers excellent torque at a slightly reduced acceleration potential (longer motor means more mass – a good choice for this rig). The CVD drive shafts and metal u-joints, sealed bearings and friendly gearing ratios contribute to the overall durability and reliability of the power delivery system.

Lockable Portal Axles

One notable feature of the EMO X is its lockable portal axles. These axles have durable, nylon housings and metal internal gears. Portals give you increased ground clearance and improved torque delivery, eliminating torque twist. The lockable differential feature ensures maximum traction and improved maneuverability in demanding terrains. Plus, you know, it’s fun! With the ability to remotely lock and unlock the differentials, you have greater control over the power distribution to the wheels. It’s not for everyone, but I’ve always been a fan.

Transmission & Slipper

The transmission and drive train components of the EMO X have been designed for durability and performance. Finger-friendly, adjustable slipper clutch, strengthened 60t spur gear, and 20t metal pinion gear comprise the main input. The final drive ratio, with options of 17.8 (high speed) and 38.9 (low speed), provides the flexibility to adapt to various terrains and driving conditions.

More Than Its Parts

The combination of the 2-speed transmission, lockable portal axles, and reliable drive train components ensures that the EMO X is ready to conquer any off-road challenge. Whether you’re crawling over rocks, navigating steep inclines, or powering through muddy trails, the EMO X’s transmission and drive train deliver the power and control you need for thrilling off-road adventures.

Lighting System

The EMO X is equipped with an impressive lighting system. It is conveniently controlled by a single channel, which can be operated through a button on the radio transmitter, clearly marked with a light symbol. You can cycle through the various lighting modes available on the vehicle with a single button press.

One of the notable features of the lighting system is the position lights. When you’re crawling or navigating challenging terrain, these lights blink to provide enhanced visibility. In addition to the standard position lights, the EMO X features an angel eye position light, which adds a unique touch to its overall appearance.

The lighting system is designed to illuminate in a specific sequence. Initially, you will have just the position lights activated, followed by low beam lights, and finally, the third position will engage the full power forward lights. The rear lighting setup is equally impressive. It completes the overall lighting package of the vehicle, ensuring that it stands out even from behind.

Cross RC EMO X Blue & Yellow

Links & Suspension

The EMO X features a well-designed suspension system that ensures optimal performance and durability during off-road driving. The rear suspension utilizes a standard 4-link setup with coil-over shocks, providing excellent articulation and control. However, what sets the EMO X apart is the unique addition of what Cross RC calls the ‘balance bar’.

What Linkage?

The ‘balance bar’ consists of a link connected to each end of the axle, which then connects to a center-mounted pivot arm on the chassis. This innovative design allows for a dynamic response when encountering uneven terrain. Believe it or not, this design is hundreds of years old! (See Watt’s Linkage on Wikipedia). When one side of the axle is raised, the center bar pivots, drawing the other side of the axle up slightly. Essentially, this system performs somewhat like a sway bar or anti-roll bar.

The rear balance bar offers several benefits to the EMO X’s overall performance. Firstly, it enhances stability by minimizing body roll and controlling the weight transfer during cornering or uneven surfaces. The pivoting action of the center bar effectively counteracts the forces exerted on the vehicle, resulting in improved handling and traction.

Another notable advantage of this system is its ruggedness and simplicity. Traditional sway bar systems can sometimes become stuck or damaged by mud or debris encountered during off-road driving. In contrast, the EMO X’s rear balance bar utilizes larger-sized materials and a straightforward mechanical design, making it considerably more robust. This ensures that the suspension system remains functional even in demanding off-road conditions, providing reliable performance without compromising durability.

Overall

The combination of the standard 4-link suspension setup, coil-over shocks, and the rear balance bar makes the EMO X a capable and reliable off-road crawler. The suspension system allows for excellent articulation and control, while the rear balance bar adds an extra layer of stability and control during challenging maneuvers. Whether you’re navigating rocky trails, crawling over obstacles, or tackling uneven terrain, the EMO X’s suspension system ensures a smooth and controlled ride.

Servos

The EMO X is equipped with high-quality servos that not only deliver precise and accurate control but also offer convenient operation. One of the standout features of the EMO X’s servos is their differential lock control, which requires no trimming or end point adjustment. These servos are designed to “just work” at 100% EPA (End Point Adjustment) due to their mechanically adjustable design.

Unlike some other RC crawlers that may require manual adjustments and fine-tuning to achieve optimal performance, the EMO X simplifies the process. With the differential lock servos set at 100% stroke, you can rest assured that they will operate flawlessly without the need for additional adjustments. This ensures optimal performance without the risk of burning out the servos or compromising their functionality.

The innovative self-lubricating steel wire assembly of the differential lock servos makes them water and dust-proof, allowing for quick and secure locking in seconds. This means that you can engage or disengage the differential locks effortlessly, enhancing the versatility and excitement of your off-road adventures.

With a 6-channel remote control, you can independently lock the front and rear differentials. The radio will indicate what’s happening under the car. Honestly, it’s a simple but brilliant system.

The steering servo is a 23kg coreless unit with alu housing. Part of why I like Cross RC so much is their choice to not scrimp on components where they could have. The ESC and motor are premium, as are the servos here. Awesome.

Cross RC EMO X Locker System

Wheels & Tires

The EMO X is equipped with Cross RC Talon 136X55 R2.2 high-performance crawler tires mounted on 2.2″ bead lock wheels. These tires are specifically designed to deliver superior grip and durability. With their larger studs, snow lines, and high-grip tire wall, they provide exceptional traction on a variety of surfaces. Measuring 136mm in diameter and 55mm in width, these tires offer compatibility with common 2.2-inch wheels in the market. The lightweight nylon clip wheel hubs reduce the load on the shaft and enhance the dynamic performance of the vehicle.

Cross RC EMO X Wheels

Conclusion

The Cross RC EMO X 1/8 RTR RC Crawler is an outstanding off-road vehicle that exceeds expectations in terms of build quality, advanced features, and thrilling performance. Its exceptional design, durable construction, and attention to detail make it a dream come true for off-road enthusiasts seeking something a bit bigger than the norm. From its rugged appearance and imposing presence to its innovative components and precise control, the EMO X is ready to unleash your passion for off-road exploration like never before.

Cross RC has once again proven its commitment to delivering outstanding RC crawlers with the EMO X. So, gear up, take the wheel, and let the EMO X take you on unforgettable off-road journeys. It’s time to explore new horizons and push the limits of your off-road adventures with the Cross RC EMO X 1/8 RTR RC Crawler.

Find the Manufacturer’s website for this rig here: https://www.crossrc.us/shop/emo-x-rtr/

This is not a sponsored article. We bought this one at full price. Stay tuned for the running and review video, which we’ll link here soon (late May 2023). Thanks for reading!

EMO X Displayed
Craig Veness

Craig Veness

RC-TNT

Craig has been into radio control since the 90s and into RC crawling since about 2010, when a Losi MRC started the obsession! Now it's all rocks this and crawl that and upgrade all the things! ...You know how it is, right? Welcome home 🙂

Rlaarlo AK-917: a Porsche 917K Love Letter

Rlaarlo AK-917: a Porsche 917K Love Letter

Introduction

This is a recount of my personal journey so far with the Rlaarlo AK-917. This new release is a remarkable 1/10 scale road car that pays homage to the iconic 1969 Porsche 917K. In this retelling, I will share my experiences, joys, and challenges encountered while exploring the capabilities of this very interesting RC car.

Join me as I recount the unboxing excitement, delve into the radio system, power system, chassis and suspension, wheels and tires, track performance, encountered issues, and future plans. This is not a sales pitch; it’s a genuine tale of my time with the Rlaarlo AK-917.

AK-917 Underside

Unboxing and Included Items

Opening the box of the Rlaarlo AK-917 Metal Version Brushless RTR revealed a very special storage case. This isn’t the first of its kind from Rlaarlo – we’ve seen similar with their buggies in the past. This one was more refined and I don’t recall feeling excited about any other RC car in recent memory as I did with this one!

The box interior revealed a meticulously-arranged assortment of components and accessories; such attention to detail, Rlaarlo! Alongside the car itself, I found a 4000mAh 3S 25C hard-pack LiPO battery pack, a 2.4GHz radio transmitter, an instruction manual and related documentation, an array of spare parts and gears, and basic tools. These items provided a comprehensive package for embarking on an immersive RC experience – you can expect these in your pack too, it wasn’t just a sponsorship special.

AK-917 on Rocks

Radio System

The heart of the AK-917’s radio system is the DumboRC X6-inspired transmitter. This power-efficient radio offers outstanding value with its affordable price tag without compromising on performance. The reputation for excellent longer-range reception adds to its appeal, especially for those planning to push the limits of the AK-917 during speed runs.

The provided receiver, a DumboRC X6F copy, seamlessly integrates with the AK-917 Metal Version Brushless RTR, ensuring reliable and precise control over the car’s movements. Its compatibility with the X6FC receiver, included with the AK-917 Carbon Fiber Brushless RTR variant, extends functionality by incorporating light control features. Rlaarlo’s attention to detail is evident in their decision to include this upgraded receiver, with an added bonus of that flashing orange exhaust LED array on throttle overruns. We’ll hopefully enjoy this on the CF version I’ve purchased after my experience with the Alloy version! Coming soon.

AK-917 Radio

Power System

At the heart of the AK-917 lies a powerful non-sensored brushless motor, specifically the 3650 4200kv variant. This motor, combined with a 3S (12V) power source, delivered an exhilarating burst of speed that surpassed my expectations. The included ESC in the alloy variant is a 60A unit capable of 2S and 3S power. (The Carbon Fiber variant ships with a 120A version that’s 2S to 4S capable).

The AK-917 eagerly responded to throttle inputs, surging forward with raw acceleration. The non-sensored brushless motor proved its efficiency and durability, enabling extended run times without sacrificing performance. While the stock power system provided ample excitement, I did find a little hesitation on applying throttle after progressively braking from higher speeds. This was a minor issue and not one I experienced with an after-market ESC. Something worth keeping in mind if you’re shopping the alloy RTR variant.

Rlaarlo AK-917 Specs

Chassis and Suspension

The AK-917’s meticulously designed chassis captivated me with its attention to detail and resilience. Constructed with durability in mind, the metal frame provided a solid foundation capable of enduring the rigors of intense driving sessions. Flexible but solid plastic sides and ends made for a very stiff chassis that didn’t pack on extra unnecessary weight. It’s quite a balanced machine.

Inspired by the iconic Porsche 917K, the AK-917’s chassis design beautifully captured the essence of the original racing legend, igniting a sense of nostalgia and admiration. (Customers won’t enjoy the surprise I had of finding ‘RC-TNT’ etched on the underside of the chassis – WOW!! Thanks Rlaarlo!)

Complementing the robust chassis, the AK-917 boasted an adjustable suspension system. Fine-tuning the suspension components allowed me to tailor the car’s performance to suit various track conditions and my preferred driving style. This suspension setup facilitated responsive handling, enhanced stability, and reasonable cornering abilities, though the front sway bar setup does seem overly soft and I’m not sure how much function it really adds to the car. More testing needed on that front.

AK-917 CF Chassis
AK-917 Diff Cover

Wheels and Tires

Rlaarlo’s attention to detail extended to the selection of wheels and tires for the AK-917. These high-quality components not only enhanced the car’s performance but also added a touch of visual flair. The wheels are pretty and lightweight. They’re plastic on the Alloy Chassis version and that’s just fine. I do have a set of the Alloy wheels that come with the CF version too – they weigh a little more than the plastic units and I’m not convinced they’re a better choice. We’ll report back in future testing.

The thoughtfully chosen tire compounds provided optimal grip on diverse surfaces, ensuring maximum traction and control. The scale-inspired wheels perfectly complemented the overall aesthetic of the AK-917, further immersing me in the nostalgia of the legendary Porsche 917K. Note, there was significant wear on the insides of the rear tires especially after about 15 minutes of track use. There was evidence of heat and hardening along the inside edges and also the tire carcasses showed early signs of deterioration after this first drive. I may be imagining it, but grip levels seemed a little lower on our second track day.

AK-917 Tire Options

Track Performance

Taking the AK-917 to the racetrack was an exhilarating experience that truly showcased the car’s capabilities. Remember, we’re dealing with a reasonably cheap car that already delivers a large amount of power. It didn’t have to be perfect on the track to win everyone’s attention, but it really is quite good!

With its powerful brushless motor and well-tuned suspension, the car demonstrated impressive speed, agility, and handling. I pushed the AK-917 to its limits, navigating tight corners and exhilarating straightaways mostly with ease. We did have some upset leaving corners under power, with an inside front wheel consistently lifting in lieu of a stiff enough sway bar system. But overall, the car’s balance and stability instilled confidence, allowing me to push further and explore the full potential of this RC racer.

AK-917 Tires

Issues and Fixes

During my testing, I encountered a couple of issues that required attention. Firstly, the servo failure experienced within seconds of use was an unexpected setback. To ensure the continuity of our review and tests, I promptly replaced the servo myself – any standard digital servo is fine, though faster is obviously better. Rlaarlo would have replaced this for me, had I approached them about it.

Additionally, intermittent ESC cut-outs were encountered during the first video’s track performance. This is best viewed in the video, linked further down in this article. Upon further investigation, Rlaarlo identified that the radio system’s antenna installation was creating interference. They promptly advised on a better placement of the antenna, and noted they were rectifying the issue for all AK-917 models sold to customers. This responsive approach demonstrated Rlaarlo’s commitment to addressing potential concerns and improving the overall user experience.

AK-917 Alloy Chassis

(My) Future Plans

As I continue my journey with the Rlaarlo AK-917, my future plans involve exploring the capabilities of both the Brushless Metal Version they supplied and the Carbon Fiber Roller Version I have purchased. I am excited to experiment with larger motors, pushing the boundaries of speed and performance even further.

Additionally, I intend to participate in Rlaarlo’s 2023 Speed Run event in June this year. We’ll be chasing 200km/h and I look forward to sharing the thrill of the AK-917 with fellow RC enthusiasts and showcasing the enduring spirit of the legendary Porsche 917K.

Conclusion

The Rlaarlo AK-917 has captivated me with its homage to the iconic Porsche 917K and its exceptional performance on the racetrack. Through the unboxing experience, high attention to vehicle detail, track performance, and exceptional power system, I have discovered a car that embodies the passion and excitement of RC racing.

While not without its hiccups, the AK-917’s ability to adapt, coupled with Rlaarlo’s dedication to addressing concerns, ensures a fulfilling RC experience. The AK-917 promises many more thrilling moments on the horizon. See you next month for the speed run!

AK-917 Front Chassis View

Where to Buy

Visit Rlaarlo and buy directly from the manufacturer. Use code RC-TNT for a discount on your vehicle purchase. Thank you for your support – we get a small commission for every vehicle sold, though would be recommending this vehicle even if we didn’t. It’s a ripper!

Craig Veness

Craig Veness

RC-TNT

Craig has been into radio control since the 90s and into RC crawling since about 2010, when a Losi MRC started the obsession! Now it's all rocks this and crawl that and upgrade all the things! ...You know how it is, right? Welcome home 🙂

SCT – Should You Own One?

SCT – Should You Own One?

RC in History

If you’ve been living under a rock for a few decades, you may not know that the Traxxas Slash SCT is one of the best-selling hobby-grade RC cars of all time. (That is excluding Nikko, Tyco and other toy grade cars). The Traxxas T-Maxx, Associated Electrics RC10 and perhaps a Tamiya Hornet or Grasshopper may give the Slash a run for its money. Whichever the biggest seller may be, most would agree the Slash is a household name in RC at this point.

Following the Traxxas T-Maxx in 2000 which brought big nitro trucking fun to the masses, the 2008 release of the Traxxas Slash was a refinement in many ways. It shaped the modern RC landscape by being tough, fast, fun and extremely durable – and cheaper and simpler than the T-Maxx. It also happened to be an SCT. And, they’re still selling today, 15 years later!

Arrma Senton 3S BLX jump

What’s SCT?

SCT stands for “short course truck,” which is a type of radio-controlled vehicle that is modelled after the full-scale short course racing trucks. Short course racing trucks are purpose-built off-road vehicles that are designed to race on a specific type of track that is typically a combination of dirt, gravel and pavement.

Radio controlled SCTs are typically 2 and 4-wheel drive vehicles that are built with durable materials most commonly of plastic, but also with aluminum and carbon fiber. They typically feature high-quality suspension systems and powerful motors. They are known for their speed and agility, and are capable of reaching high speeds on a variety of surfaces. Some popular RC SCTs include the Team Associated SC10, the Traxxas Slash, the HPI Blitz, and the Losi 22S.

Traxxas Slash 2WD XL5 Chassis

Why a Short Course Truck?

This can be a tough question. We made a video that compares SCT to MT (Monster Truck) and Buggy options. Check that out here:

SCT Durability

Durability is definitely worth considering. Not all RC cars are created equally. Some of the drawbacks of the SCT design are tires wearing the inside of the body, dirt and mud filling the tub chassis common to SCT (but not always – more on that in a moment) and the tendency of an SCT body to catch air in big jumps, destabilizing the vehicle before landing. So, there are some drawbacks.

But, there’s plenty of good to consider with this vehicle type as well. For one thing, the modern SCT is a durable beast. Check this out to get an idea of just how much abuse and punishment a modern RC SCT can take!

Which One?

RC SCTs come in both kit and RTR (Ready-To-Run) packages. They’re popular among RC enthusiasts and hobbyists for their versatility and ability to handle a variety of terrains. They can be used for racing and also for bashing, with the right setup and tuning.

SCT deliver a good balance of speed and durability, making them an exciting option for people who enjoy both off-road and on-road driving. They require some maintenance and care, but with the right setup and tuning, they can provide hours of fun and excitement.

We’ve covered a few on our YouTube channel so far and there are more coming. Here’s a list to consider:

HPI Jumpshot SC V2: https://youtu.be/FNosmI2rwQw

Arrma Senton 3S BLX: https://youtu.be/ybv6i_wLx3Q

Traxxas Slash 4X4 VXL: coming soon!

Awful smaller ones: https://youtu.be/j38Af1kb6J8

Also, check out our Off-Road category on the RC-TNT.com here. Plenty more to think about there too!

Traxxas Slash 2WD XL5
Craig Veness

Craig Veness

RC-TNT

Craig has been into radio control since the 90s and into RC crawling since about 2010, when a Losi MRC started the obsession! Now it's all rocks this and crawl that and upgrade all the things! ...You know how it is, right? Welcome home 🙂

Traxxas X-Maxx 8S – a Durable Monster!

Traxxas X-Maxx 8S – a Durable Monster!

Meet the Traxxas X-Maxx

Have you ever wondered what the Traxxas X-Maxx can really do? As one of the most popular large-scale remote control (RC) vehicles on the market, the X-Maxx is known for its impressive size and advanced features. But how does this 1/5 scale monster truck perform in a real-world setting?

In this article, we’ll be taking a closer look at the Traxxas X-Maxx by putting it through its paces in a bash test, which includes off-road driving and stunt driving. We’ll examine its performance capabilities, features, and any issues that may arise. Are you ready to find out what the Traxxas X-Maxx is really made of? Let’s dive in!

Traxxas X-Maxx 8S Chassis

Prepping to Bash

In preparation for the bash test, we made a few small investments in parts and body preparation to extend the longevity of the Traxxas X-Maxx. Although the X-Maxx is already known for its durability, these upgrades will help it withstand even the toughest driving conditions. To protect the body, we applied heavy-duty tape and Shoe-Goo.

On the chassis, we installed RPM upper and lower A-arms, as well as oversized hub carriers and bearings on the rear. Additionally, we replaced the stock pins with RPM threaded pins to ensure that the A-arms wouldn’t bend apart in the event of a rough landing. By making these upgrades, we’re confident that the Traxxas X-Maxx will perform at its best in the bash test.

Where We’ll Drive

Our bash session will put the Traxxas X-Maxx to the test as we drive it on a variety of terrains. First, we’ll take on a rocky dirt closed circuit that was designed for smaller 1/10 scale vehicles. This will be a real test of the X-Maxx’s handling capabilities, as it will have to maneuver through tight turns and over rough terrain.

Next, we’ll take the X-Maxx out on grass and tackle small jumps to see how well it handles different types of surfaces. After that, we’ll take on large mound jumps with no smooth landing area to see how well the X-Maxx can handle big air. With these diverse terrains, we’ll get a good picture of what this big monster truck can do.

Traxxas X-Maxx 8S Rear

Let’s Go!

In this video, we put the X-Maxx through its paces on all the different terrains mentioned in this article. You’ll see for yourself just how tough and capable this vehicle really is as it navigates through rocky dirt circuits, grass, big air jumps, and urban settings. So, if you’re a fan of remote control vehicles or just want to see what the Traxxas X-Maxx is all about, be sure to check out our video. Durable fun is what this thing is all about!

Craig Veness

Craig Veness

RC-TNT

Craig has been into radio control since the 90s and into RC crawling since about 2010, when a Losi MRC started the obsession! Now it's all rocks this and crawl that and upgrade all the things! ...You know how it is, right? Welcome home 🙂