What This Is
The files I developed to transform my Axial SCX10 III JLU into a WRCCA Scale-1 competition beast!
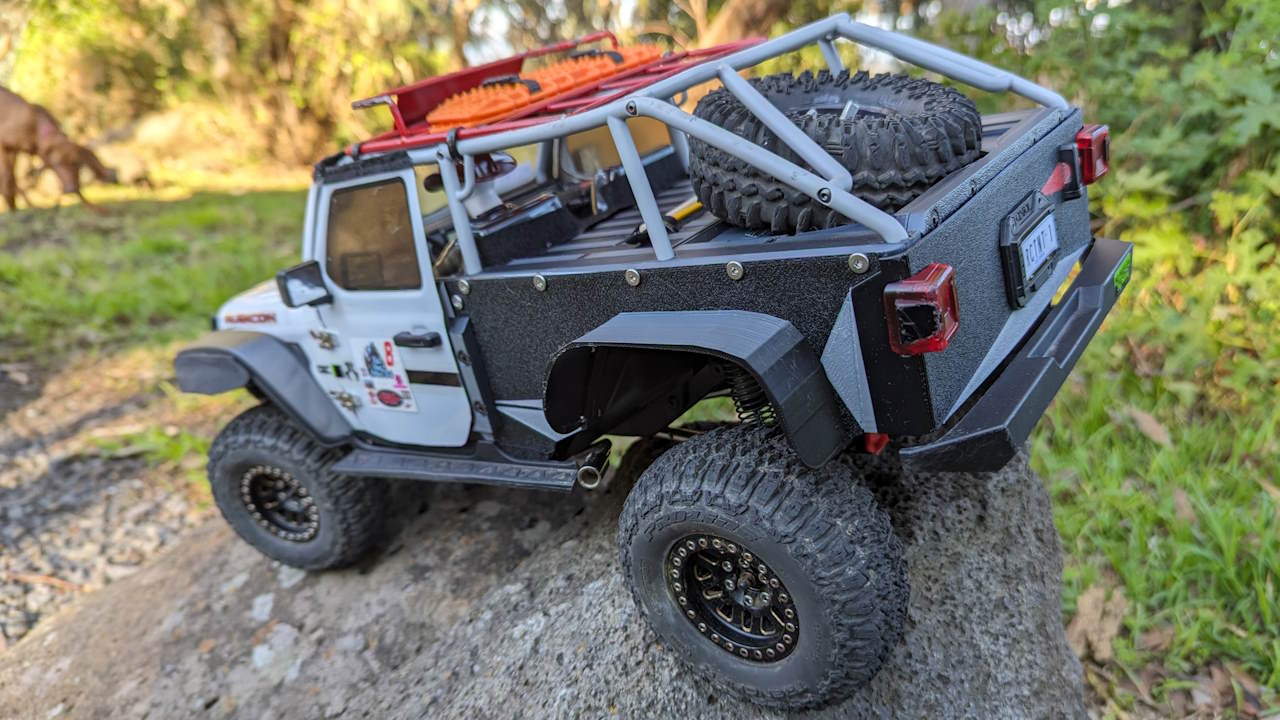
These parts aren’t perfect and you’ll need a little imagination (and scissors!) to meld the body with this tray. You’ll also want to drill (6mm) out the roof rack holes and use the shortest of the cups included in the file list underneath to get the length right.
I used flat M3 screws for the most part, 8mm and 12mm, as well as 8 or so 8mm M3 countersunk screws.
These parts aren’t perfect, but they’ll get you pretty close to the end result here.
What’s It Cost?
Nothing! I’m giving this away. Print it yourself, build it, enjoy it.
All I ask in return is that you consider signing up to my email list (bottom of page). I won’t spam you. It’s basically a way for me to let you know when I release something cool that you’ll probably be interested in. If you like my YT channel and/or the files on these pages, it’ll probably be right up your alley.
Don’t worry, it’ll only be sporadic and I’ll safeguard your email address. I’m very pro privacy and will not abuse your trust. Thank you!
")
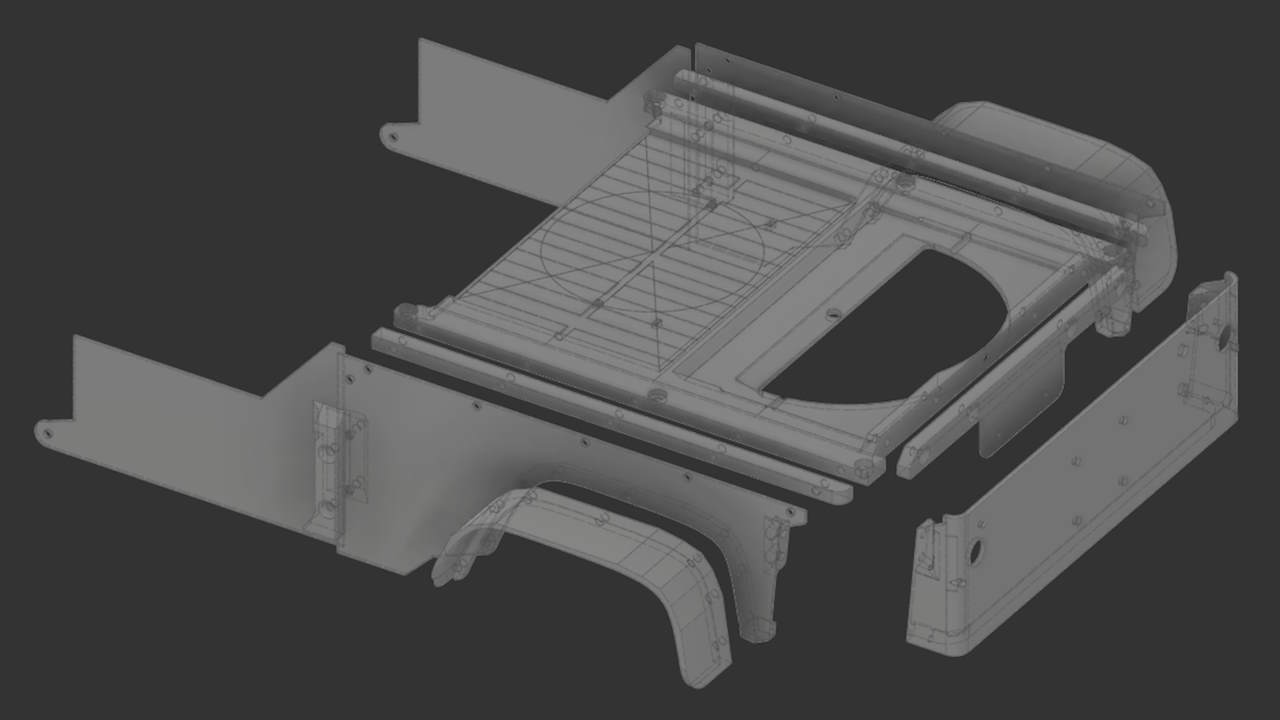
What You Get
You get 15 files in this downloadable zip file:
- Bed.stl – the main tray
- LHS Connector.stl – goes left of tray
- LHS Door Clip.stl – goes outside front panel
- LHS Flare.stl – print in TPU
- LHS Front Panel.stl – goes at front
- LHS Rear Panel.stl – connects to LHS Connector
- Rear Connector.stl – bolts to rear of tray
- Rear Panel.stl – bolts to Rear Connector and Rear Panels
- RHS Connector.stl – goes right of tray
- RHS Door Clip.stl – goes outside front panel
- RHS Flare.stl – print in TPU
- RHS Front Panel.stl – goes at front
- RHS Rear Panel.stl – connects to RHS Connector
- Roof Rack Cups.stl – use to adjust roof rack under tray
- Read Me.txt
How To Use
Here’s how to print them:
Quantity: 1 of each piece.
Material: print all* in PETG or PLA+ (any brand) – I’ve had success with eSUN and SUNLU. There’s no standard for PLA+, but it gives strength and flexibility to PLA and has been good.
*Except for LHS and RHS Flare – suggest these be done in TPU (any). They’ll still be okay in PLA+ but TPU will help ensure longevity on the rocks!
Resolution: I’ve been using 0.24, but any of 0.2, 0.24 or even 0.28 will work. Lower res is stronger, higher res is smoother. 0.24 is a good mid-point.
Infill: doesn’t really matter, but 15% should be fine.
Walls: 3, gives a little extra strength on those thinner parts.
Supports: none, except for the RHS and LHS Front Panels, where it needs just a smidge under those connecting parts.
Rafts: none
Orientation: on the flat side of all parts. They’re designed to just work. Align the flares on the inside part that connects to the side panels. Cups just stand up.
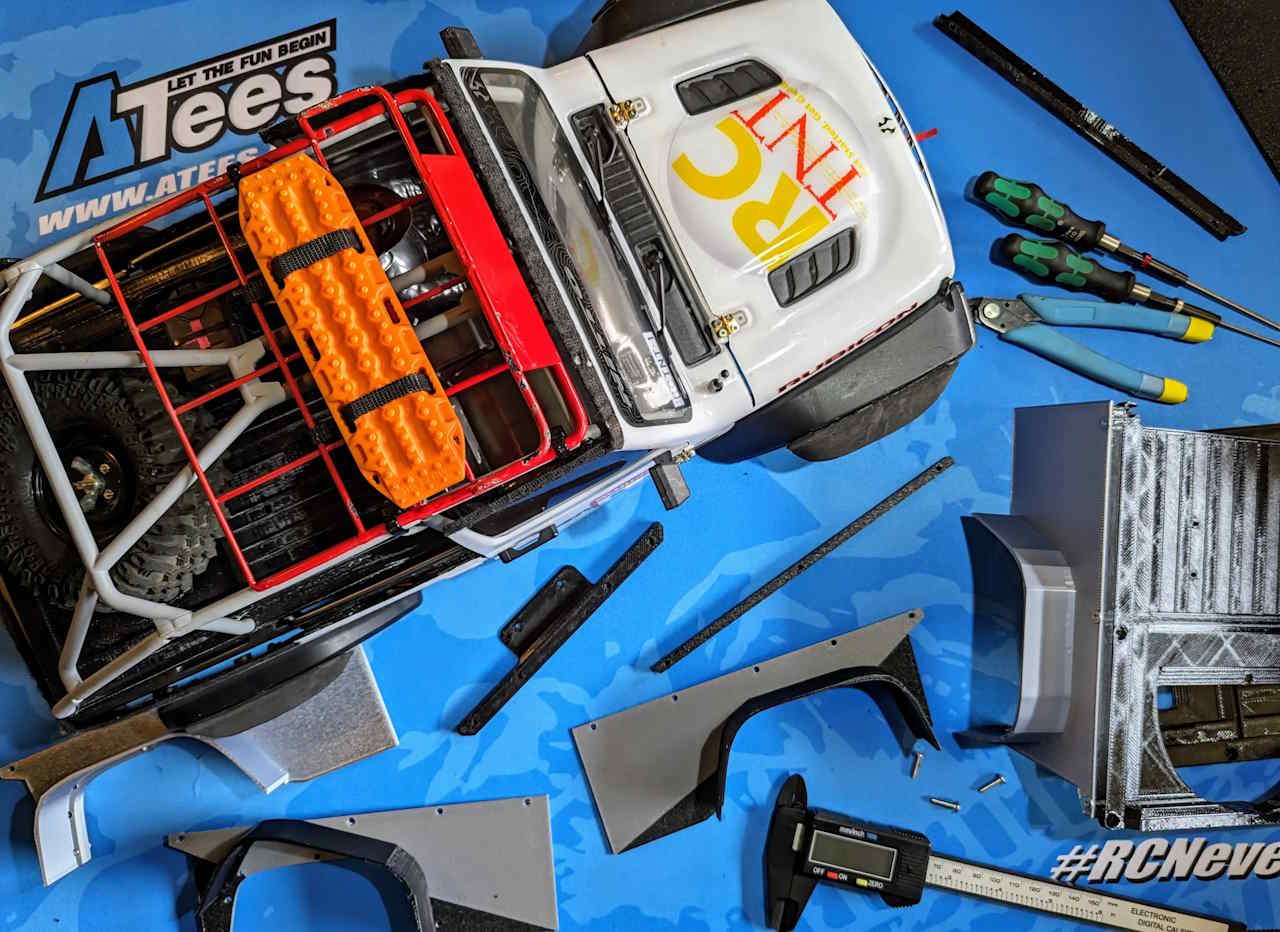
Assembly
Screws. You’re gonna need em! I used flat M3 screws in 8mm and 12mm, and also countersunk M3 screws in 8mm. Worked nicely.
You’ll also need two M2.5 screws in 12 to 16mm for securing the bottom of the LHS and RHS Rear Panels to the Rear Panel. Do these up first before you screw in that last LHS/RHS Flare screw.
I used a little tape behind the LHS/RHS Rear Panel and LHS/RHS Front Panel pieces to help line them up with the lexan interior. I also poked a few holes in that interior so the screws would go though and help align it.
Lastly, the front hole of the LHS/RHS Front Panel goes under the rearmost screw of the front wheel wells on the body. That’ll also help align it.
Don’t over-tighten things. You’ll probably find PLA+ more tolerant of enthusiastic screw tightening than PETG, but take it easy and use hand tools rather than a drill. Once assembled, she’s a pretty rugged thing.
Enjoy!
Terms of Use
These files are provided for your personal use and enjoyment only. Please don’t print and sell them, nor the stl files (if you see them for sale in the wild, do me a solid and let me know!)
Please also don’t upload these to any of the online 3D printable sites. I’ve chosen not to do that and would appreciate you respecting that choice, as I’ve freely shared the files with you to print here on RC-TNT.com.
Thank you and please enjoy!