Upgrades for the MN-82 Landcruiser
What This Is
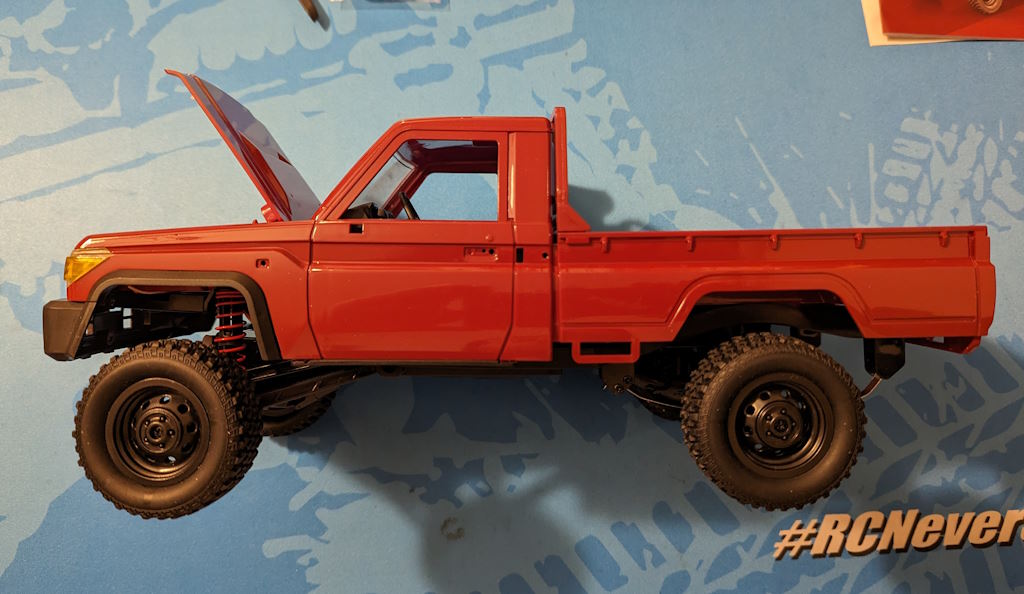
Banggood sent me the MN-82 Landcruiser 79-Series Ute (or ‘pickup’ for you good Americans following along). It was attractive in stock form, but the suspension was way too firm and the vehicle was missing a certain something.
So, I got to work and this is what I came up with! Better looking, better performing and for minimial expense – especially if you already have a spare set of 1/24 wheels and tires to use with this pretty car!
Terms of Use
These files are provided for your personal use and enjoyment only. Please don’t print and sell them, nor the stl files (if you see them for sale in the wild, do me a solid and let me know!)
Please also don’t upload these to any of the online 3D printable sites. I’ve chosen not to do that and would appreciate you respecting that choice, as I’ve freely shared the files with you to print here on RC-TNT.com.
Thank you and please enjoy!
What’s Included
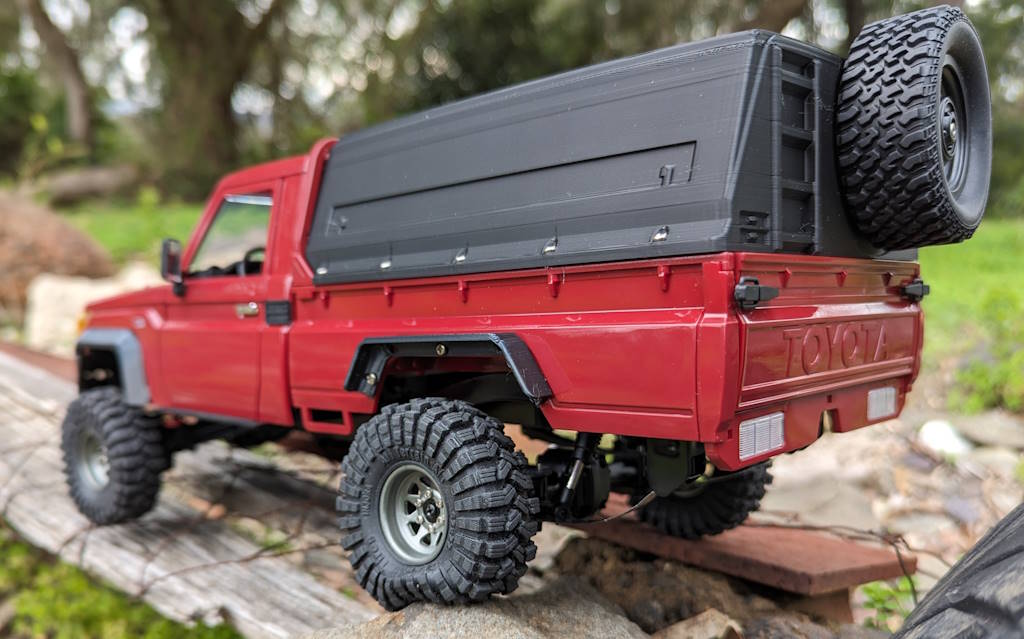
- Canopy for the drop bed;
- Sliding door for the canopy;
- Spacers to fit the rear springs to the front friction shocks;
- 5mm to 8mm hex adapters to allow regular 1/24 wheels to fit;
- Widened front and rear wheel arches to maintain scale tire coverage;
- Anti-wrap bars for the rear leaf suspension, allowing you to remove all but the main leaf without sacrificing axle alignment;
- Instructions on how to put it all together!
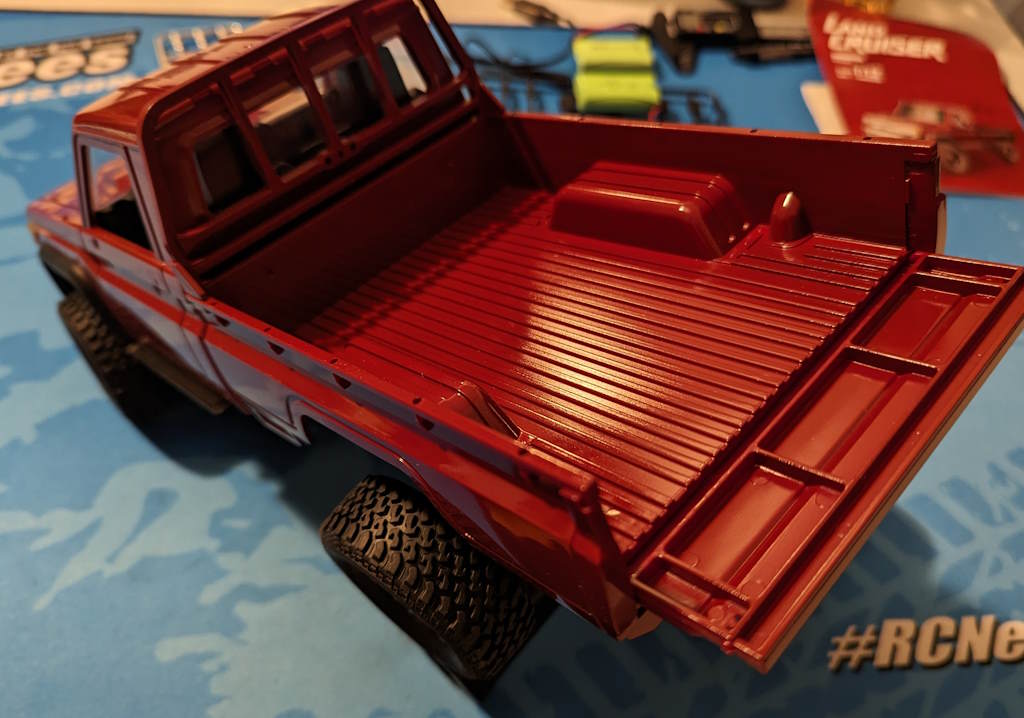
Stock Bed with Open Tailgate
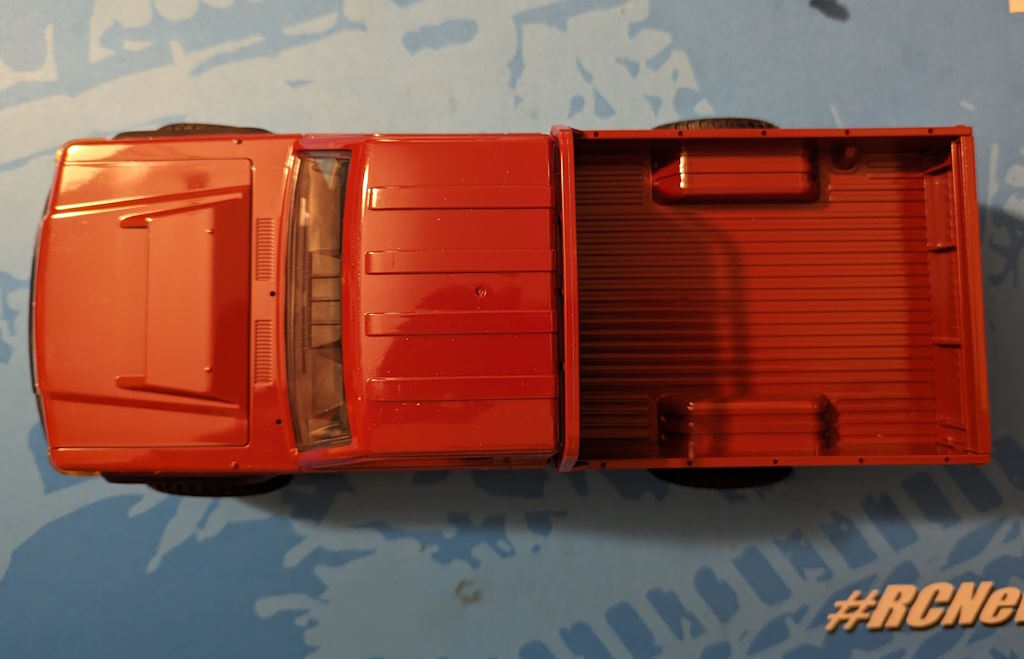
Stock Model Top-Down

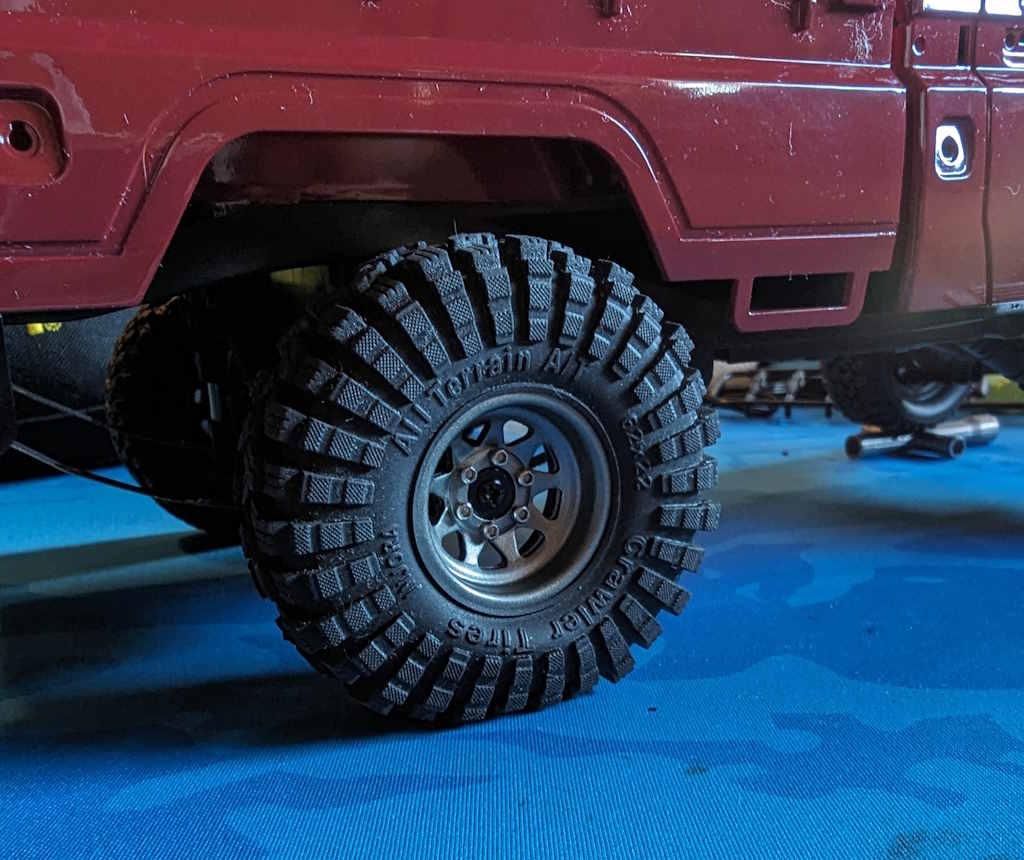
Stock Tire Clearance
Rear Axle with Stock Setup
Materials Needed
- MN-82 Landcruiser (buy here)
- Injora (or other standard) 1/24 Wheels and Tires (links to the ones I’m using)
- Jeweler’s (L) Philips Head Screwdriver
- M2 Bolts and Screws
- 16x 6mm x 1mm self-tapping screws for the canopy and fenders
- 1x 20mm M2 bolt for the spare tire
- 4x 20mm M2 bolts for the inner screws on the leaf spring brackets
- 2x 20mm M2 bolts for the upper front shackle & anti-wrap bar fronts
- Xacto blade or similar sharp cutting tool with strong handle
- 1.6-1.8mm drill bit + drill
- Conformal Coating for electronics use
- Cotton wool bud for appling conformal coating
- ~125g of PLA+ filament and access to 3D printer
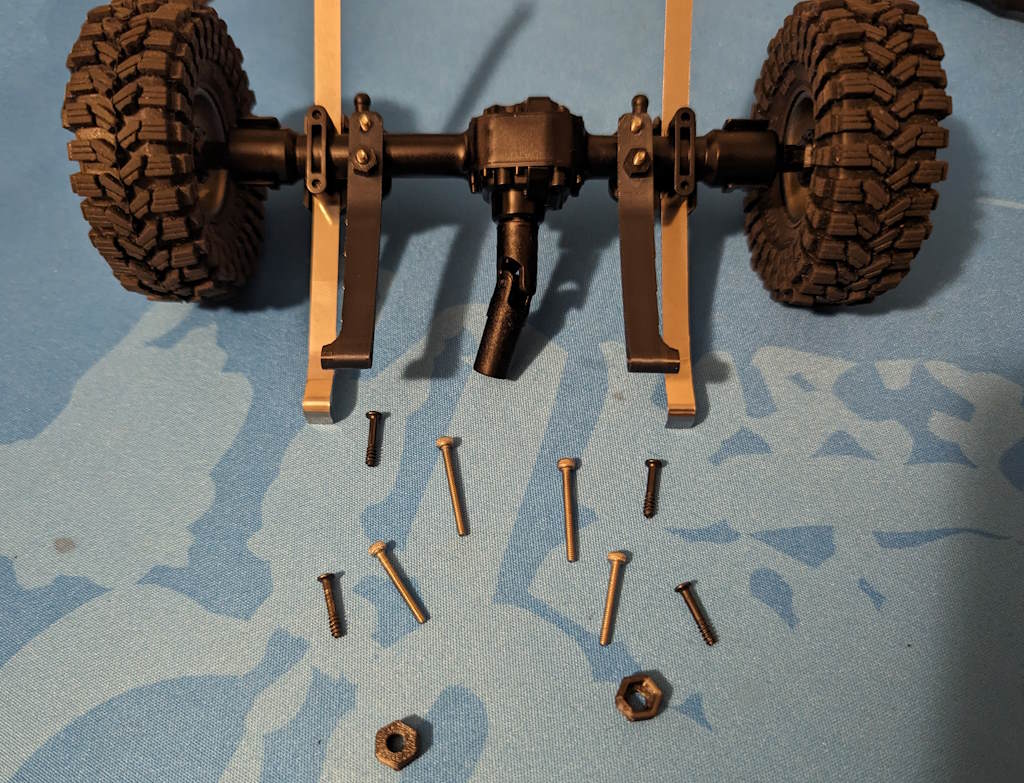
All Hardware Layout for Rear Axle

Recommended 6mm Screws

Conformal Coating

Preparing to Mount Spare Wheel
Printable Parts List
- Anti-Wrap Bar LHS.stl – print 1, PLA+ or PETG
- Anti-Wrap Bar RHS.stl – print 1, PLA+ or PETG
- Bed Canopy.stl – print 1, PLA+
- Canopy Door.stl – print 1, PLA+
- Front Fender LHS.stl – print 1, PLA+ or PETG
- Front Fender RHS.stl – print 1, PLA+ or PETG
- Front Shock Spacer 12.5mm (2) sliced.png – shows how I’d print it (ie. use brim)
- Front Shock Spacer 12.5mm (2).stl – print 2, PLA+ or PETG
- Hex Adapter LP (4).stl – print 4, PLA+ strongly recommended
How to Print
Print the bed canopy on its roof. Tree supports are needed, but that’s it.
Canopy door can just be printed flat.
Print the front and rear fenders on their upper, main arches.
Resist the urge to print the rear ones on the side that mates to the body.
Use tree supports. They’ll be fairly minimal but they’ll help.
Print the spacers and the hex adapters with a brim to assist with bed adhesion.
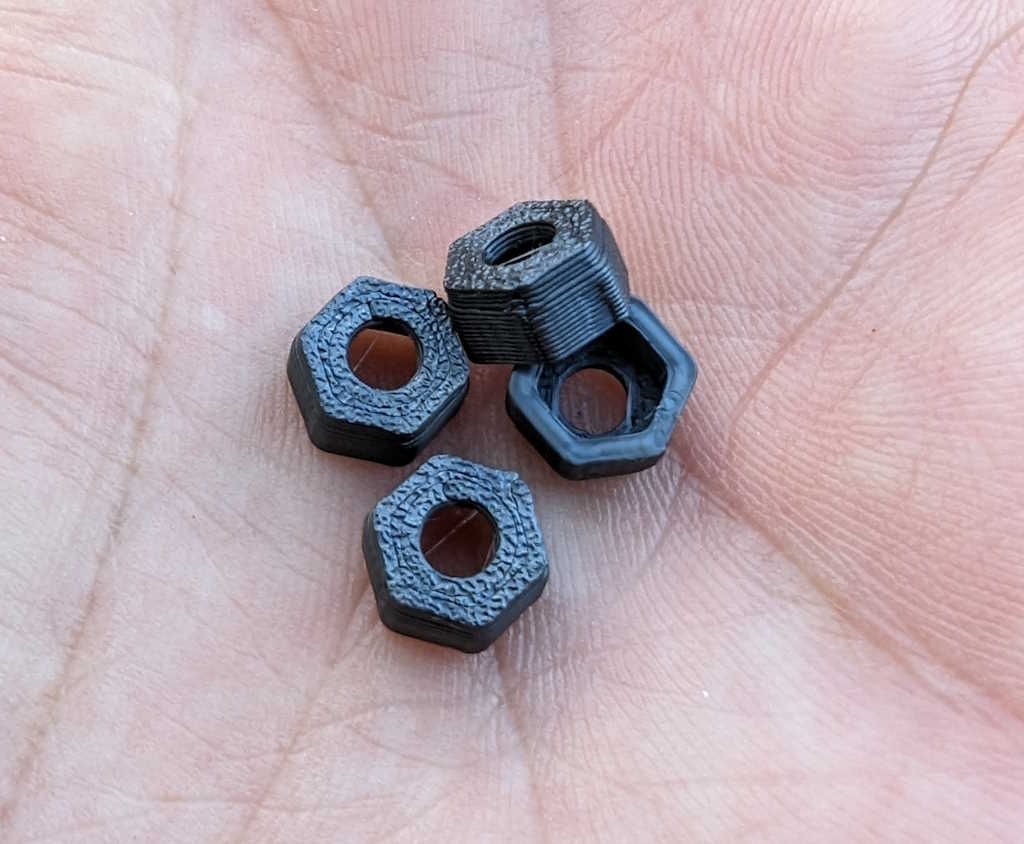
Axle Hex Adapters Printed

Cutting Plastic Axle

Preparing Axle Adapters

Injora Tires and Wheels Mounted on Side
Model Preparation
- Disconnect the battery.
- Remove the four wheels.
- Remove the 6 screws underneath that attach the body to the chassis.
(Don’t stress if you get these wrong. Worst case, you unscrew the interior.) - When you remove the body, do it slowly! Prepare to unplug the battery & lights.
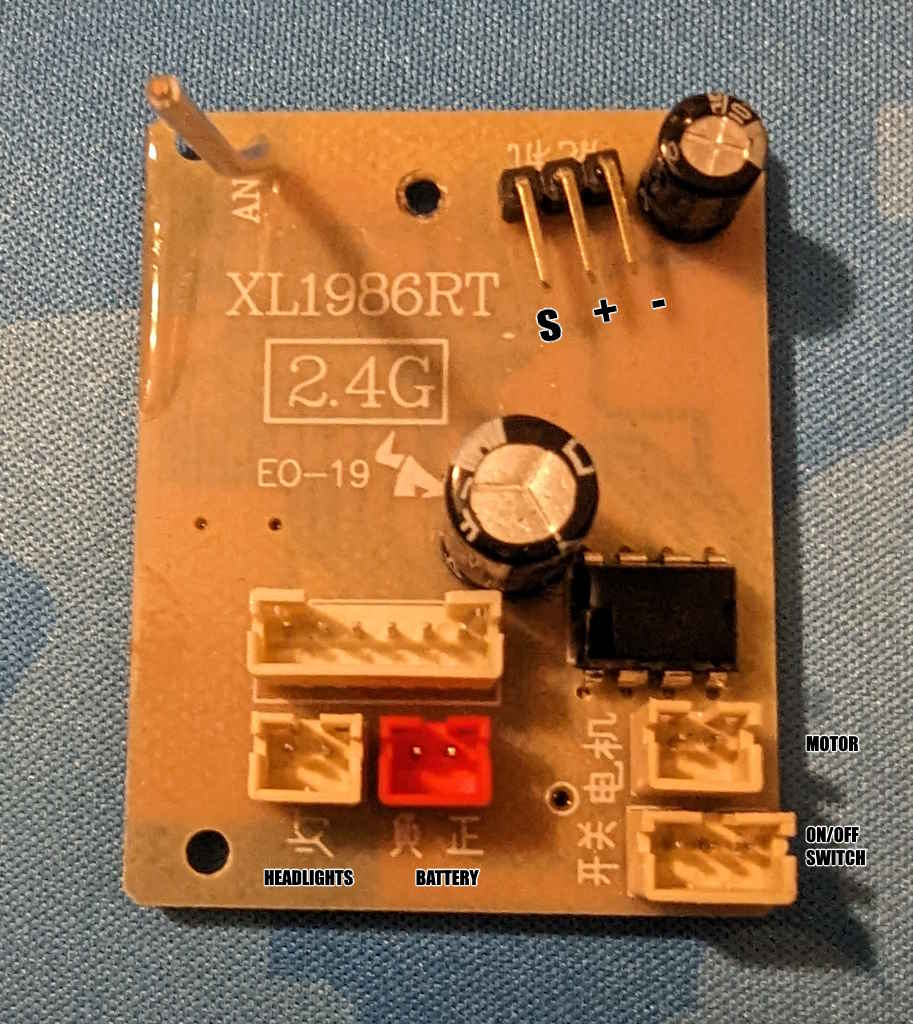
- First: take a photo of the PCB before you unplug anything. Then unplug them.
- Set the body aside. It should have headlights and power cable dangling.
- Disconnect the motor and switch plugs. Disconnect the servo.
- Remove the screw holding the PCB to the chassis plate. Remove the PCB.
- Replace the PCB screw so you don’t lose it – it’s smaller than the others.
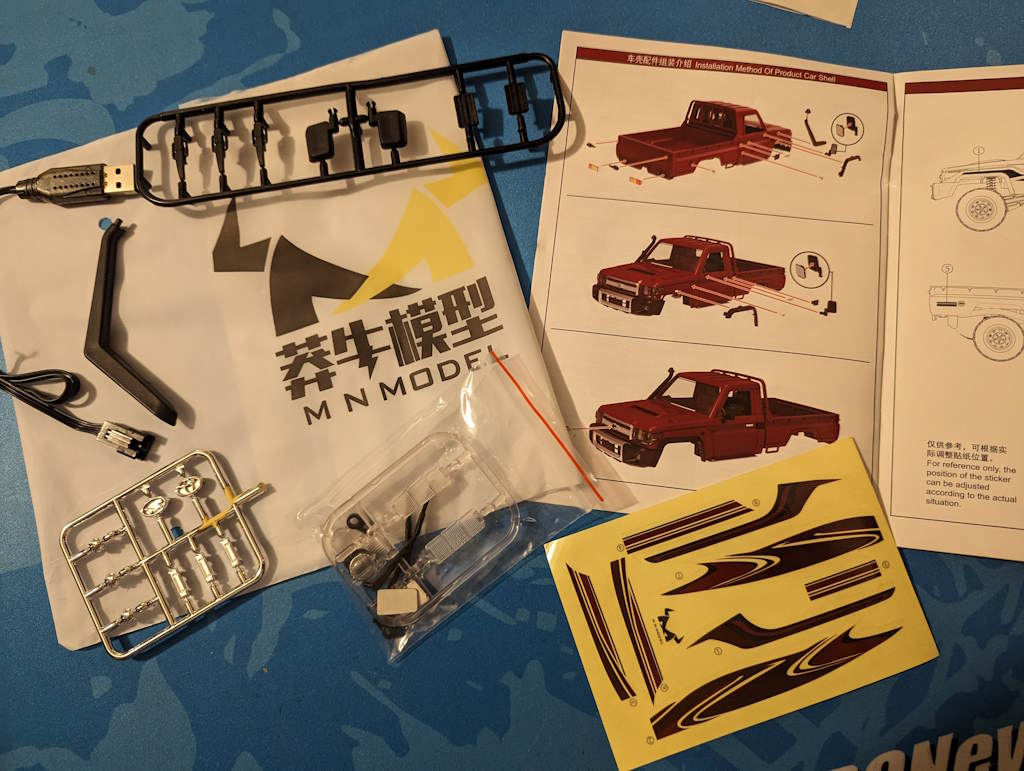
Included Parts

MN-82 with Body Lifted Off PCB
Conformal Coating on PCB Front

MN-82 Chassis Top-Down
PCB Waterproofing
(Do this outside or somewhere with good ventilation, or wear a breathing apparatus.)
- Place the PCB down on cardboard or kitchen paper towel.
- Open the Conformal Coating bottle.
- Dip cotton bud into the liquid, which will be like honey in consistency.
- Dab it all over the single large chip on the plug side of the board.
- Close bottle, dispose of bud, allow to dry for a couple hours.
- Turn board over, open bottle, dip new bud into Conformal Coating.
- Apply liberally all over the back side of the board except the holes.
- Be careful not to miss any area – air holes can bite you later on when it gets wet!
- Leave to set overnight. Once it’s firm to the touch and finished off-gassing, you’re good to go.
- Re-install waterproofed board into chassis. Reconnect servo, motor and switch plugs.

Rear Shocks
- Unscrew the rear shock tops and pop off the top half of the assembly.
Remove the rear coil springs. - Press the shocks back together and screw back on.
Front Shocks
- Unscrew the front shock tops and pop off the top half of the assembly.
- Remove the front coil springs.
- Drop the rear coils onto the lower halves.
- Slide the spacers onto the upper halves.
- Press back together and screw back on.

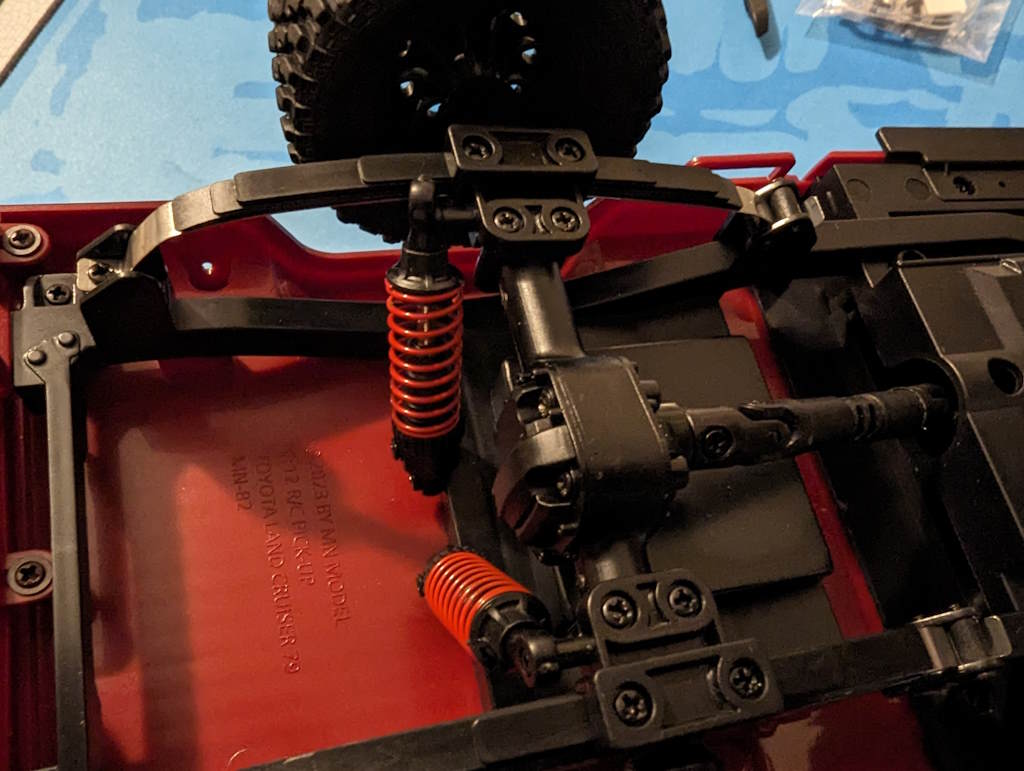
Front Shock Spacers with Rear Springs

Rear Shocks with Springs Removed
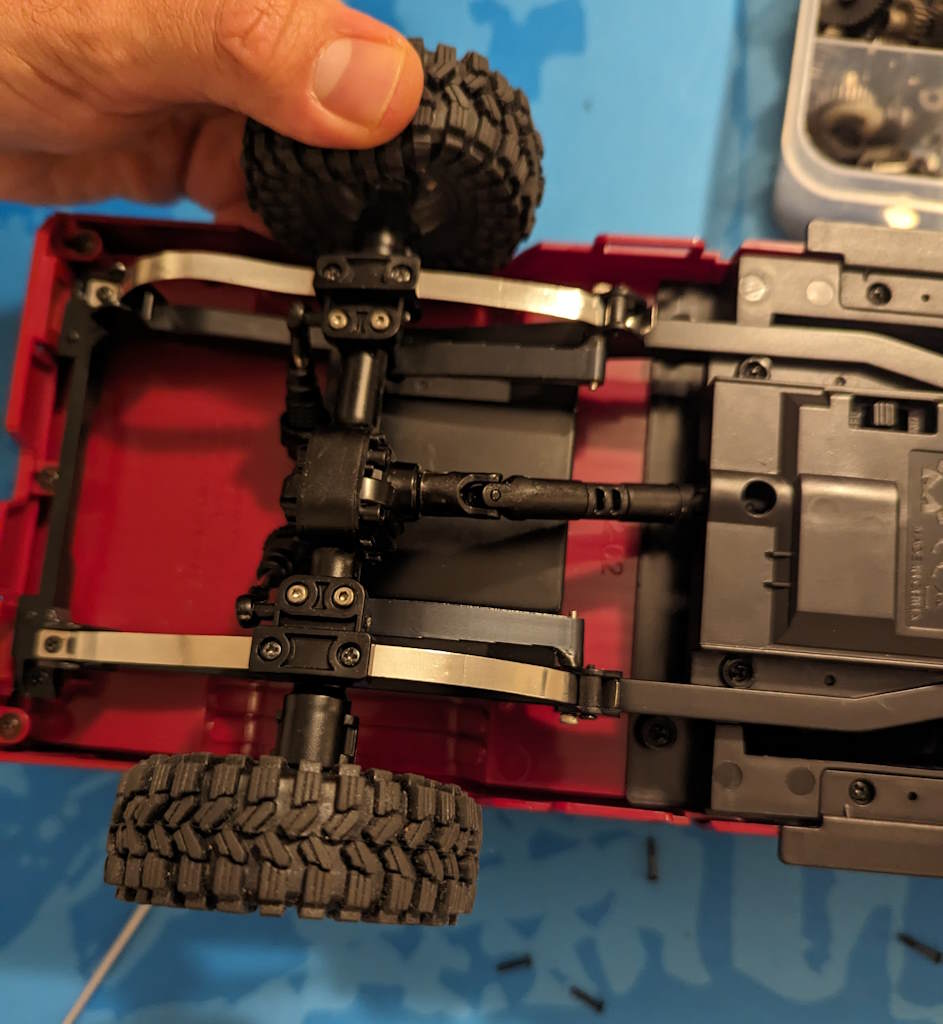
Leaf Springs
Examine the below picture for an idea of how it should look when done.
- Pop off the rear shocks from the ball studs on the leaf spring brackets.
- Unscrew your rear leaf springs.
- Remove the plastic parts and just leave the metal mains.
- Replace the original screws through the metal leaf spring.
- Unscrew the inner screws on the leaf brackets (closer to chassis rails).
- Place the anti-wrap arm under the inner of the two holes between the bracket and axle underside.
- Screw in the M2 20mm screws to secure the top axle piece to the base, through the anti-wrap bar.
- Remove the upper (closer to chassis) screws through the front leaf spring ‘sliding shackle’
- Install M2 20mm screws through the shackle, with the spacer if it fits over your screw, then through the anti-wrap bars.
- Press the rear shocks back onto the ball studs.
- Test everything moves smoothly.
Unscrewing Leaf Spring Brackets

Leaf Springs Removed
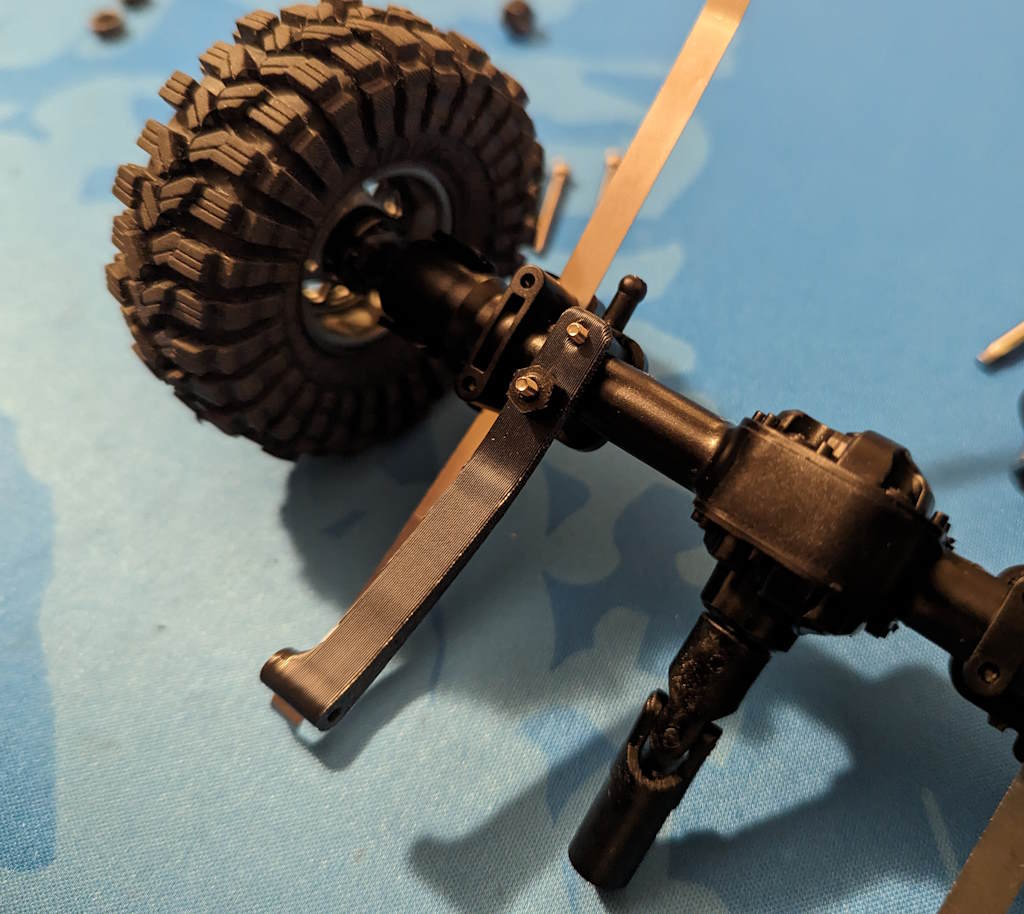
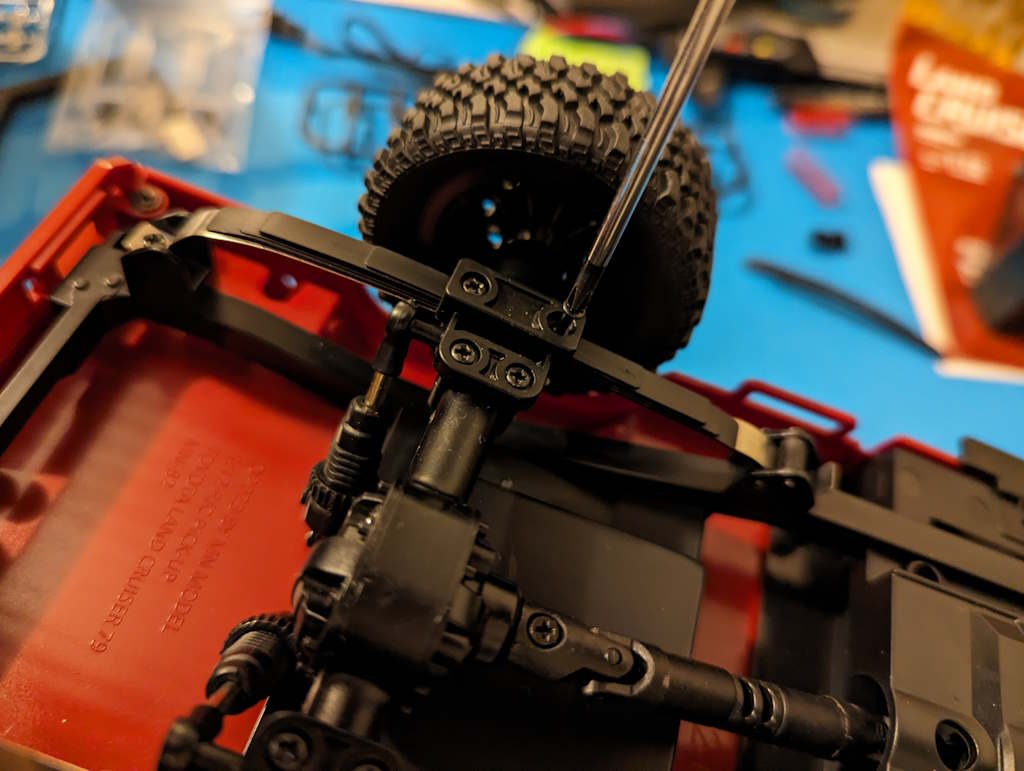
Anti-Wrap Bar Installed

Rear Leaves & Anti-Wrap Bars Installed
Canopy and Door
The canopy door should be installed before you screw the canopy to the bed.
Wiggle and push it into the rails at an angle from the inside. Some force is needed.
Work at it, you’ll get there. Once it’s in, it’s staying in. Slide back and forth a bit to loosen it up, as desired.
Align the canopy over the bed and do up your screws.
Attach the spare wheel.

Rear Mud Guards
Hold the rear mud guards up to the side of the body and use a felt tip marker to mark where to drill.
Drill your holes (I used end and middle holes), then screw the mud guards on. Don’t over-tighten.
Front Mud Guards
Pop out the clips on the front fenders and then pop in the new ones.
The new ones should be popped in with the middle clip first, then the front, then the rear.
Injora Tires and Wheels Mounted

Preparing to Drill Fenders

Drilling Rear LHS Fender

Holes Drilled in Rear LHS Fender
Attaching the Wheels
- The adapters are necessarily a tight fit.
- Press the adapters into the wheel hex nuts.
- Use the rounded end of a screwdriver to get a nice, even downward force on them.
- Take care to press them in as evenly as possible.
- (If you mess up, don’t worry – these are a fast and easy part to print, and once they’re on, they’ll be reliable because of how tight the fit is).
- Once in, carefully cut your plastic axle ends by 5mm and then fit the adapters and their attached wheels onto the shorter axles.
- Attach the screw, and you’re done!

Injora vs Stock Tires
Cutting Plastic Axle
Preparing Axle Adapters
Injora Tires and Wheels Mounted on Side
Finishing Up
Screw the body back onto the chassis, reconnecting the wires into the correct plugs.
(And by the way, there is a light kit for the MN-78 that you may be able to adapt to this thing, if you’re keen. Find that here.)
For any of the above, see the pictures here and my original video summary for help.
I hope this all goes smoothly! I’ve just done it following these instructions and it seems good.
Thanks and enjoy this one!
-Craig
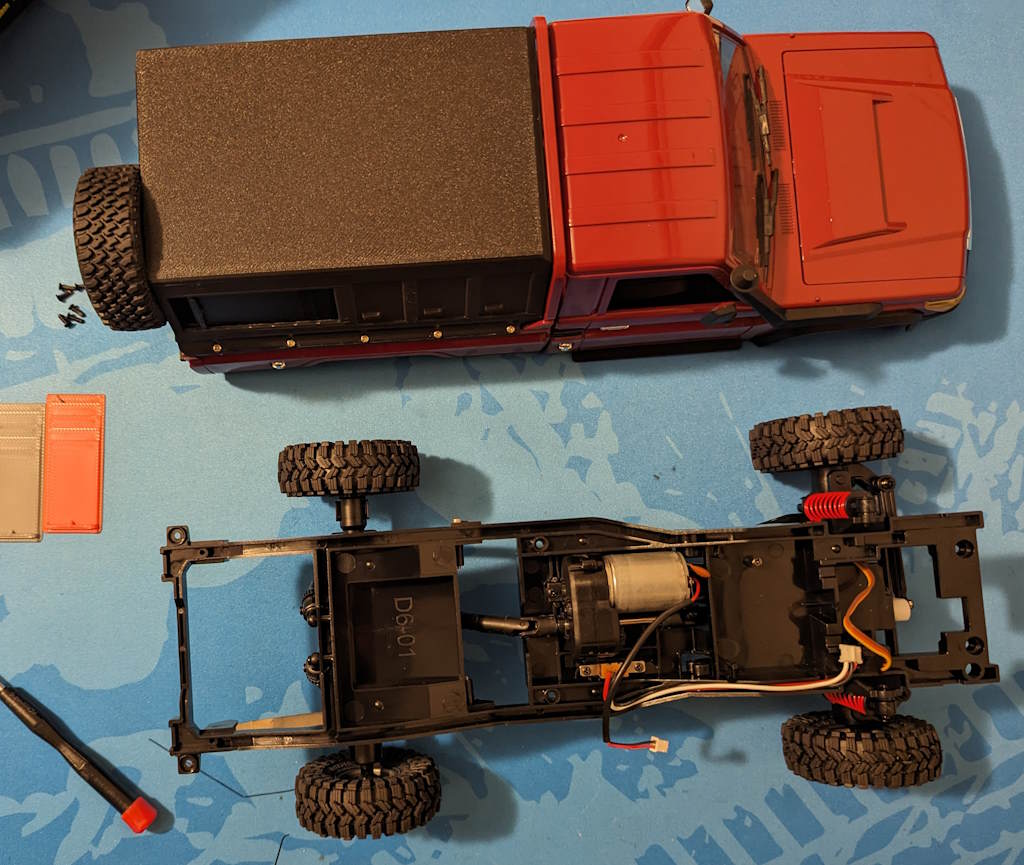
Body Removed Top-Down
Rear Leaves & Anti-Wrap Bars Installed
Testing Compression After Mod

Completed Model Front-LHS

Craig Veness
RC-TNT
Craig has been into radio control since the 90s and into RC crawling since about 2010, when a Losi MRC started the obsession! Now it's all rocks this and crawl that and upgrade all the things! ...You know how it is, right? Welcome home 🙂